Moving iPhone photos to a Windows PC gets messy when old iTunes, Phone Link, and DCIM advice appears beside current Apple and Microsoft steps. Use the methods below to copy one photo, import a whole batch, or keep your library synced without relying on deprecated workflows.
1. Import photos with Microsoft Photos
On the PC, install Apple Devices from Apple's Microsoft Store download page.
Connect the iPhone to the PC with a USB cable that transfers files.
Unlock the iPhone with your passcode.
Tap Trust or Allow on the iPhone when prompted.
On the PC, select Start, then open Photos.
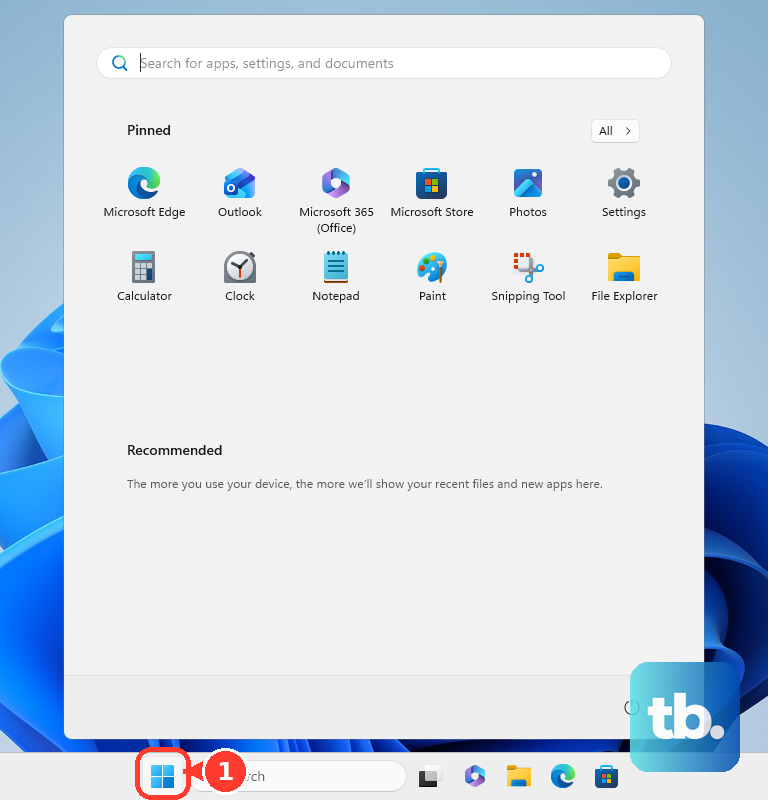
Select Import, choose the connected iPhone, pick the photos and videos, choose a save location, then follow the prompts.
Tip: when iCloud Photos is on, download the originals to the iPhone before USB import.
2. Sync photos with iCloud for Windows
On the iPhone, open Settings, tap [your name], then open iCloud and Photos.
Turn on Sync this device.
On the PC, install iCloud for Windows from Apple's Microsoft Store download page.
Sign in with your Apple Account.
Open iCloud for Windows, then click the arrow button next to iCloud Photos.
Turn on iCloud Photos, select options such as Download High-Efficiency format photos and videos or Download HDR videos (both available in iCloud for Windows 14.2 or later), then click Done.
Open File Explorer and select iCloud Photos. If it is missing, open Pictures, then iCloud Photos.

Double-click a thumbnail to download and view it.
3. Keep iCloud photos stored on the PC
Open File Explorer on the Windows PC.
Open iCloud Photos.
Right-click a photo, video, or the full iCloud Photos folder.
Choose Always keep on this device.
Tip: pin the photos you need offline before you travel, archive, or disconnect from the internet.
4. Download photos from iCloud.com
For a browser-only transfer, open iCloud.com/photos, sign in with your Apple Account, select one or more photos or videos, then click the download button in the upper-right corner. Hold Ctrl on Windows to select multiple items. This works when the photos already exist in iCloud Photos.
5. Send a small batch from Photos
On the iPhone, open Photos.
Open one photo or video, or tap Select and choose multiple items.
Tap the Share button.
Choose Mail, Messages, or another installed app.
On the PC, open the same mail, web app, or companion app and download the files.
6. Create an iCloud Link
On the iPhone, use Photos > Share button > Options > iCloud Link > Done, then send the link to yourself and open it on the PC. Apple says iCloud links remain available for 30 days. Use this for a temporary download link instead of full library sync.
7. Back up photos with a cloud app
This fixes ongoing transfers when you want new iPhone photos to upload through a cloud account.
For OneDrive, open the iPhone app, tap the Me icon, open Settings, then Camera backup, and turn on Camera backup.
For Google Photos, open the iPhone app, sign in, tap your profile picture or initial, open Photos settings, then Backup, and turn on Backup.
For Dropbox, open the iPhone app, tap the account icon, tap Camera uploads, then tap Upload from and Settings to give Dropbox access to your photos and videos. Back in Dropbox, choose what to back up and whether to use cell data, then tap Turn on camera uploads.
For Amazon Photos, open the iPhone app, sign in, tap the Profile icon in the upper left, select Uploads, tap the three dots in the upper right, open Uploads settings, then switch Save on for photos and videos under Auto-Save. On iOS you have to open the app for auto-save to run.
On the PC, sign in to the same service in a browser or its desktop sync folder, then download or copy the photos.
8. Upload selected photos to Drive or Dropbox
For Google Drive, open the iPhone app, tap Add, then File upload, choose the photos or files, and upload them.
On the PC, open drive.google.com, select one or more files, right-click, then choose Download.
For Dropbox, open the iPhone app, use the create or add action, choose Upload photos, select the photos, then tap Upload.
On the PC, open dropbox.com, select the uploaded files or folders, then click Download.
9. Avoid outdated transfer advice
This fixes confusion from older tutorials that still appear in iPhone photo transfer searches.
Do not use My Photo Stream. Apple replaced that workflow with iCloud Photos, and My Photo Stream shut down in 2023.
Do not use iTunes as the current Camera Roll import method. Apple points Windows users to Apple Devices plus Microsoft Photos, or to iCloud for Windows.
Do not rely on Phone Link for iPhone photo transfer steps. Microsoft's current documented File Explorer phone-file access applies to Android, not iPhone.
Treat File Explorer, This PC, Apple iPhone, Internal Storage, and DCIM copying as a legacy workaround, not the supported path. Use Microsoft Photos or iCloud.
Frequently Asked Questions
Why are some iPhone photos missing when I import by USB?
When iCloud Photos is enabled, download the originals to the iPhone before importing with Microsoft Photos over USB.
Do I need Windows 11 to transfer iPhone photos to a PC?
USB import with Microsoft Photos applies to Windows 10 and Windows 11. Apple's latest iCloud for Windows requires Windows 11 or later.
What iPhone camera format works best with Windows?
For future photos and videos, use Settings > Camera > Formats > Most Compatible. New captures use JPEG and H.264 where applicable.
Can I move iPhone photos with an external drive instead?
Yes. Connect a compatible USB drive or SD card reader to the iPhone, export photos through Photos or Files, then connect the storage device to the PC and copy the files.