


To set up an eSIM on an iPhone, open Settings, tap Cellular, then tap Set Up Cellular or Add eSIM. Depending on your carrier, you can then transfer your number from your old iPhone, scan the carrier's QR code, or install a plan it assigned to the phone. In a dozen markets the iPhone 18 Pro and iPhone 18 Pro Max have no SIM tray, so an eSIM is the only option.
The short version
- Start in Settings, Cellular. On some iPhones the menu is called Mobile Data.
- You can usually activate the eSIM during setup. The methods depend on your carrier.
- With eSIM Quick Transfer, if your carrier supports it, your number moves from the old iPhone and stops working there.
What you need before you start
You need an iPhone XS, iPhone XS Max, iPhone XR or later and a carrier that supports eSIM. Fewer models support eSIM in China mainland, Hong Kong and Macao. Connect the new phone to Wi-Fi or a hotspot. In some countries and regions, Apple says, eSIM-only models can activate without Wi-Fi.
Apple keeps a list of carriers and the activation types each one supports, and its tip is to ask the carrier whether to expect a notification, a QR code or something else.
Moving from an older phone? Back up that iPhone first. Our guide to transferring from iPhone to iPhone covers photos, apps and settings.
How to set up an eSIM during iPhone setup
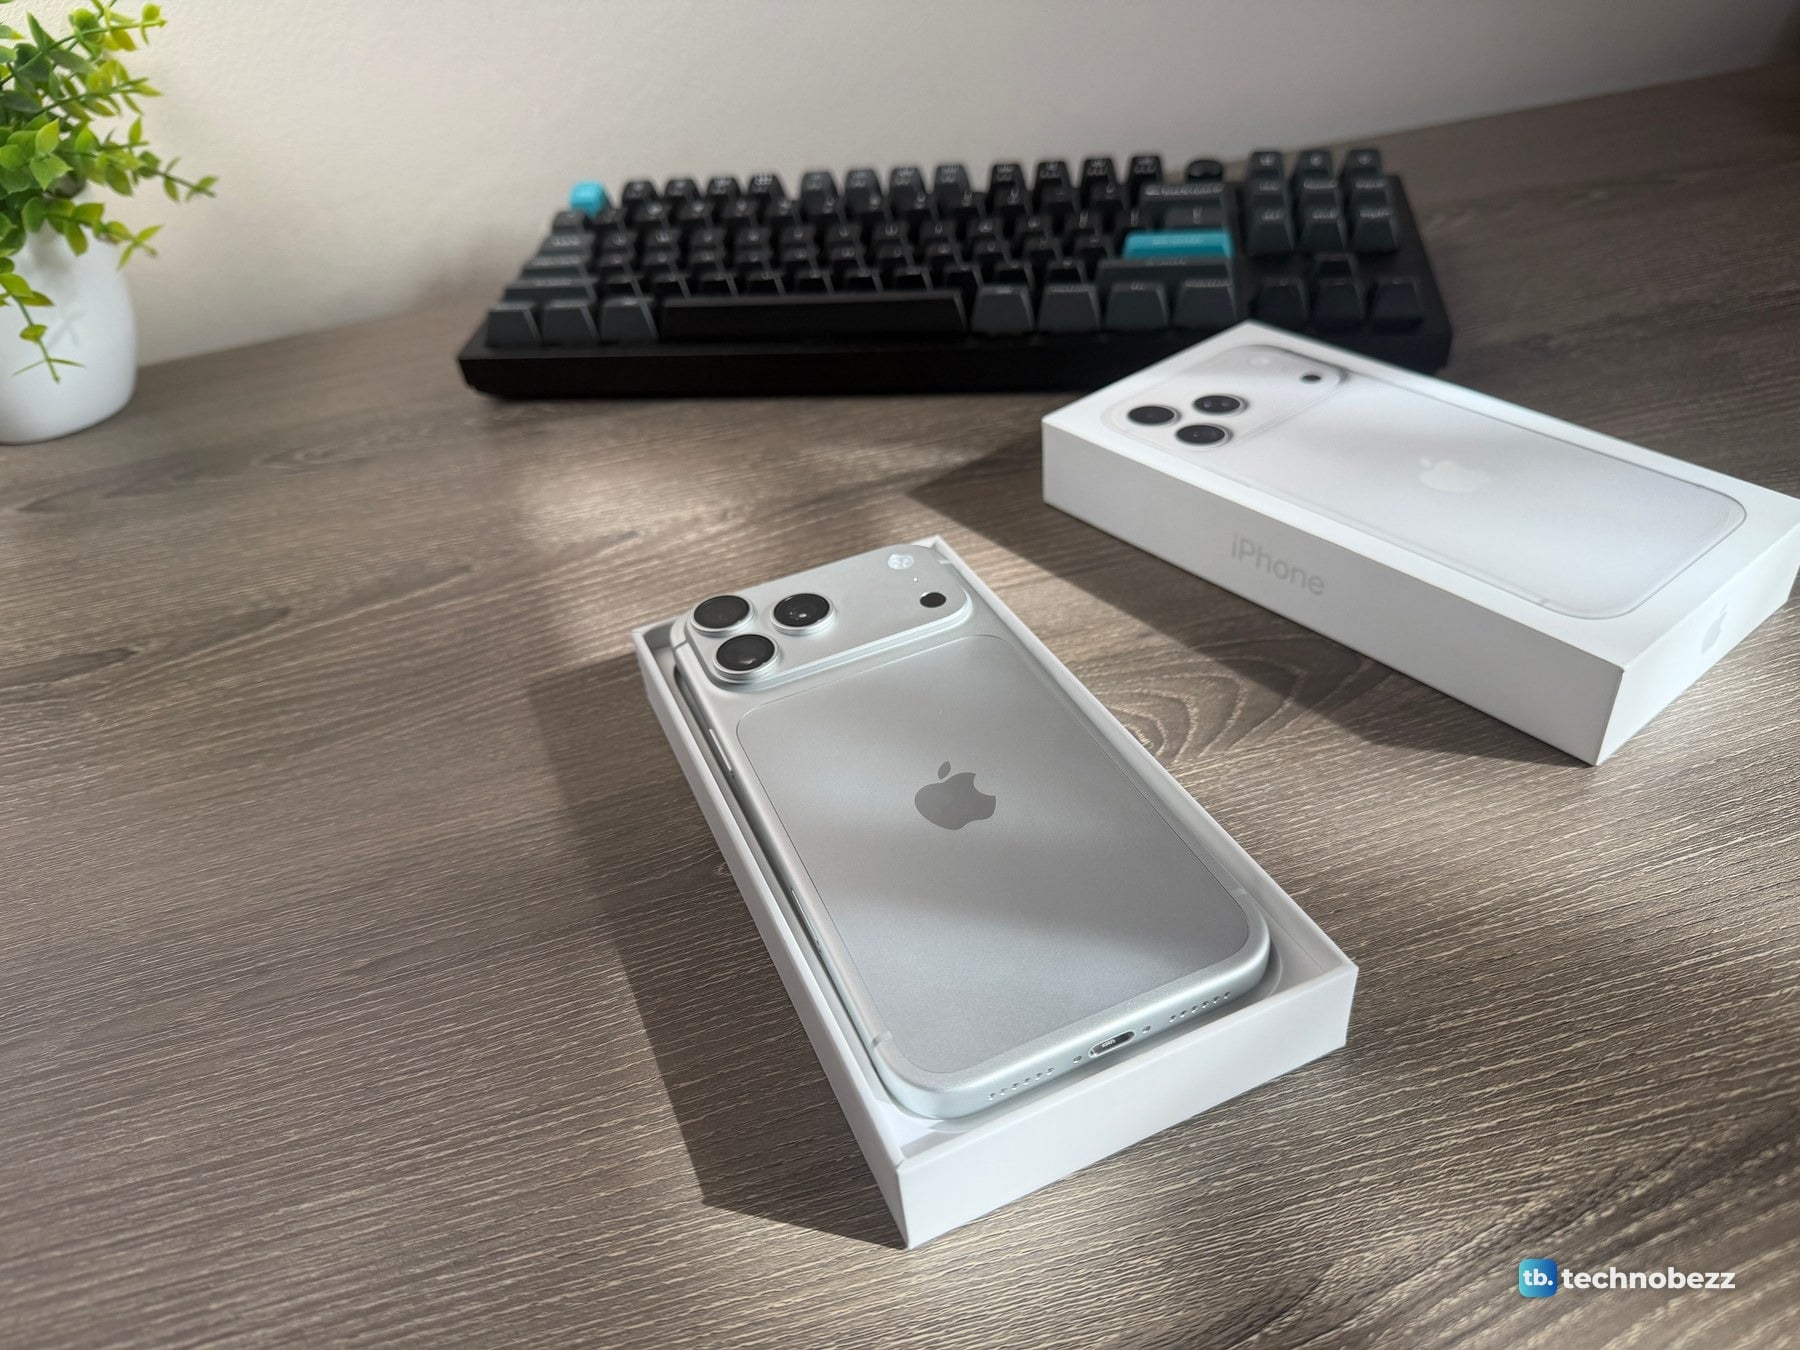
The label on the box of my iPhone 18 Pro Max says Requires eSIM.
In most cases, Apple says, you can activate the eSIM while you set the iPhone up. What appears depends on the carrier:
- If the carrier assigned an eSIM at purchase, turn the iPhone on and follow the onscreen instructions.
- If asked to transfer your number, follow the prompts to move the physical SIM or eSIM from your previous iPhone.
- If the carrier gave you a QR code, tap Use QR Code when the Set Up Cellular screen appears.
How to transfer your number from your old iPhone
eSIM Quick Transfer also works after setup, if the carrier supports it. Sign in to both iPhones with your Apple Account. Keep them nearby with Bluetooth turned on and iOS 18.4 or later installed, and unlock the previous iPhone with its passcode.
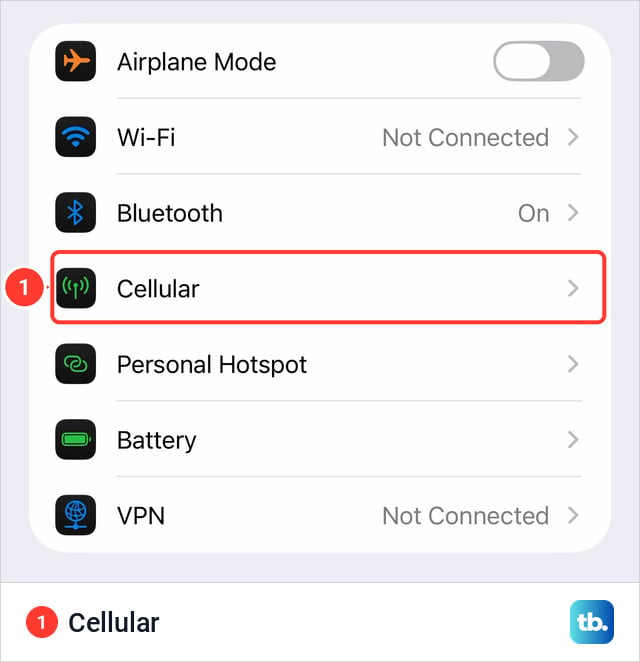
- 1.On the new iPhone, open Settings.
- 2.Tap Cellular.
- 3.Tap Set Up Cellular or Add eSIM.
- 4.Choose the plan to transfer. If no numbers are listed, tap Transfer From Nearby iPhone. If that row is not there either, tap Other Options.
- 5.On the previous iPhone, tap Transfer, or enter the verification code shown on the new iPhone if asked.
- 6.Wait for the plan to activate.
- 7.If a banner asks you to finish setting up your carrier's cellular plan, tap it and finish on the carrier's web page.
On my iPhone 18 Pro Max (iOS 27.0.1), which already has one line, the row in step 3 is Add eSIM.
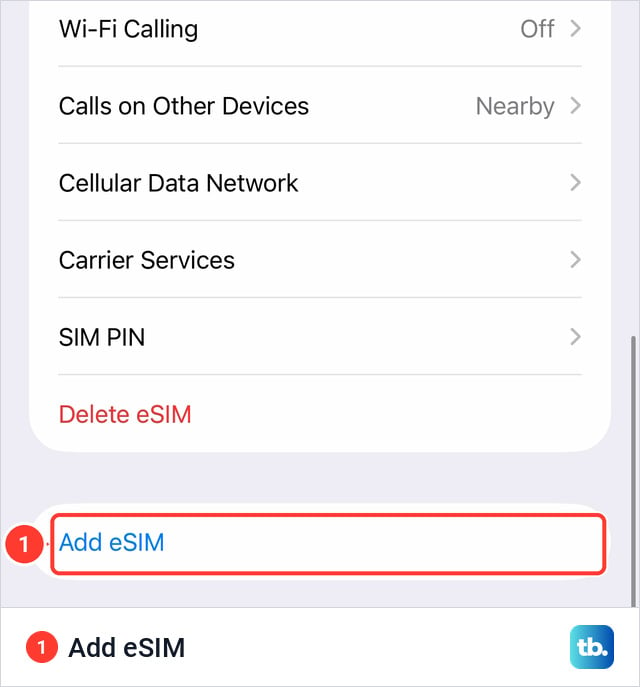
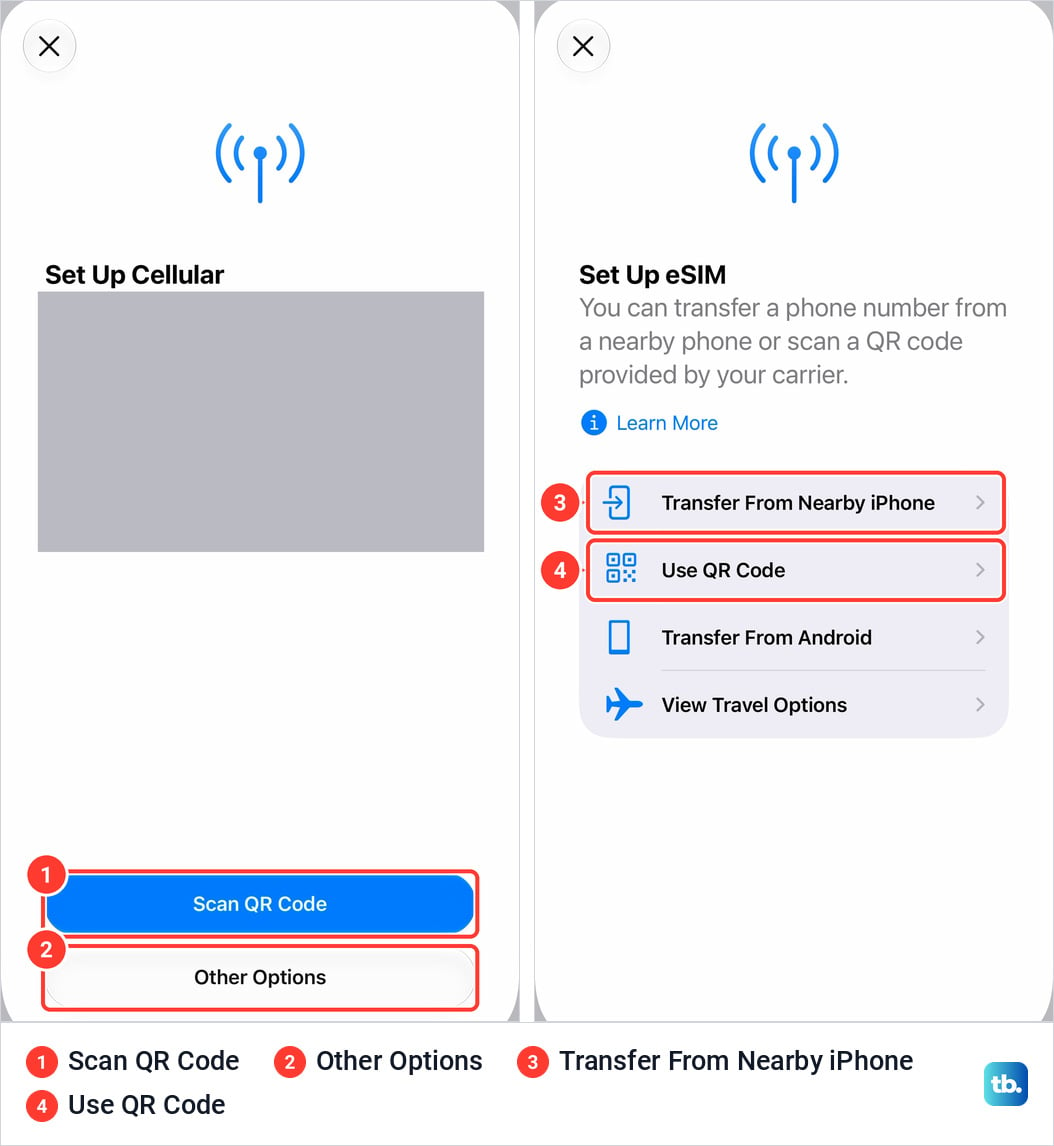
Four or five seconds after I tapped it, a sheet called Set Up Cellular came up with two buttons, Scan QR Code and Other Options. Other Options led to a second sheet, Set Up eSIM, with Transfer From Nearby iPhone at the top. I stopped there, without starting a transfer.
How to add an eSIM from your carrier
Your carrier can also supply the eSIM in one of these ways.
| Method | What the carrier does | Where it starts |
|---|---|---|
| eSIM Carrier Activation | Assigns the eSIM to your iPhone | A notification |
| QR code | Gives you a code to scan | Camera or Settings |
| Carrier link | Sends a link (iOS 17.4 or later) | Tap the link, then Allow |
| Carrier app | Activates in its own app | The App Store |
| Manual entry | Sends details to type in | Settings, under Cellular |
eSIM Carrier Activation
With Carrier Activation, your carrier assigns the eSIM and the iPhone shows a notification. Apple names it two ways: its iOS 27 user guide calls it Finish Setting Up Cellular, and its support article calls it Carrier Cellular Plan Ready to Be Installed. Tap the one that appears. Or, as the user guide says, go to Settings, tap Cellular, then tap Set Up Cellular or Add eSIM.
QR code
- 1.Open the Camera app and scan the QR code.
- 2.Tap the Cellular Plan Detected notification.
- 3.Tap Continue.
- 4.Tap Add Cellular Plan.
- 5.Enter the confirmation code from your carrier if asked.
On iOS 17.4 or later, tap and hold a carrier QR code received in your default email app or browser, then tap Add eSIM.
You can also start in Settings. Tap Cellular, tap Set Up Cellular or Add eSIM, then tap Use QR Code. You may need to tap Other Options first, as on my phone. Its first sheet also has a Scan QR Code button, which is the one I tapped. Position the QR code from your carrier in the frame at the top of the screen.
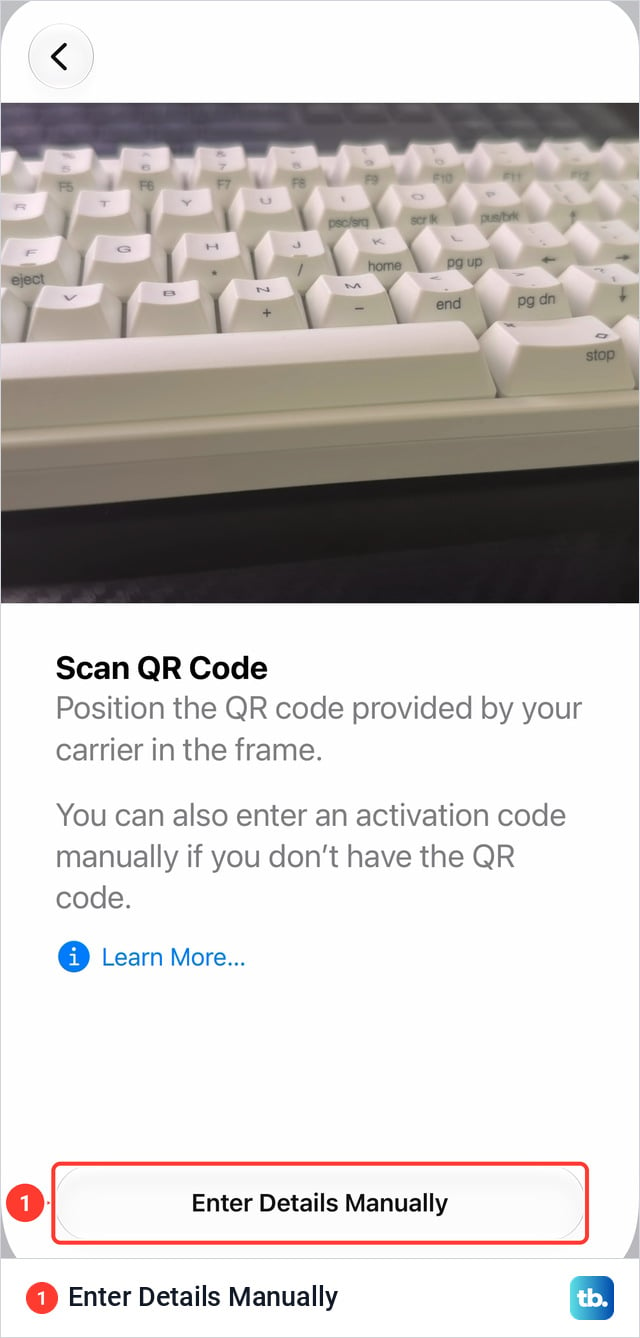
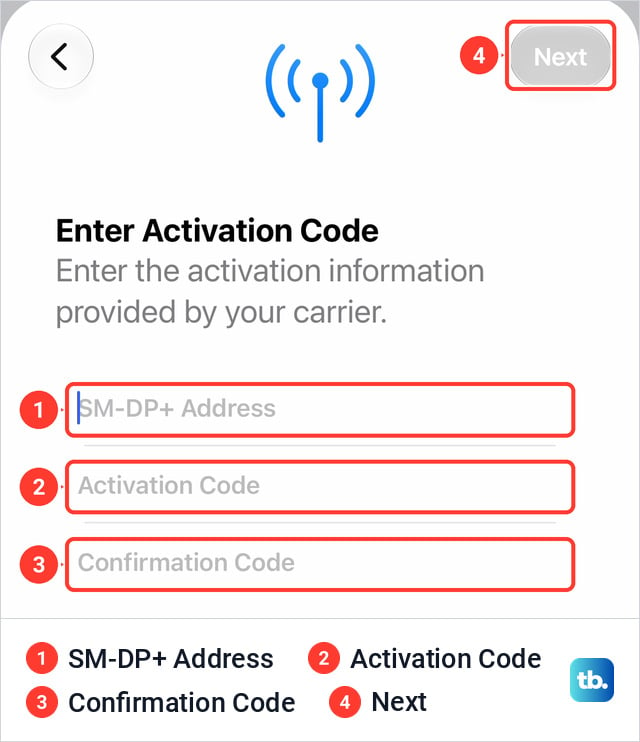
If your carrier sent details to type instead, tap Enter Details Manually at the bottom of that screen. The next screen, Enter Activation Code, has three fields: SM-DP+ Address, Activation Code and Confirmation Code.
How to convert a physical SIM to an eSIM
If your carrier supports it, an iPhone can convert its physical SIM to an eSIM.
- 1.Open Settings.
- 2.Tap Cellular, then tap Set Up Cellular or Add eSIM.
- 3.Choose the phone number with a physical SIM.
- 4.Tap Convert to eSIM, then follow the onscreen instructions.
The physical SIM stops working after the conversion, so you can remove the SIM card.
How to use two lines on one iPhone
Dual SIM gives one iPhone two active numbers. iPhone 13 and later can keep two eSIMs active. For two carriers, the iPhone must be unlocked.
Add the second line, then open Settings and tap Cellular. Tap a line and tap Turn On This Line. Cellular Plan Label names it. With one line, my phone shows that switch on the Cellular screen itself, and no label row.
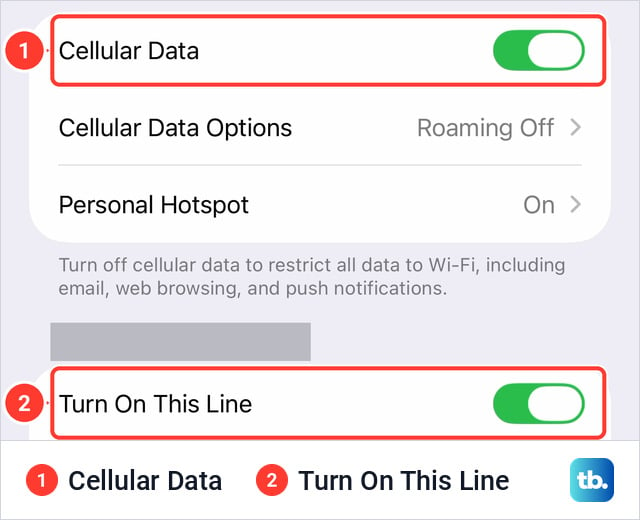
Cellular Data sets the default line for data. Default Voice Line sets the default line for calls, although a call to a contact uses the number you used last time, or one you assign. If messages stall afterward, see how to enable iMessage and fix activation.
What to do when eSIM activation fails
After each of Apple's steps below, swipe down from the upper-right corner to open Control Center and check whether your carrier appears in the status bar.
- 1.Turn Airplane Mode on, then off.
- 2.In Settings, tap Cellular. If the number is listed, switch Turn On This Line off and back on.
- 3.Restart the iPhone. If it is frozen, force restart it.
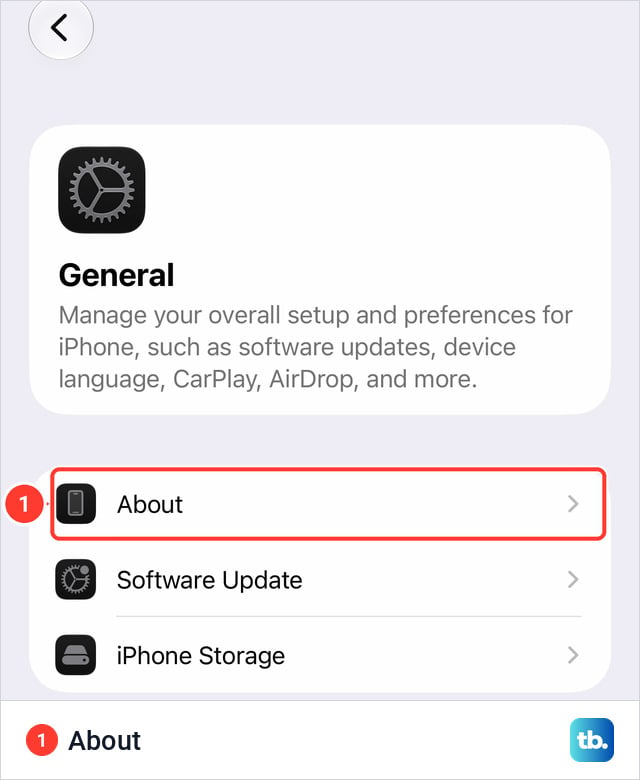
- 4.Open Settings, tap General, tap About, scroll to the eSIM section and tap the version number next to Carrier. Tap OK or Update if a carrier update is offered.
- 5.Contact the carrier with the error message, your phone number, your account password or PIN, and the IMEI or EID from the same About screen.
Apple says not to erase an eSIM as a troubleshooting step unless your carrier directs you to. With one plan, that is the red Delete eSIM row on the Cellular screen. Some countries and regions may require an in-person ID check at a carrier store.
Does the iPhone 18 Pro need an eSIM?
It depends on where it was sold. Apple sells eSIM-only versions of the iPhone 18 Pro and iPhone 18 Pro Max in Bahrain, Canada, Guam, Japan, Kuwait, Mexico, Oman, Qatar, Saudi Arabia, the UAE, the US and the US Virgin Islands. Its specifications page says they are "not compatible with physical SIM cards."
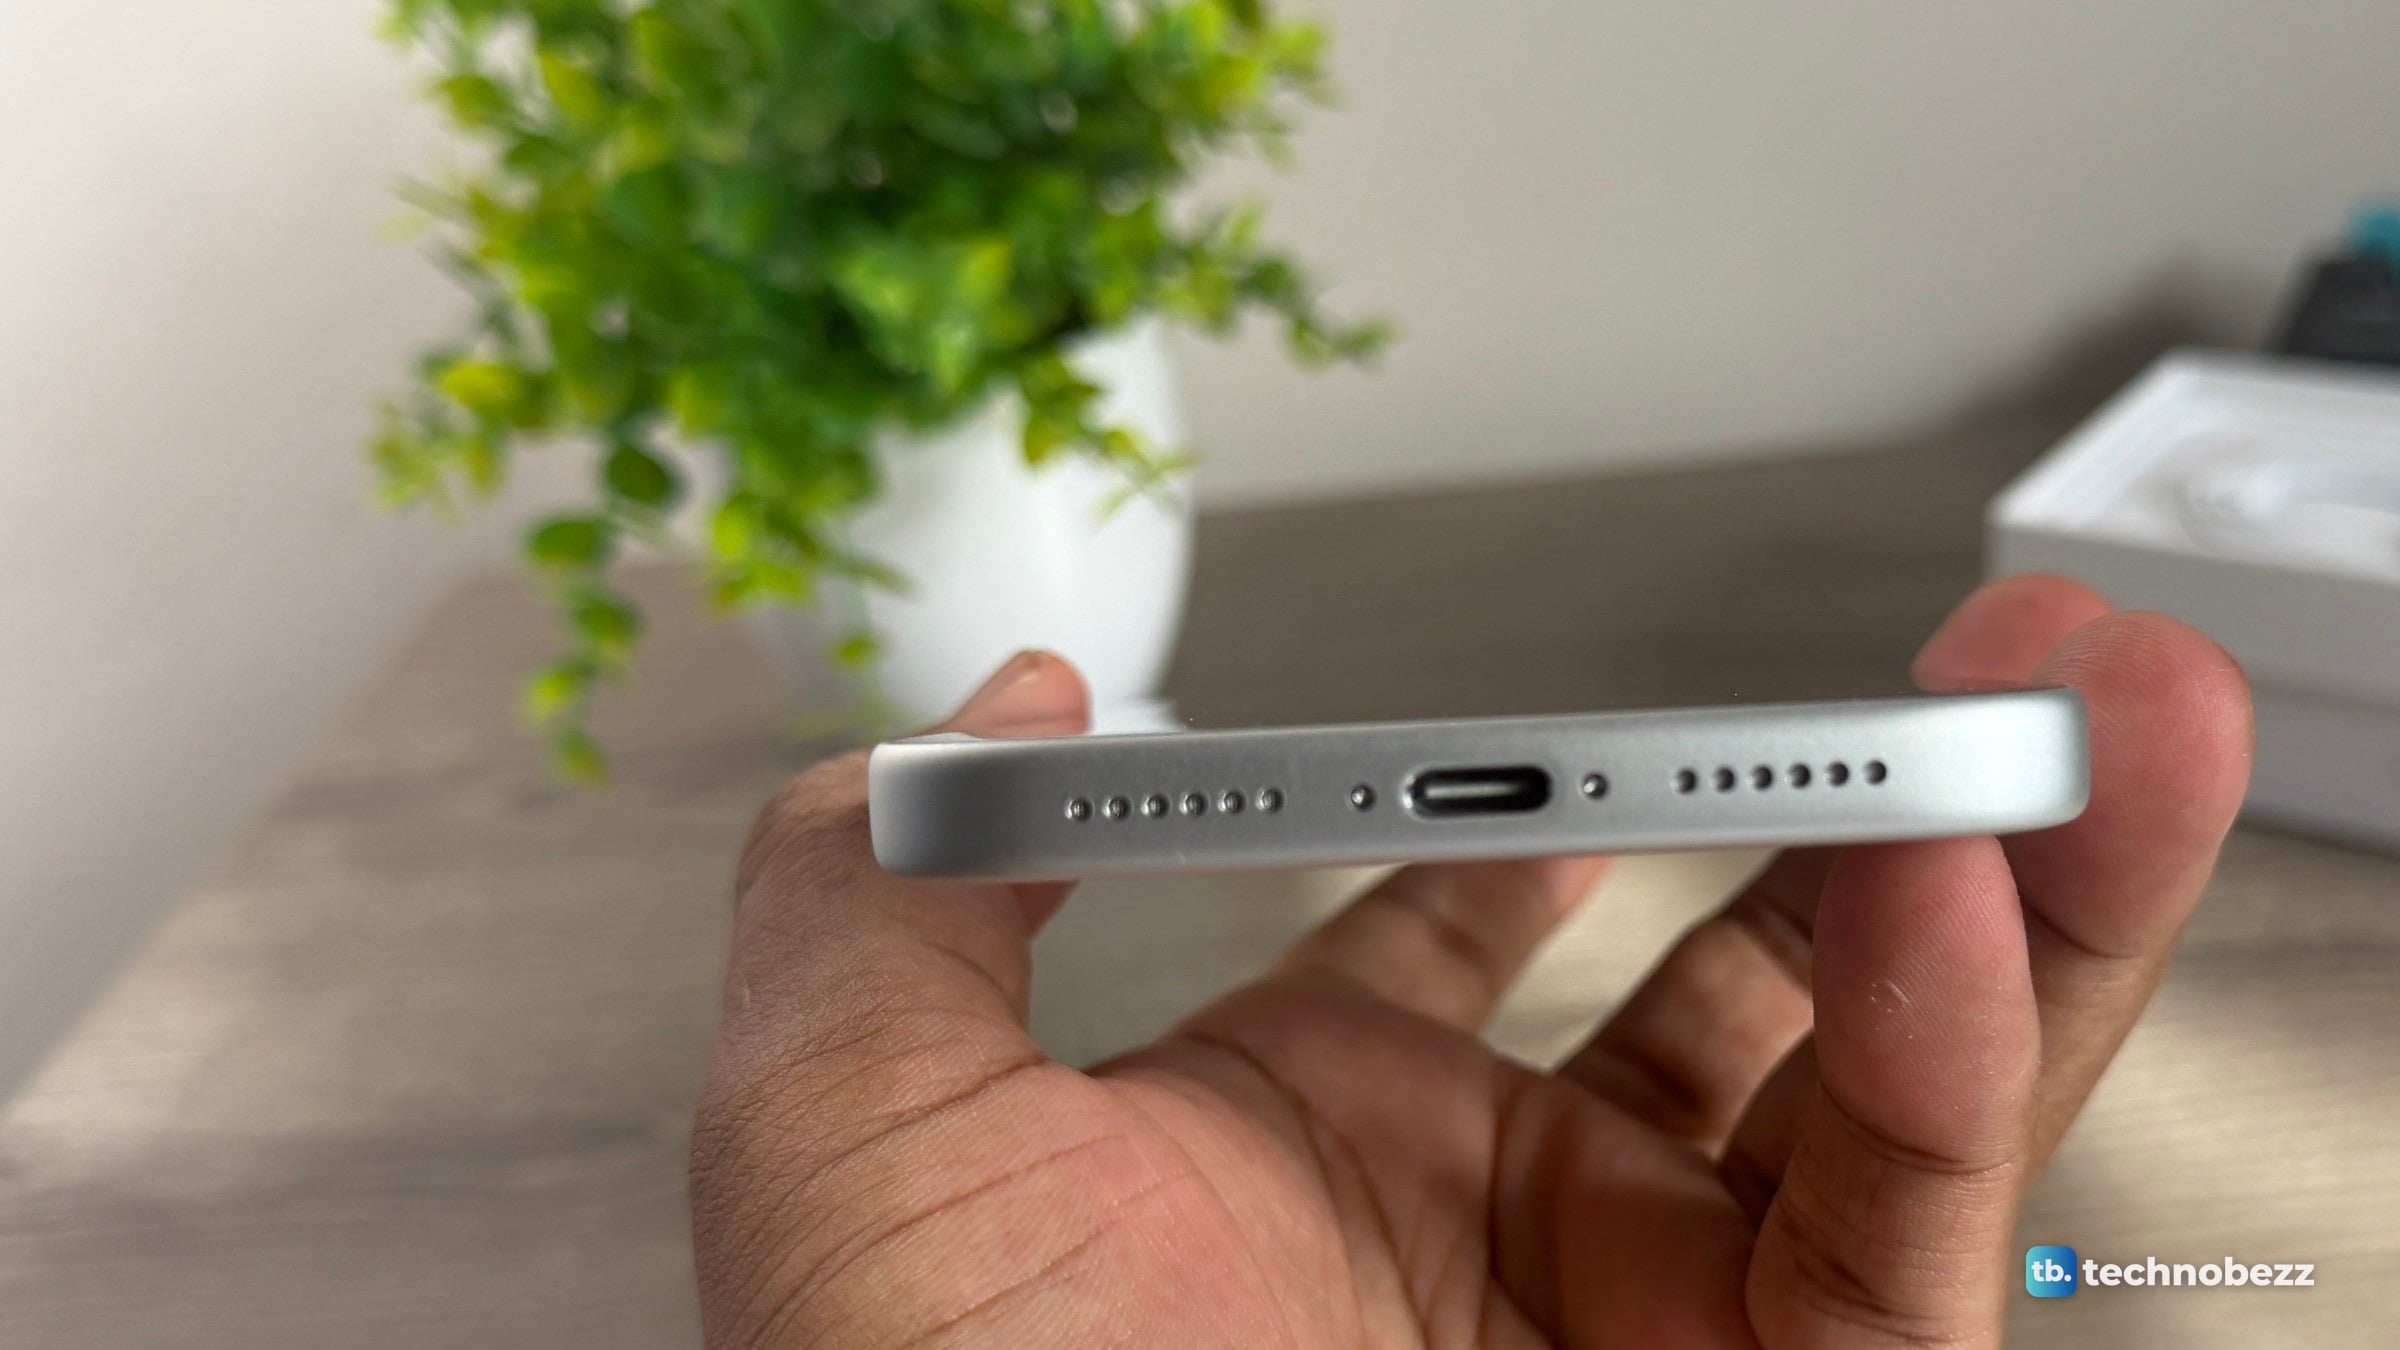
Apple's user guide puts the SIM tray, on models that have one, on the left side below the volume buttons. On my phone that stretch of rail is blank.
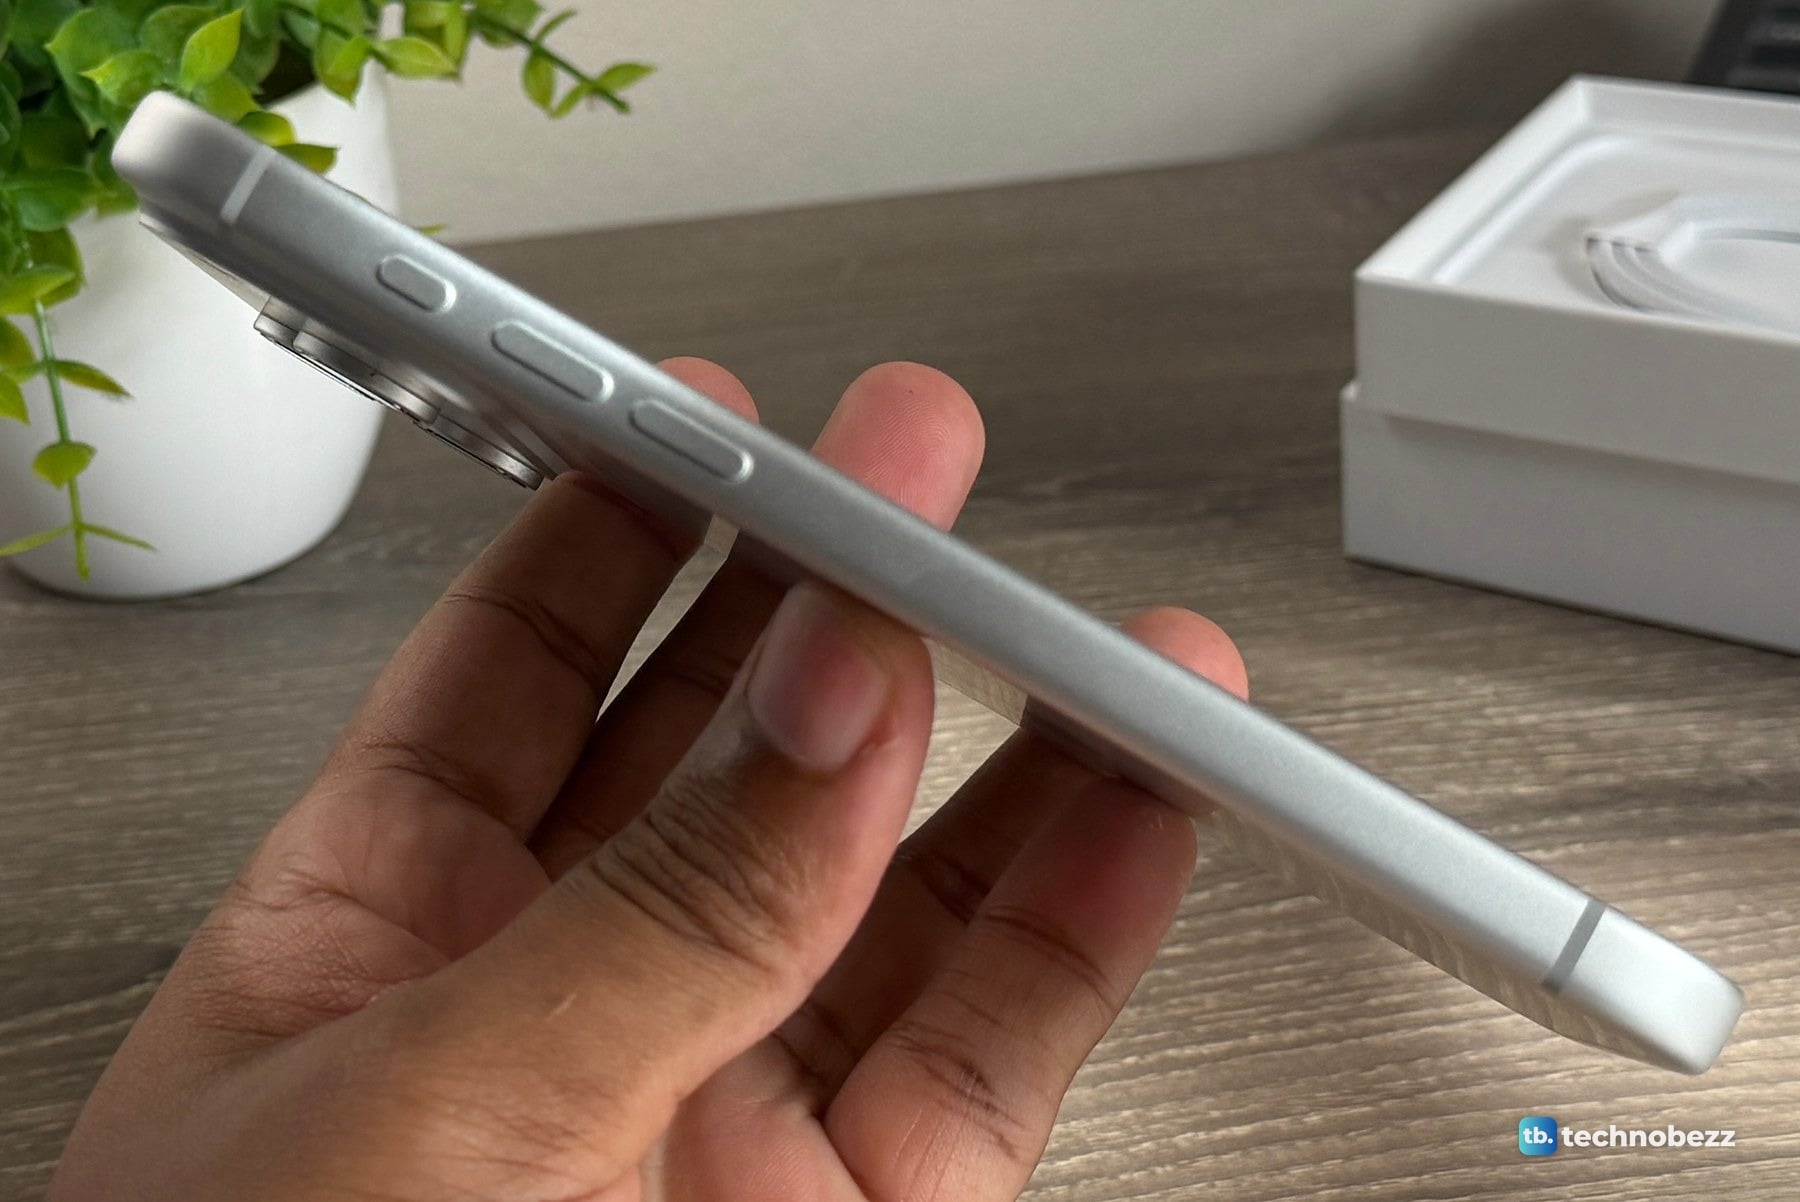
In most other countries, including the UK, Australia and India, the phone has a tray for one nano-SIM alongside the eSIM. Not sure which model you have? See how to see what iPhone you have.
Does erasing an iPhone delete the eSIM?
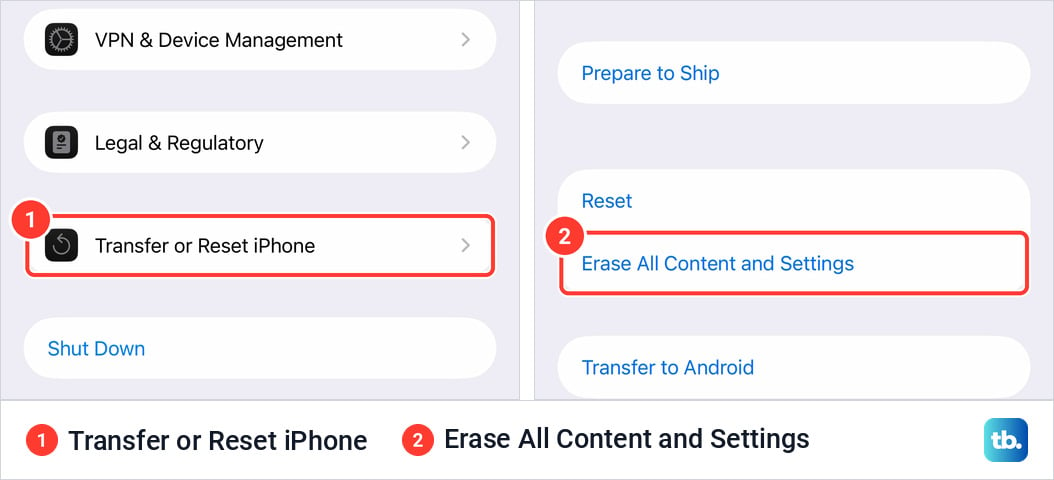
Only if you choose that. When you erase all content and settings, you can choose to erase the eSIM or keep it. If you erase it, you need to contact your carrier to reactivate the plan. Erase All Content and Settings is in Settings under General, then Transfer or Reset iPhone.
See our guide to erasing an iPhone before selling it.