


To take out the SIM card on an iPhone, insert a SIM-eject tool or straightened paper clip into the SIM tray’s eject hole, press inward gently, pull out the tray, and lift out the card. Reinsert the original tray in the same orientation without forcing it. If your iPhone is eSIM-only, it has no physical card to remove; you manage its digital SIM in Settings.
The short version
- Physical SIM: Use a SIM-eject tool or straightened paper clip to release the tray.
- Tray location: Check your model and purchase region because the tray’s position varies and some iPhones have no tray.
- Stuck tray: Get help from your carrier or an Apple Store if gentle pressure does not release it.
- Digital SIM: Delete the installed profile to remove it, or turn off the line to keep the profile.
| Your task | Method | What to expect |
|---|---|---|
| Remove a physical SIM | SIM-eject tool | Releases the tray so you can lift out the card |
| Remove a SIM without the tool | Straightened paper clip | Apple-supported alternative |
| Remove either of two physical SIMs | Check both tray faces | One card can sit on each face |
| Get help with a stuck tray | Carrier or Apple Store assistance | Use when gentle pressure fails |
| Keep your number on the same phone | Convert the physical SIM to eSIM | Requires carrier support and disables the old card |
| Move your number to another iPhone | eSIM Quick Transfer | New activation deactivates the previous SIM |
| Delete your only eSIM plan | Delete eSIM | Removes the installed digital profile |
| Delete one of several plans | Select the plan and choose Delete Plan | Removes the selected profile |
| Remove every installed eSIM | Delete All eSIMs | Requires a new SIM to reconnect |
| Temporarily turn off a line | Switch off Turn On this Line | Keeps the installed profile |
| Remove eSIMs during a factory reset | Choose eSIM removal while erasing the phone | Also erases your content |
| Erase remotely from another Apple device | Find My app | Erases the whole phone, including eSIMs |
| Erase remotely from a browser | Find Devices service | Erases the whole phone and retains Activation Lock |
| Erase an organization’s managed phone | Administrator sends Remote Wipe | Removes eSIMs with Preserve Data Plan off |
| Allow deletion on a restricted phone | Administrator permits eSIM modification | Enables the appropriate deletion controls |
Find the SIM tray on your model
Look on the left edge of tray-equipped iPhones in the iPhone 12 through 17 families, including iPhone 16e and 17e. Regional iPhone 18 Pro and Pro Max models with physical SIM support also have the tray on the left. On iPhone 11 and older models with a side tray, plus all three iPhone SE generations, look on the right edge.
Your purchase region matters as much as the model name. US-purchased iPhone 14 through 16 families are eSIM-only, and iPhone Air is eSIM-only. Apple also lists iPhone 18 Pro and Pro Max, iPhone 17e, iPhone 17, and iPhone 17 Pro and Pro Max as eSIM-only when purchased in the United States, US Virgin Islands, Canada, Mexico, Japan, Guam, UAE, Saudi Arabia, Bahrain, Kuwait, Qatar, or Oman.
Those listed iPhone 17 and 18 variants support physical SIMs when purchased elsewhere, subject to regional differences. If your model is eSIM-only, use the digital SIM controls below.
Eject the tray and remove the card
Insert a SIM-eject tool into the small eject hole in the SIM tray. Press inward gently until the tray releases, then pull the tray out. Lift the SIM card out of the tray.
If you do not have a SIM-eject tool, straighten one end of a paper clip. Insert that end into the tray’s eject hole, press inward gently, and pull out the released tray. Remove the SIM card; Apple supports using a paper clip for this task.
If your iPhone has a two-sided Dual SIM tray, check both faces after ejecting it. One nano-SIM sits on the bottom and another sits on the top. Remove the intended card or both cards before reinserting the tray.
Two-card trays are available on applicable iPhone 11 through 16 models, including Plus, Pro, and Pro Max variants, plus XS Max and XR, in China mainland, Hong Kong, and Macao. In China mainland, they are also available on iPhone 18 Pro and Pro Max, iPhone 17, 17 Pro and Pro Max, and iPhone 16e. Regional exceptions apply, and mini models are excluded.
After removing the card, reinsert the original tray in the same orientation it had before removal. Do not force it into place.
Get help when the tray will not release
Stop if gentle inward pressure does not release the tray. Apple says to take the iPhone to your carrier or an Apple Store for assistance. Do not force the tray or pry it open.
Keep your number before removing the old SIM
To keep using your number on the same iPhone without its physical card, convert the SIM to eSIM first. You need an iPhone with both physical SIM and eSIM capability, plus a carrier that supports conversion. Open Settings > Cellular > Set Up Cellular, or choose Add eSIM, then select the number associated with the physical SIM.
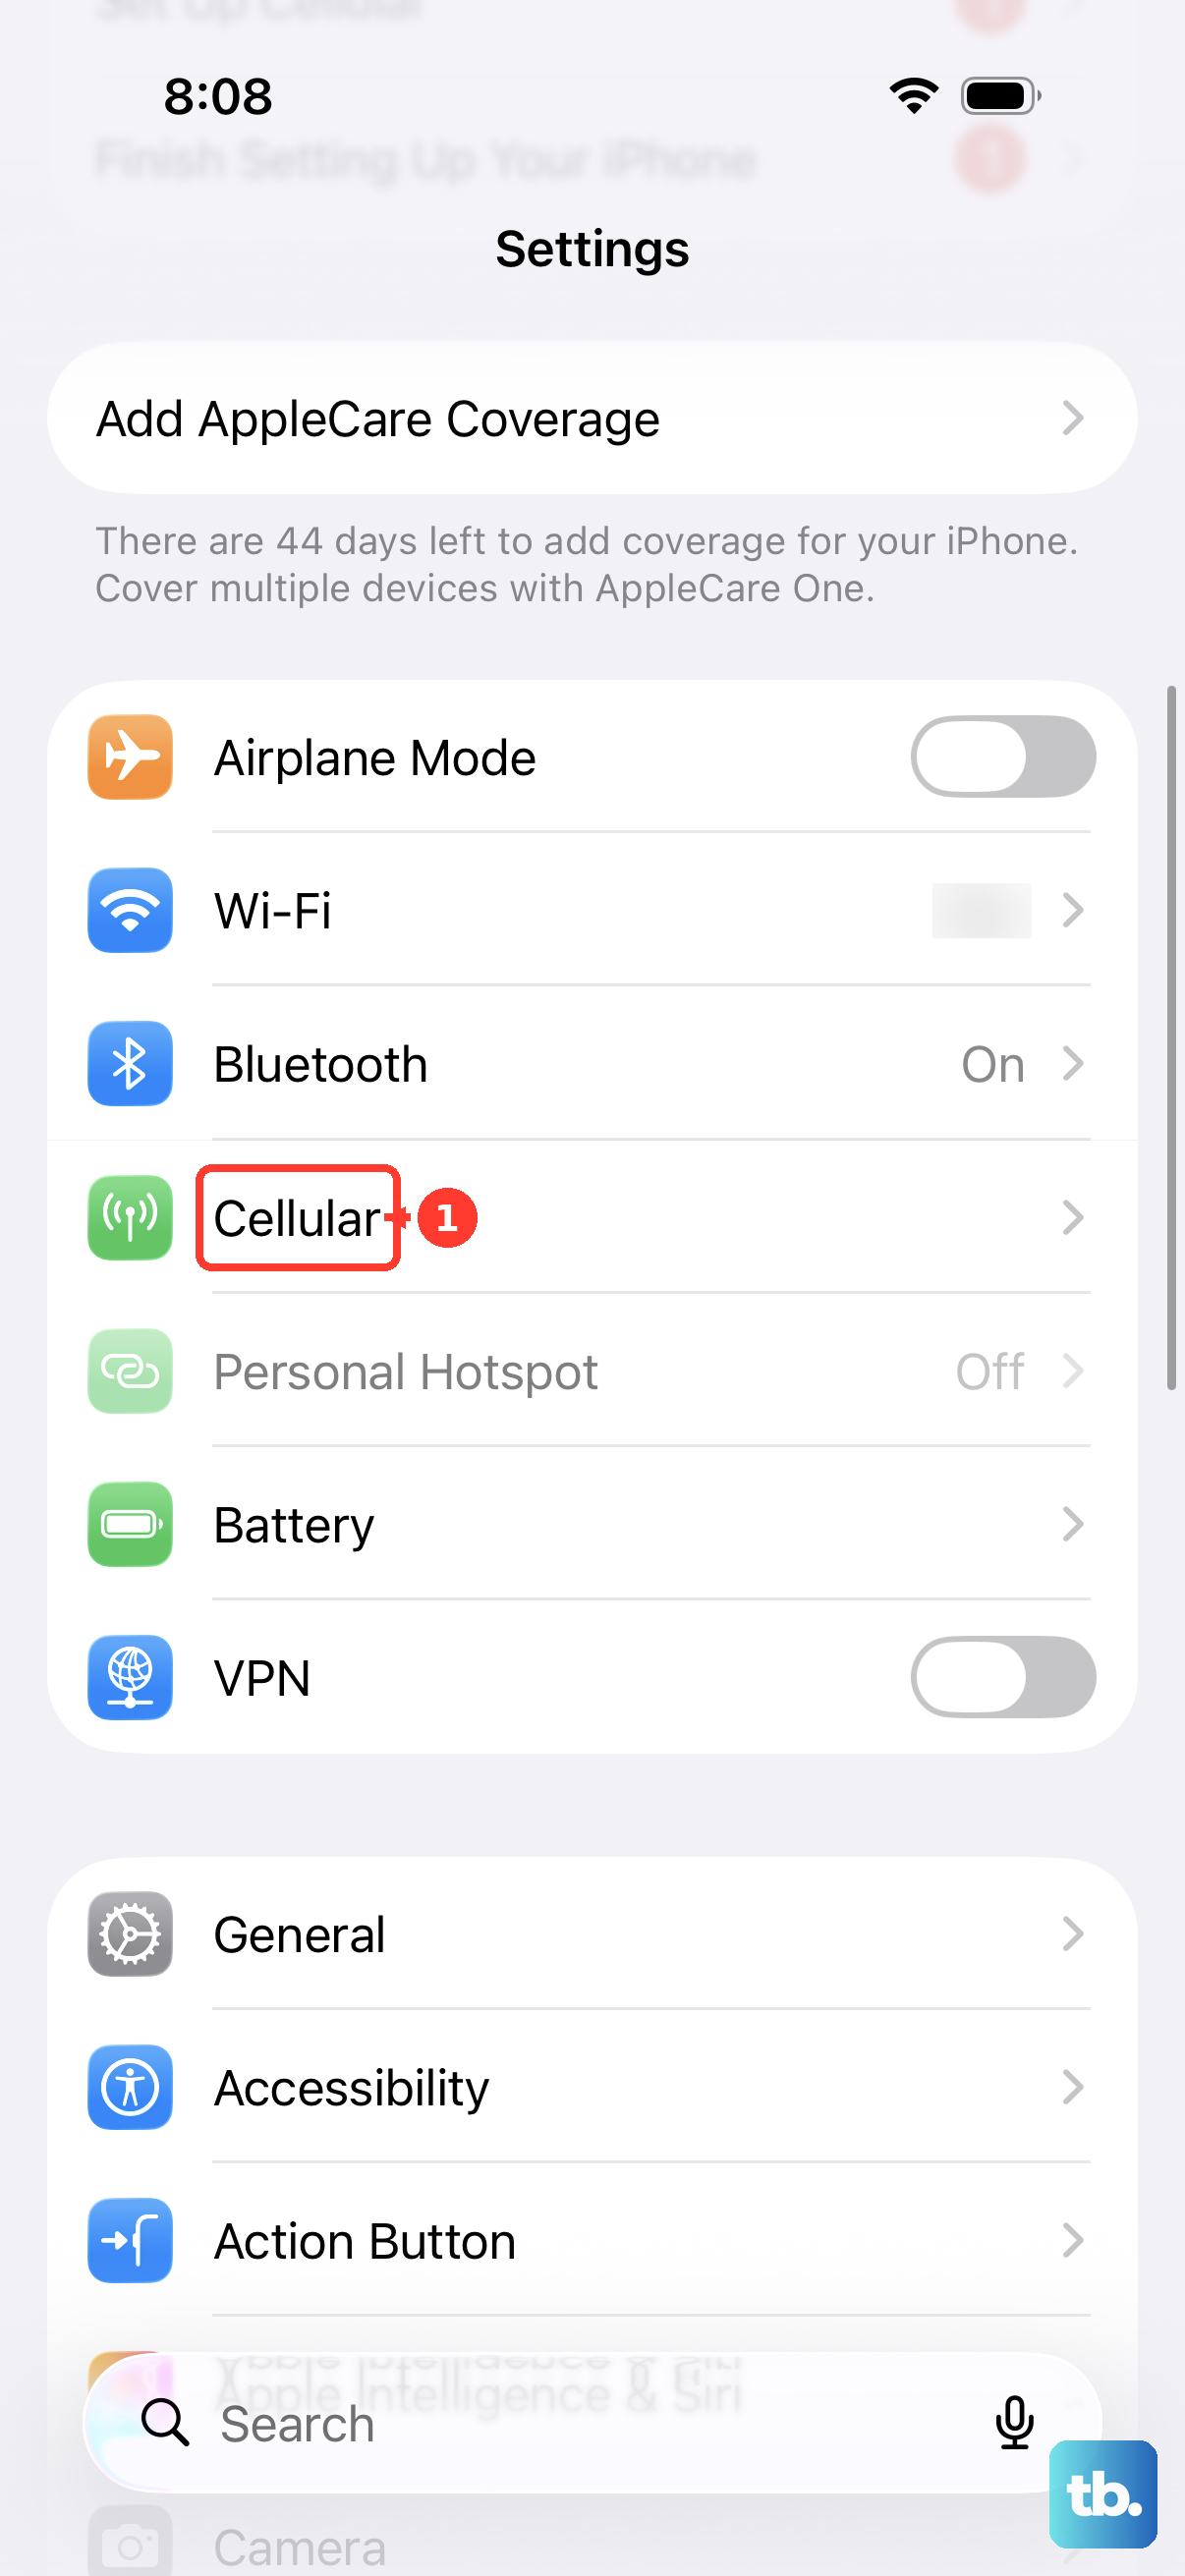
Choose Convert to eSIM and follow the onscreen instructions. Conversion disables the old physical SIM. Once conversion is complete, eject the tray and remove the card.
When moving to another iPhone, follow the number-transfer prompts during the new phone’s setup. If you also need to move your data, follow the steps to transfer iPhone to iPhone. For eSIM Quick Transfer, your carrier must support the feature, both phones must run iOS 18.4 or later, and both must use the same Apple Account. Keep them nearby with Bluetooth enabled, and unlock the old phone.
If the new phone is already set up, open its Settings > Cellular, then choose Set Up Cellular or Add eSIM. Select your number or Transfer From Nearby iPhone, then confirm Transfer on the old phone. Activation on the new phone deactivates the previous SIM. Separately remove the old physical card or delete the old eSIM if you want it removed from the old phone.
Delete an eSIM or temporarily turn off its line
With one installed cellular plan, open Settings > Cellular > Delete eSIM. With multiple plans, open Settings > Cellular, select the plan you want to erase, then choose Delete Plan. These actions remove the selected digital SIM profile.
For a temporary pause, open Settings > Cellular, select the line, then switch off Turn On this Line. This keeps the profile installed and does not cancel service. Apple documents this option for unused travel eSIM lines.
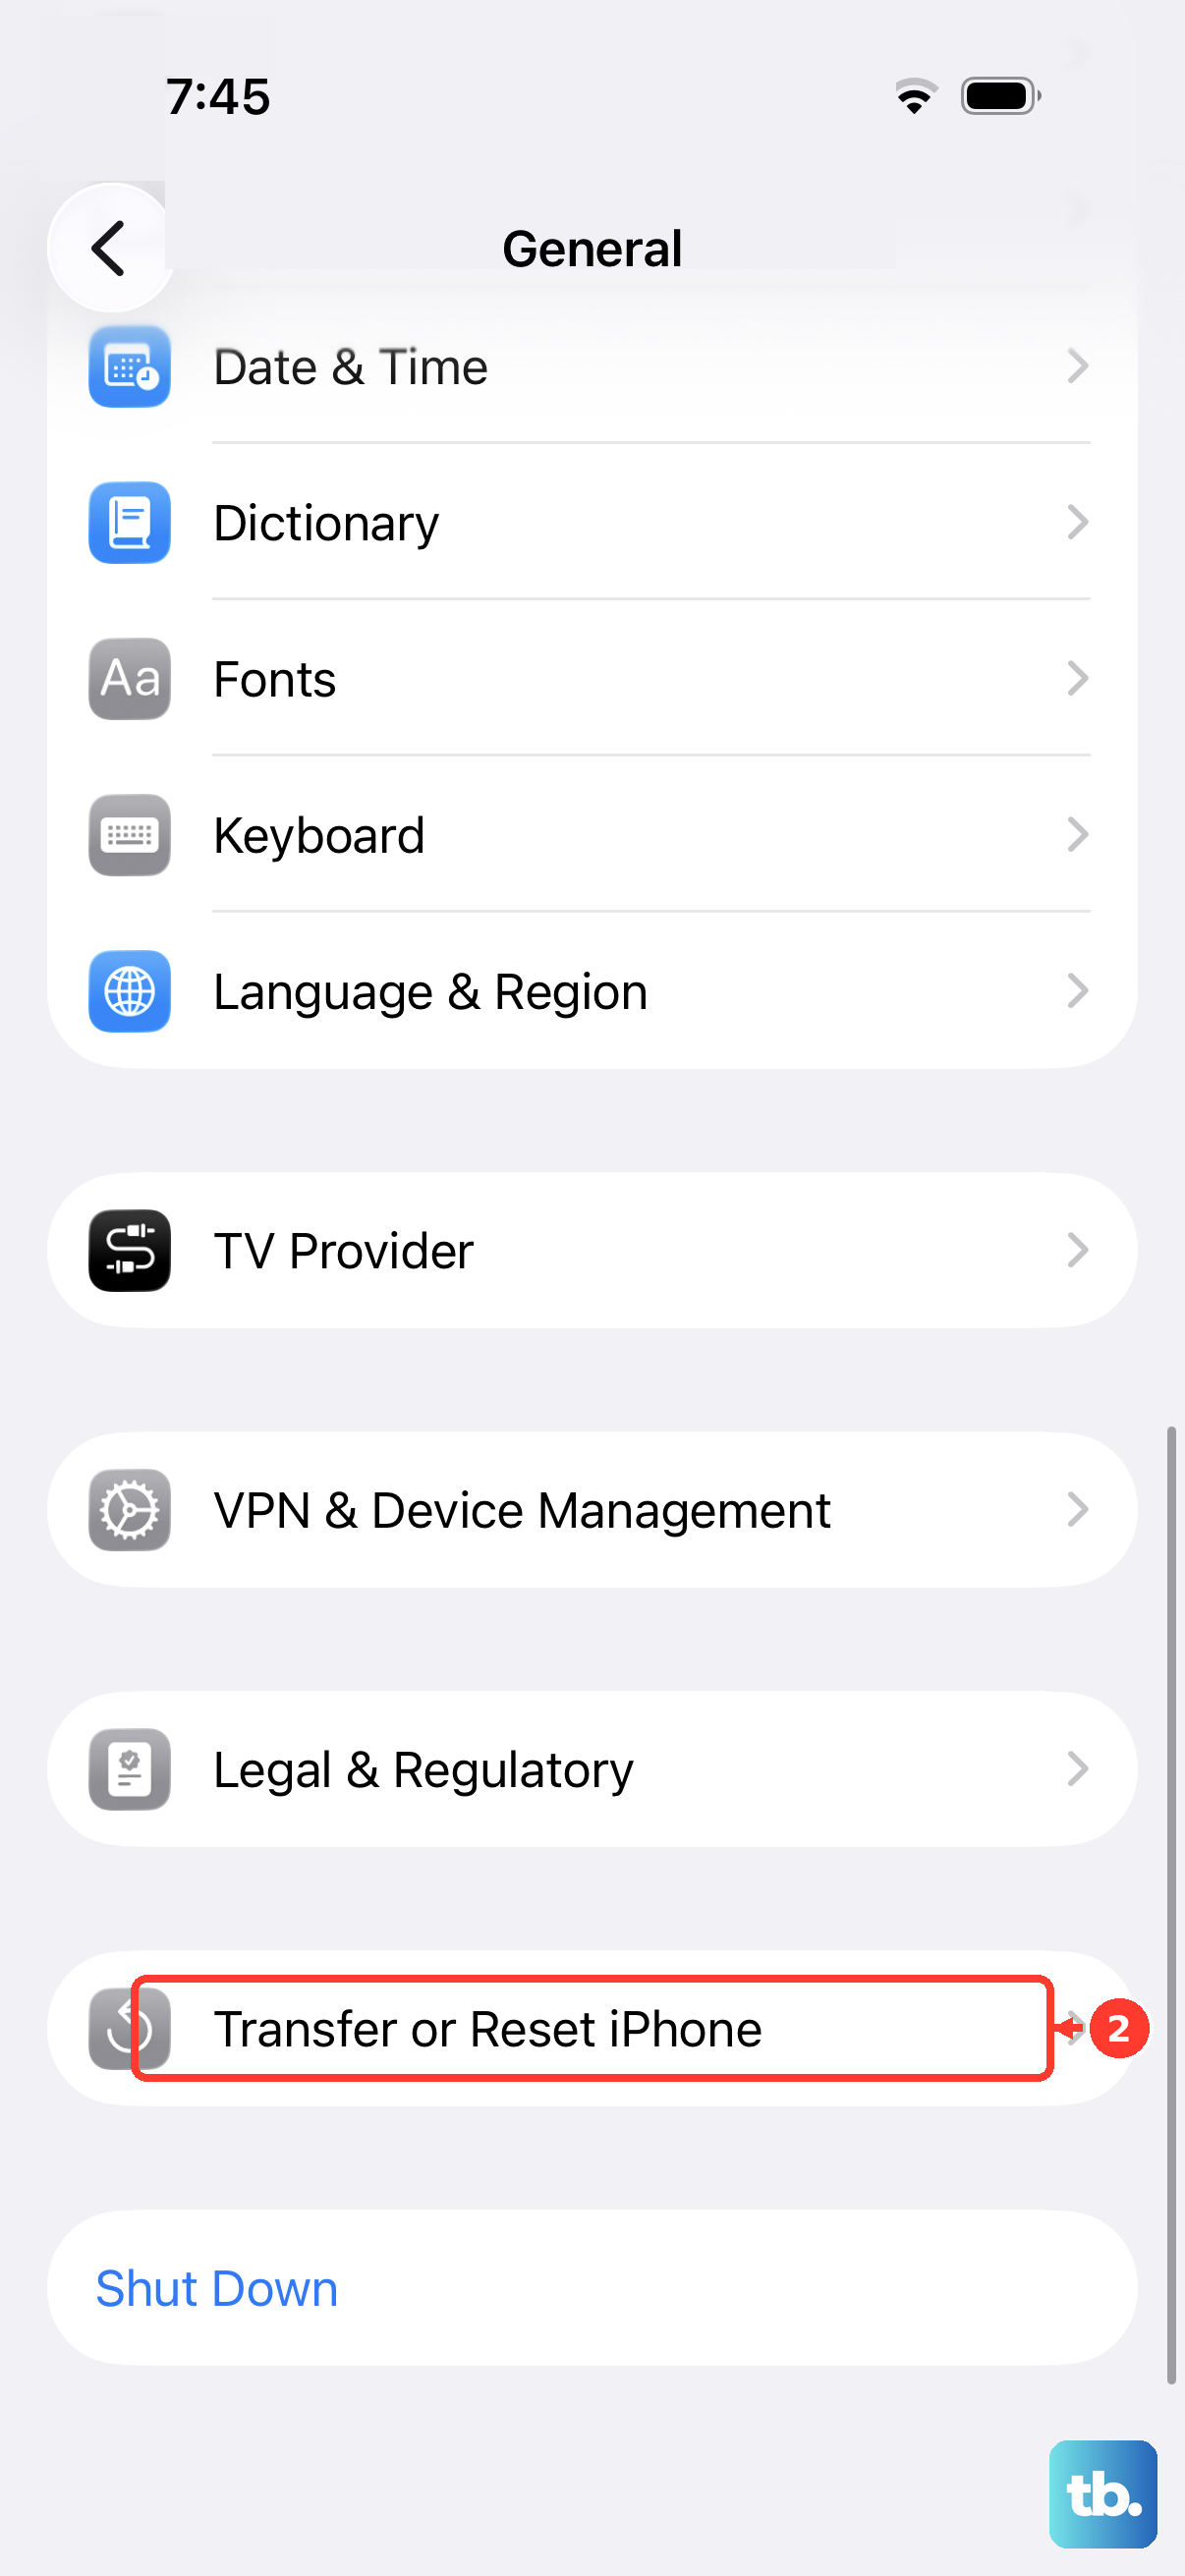
To delete every installed eSIM on iOS 27, open Settings > General > Transfer or Reset iPhone > Reset > Delete All eSIMs. You will need a new eSIM or physical SIM to reconnect to cellular service. Use the individual-plan deletion path if you only want to remove one profile.
Remove eSIMs when erasing the phone for sale
Back up any data you want to keep before erasing the iPhone. Removing its SIM alone leaves its content on the phone. Follow the steps to erase an iPhone before selling when you are preparing to hand it over.
On iOS 27, open Settings > General > Transfer or Reset iPhone > Erase All Content and Settings. Enter the requested credentials and tap Continue, then choose to erase the eSIM when prompted. This also erases the phone’s content, so use the separate eSIM deletion controls if you only need to remove a cellular profile. On a managed phone, your organization’s restrictions may require eSIMs to be preserved.
Erase the phone remotely when you cannot access it
Remote erasure removes the iPhone’s content as well as its eSIMs. You must have enabled Find My on the iPhone beforehand. If the phone is offline, erasure starts when it reconnects.
From another Apple device, open Find My > Devices and select the iPhone. Select the More button, choose Erase or Erase This Device, and complete the onscreen instructions. App-based remote erasure requires two-factor authentication and access through your Apple Account or eligible Family Sharing access.
From a browser, sign in to Apple’s Find Devices service and select the iPhone from the device list. Choose to erase the iPhone and follow the onscreen instructions. Apple says erasure through Find My does not preserve eSIMs, and Activation Lock remains enabled after browser-based erasure.
Fix blocked eSIM deletion on a managed phone
If your organization restricts eSIM changes, ask its administrator to allow eSIM modification. Apple’s management restriction allowESIMModification blocks changes when set to false. Your administrator may also need to address forcePreserveESIMOnErase, which preserves eSIMs during local erasure. Once the restriction is resolved, use the appropriate deletion method in Settings.
If the organization needs to erase the entire managed phone and remove its eSIMs, an administrator can send the Remote Wipe command with Preserve Data Plan turned off. This removes the device’s content as well as its eSIMs. Management-console paths vary by service, and this action requires administrator access.
Frequently Asked Questions
Do you need to turn off your iPhone before removing the SIM?
Apple’s SIM removal instructions do not require powering off the iPhone first. The physical removal procedure is independent of the iOS version.
Does removing a SIM card cancel your phone plan?
Removing a physical SIM or deleting an eSIM does not cancel your cellular subscription. Contact your carrier if you want to cancel service.
Should you delete an eSIM to fix cellular problems?
Apple advises against deleting an eSIM for troubleshooting unless your carrier directs you to do it. If you erase an eSIM, contact your carrier to get a new one. If the deleted eSIM used iPhone Handoff, ask your carrier to disable that service as well.
Does restoring an iPhone in recovery mode remove its eSIM?
Recovery and DFU restores preserve eSIMs, as does Apple Configurator erasure. To remove the installed profile, use the eSIM deletion controls.