
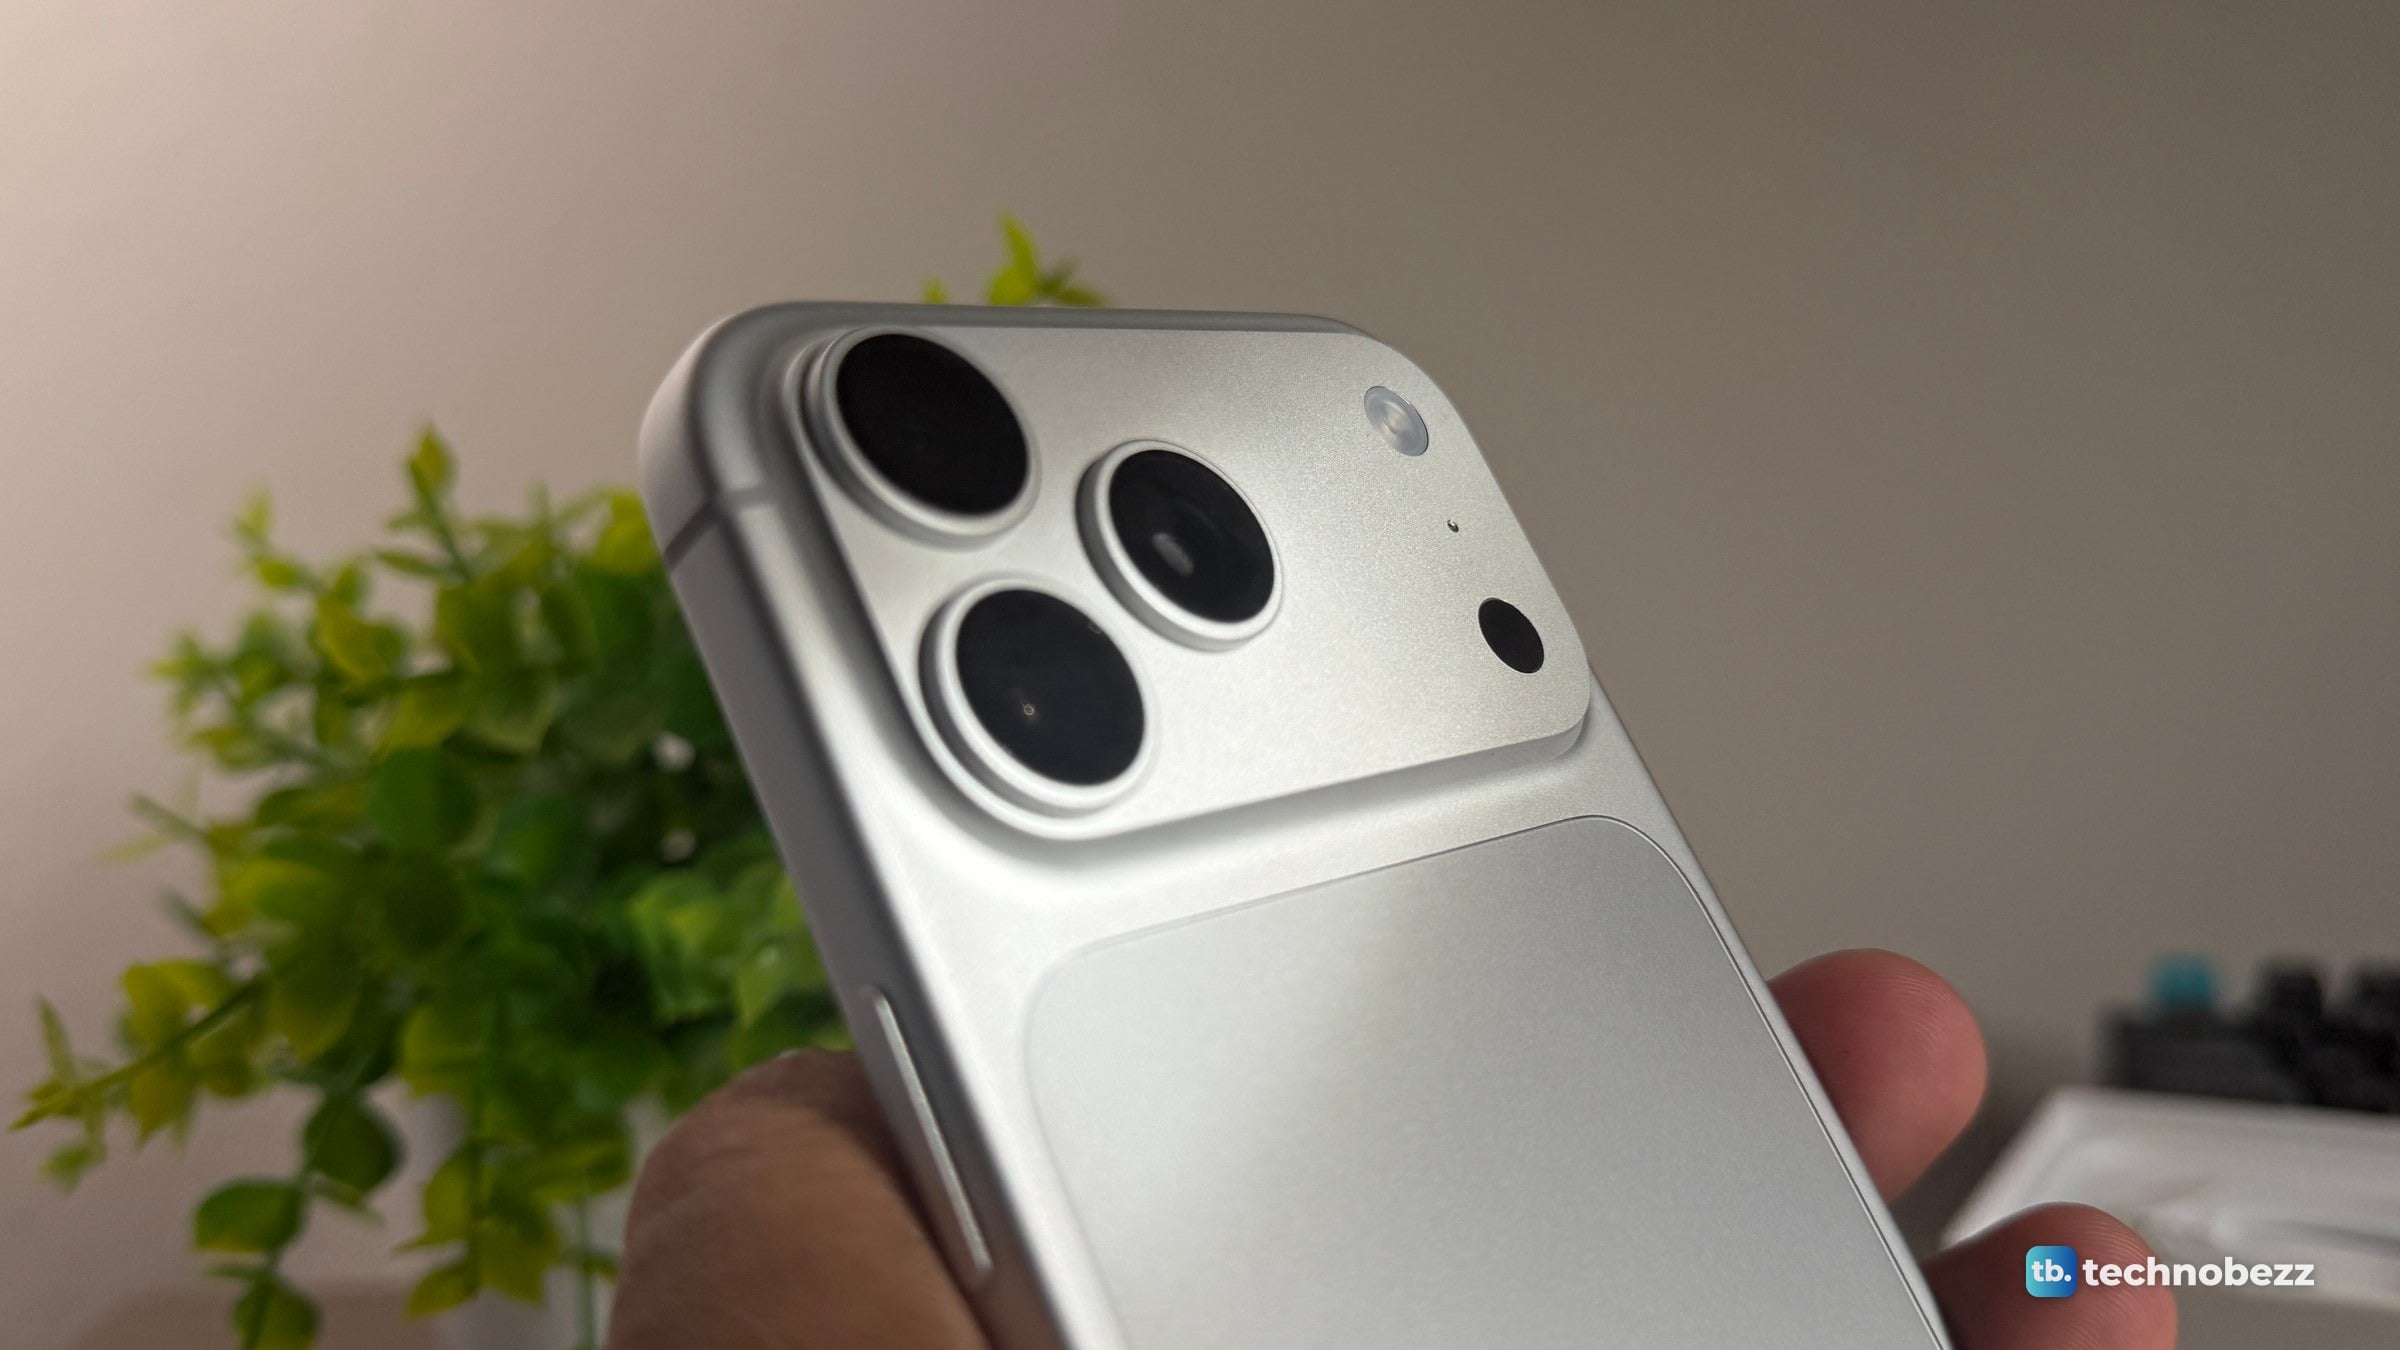
The variable aperture on the iPhone 18 Pro Max is a real, physical control, and in my photos it matters most up close. I shot the same frame at all four settings, f/1.48, f/1.8, f/2.8 and f/4, on a car badge, a tree and the open sea, and at three of them on the sky. Close up, the paint in front of the badge went from a soft smear to visible metallic flake. On the tree I had to zoom in to find a difference. The sea and sky photos looked similarly sharp across the settings, while the shutter speed and ISO changed.
Technobezz is supported by its audience. We may get a commission from retail offers. Reviews ethics statement.
iPhone 18 Pro Max Variable Aperture Explained With Real Photos
Daylight and indoor photos show how the iPhone 18 Pro Max's four aperture settings change close-up detail, background sharpness and brightness.
Updated October 14, 2026Oct 14, 2026
•13 min read

Credit: Technobezz
Get Deals Like These in Your Inbox
The best prices, checked by our editors.
In This Review
Apple iPhone 18 Pro Max
Display6.9-inch all-screen OLED
Height6.43 in (163.4 mm)
Width3.07 in (78.0 mm)
Depth0.34 in (8.75 mm)
Weight8.78 oz (249 g)
Main camera48MP Fusion Main with variable aperture
The short version
- The main camera has four aperture settings: f/1.48, f/1.8, f/2.8 and f/4.
- Up close, f/4 pulled the paint in front of the badge into focus, with about 3.2 times more fine detail than f/1.48.
- The star on the badge stayed sharp at every setting. A tree, the sky and the sea looked the same at screen size.
- f/4 lets in about 7 times less light than f/1.48. In the badge set, the shutter stayed open 6 times longer.
- In a dark room with Night mode off, the f/2.8 photo came out 29 percent as bright as the f/1.48 photo. Not tested yet: Night mode and portraits.
What is the variable aperture on the iPhone 18 Pro Max?
The aperture is the opening inside the lens that light passes through. A low f-number means a wider opening and more light. A high f-number means a smaller opening and less light. For the same scene and focus point, a higher f-number can keep more of the scene in focus from front to back. Until now, the main camera on an iPhone had a fixed aperture. On my iPhone 17 Pro it is f/1.78, according to its photo data.
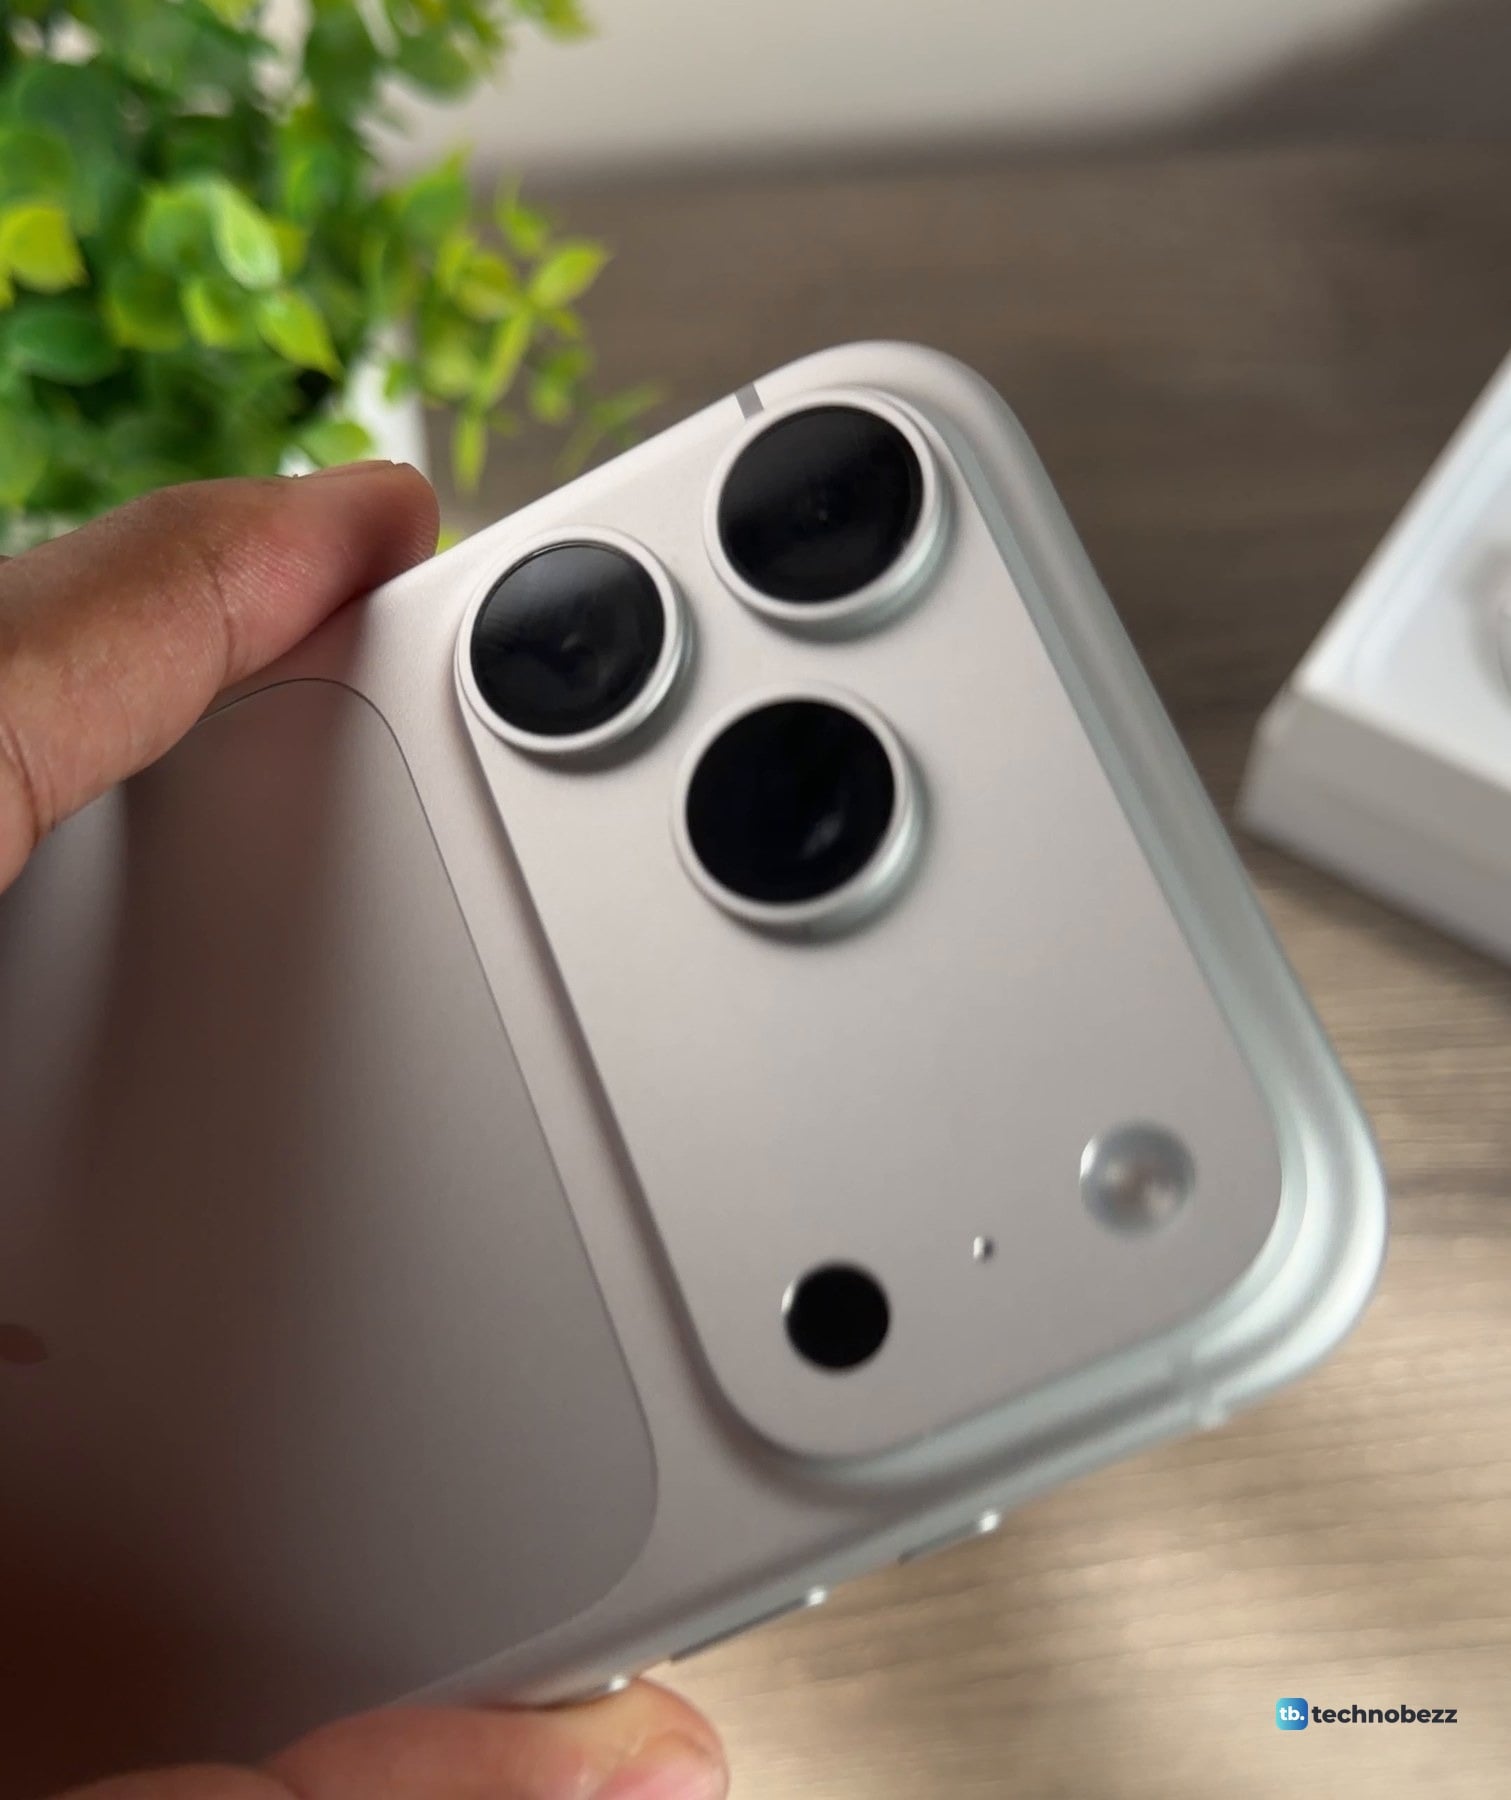
On the iPhone 18 Pro and iPhone 18 Pro Max, Apple lists the 48MP Fusion Main camera with a variable aperture and four settings: f/1.48, f/1.8, f/2.8 and f/4. Apple says six blades move between them. The photo data from my phone reads a 6.93 mm lens, so f/1.48 works out to an effective opening about 4.7 mm across, and f/4 to about 1.7 mm.
We covered the announcement in our launch report on the variable aperture, after months of reports about a smaller Dynamic Island and a thicker body. Apple announced it for the two Pro models, so here is how to check which iPhone you have if you are not sure.
How I tested the four aperture settings
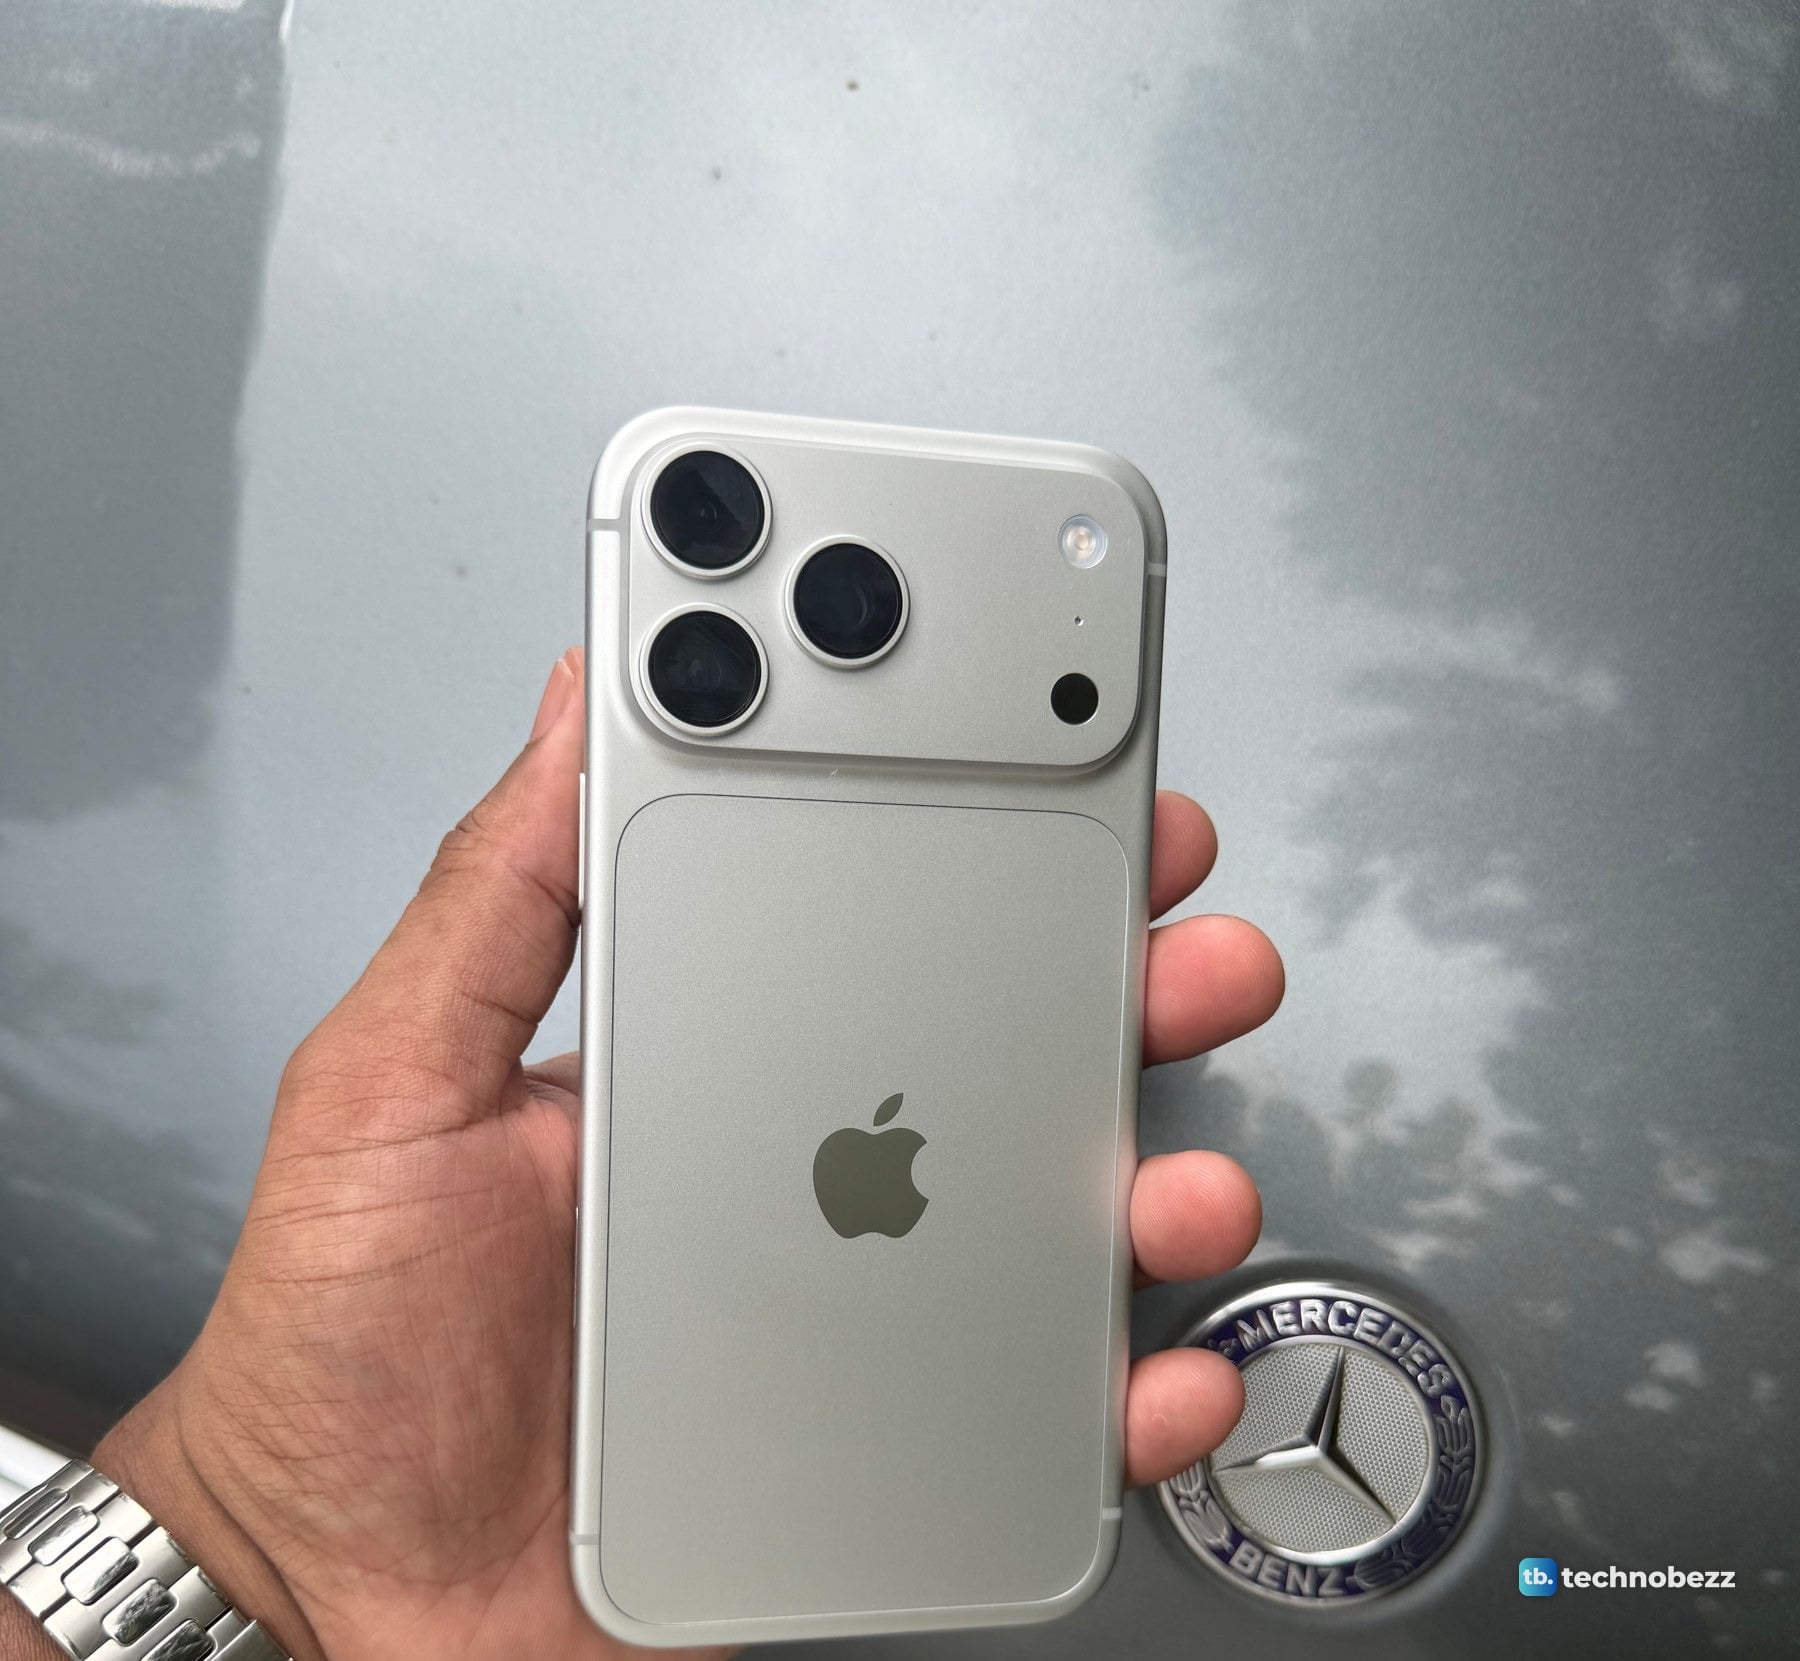
I took the phone outside on one sunny afternoon and shot everything handheld. For each subject I took the same photo at one setting after another. The four badge photos were taken within six seconds. Everything is from the main camera. The photos are the default 24MP, apart from the sea set, which I shot at 2x and which comes out at 12MP.
My two main subjects were the Mercedes badge on the hood of my car, shot from close range, and a tree against the sky, shot from further back. I also have a set of the sky straight up, which stops at f/2.8, and a set of the open sea. This is a hands-on test in the same style as my OLED burn-in test.
The Short below shows the four badge photos and the paint close-up in 39 seconds.
The same photo at f/1.48, f/1.8, f/2.8 and f/4
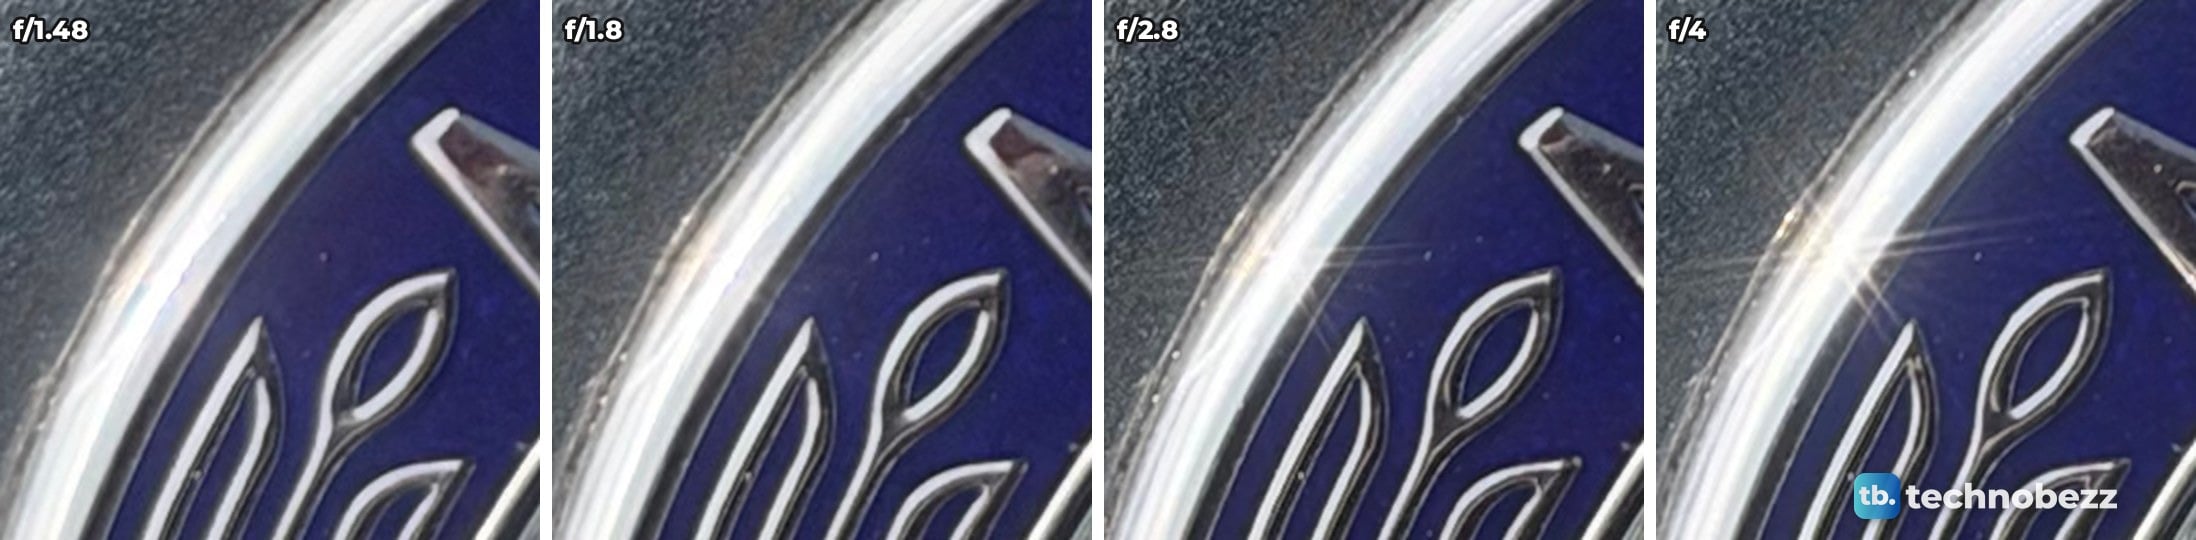
Here is the badge at all four settings. Handheld framing drifts a little from shot to shot, so the four photos were lined up on the badge before cropping. Every panel shows the same area.
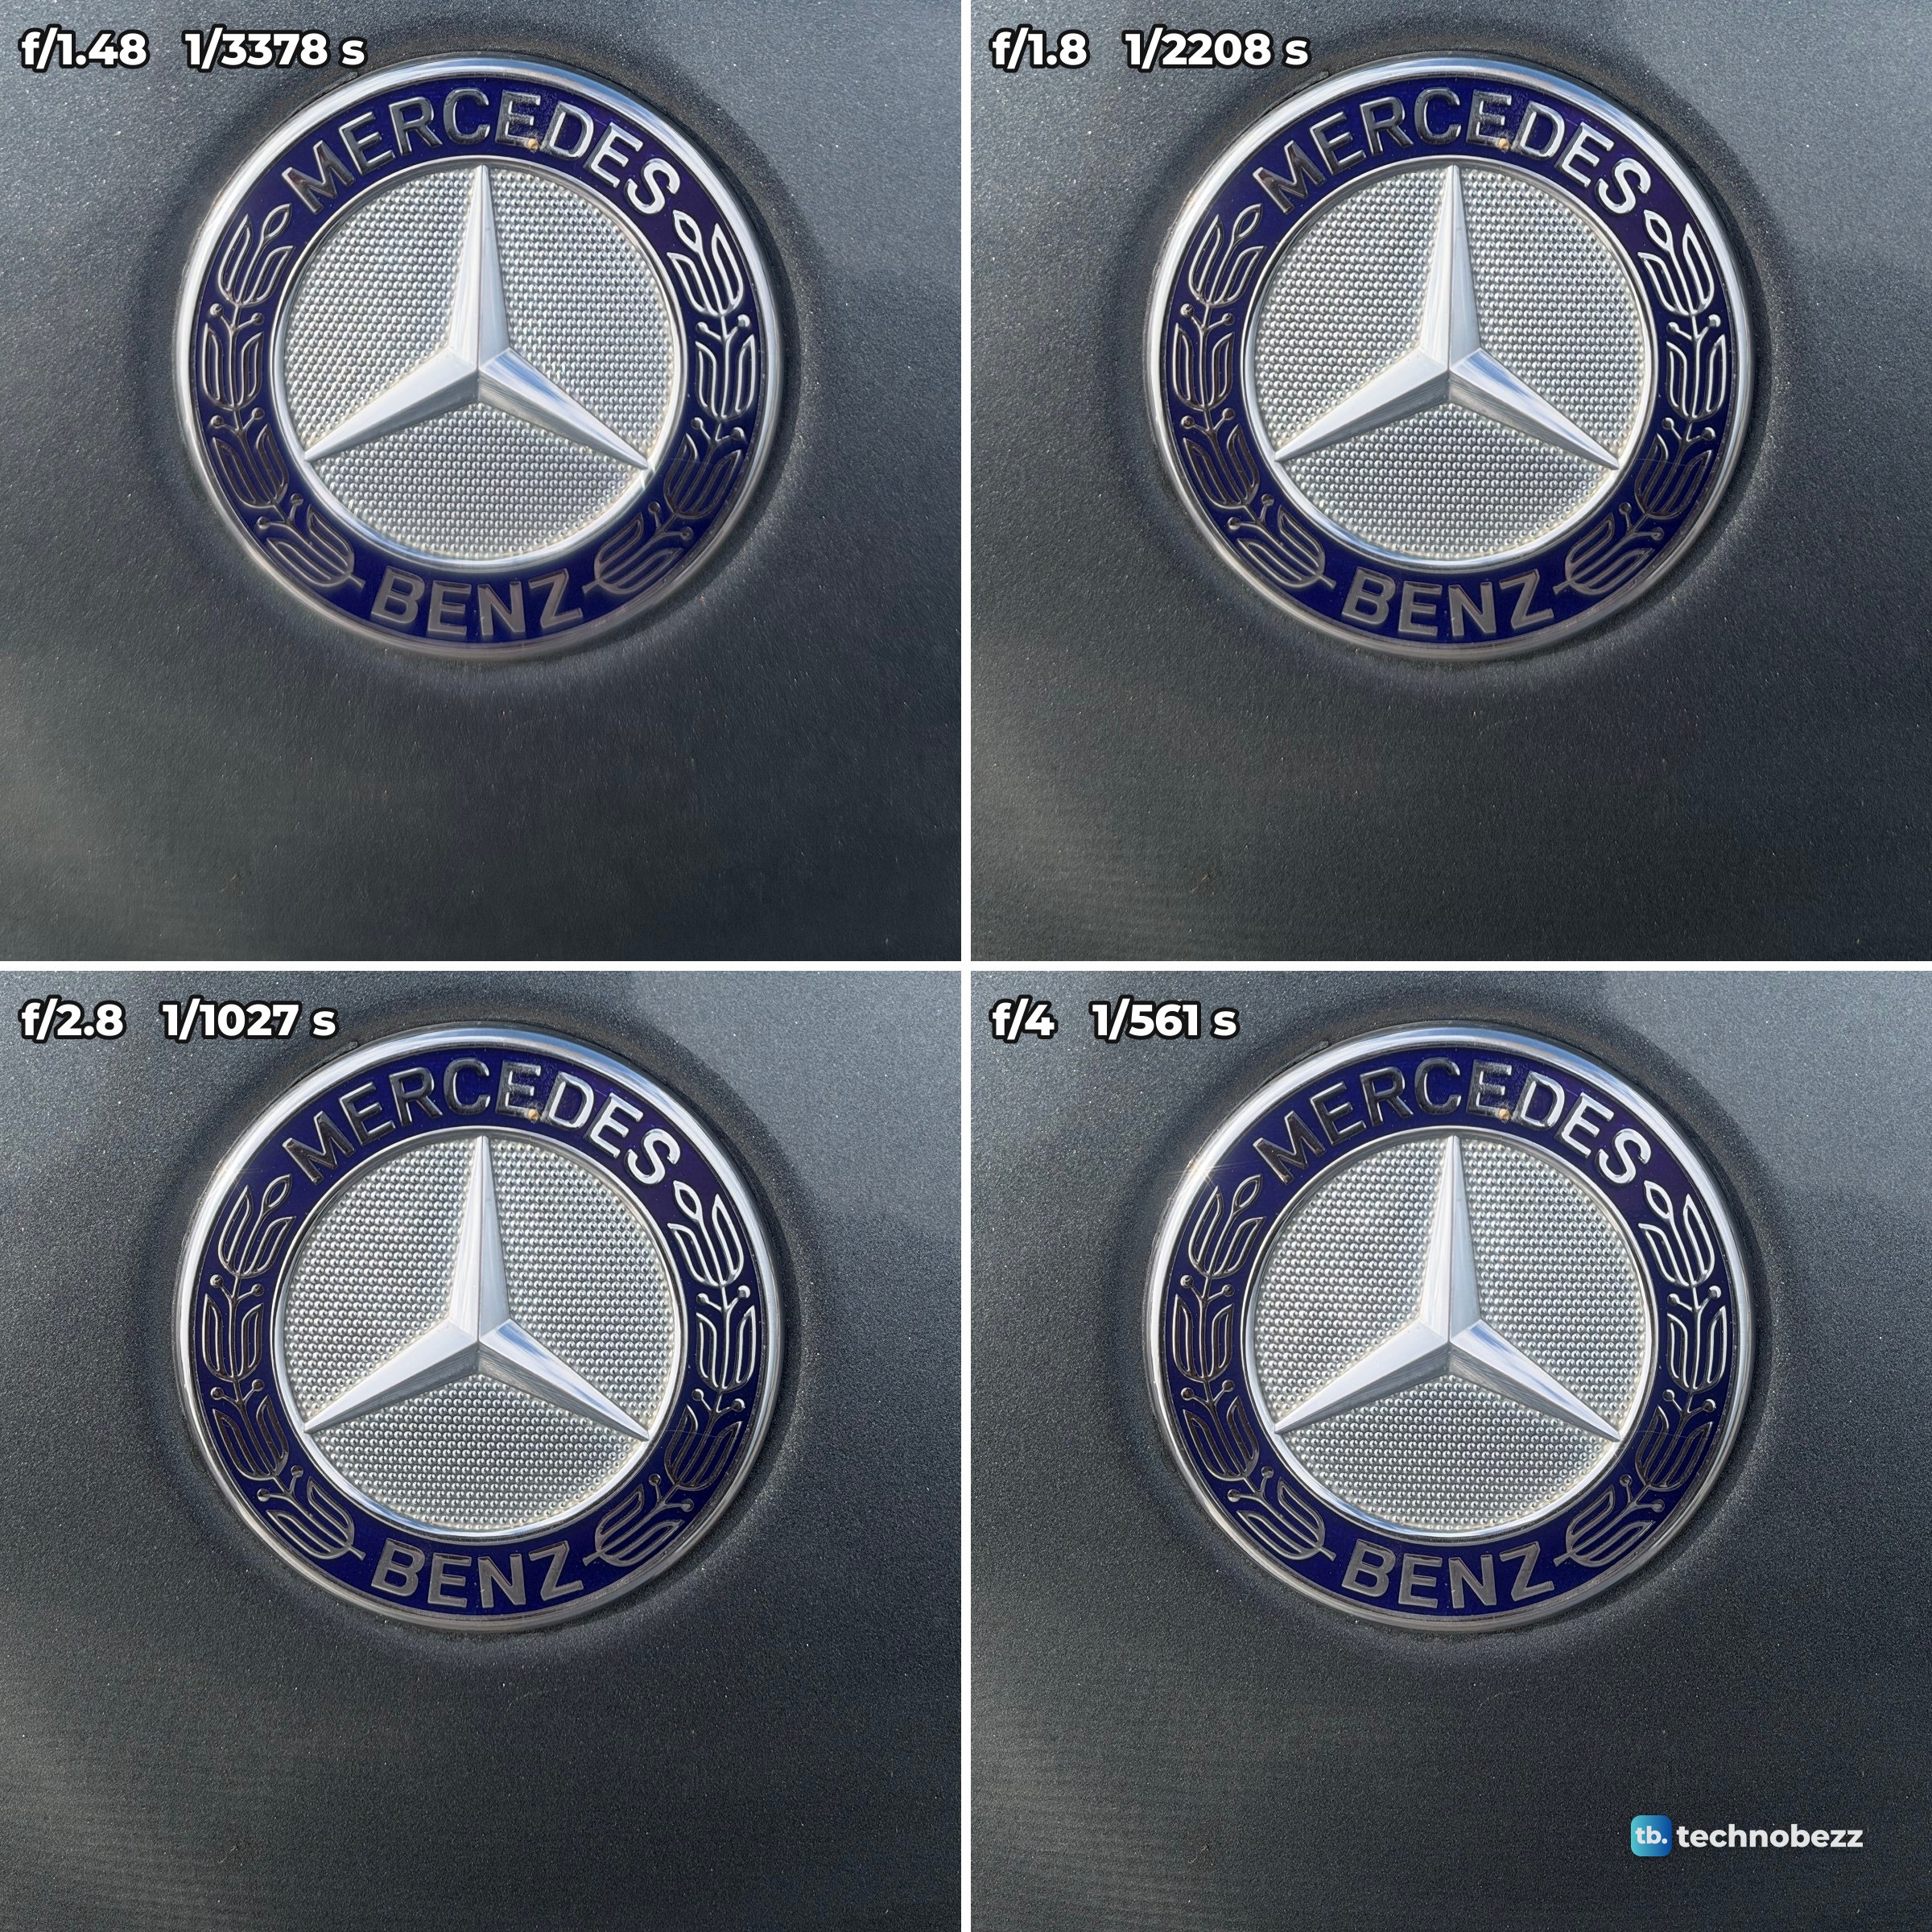
At a glance the four look alike, and the badge itself stays sharp the whole way. The difference is the paint around it, most of all the strip just below the badge, nearest the camera.
What changes up close
Wide open at f/1.48, the paint in front of the badge melts away. The flake smears into soft streaks and the surface looks airbrushed. At f/4 it looks like what it is: gray paint full of metal flake.
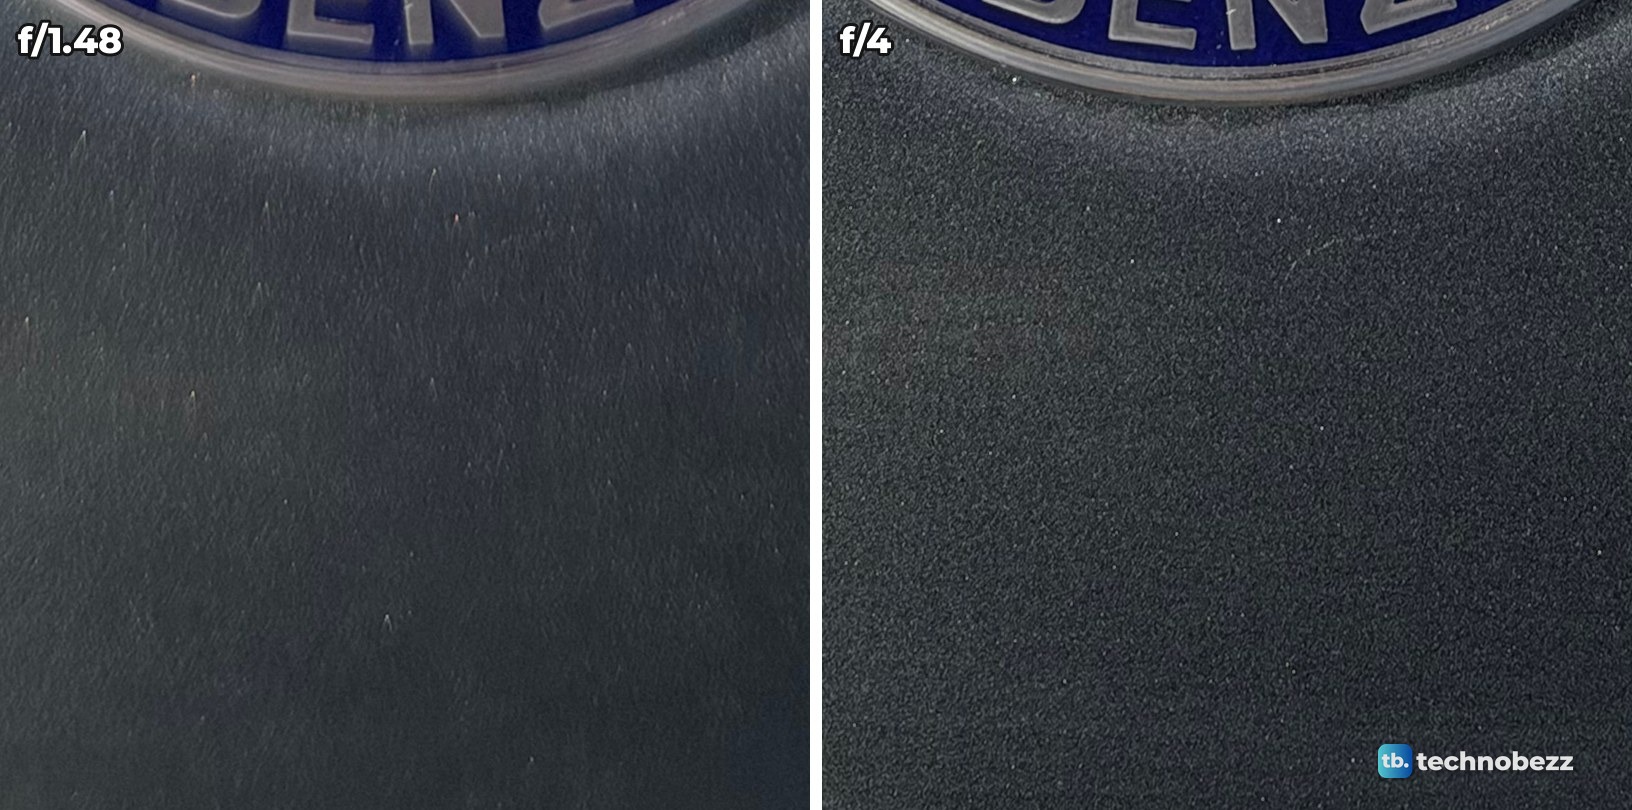
With the four photos lined up on the badge, I measured about 3.2 times more fine detail in that strip of paint at f/4 than at f/1.48. The paint behind the badge gained less, about 1.8 times.
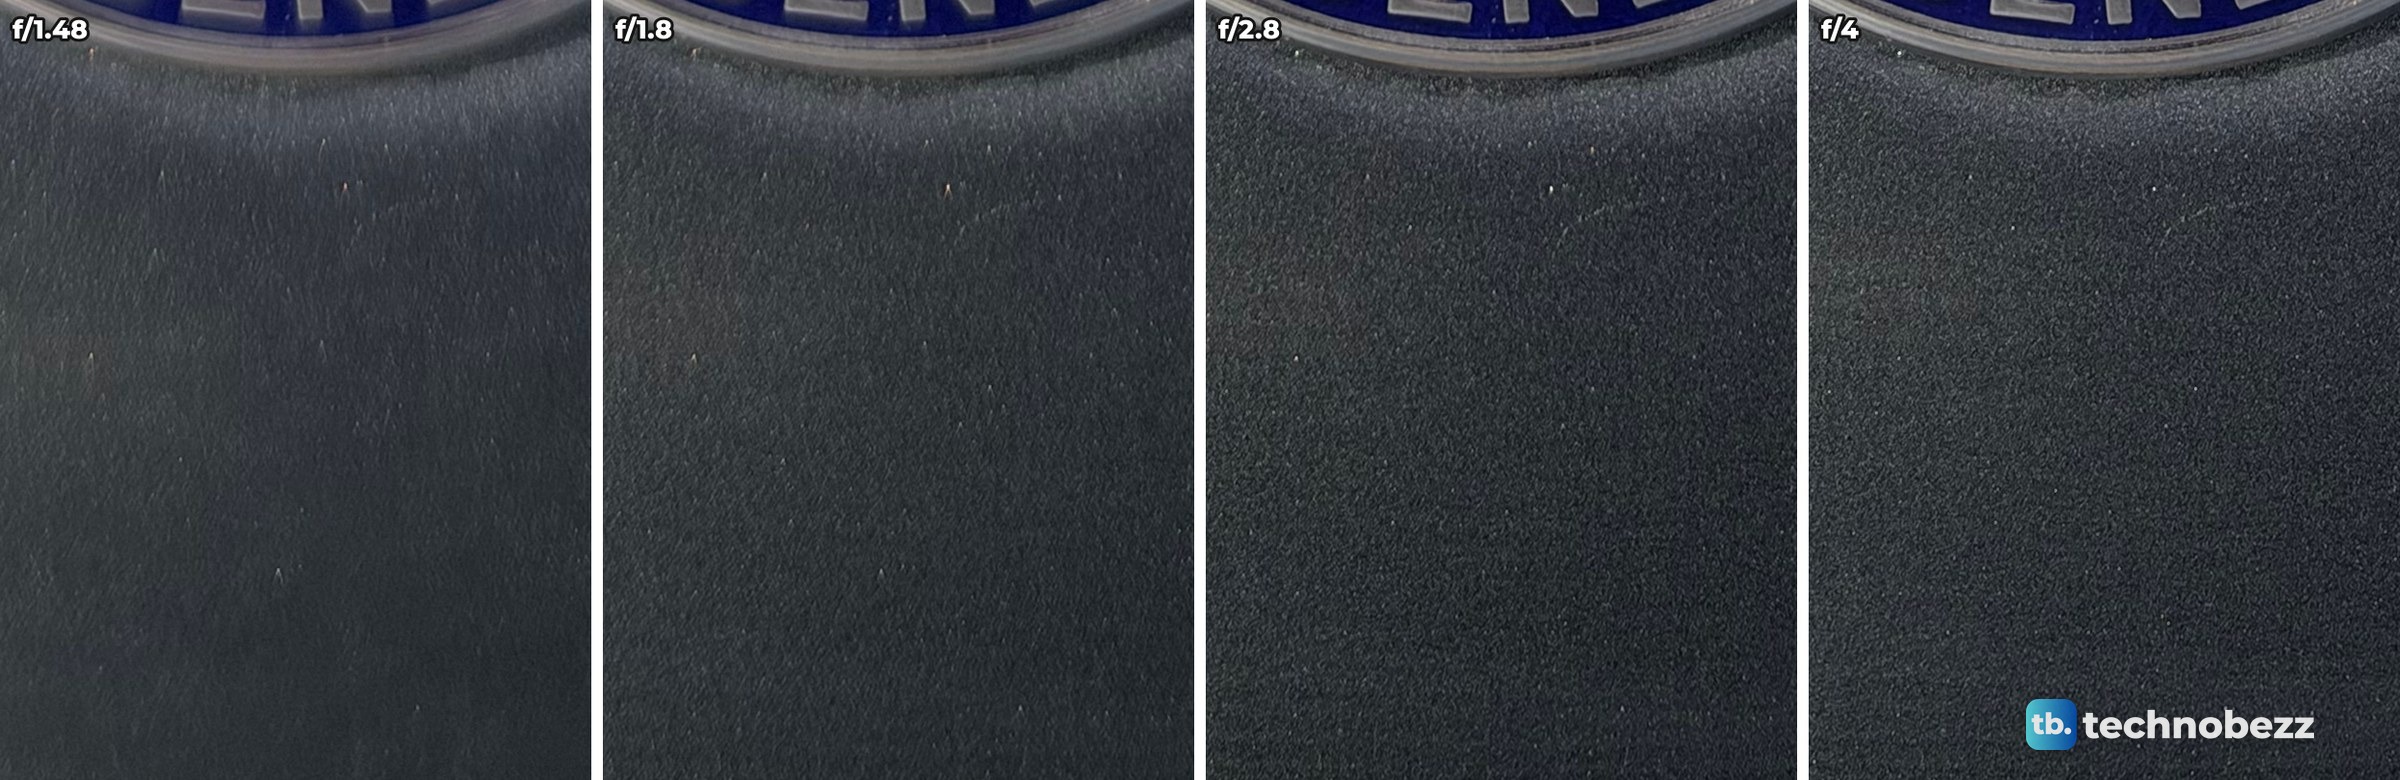
The steps are not even. f/1.8 is only a little clearer than f/1.48. The flake starts to resolve at f/2.8, and f/4 tightens it a bit more.
What stays the same
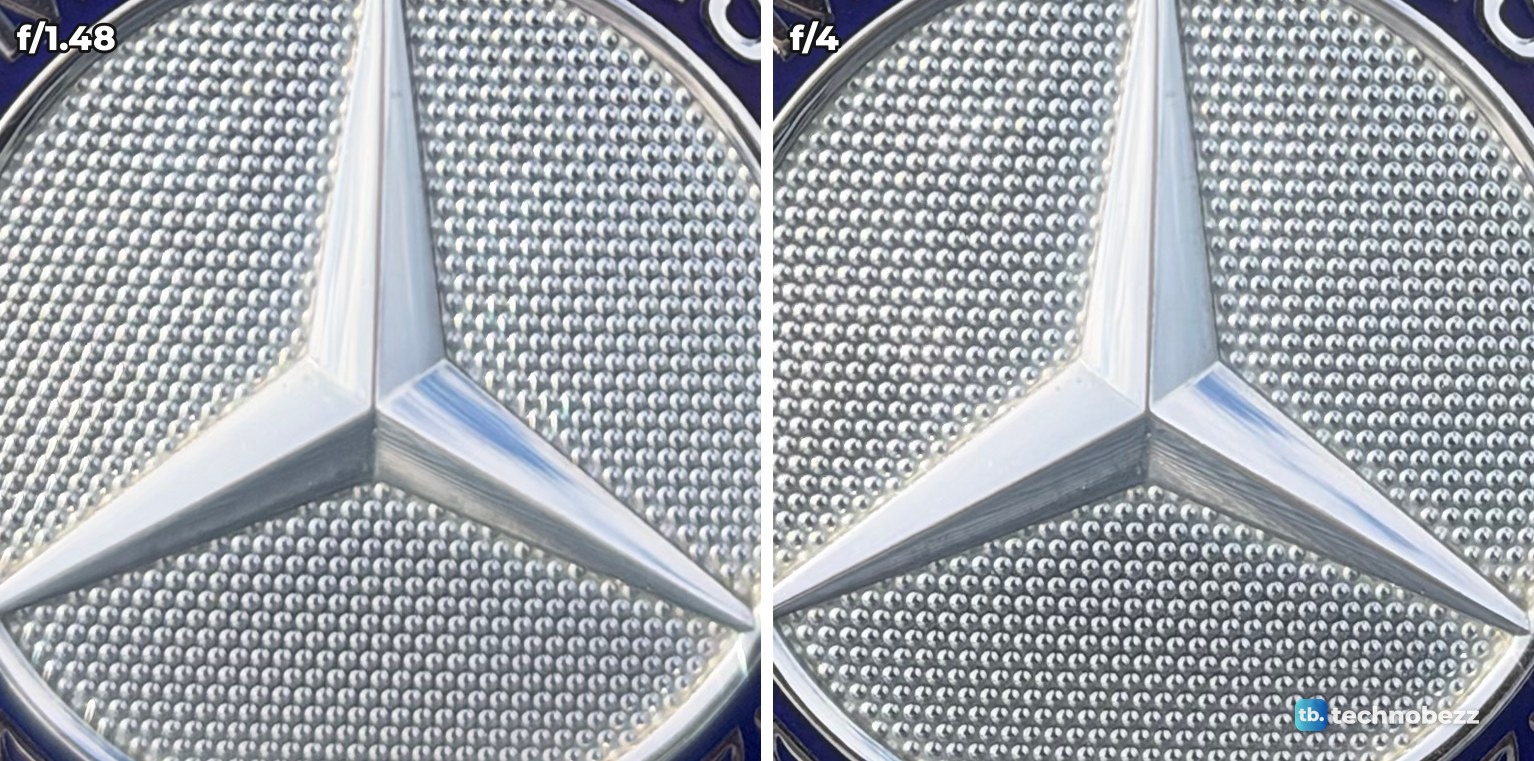
The star in the middle of the badge is sharp at every setting.
Two small tells at full size
Zoom in further and the aperture shows in two more places. The first is the rim of the badge nearest the camera, where the lettering is slightly soft at f/1.48 and crisp at f/4. The zone of sharp focus is that thin from this close.
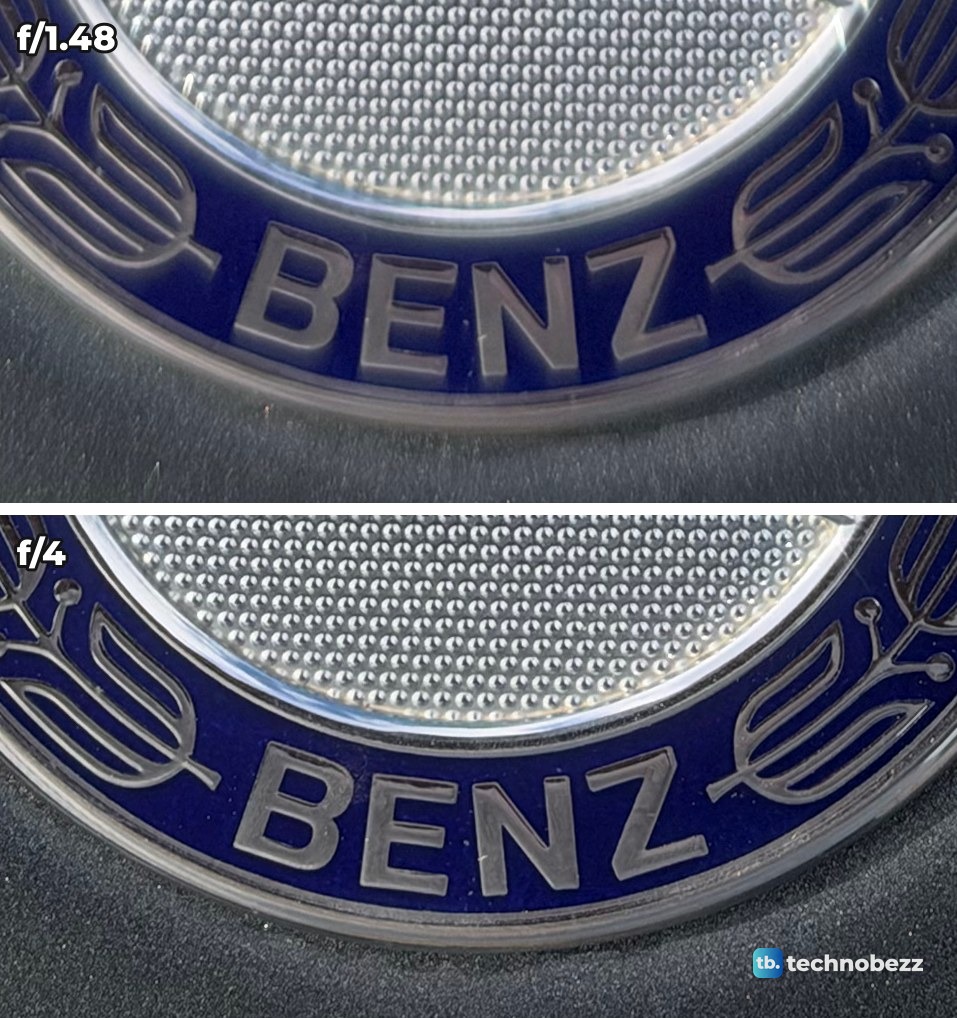
The second is a glint of sun on the chrome ring. At f/1.48 and f/1.8 it is a plain bright spot. At f/2.8 it grows thin rays, and at f/4 it is a small starburst. Photographers call that a sunstar, and it comes from light bending around the edges of the aperture blades.
How much light does f/4 cost?
A smaller opening lets in less light, and the camera has to make that up somewhere. Going from f/1.48 to f/4 cuts the light about 7 times (4 divided by 1.48, squared, is 7.3). On the badge, the shutter went from 1/3378 s to 1/561 s, which is 6 times longer, and the ISO moved from 64 to 80, which accounts for the rest.
| Subject | f/1.48 | f/1.8 | f/2.8 | f/4 |
|---|---|---|---|---|
| Mercedes badge, close | 1/3378 s, ISO 64 | 1/2208 s, ISO 64 | 1/1027 s, ISO 80 | 1/561 s, ISO 80 |
| Tree against sky | 1/1795 s, ISO 100 | 1/1285 s, ISO 80 | 1/561 s, ISO 100 | 1/227 s, ISO 80 |
| Sky straight up | 1/11364 s, ISO 64 | 1/8772 s, ISO 80 | 1/3378 s, ISO 64 | Not shot |
| Sea and sky at 2x | 1/17544 s, ISO 80 | 1/10417 s, ISO 64 | 1/3759 s, ISO 64 | 1/2000 s, ISO 64 |
In these daylight sets, even the slowest shutter speed was 1/227 s, on the tree at f/4. In dim light the same trade costs far more, and I tested that indoors the next evening.
What the aperture does in low light
Indoors the next evening, with Night mode off, I ran the settings again on four scenes: wall art in a dark room, a plant, a PC case and my desk. That is 16 photos on the main camera.
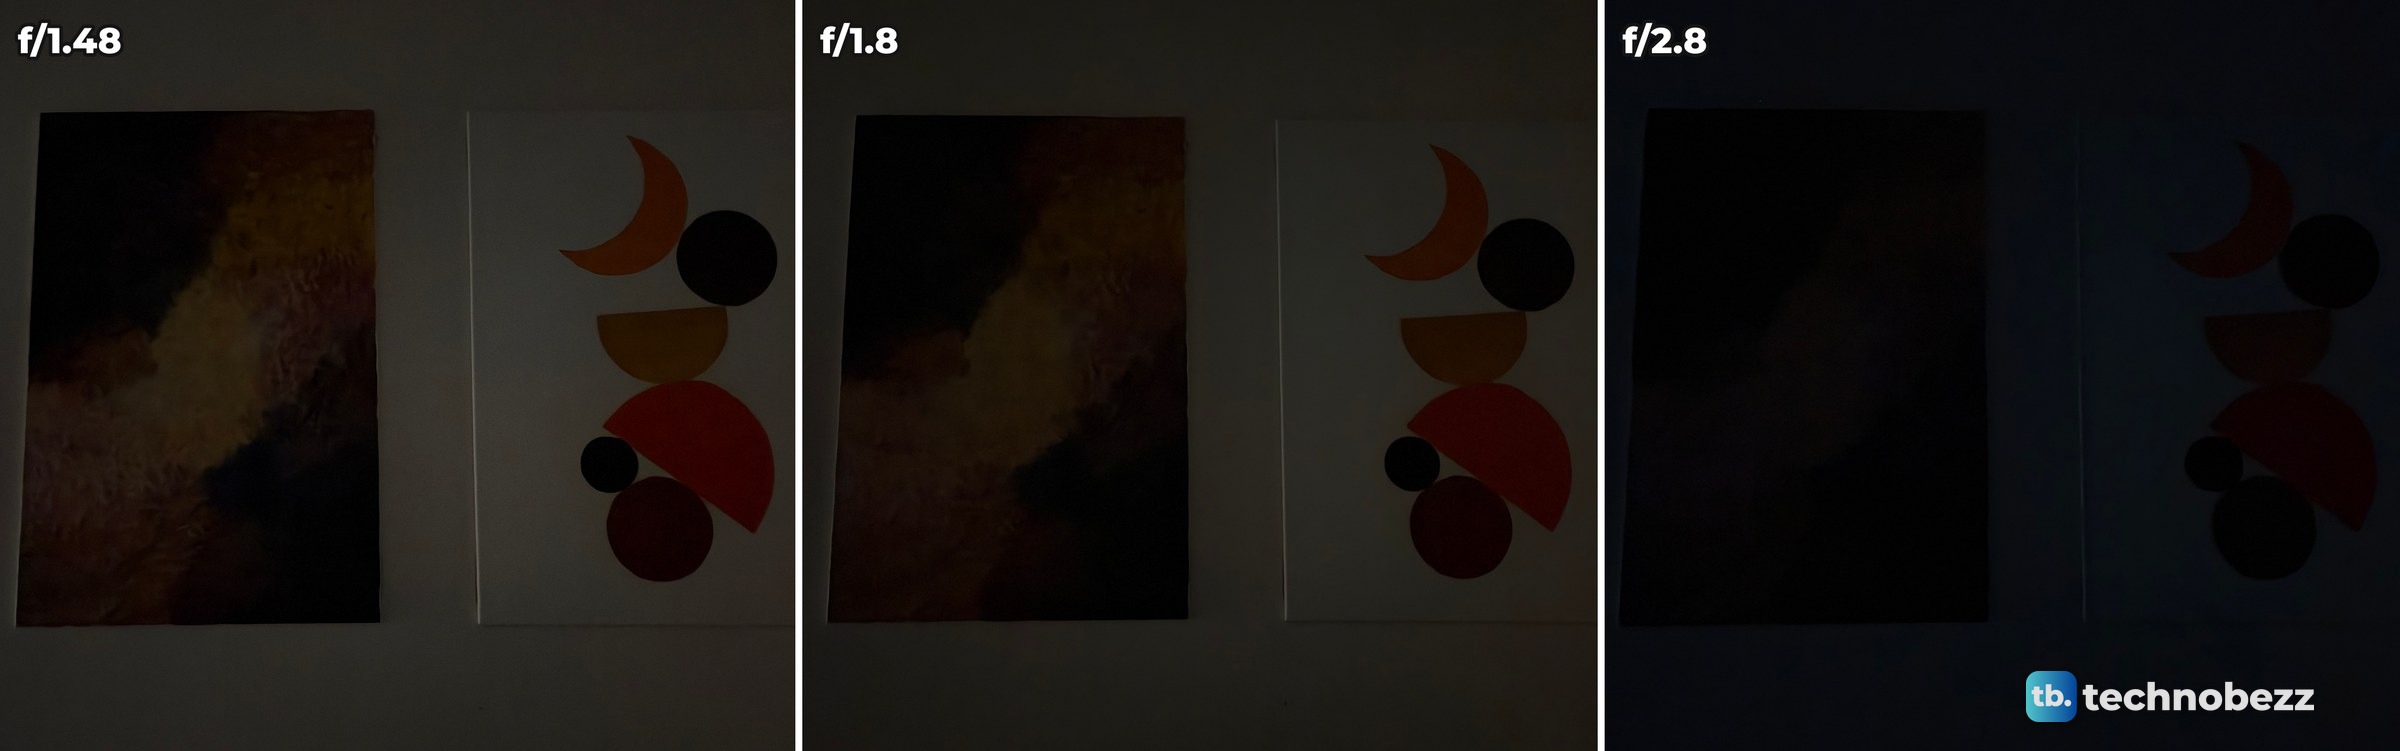
The dark room is the blunt one. At f/1.48, f/1.8 and f/2.8 the photo data reads the same ISO 12,500 and the same 1/17 s shutter, so closing the lens just took light away. Against the f/1.48 frame, f/1.8 measured 74 percent as bright and f/2.8 measured 29 percent. A second f/1.48 frame at the end measured 99.5 percent of the first, so the room light had not changed.
This Short shows the dark room and the plant.
With a little more light, the cost hides. On the plant, the first three settings came out equally bright to within 3 percent, and f/4 came out 14 percent brighter. The ISO climbed to cover the smaller opening: 800 at f/1.48, 1000 at f/1.8, 2500 at f/2.8 and 5000 at f/4, all at 1/25 s.
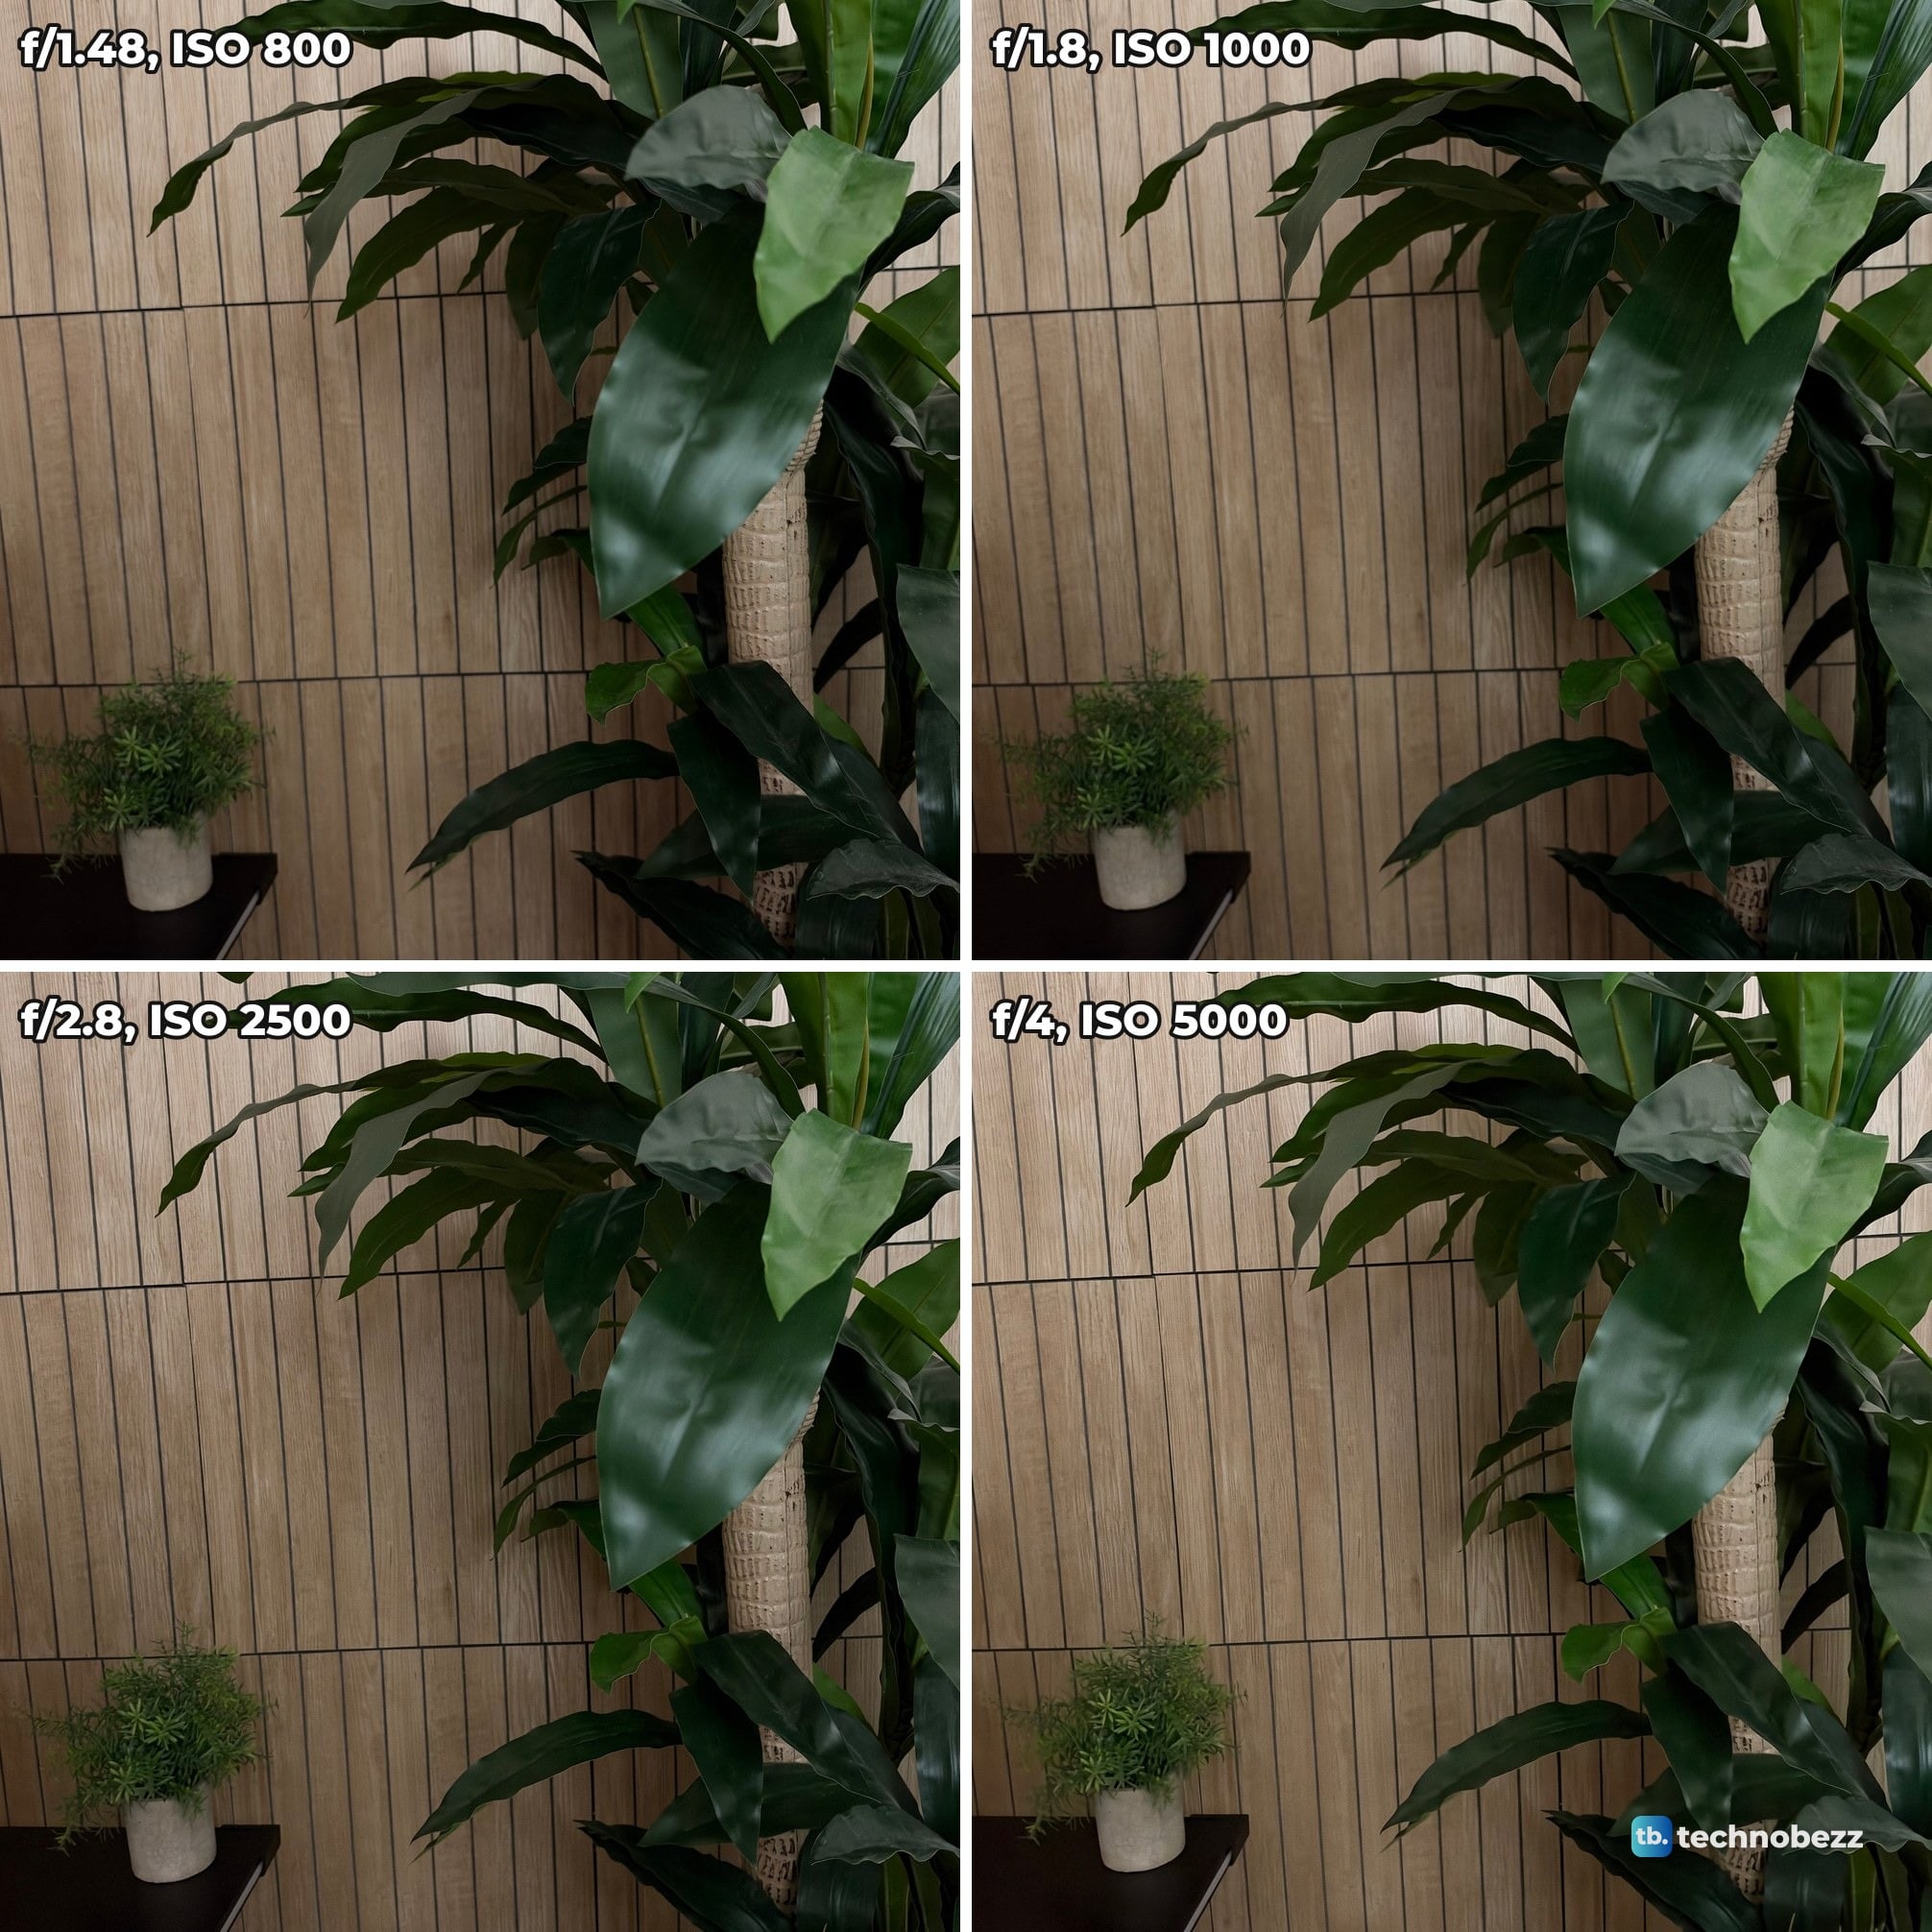
The climb shows when you zoom in. On a leaf at full size, the f/4 frame measured about twice the fine grain of the f/1.48 frame.
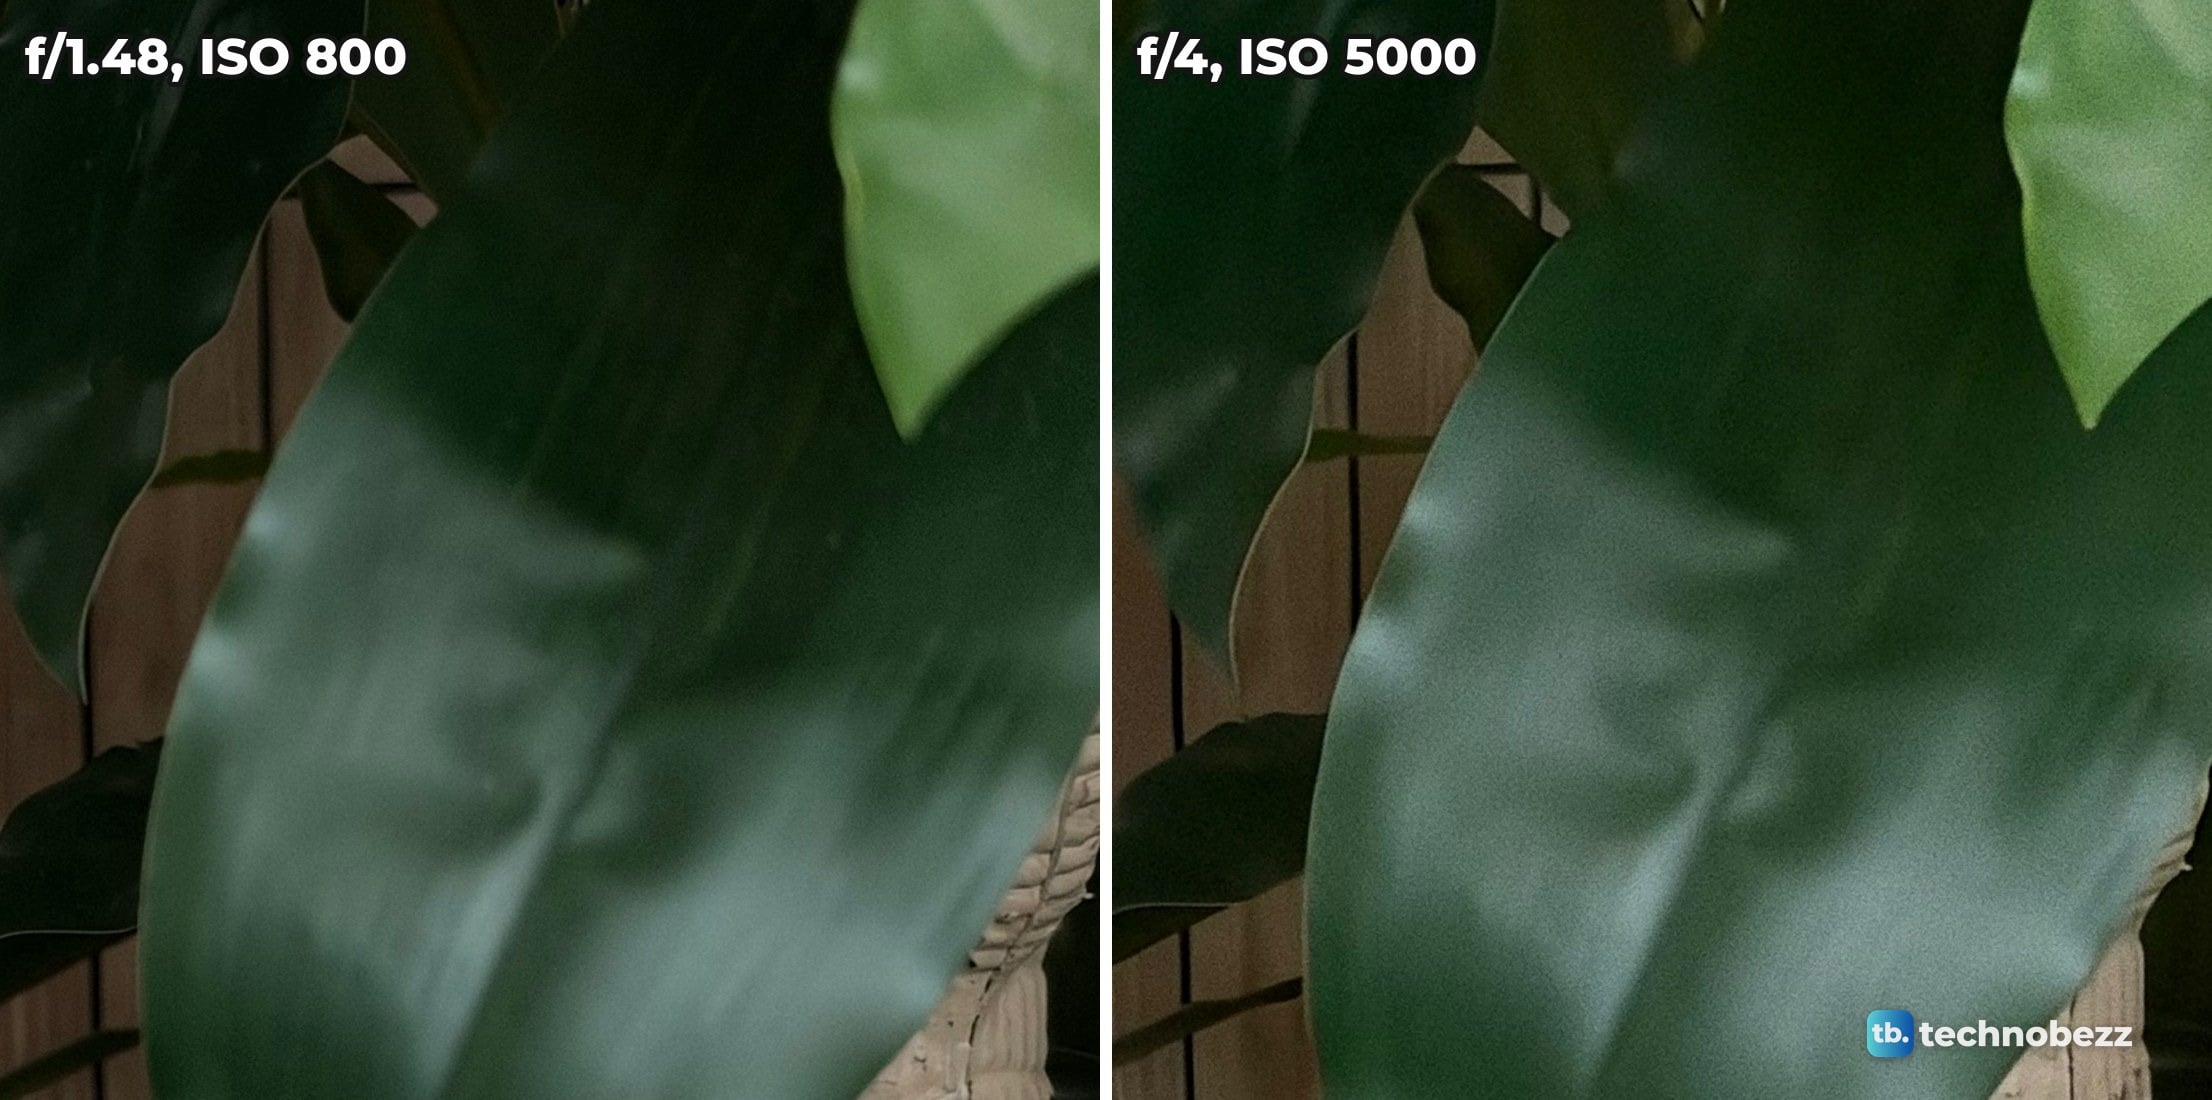
f/4 gave something back, though. The slatted wall behind the plant is soft at f/1.48 and sharp at f/4.
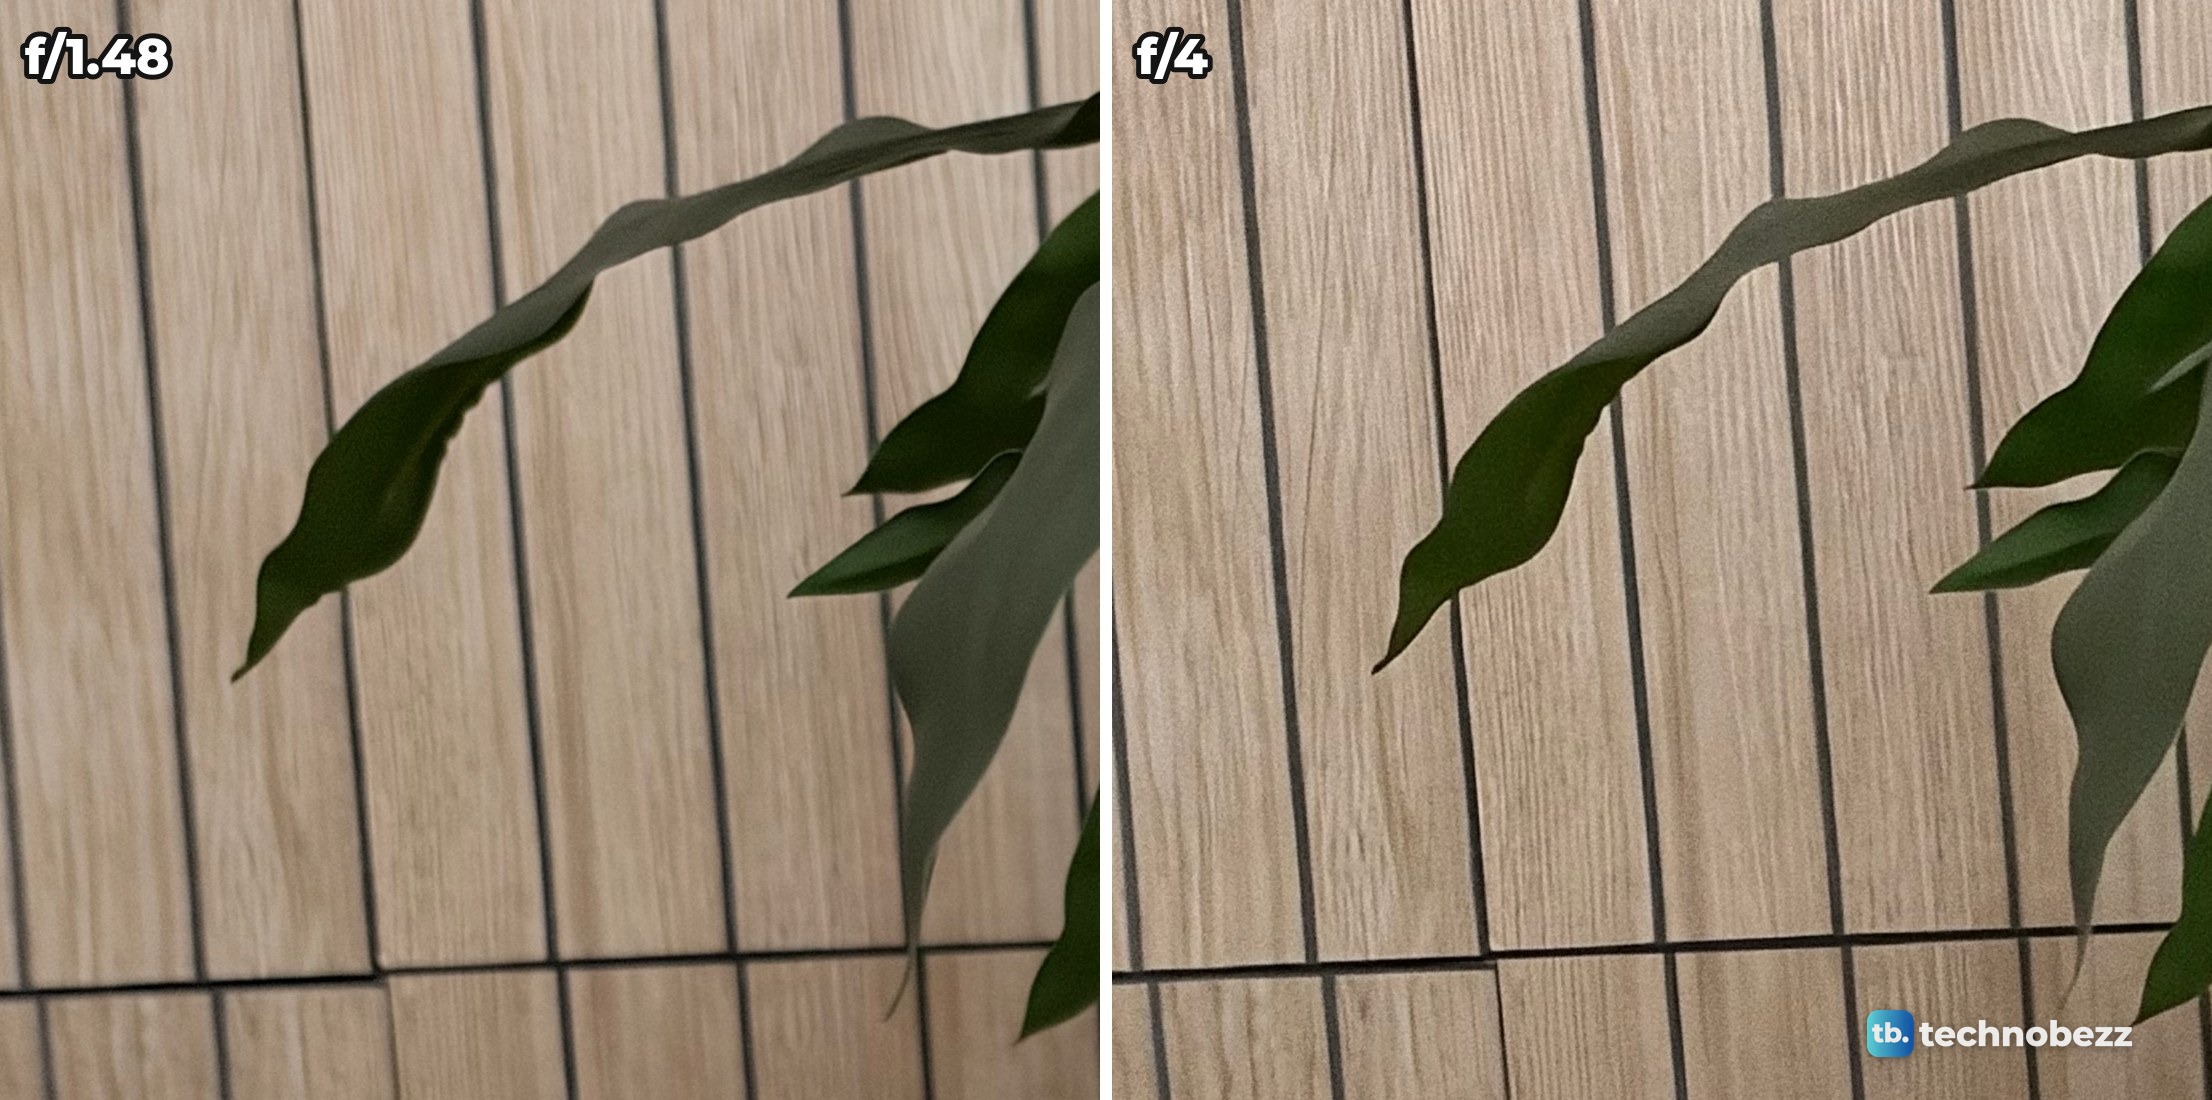
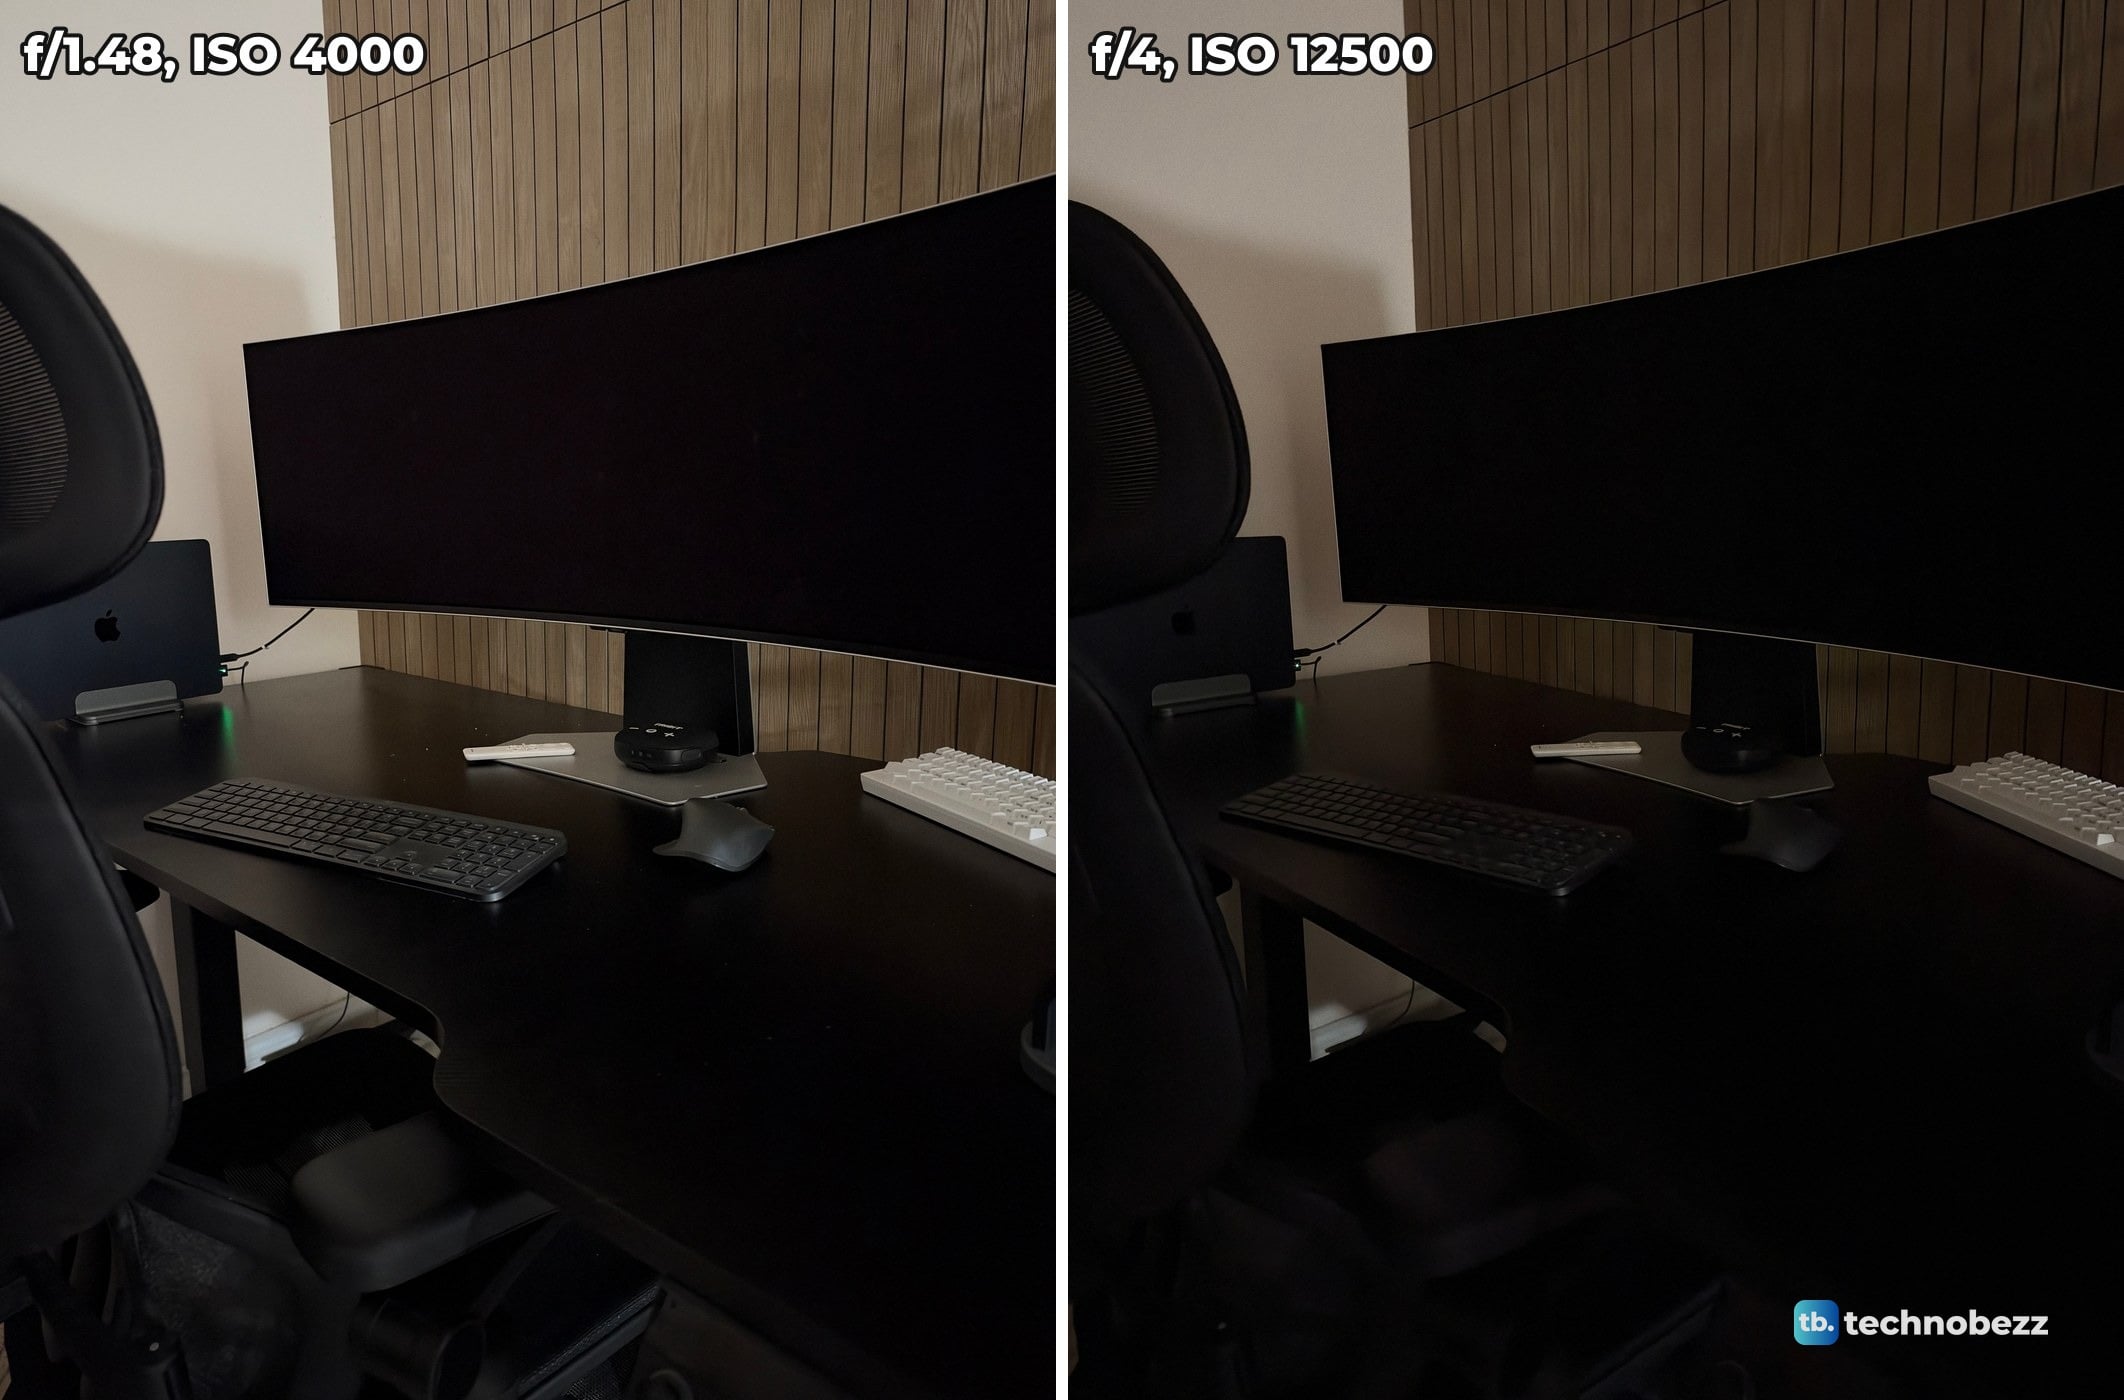
The other two scenes followed the same pattern. On the PC case the ISO went 3200, 6400 and 12,500 from f/1.8 to f/4. On the desk the camera reached ISO 12,500 by f/2.8, and the f/4 frame came out 58 percent as bright as the f/1.48 frame.
| Subject, indoors | f/1.48 | f/1.8 | f/2.8 | f/4 |
|---|---|---|---|---|
| Wall art, dark room | 1/17 s, ISO 12500 | 1/17 s, ISO 12500 | 1/17 s, ISO 12500 | Not shot |
| Plant | 1/25 s, ISO 800 | 1/25 s, ISO 1000 | 1/25 s, ISO 2500 | 1/25 s, ISO 5000 |
| PC case | Not shot | 1/17 s, ISO 3200 | 1/17 s, ISO 6400 | 1/17 s, ISO 12500 |
| Desk | 1/17 s, ISO 4000 | 1/17 s, ISO 5000 | 1/17 s, ISO 12500 | 1/17 s, ISO 12500 |
In all 16 photos the camera never went past ISO 12,500 or slower than 1/17 s. Night mode was off, so this shows the aperture by itself, not what the phone can do in the dark with Night mode helping.
Does the aperture matter on distant subjects?
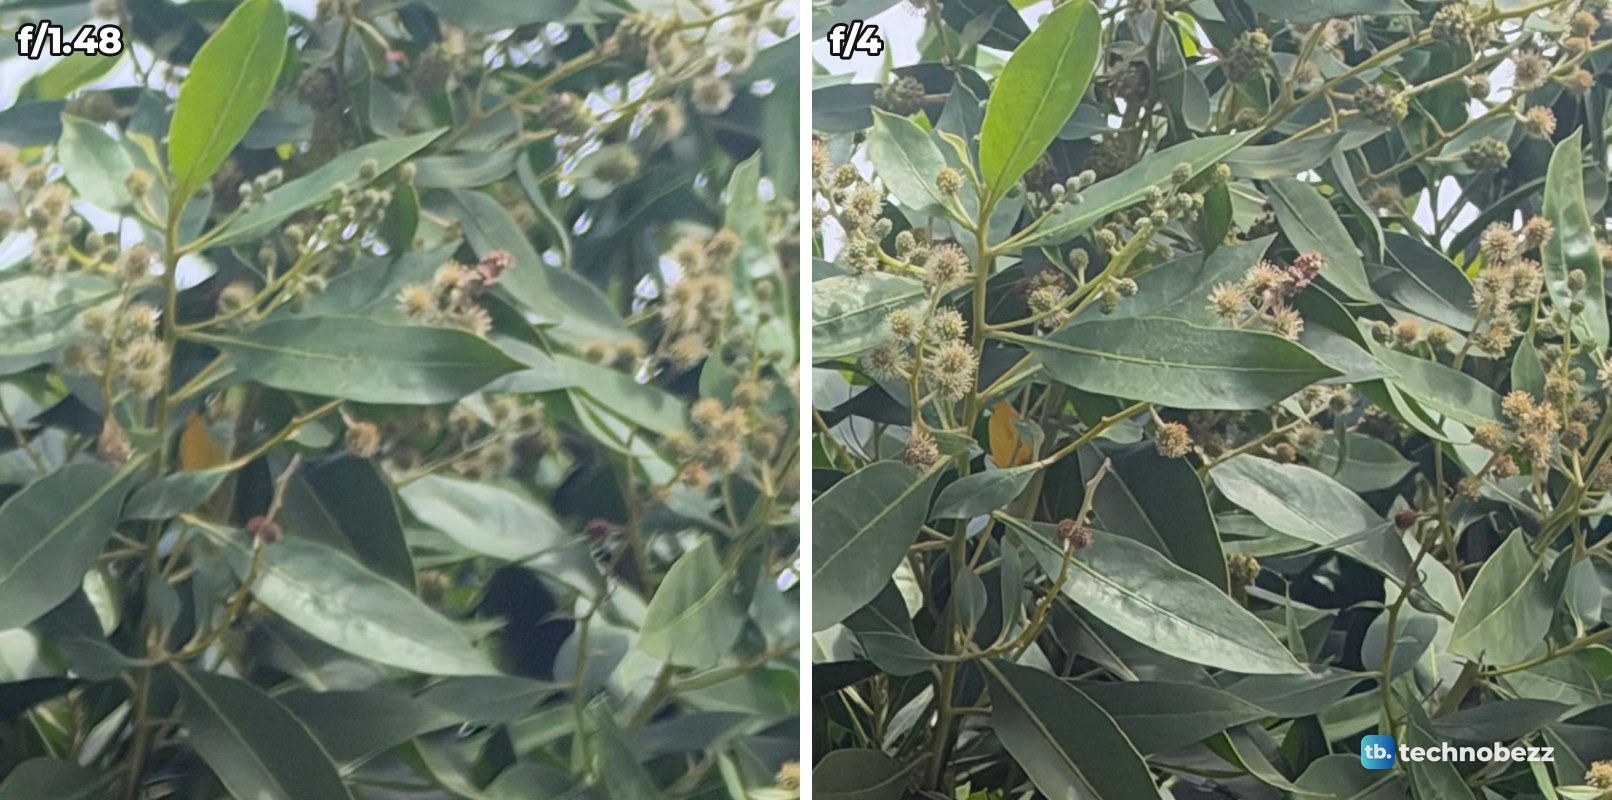
A tree, further back
On the tree I could not tell f/1.48 and f/4 apart without zooming in.
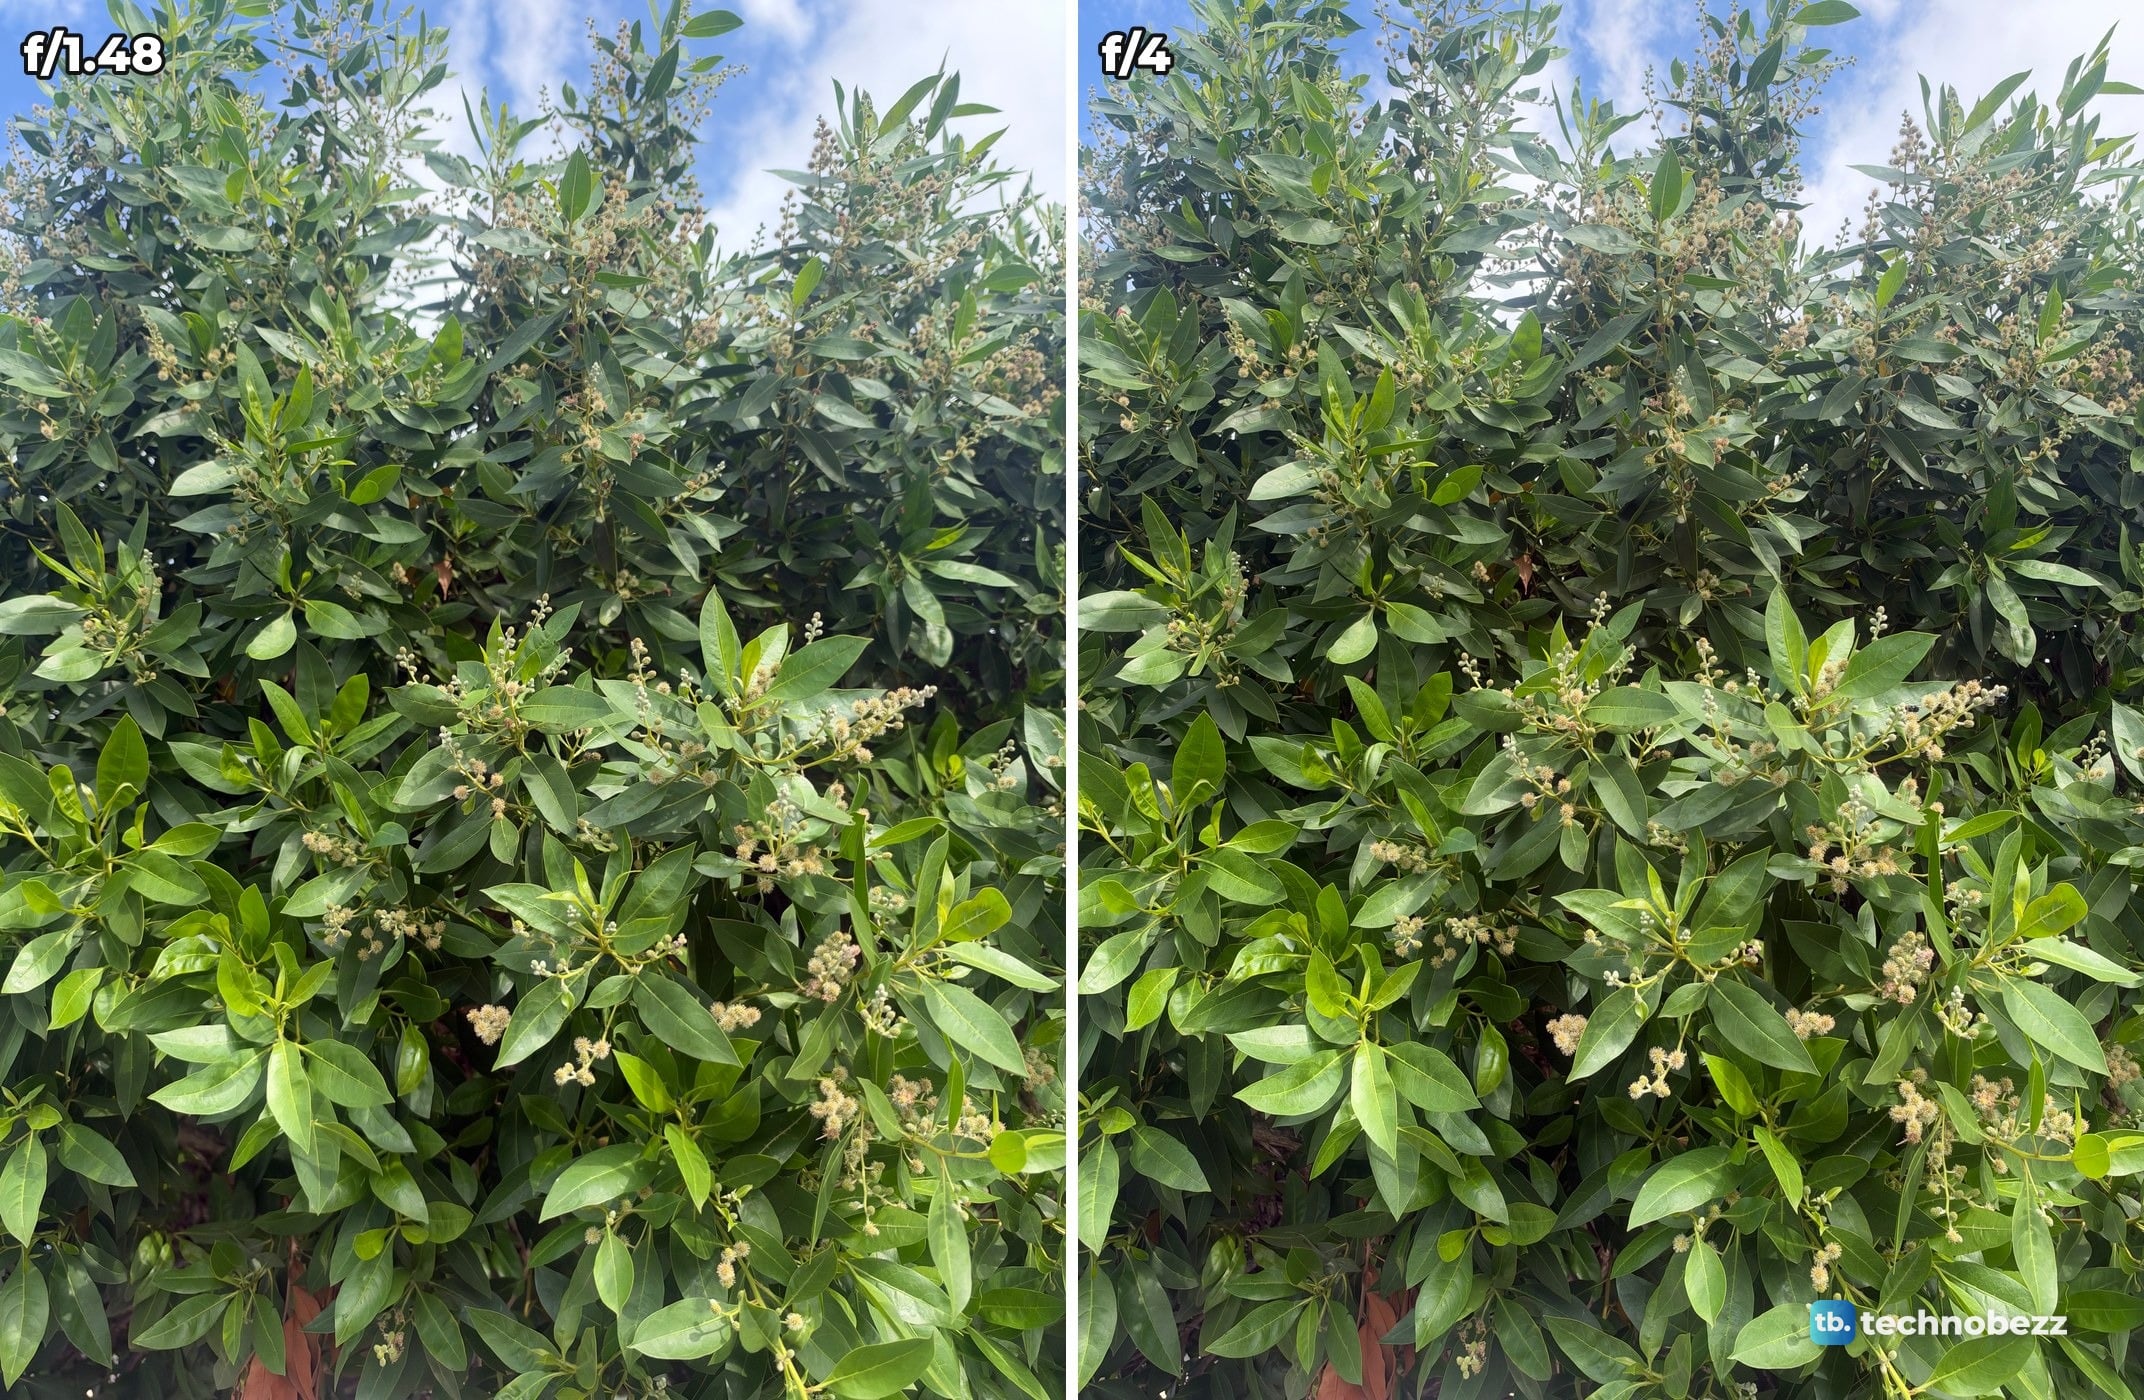
At full size, the leaves in the middle of the frame are sharp in both photos, and they match.
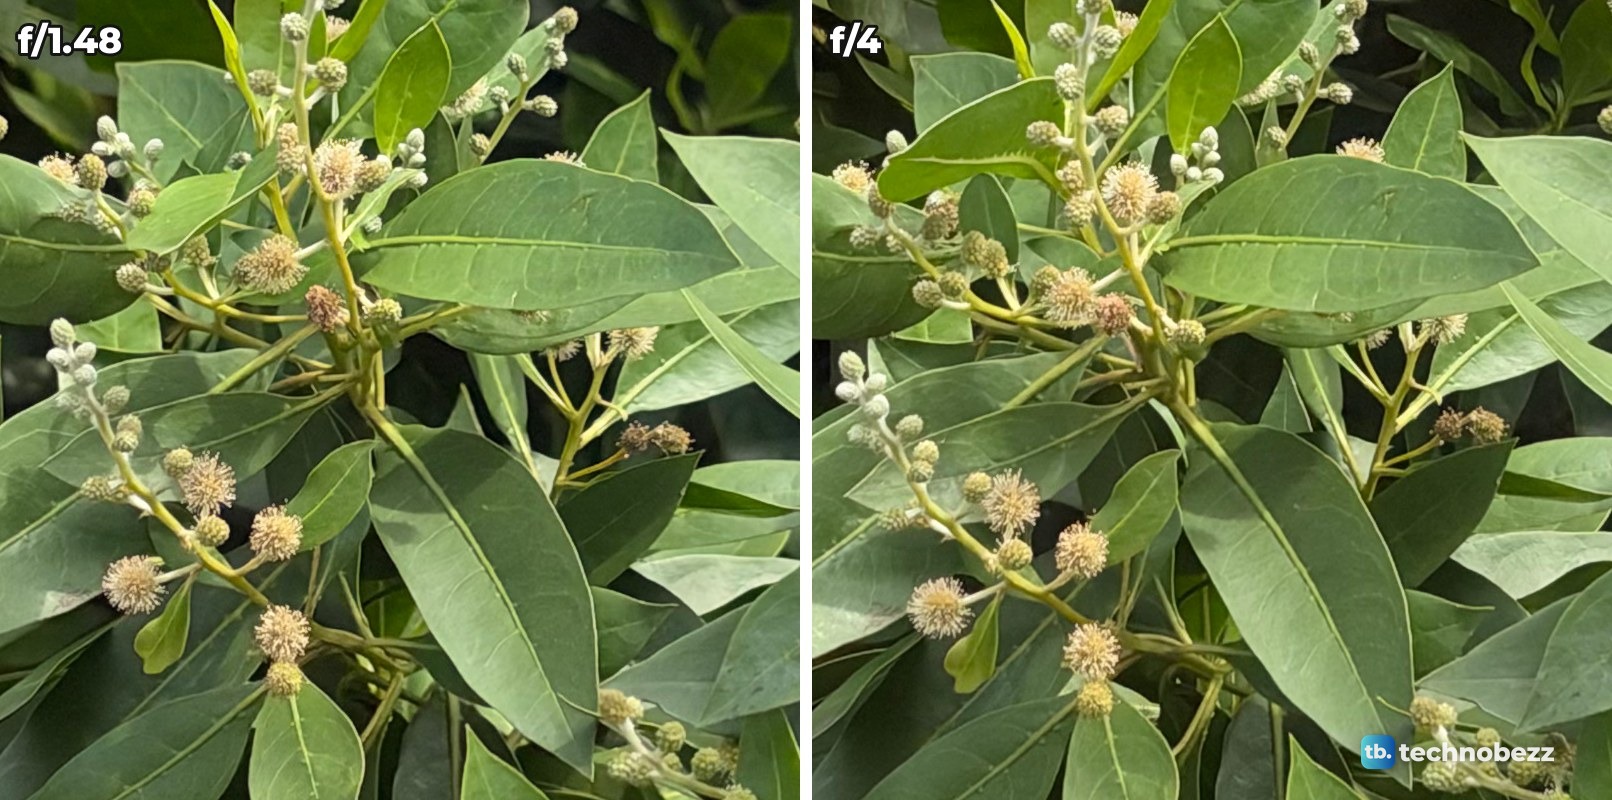
The leaves further back, near the top of the frame, are different. They are soft at f/1.48 and crisp at f/4. It is the same effect as the paint around the badge, but you have to zoom to full size to see it.
Sea and sky
I shot the open sea at 2x, which the photo data shows is a 12MP crop from the same main camera, at all four settings. In this daylight sea set, changing the aperture made no clear difference to visible sharpness.
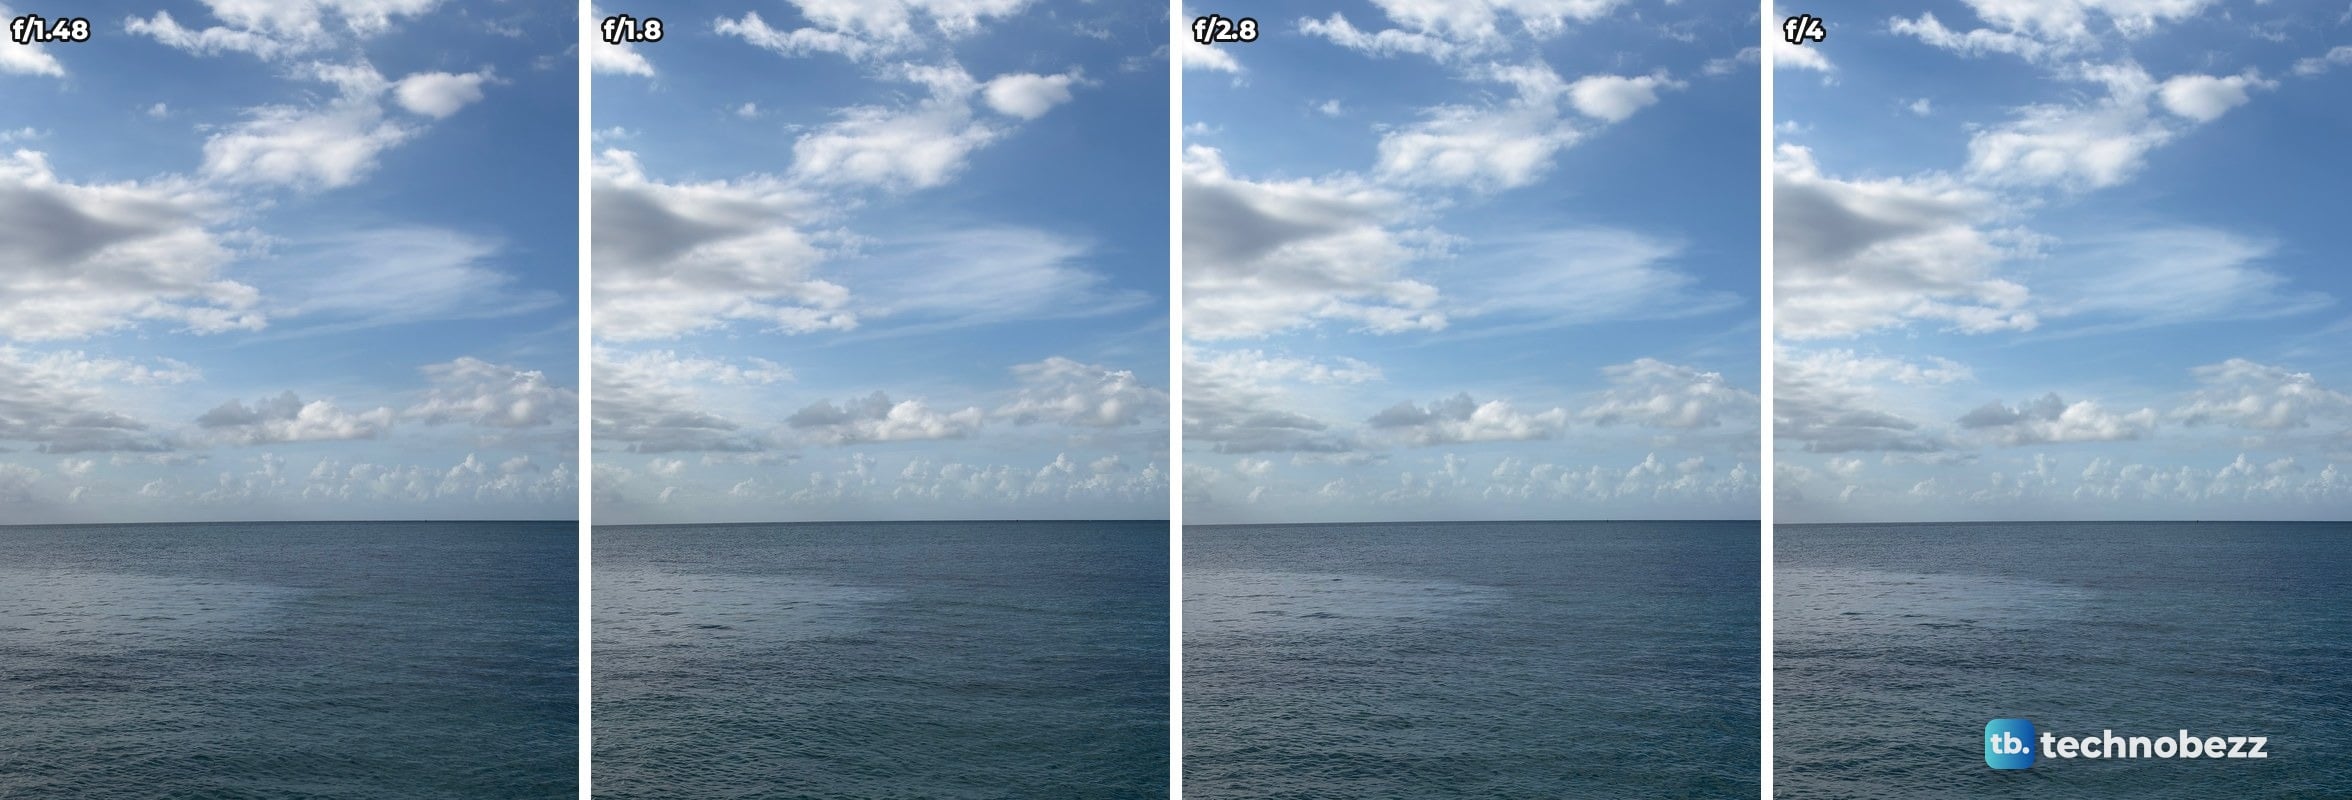
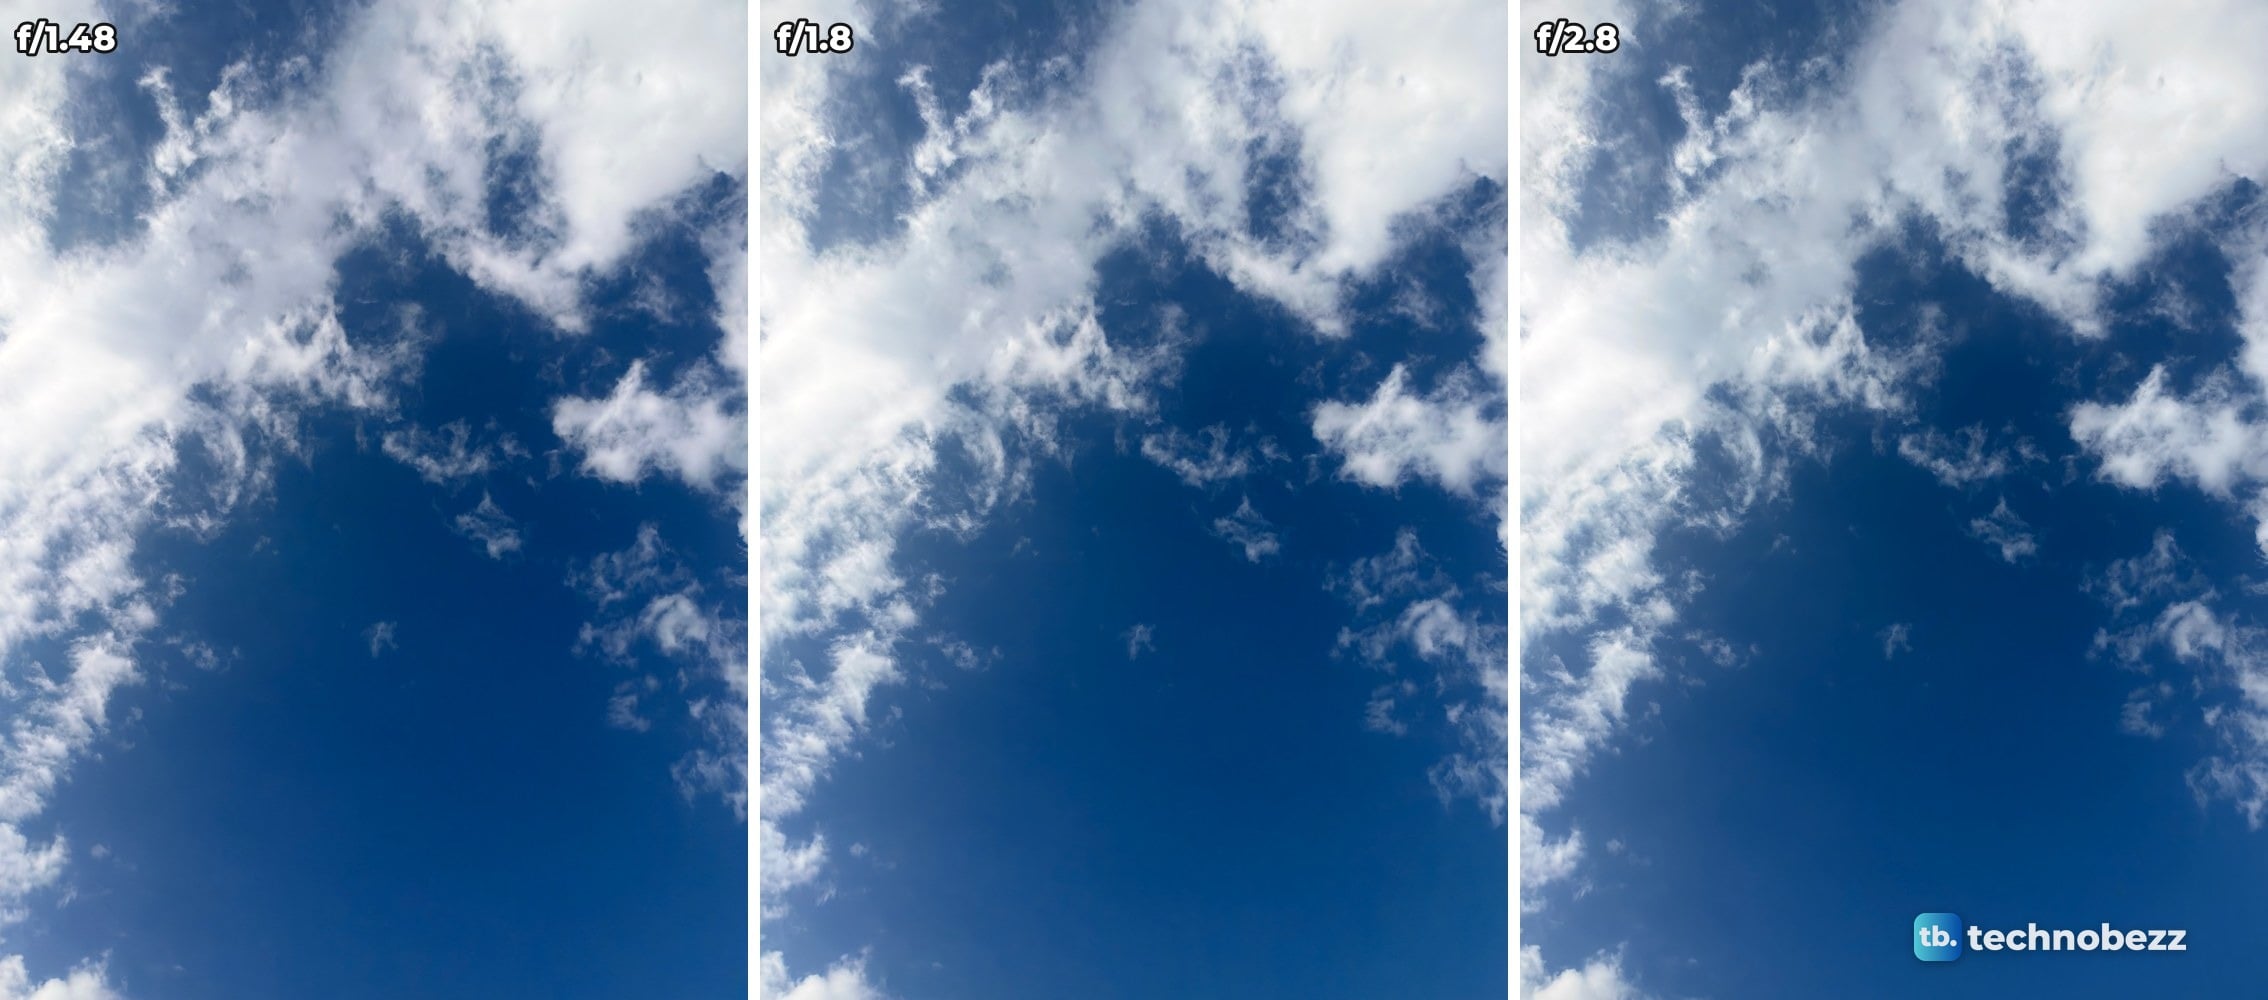
What changed most is the shutter speed, from 1/17544 s at f/1.48 to 1/2000 s at f/4. That is a lot of shutter for a subject that was not going anywhere. The sky set, shot straight up at three settings, shows the same thing.
Which aperture setting should you use?
- f/1.48 lets in the most light, and on the close badge it left the paint in front out of focus. Apple pitches it for low light, and in my dark room it was the difference between a photo and a nearly black frame.
- f/1.8 is what all my other main camera photos read that afternoon, outside the aperture sets. Of the 68 photos I took with the main camera, 57 read f/1.8. The other 11 are the test shots at the other three settings.
- f/2.8 is the middle step for close subjects. On the badge, this is where the paint started to sharpen.
- f/4 is for a close subject with depth, when there is light to spare. Apple's own example is keeping more of a group in focus. Indoors it kept the wall behind my plant sharp, at the price of about twice the grain.
- Sea and sky looked similarly sharp across the aperture settings in this daylight test.
How to change the aperture on the iPhone 18 Pro Max
Apple says the camera adjusts the aperture on its own for depth of field and lighting, and that the new Pro controls in the Camera app let you pick any of the four settings yourself, along with shutter speed and white balance. Apple's support guide gives the steps for the main camera: tap the Camera Controls button, tap Lens Aperture, then tap the value you want. It says the Lens Aperture control can also be added above the frame. To keep the last aperture setting, it says to turn on Lens Aperture in Settings > Camera > Preserve Settings.
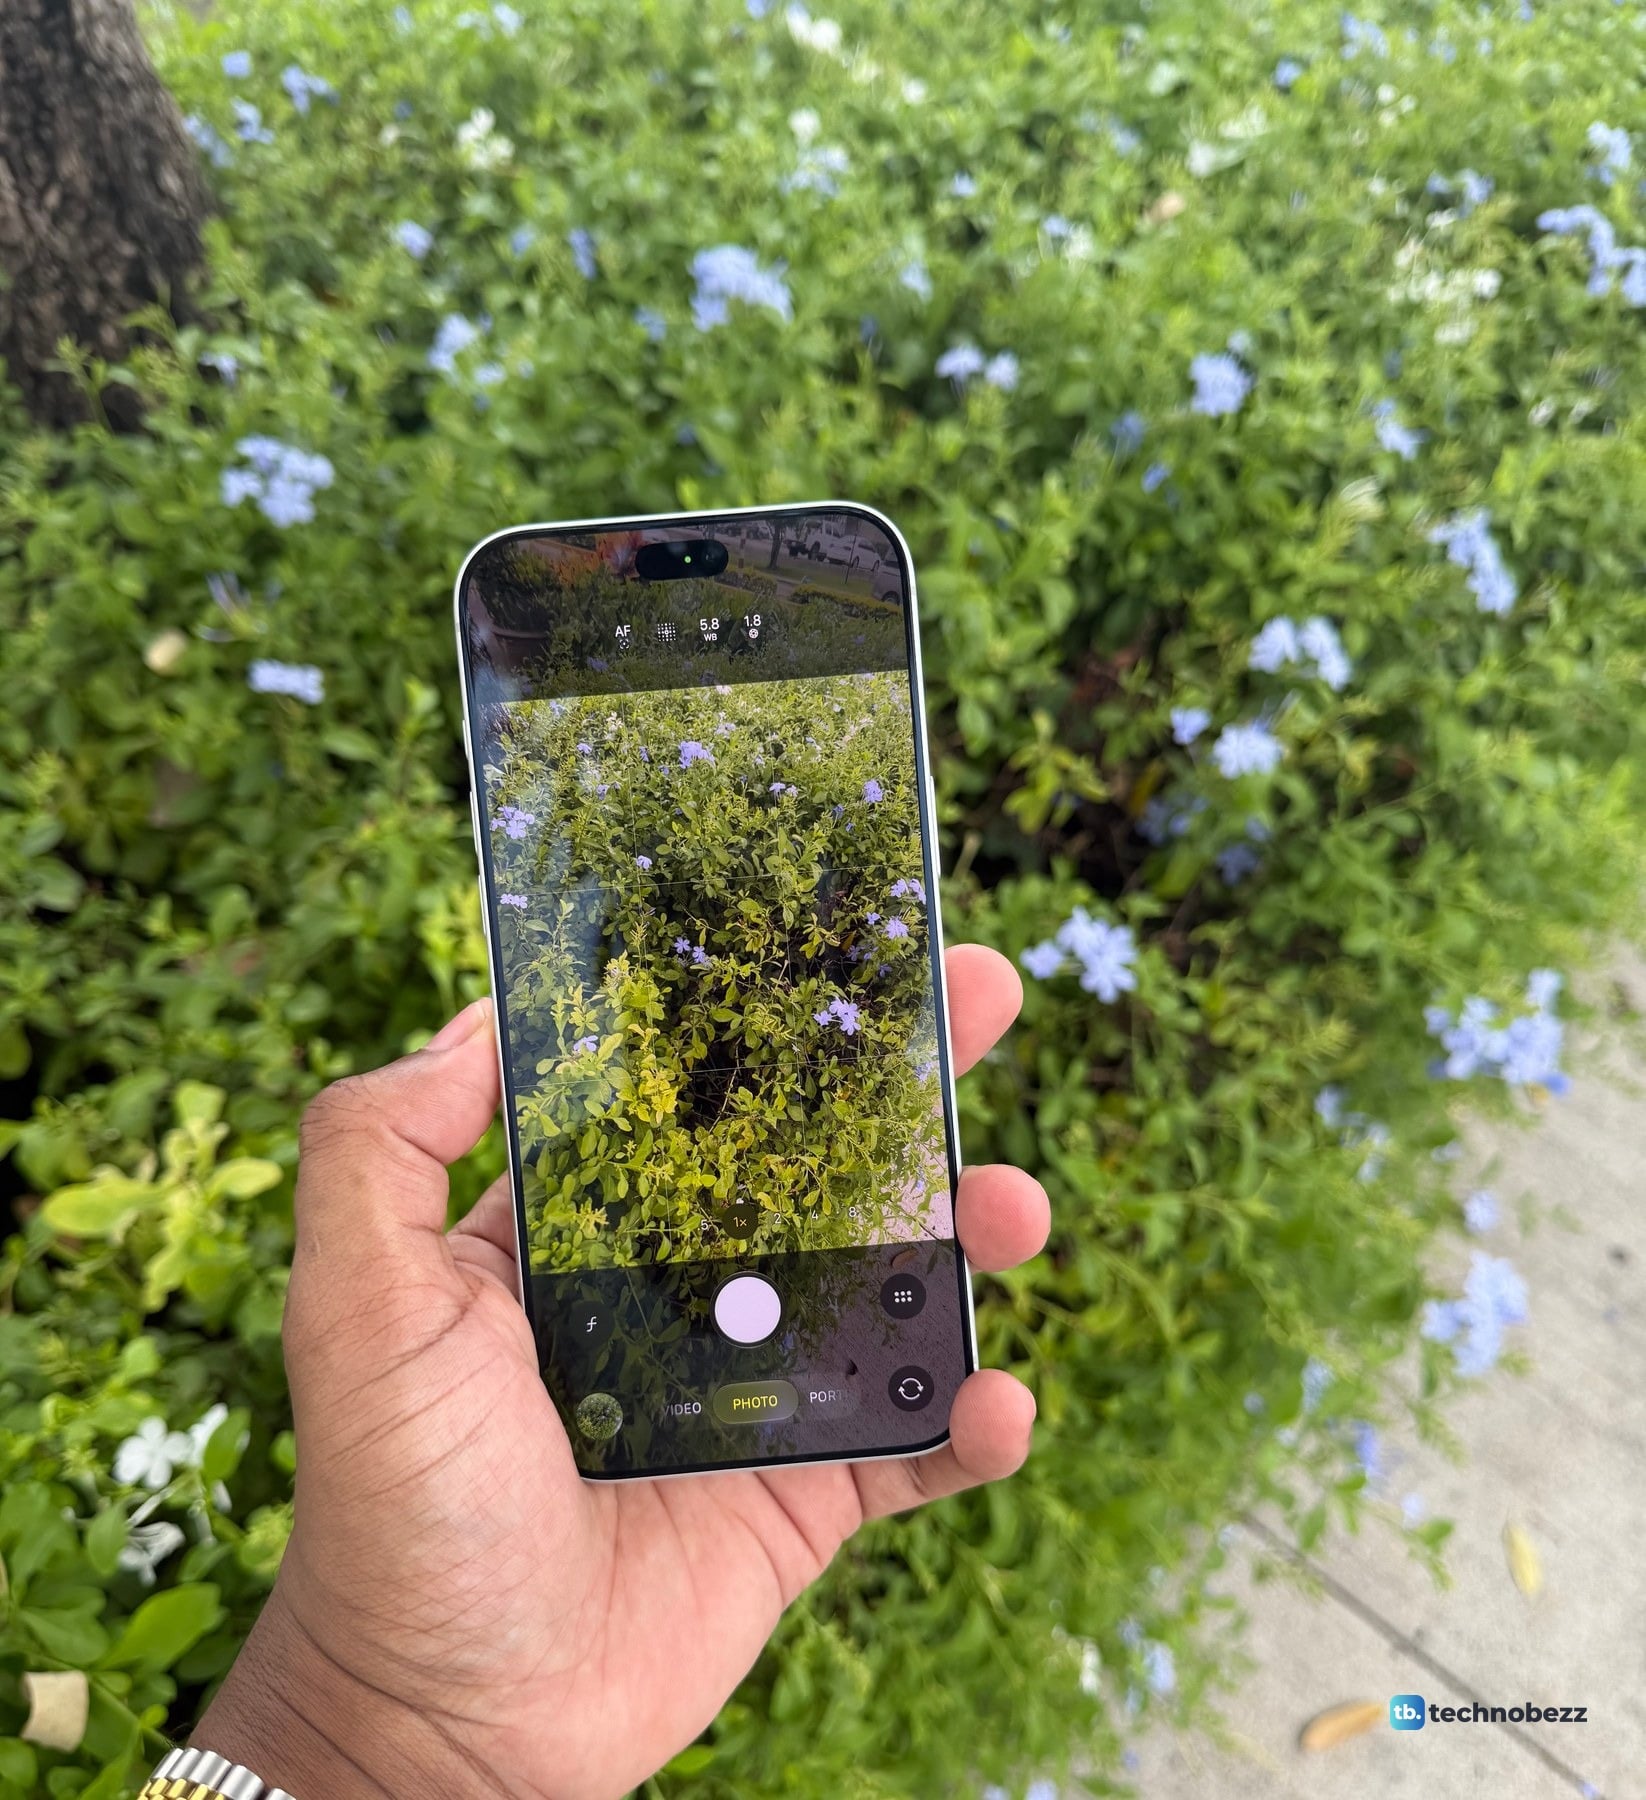
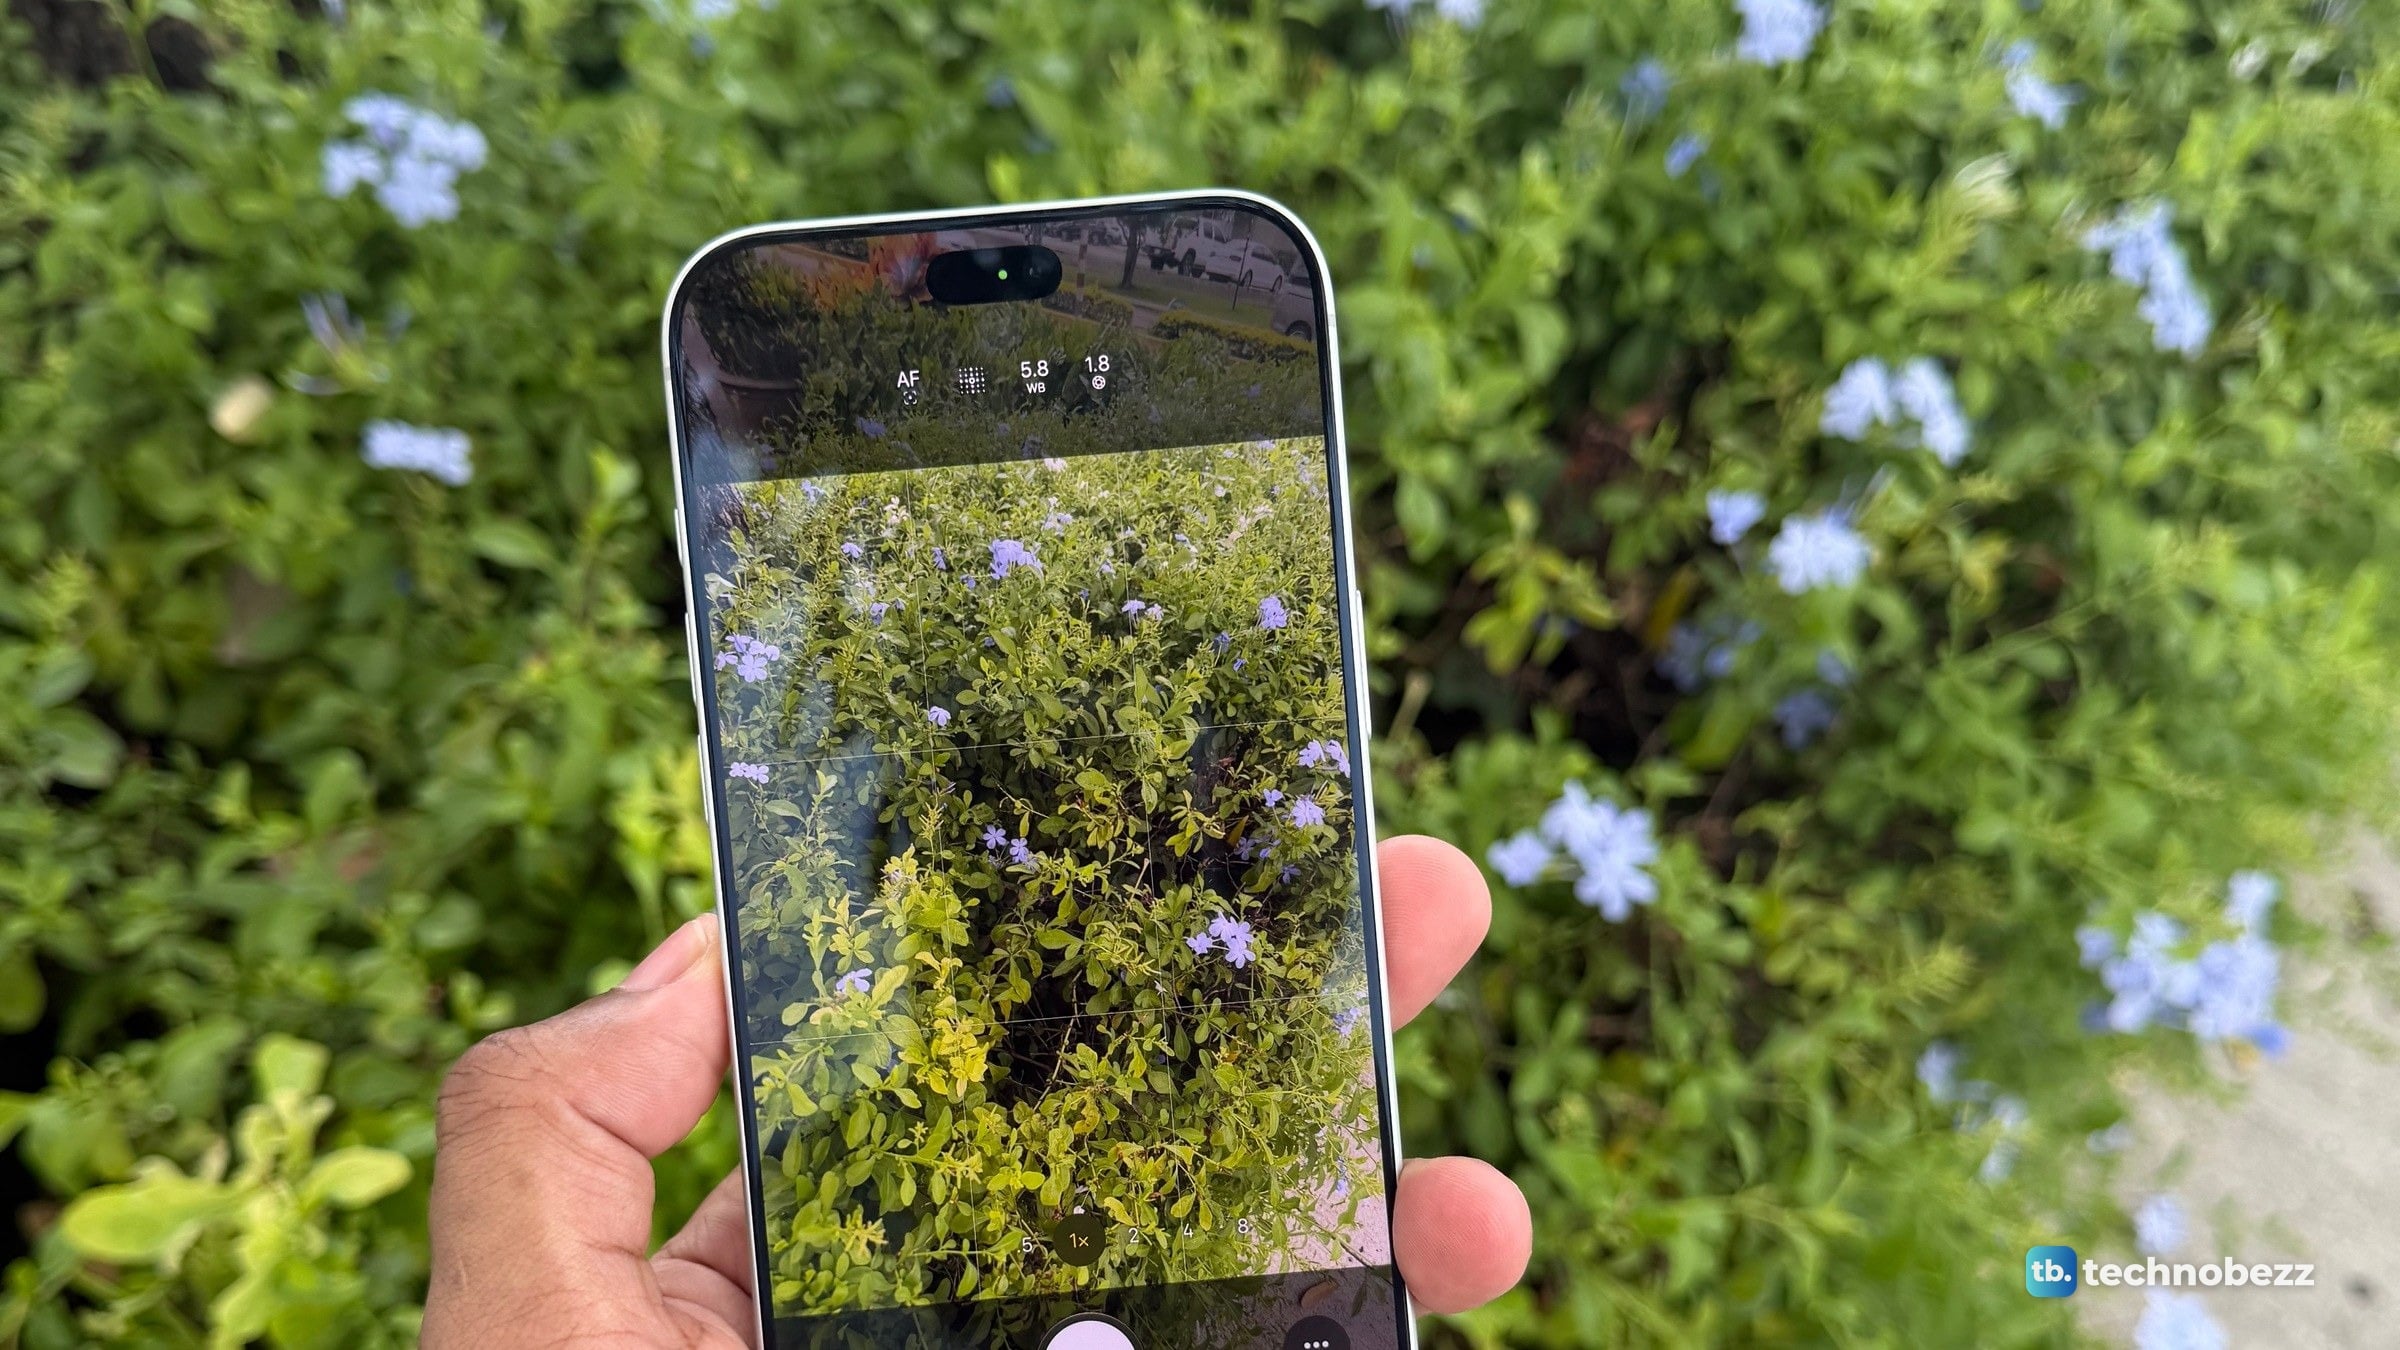
That control is on my phone. In the photos of it taken at the flower hedge, an aperture readout sits above the frame next to white balance, and it reads 1.8. The photos I took at that moment read f/1.8 too.
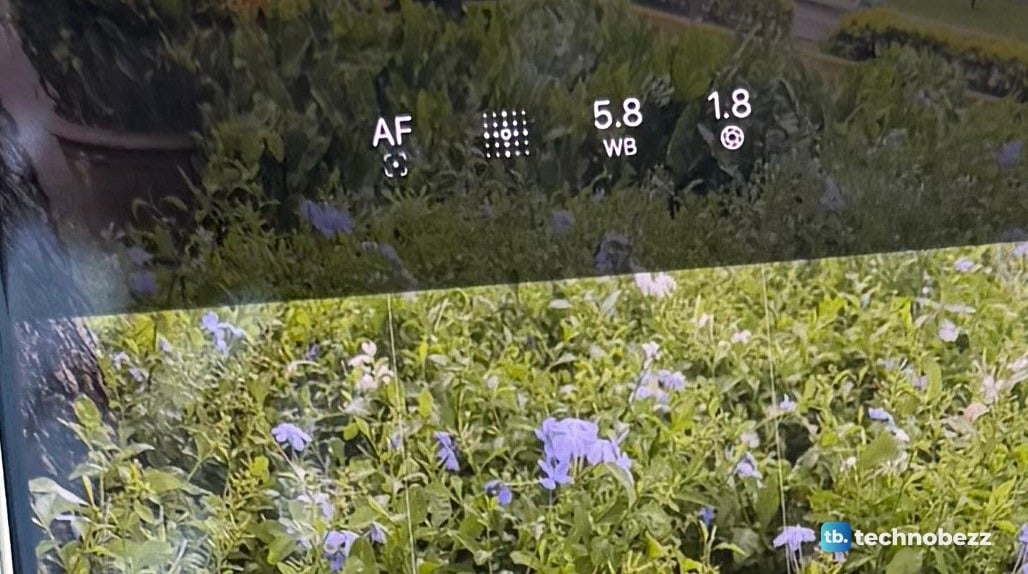
My photo data agrees on the main camera point. The 2x sea photos carry all four settings, and every telephoto photo from the day reads f/2.8.
What I have not tested yet
The first test was shot in bright daylight and the low light sets indoors with Night mode off. I have not tested Night mode, where the phone has more ways to gather light. I have not tested portraits at each setting, and this covers photos only, not video. Low light against my iPhone 17 Pro is still to come.
In daylight, next to my iPhone 17 Pro, the rest of the camera came down to a difference in taste, not in quality. The one upgrade I could really see is the aperture.
More from my iPhone 18 Pro Max testing
- iPhone 18 Pro Max vs iPhone 17 Pro camera comparison
- iPhone 18 Pro Max camera samples
- iPhone 18 Pro Max hands-on
- iPhone 18 Pro Max unboxing
This product was provided to Technobezz for review. We independently select what we review. The manufacturer had no input on this article and did not see it before publication. All opinions are our own.
Share this article
More in News
iPhone 18 Pro Max vs iPhone 17 Pro Camera Comparison in Daylight
The same scenes on the iPhone 18 Pro Max and iPhone 17 Pro in daylight: photo pairs, matched 4K video and skin tones, with the data.
4 min read
iPhone 18 Pro Max Hands-On After Two Days, What Stood Out and What I Still Need to Test
An early hands-on with the silver iPhone 18 Pro Max. A narrower Dynamic Island, an aperture change you can see up close, and what is still untested.
3 min read
iPhone 18 Pro Max Dynamic Island Is Smaller and Shows Three Things at Once
I put the iPhone 18 Pro Max next to my iPhone 17 Pro. Its Dynamic Island is about 24 percent narrower in my photo and shows three things at once.
4 min read
iPhone 18 Pro Max Size, Thickness and Weight in Real Life
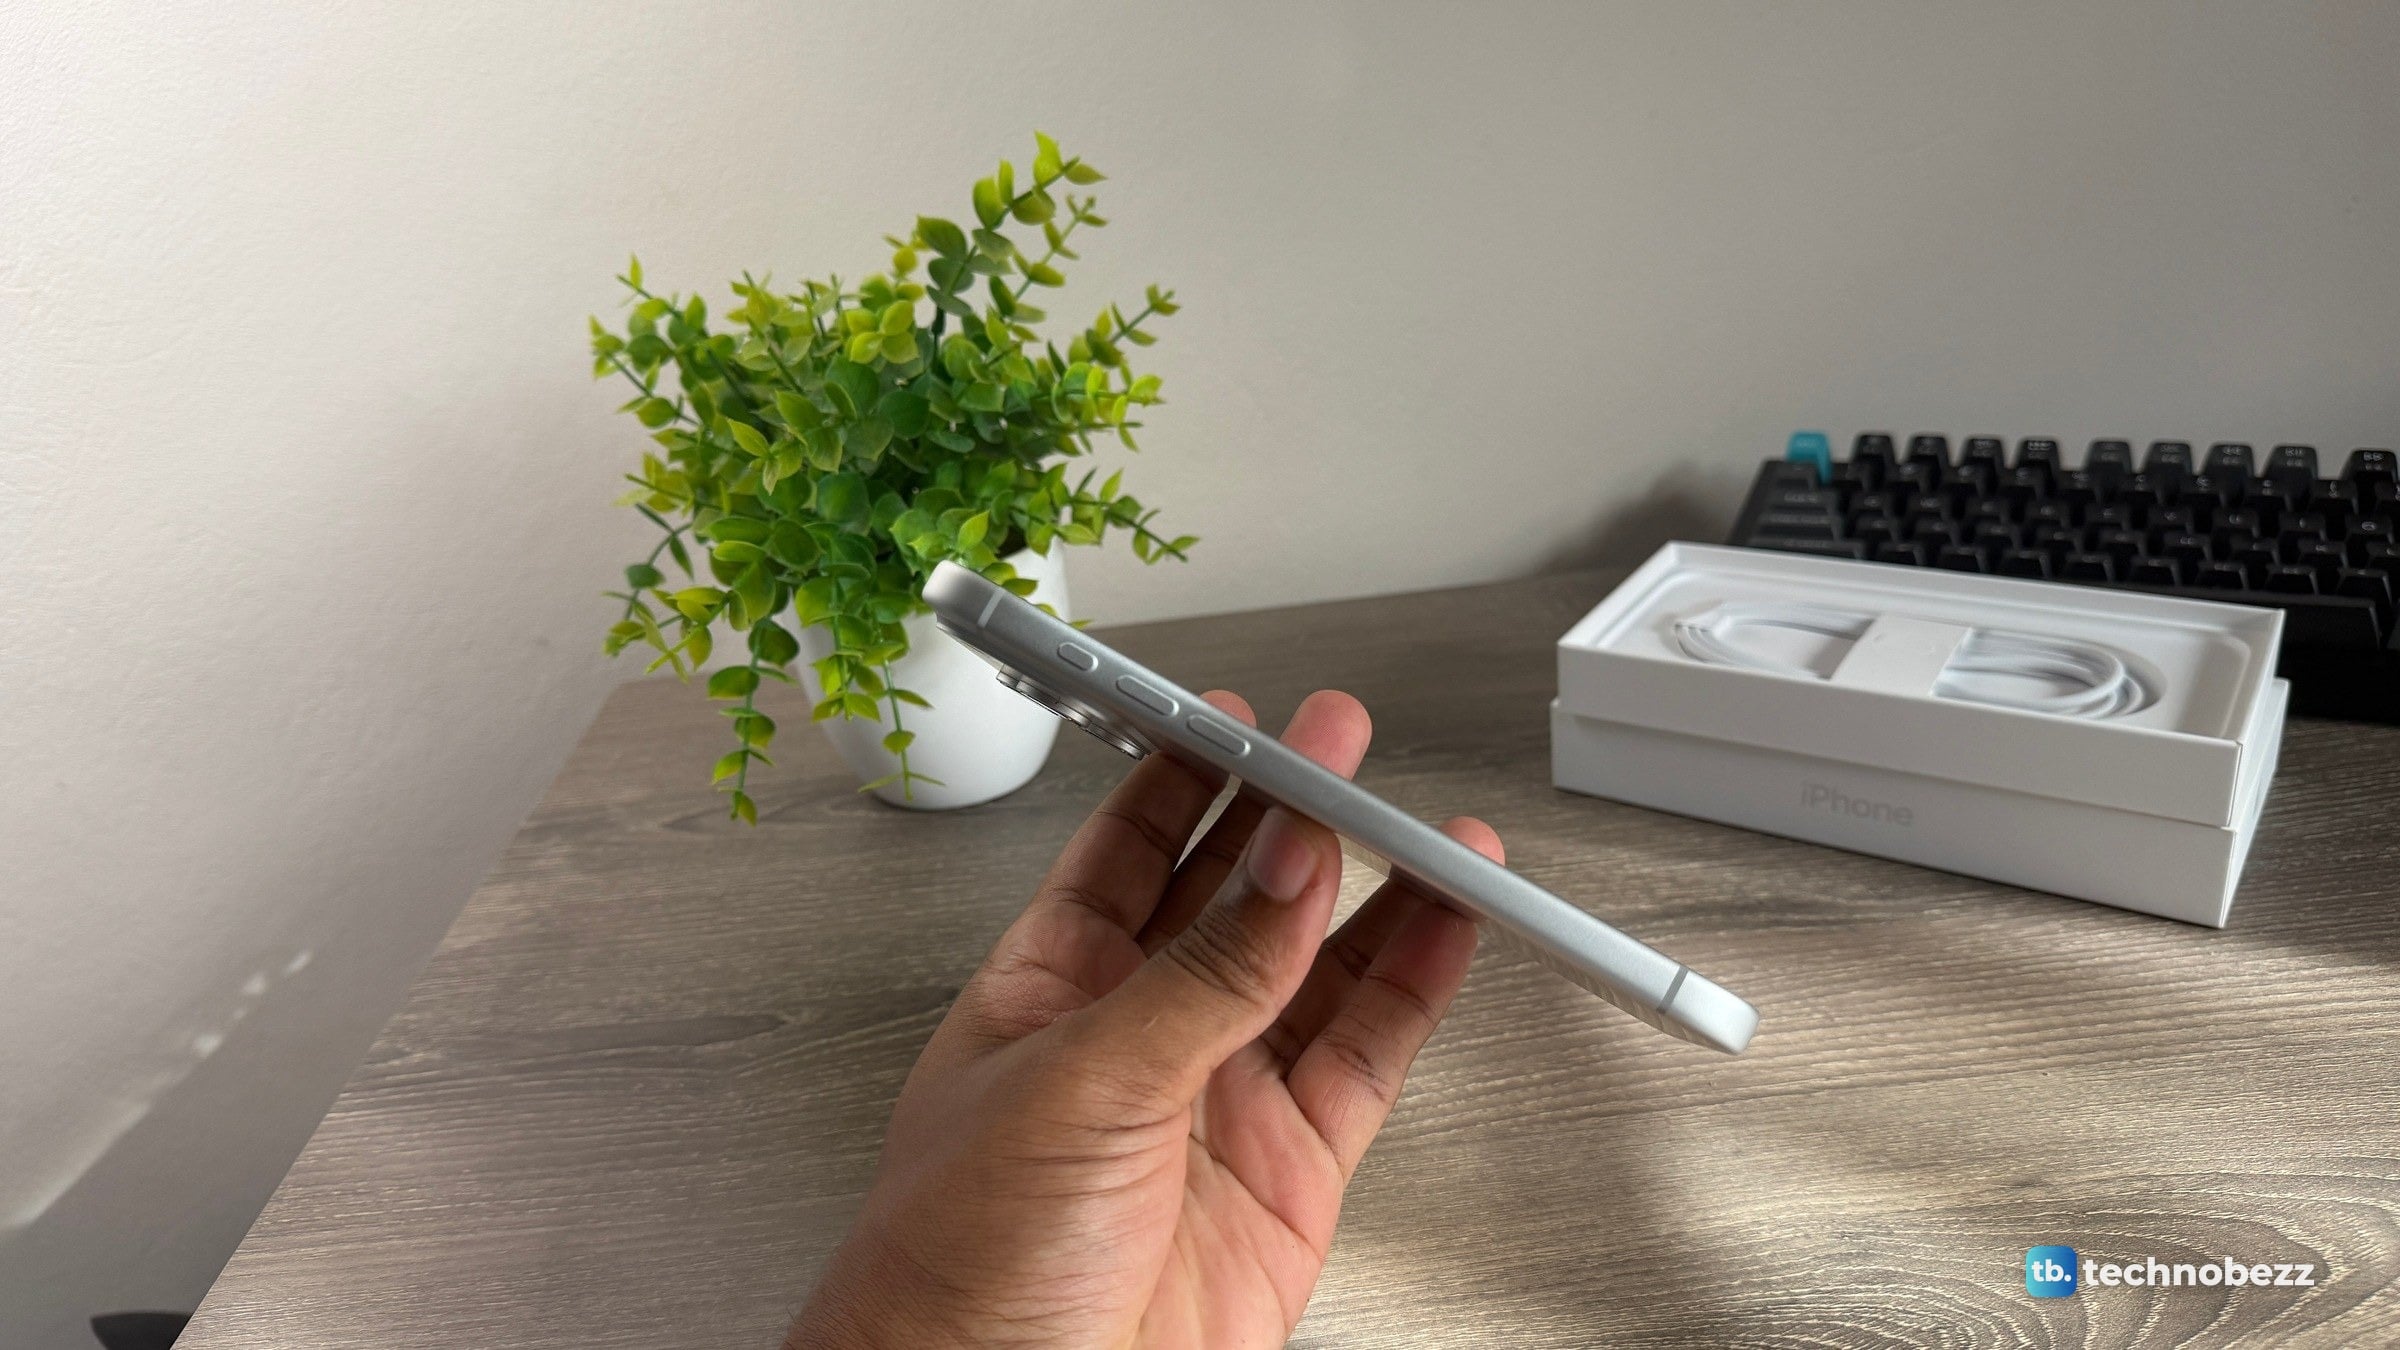
Apple's iPhone 18 Pro Max and 18 Pro dimensions in inches and millimeters, plus my photos of it in the hand, side on and going into a trouser pocket.
4 min read
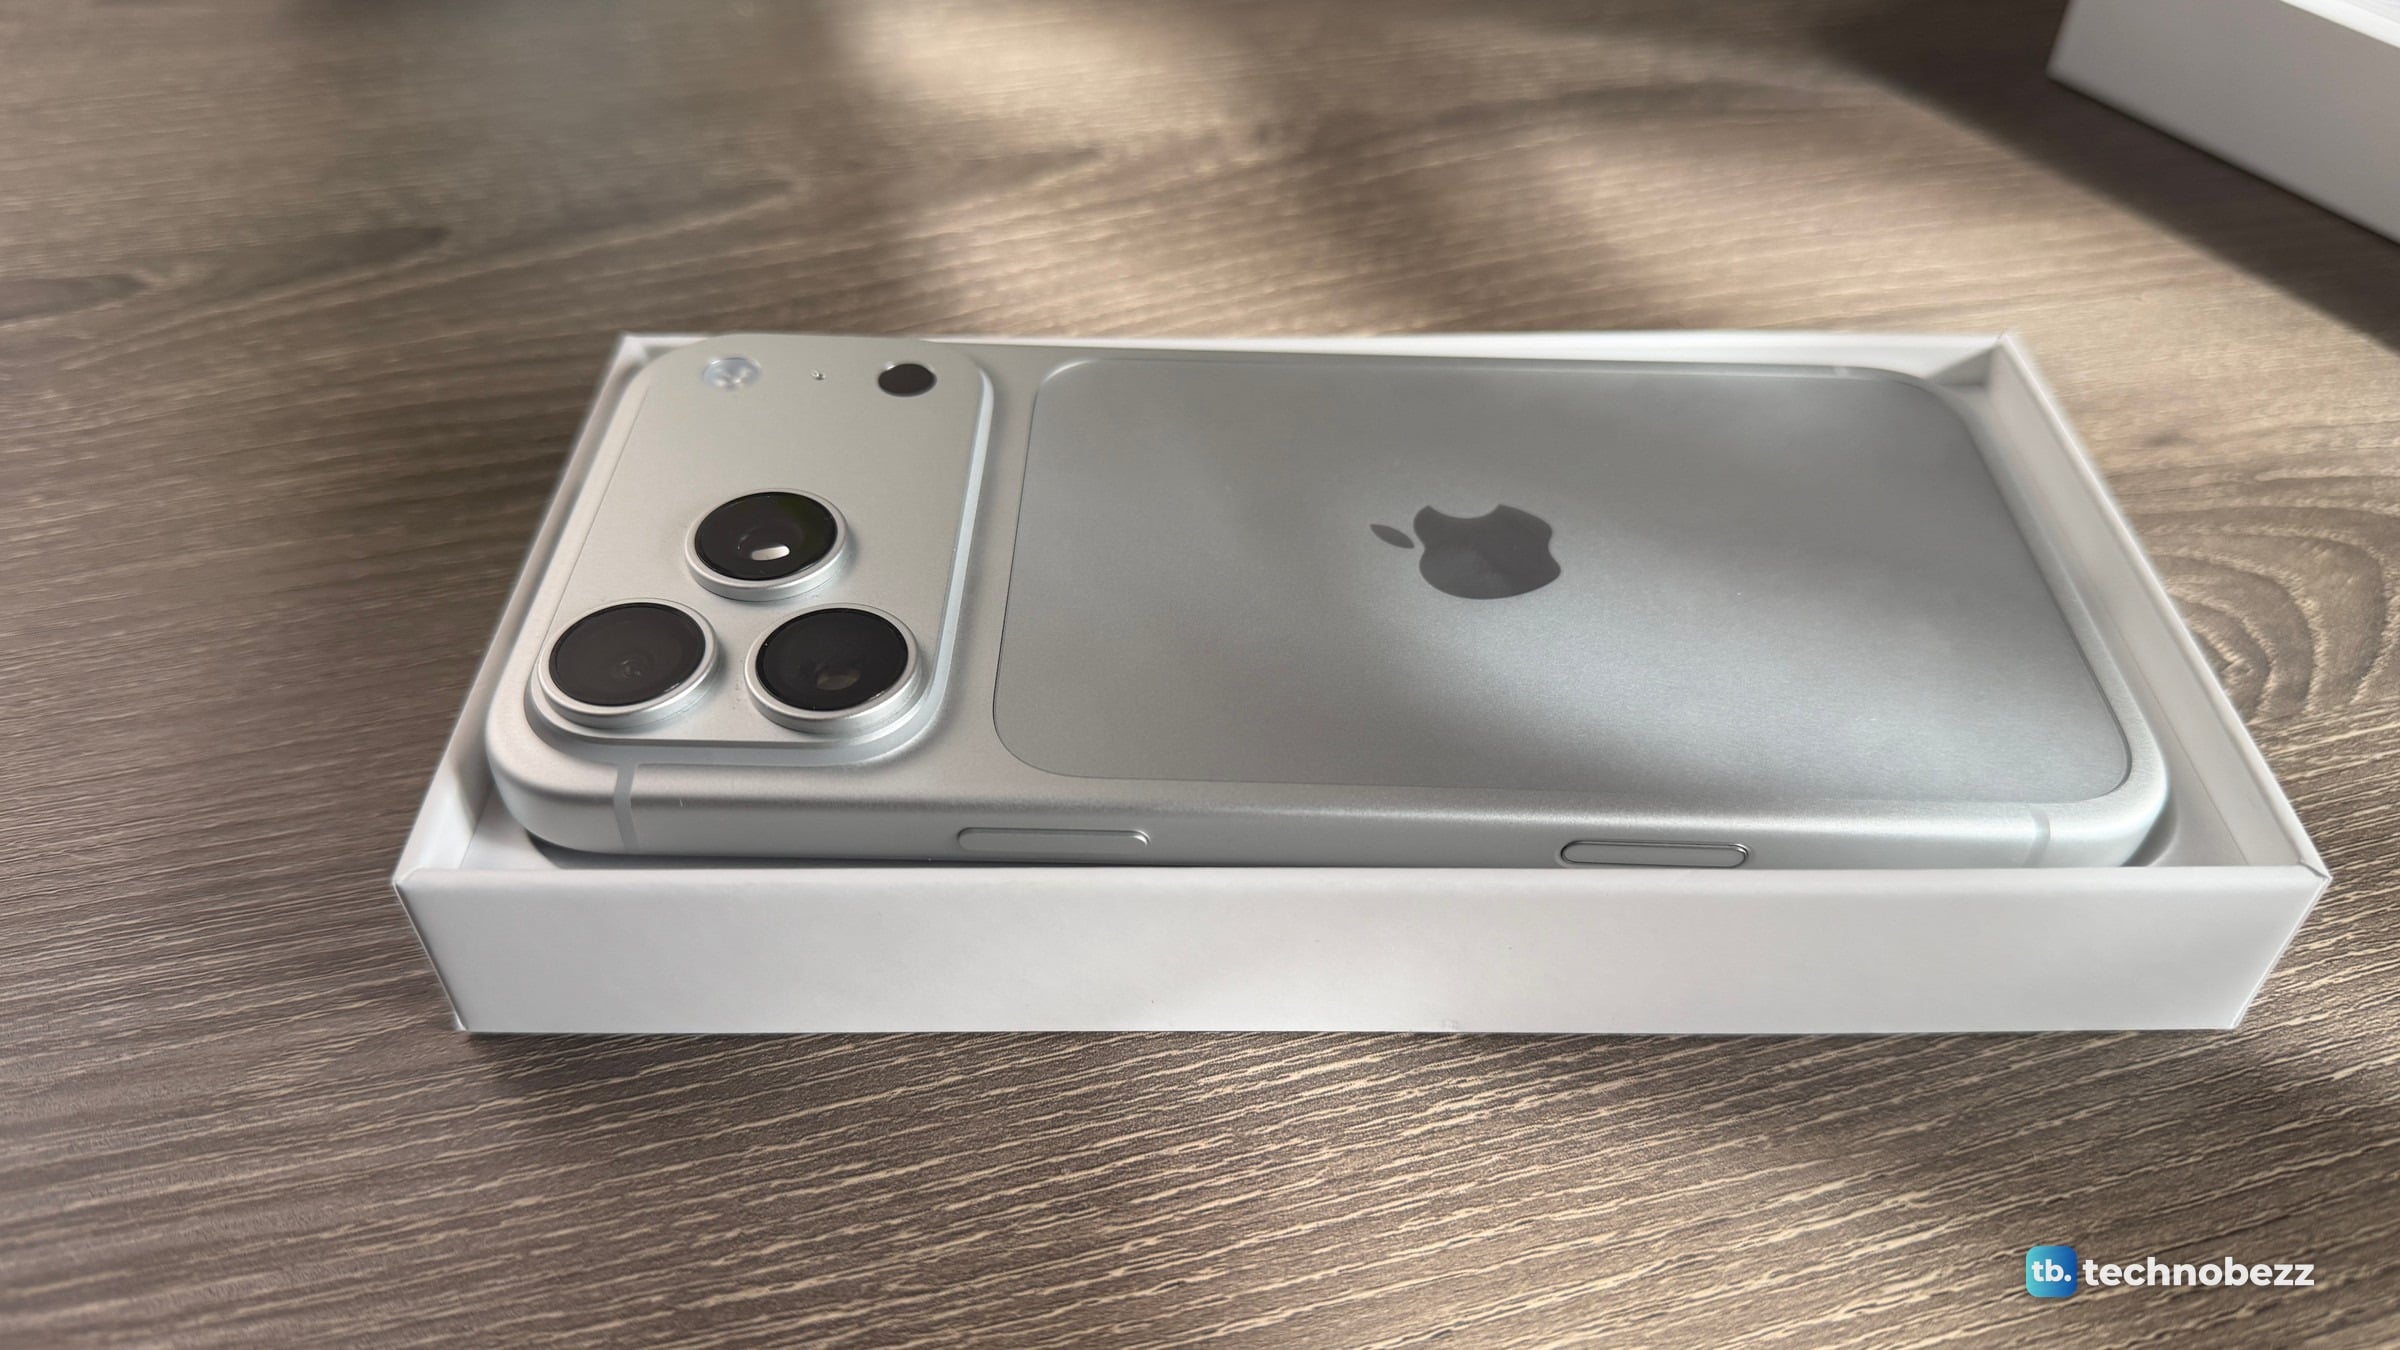
iPhone 18 Pro Max Unboxing and What Comes in the Box
5 min read
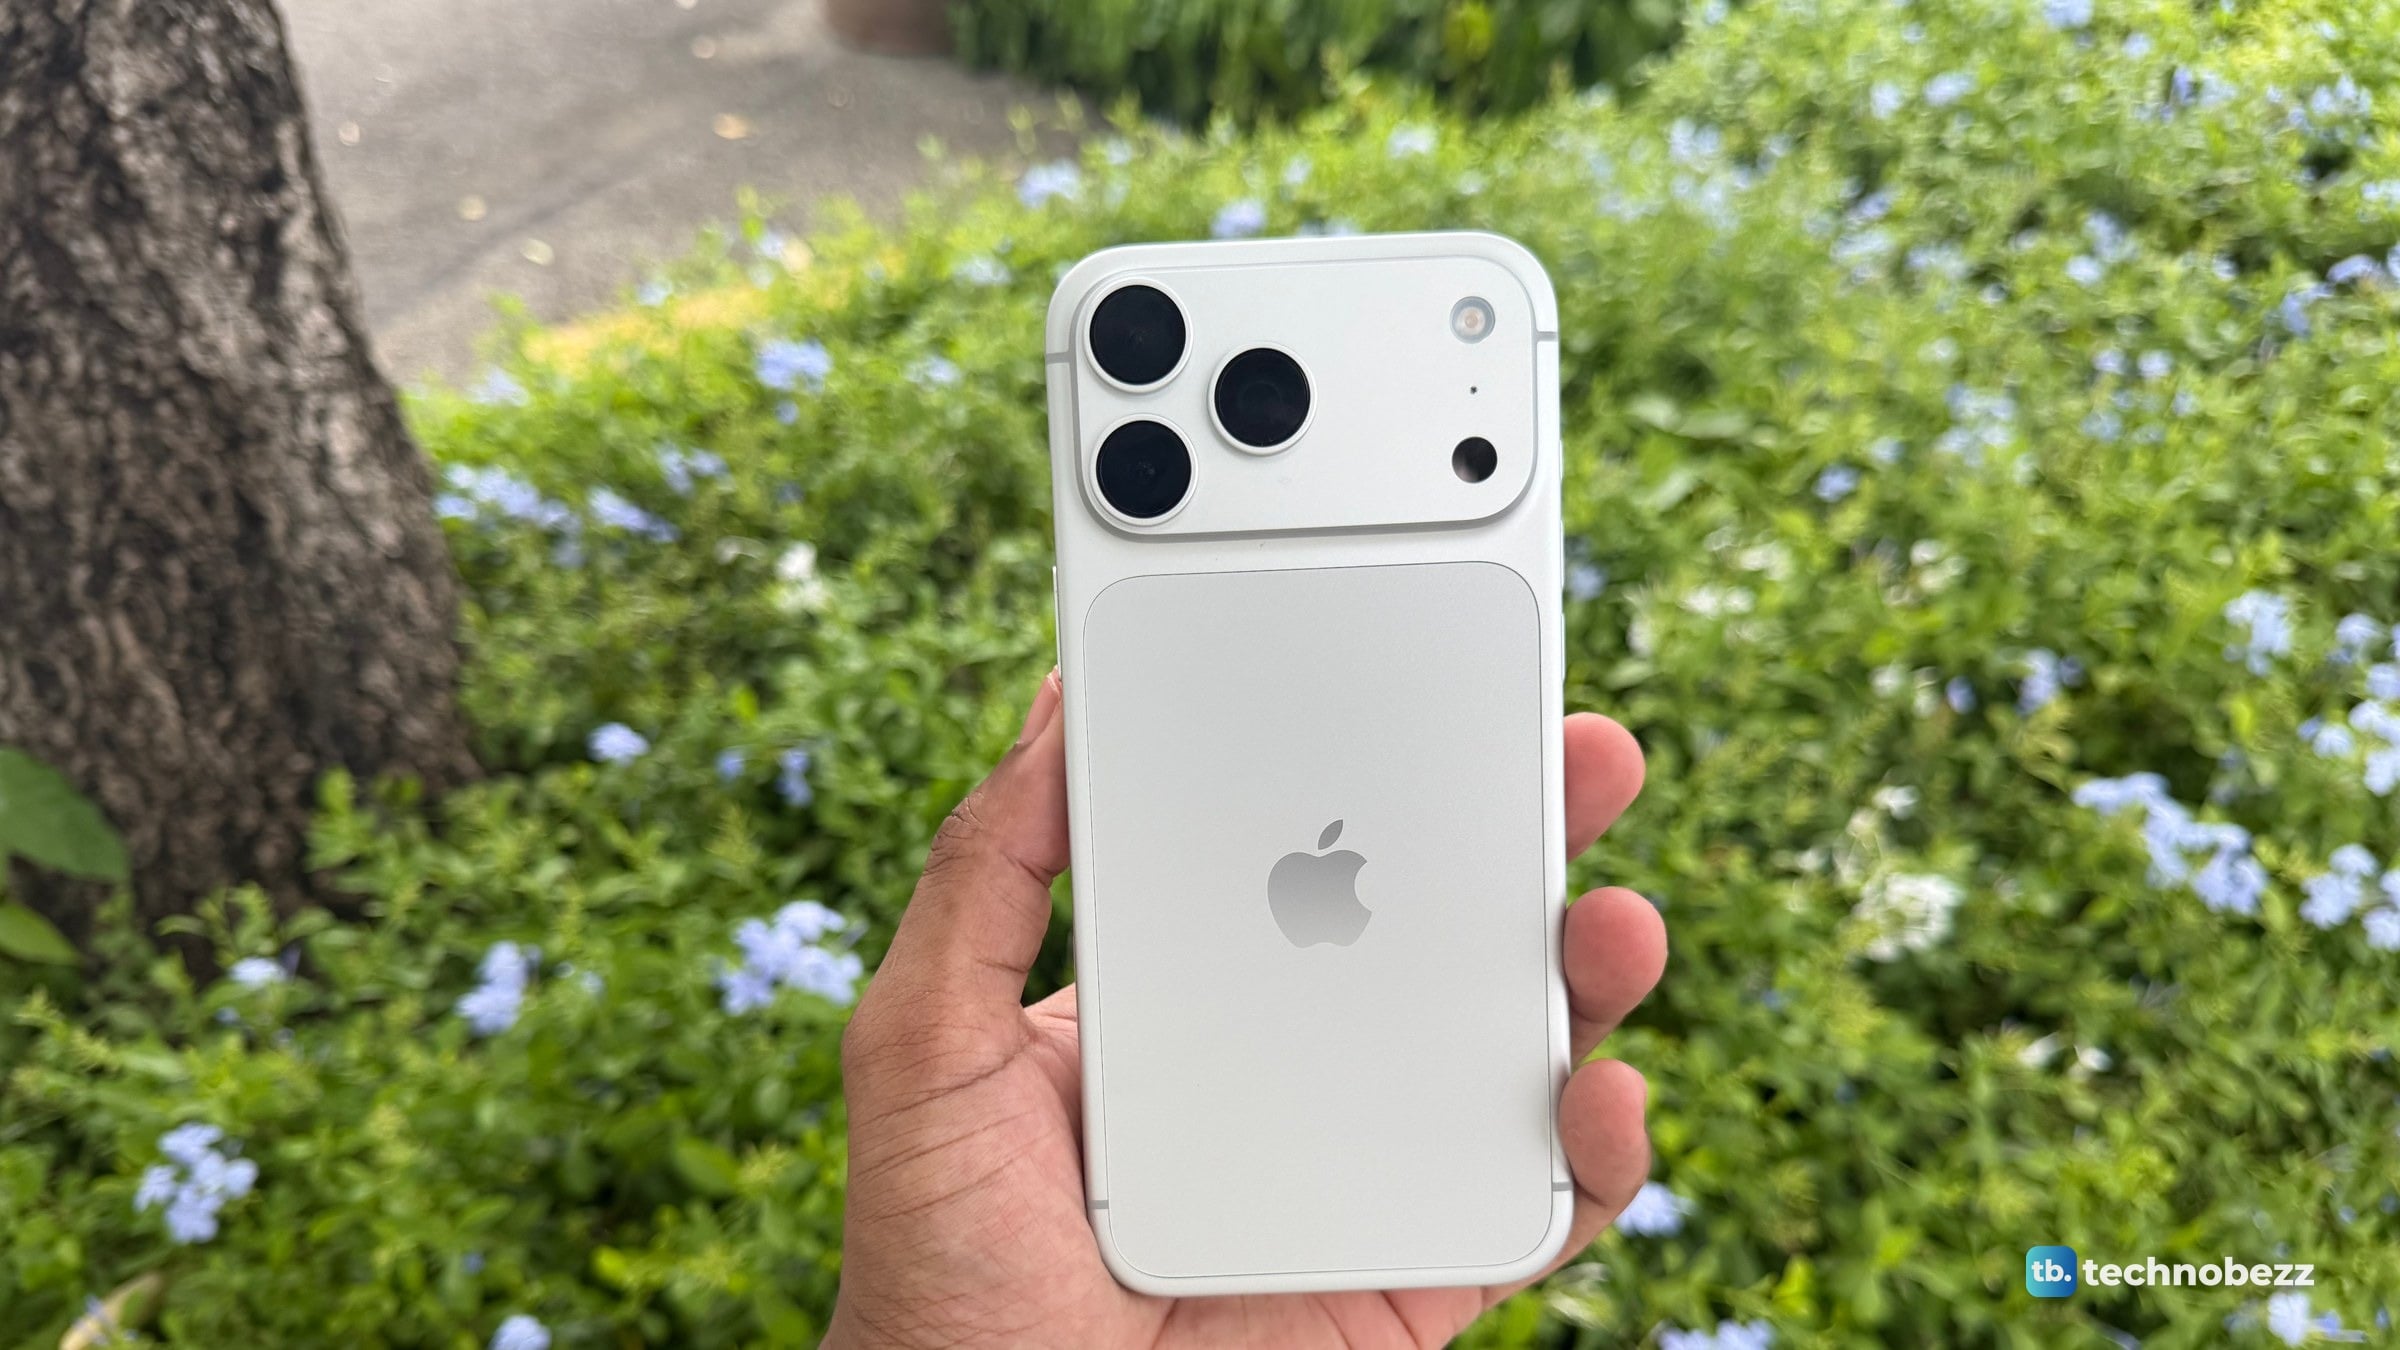
iPhone 18 Pro Max Silver in Real Life, From White to Blue
5 min read
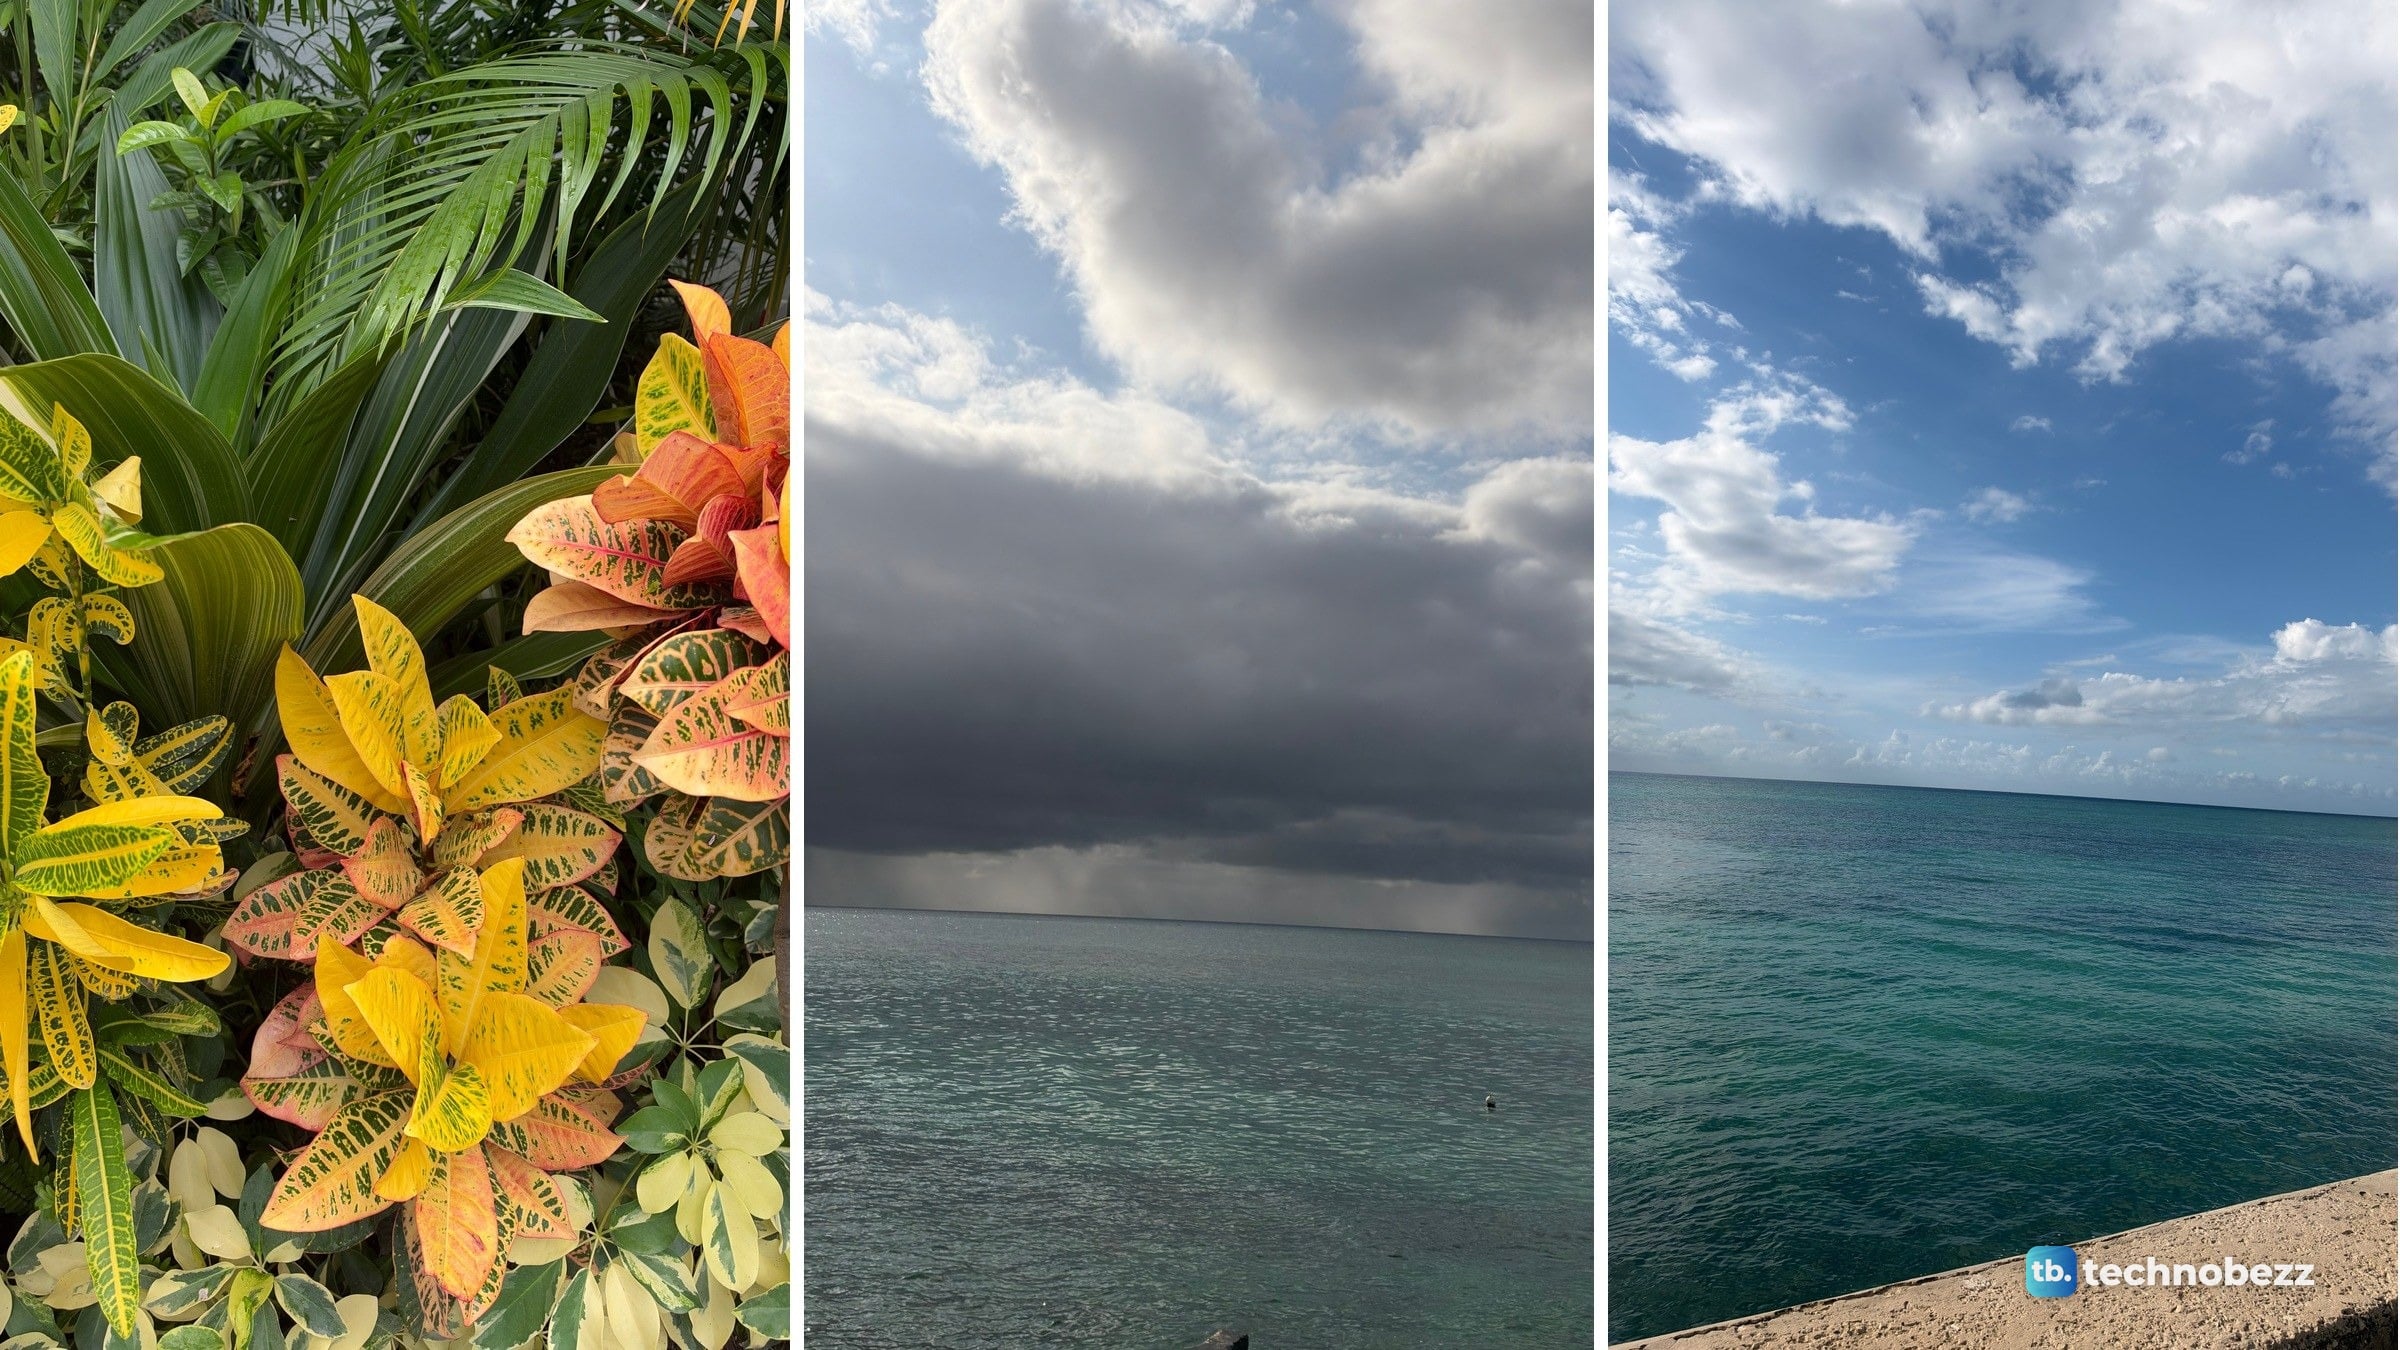
iPhone 18 Pro Max Camera Samples From One Afternoon Outdoors
5 min read
Sennheiser HD 490 PRO Leads 3 Headphone Deals All Under $346.40
3 min read
TP-Link Archer BE12000 Tri-Band Wi-Fi 7 Router on sale for $229.99
5 min read
OSCOO 2TB PCIe 4.0 NVMe SSD slips to $269.99
4 min read
Razer Moray in-Ear Monitor dips to $99.99
4 min read
TCL 75-inch F7D QLED 4K UHD HDR sees price cut to $599.99
3 min read