

A purple line that stays across apps and after a restart can point to a display fault that needs professional inspection. Compare apps and examine a screenshot on another screen, then restart your iPhone before trying software fixes. A clean screenshot helps narrow the problem to the physical display path, but it cannot identify the failed component.
If the purple mark appears only in one app, troubleshoot that app first. If the whole screen looks purple rather than showing a narrow line, check display color settings instead.
The short version
- Compare screens: Check other apps and view a screenshot on another device to help isolate the problem.
- Restart once: Restart normally, or force restart if your iPhone is unresponsive.
- Match the fix: App troubleshooting addresses app-specific problems, while color settings are relevant to an overall tint.
- Know when to stop: Back up and arrange inspection when a fixed line survives the basic checks.
| Check or fix | When to use it |
|---|---|
| Compare apps | Determine whether the line affects one app or the whole display |
| Compare a screenshot | Check whether another screen shows the same line |
| Clean the screen | Check for surface contamination |
| Remove the case and protector | Check for external interference or a protector artifact |
| Disconnect accessories | Touch also behaves intermittently |
| Restart through Settings | Touch still works |
| Restart with buttons | Use the shutdown combination for your model |
| Force restart | The phone is unresponsive |
| Close and reopen an app | One app is malfunctioning |
| Update an app | An app-specific defect returns |
| Delete an app | Less disruptive app checks fail and needed data is preserved |
| Redownload an app | Reinstall after deleting it |
| Contact the developer | The defect remains confined to one app |
| Check color filters and inversion | The screen has an overall tint or unexpected colors |
| Compare brightness and appearance | Distinguish color effects from a fixed line |
| Inspect accessibility shortcuts | A color effect keeps returning |
| Back up with iCloud | Before updates, resets, or repair |
| Update iOS on the phone | Check for a compatible software update |
| Update through Finder | Use a compatible Mac |
| Update through Apple Devices | Use a compatible Windows PC |
| Reset settings | Settings remain a plausible cause |
| Erase through Settings | Last software check after backing up |
| Restore through a computer | Erase and reinstall compatible iOS as a last software step |
| Check display repair history | The screen was previously replaced |
| Finish repair calibration | A supported replacement display needs repair completion |
| Arrange professional inspection | A fixed line persists across apps and restarts |
Find out where the purple line appears
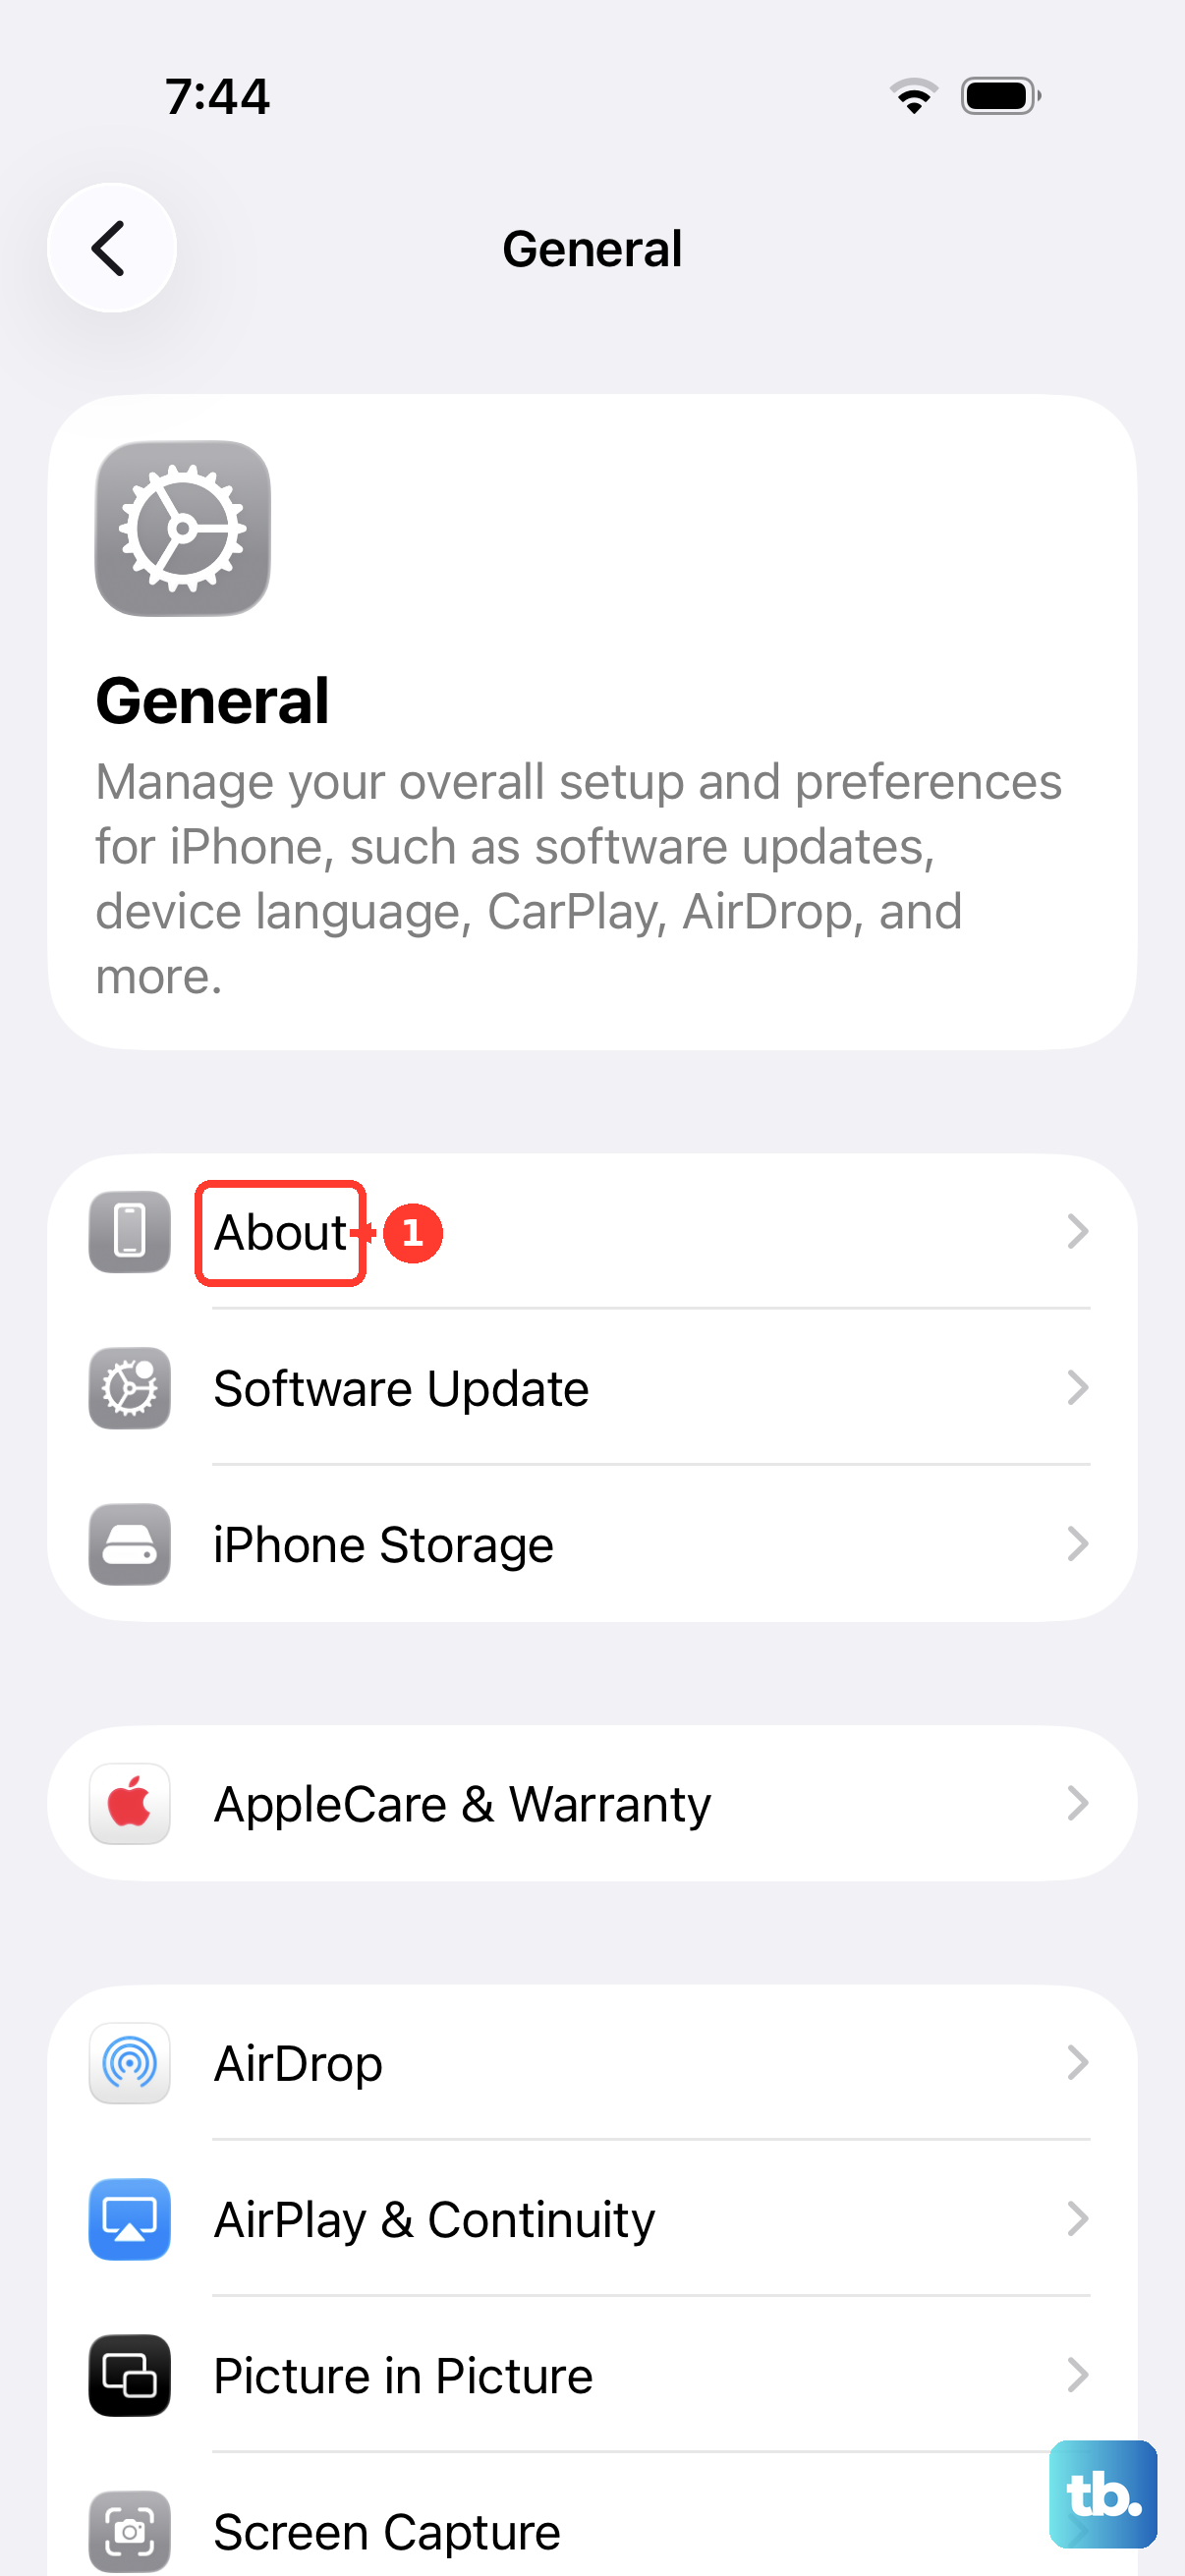
Open Settings, return to the Home Screen, and compare several apps. A line confined to one malfunctioning app calls for different troubleshooting from a line visible everywhere. On an iOS 27-compatible iPhone, open Settings > General > About to record your model and iOS version before choosing model-specific instructions.
Next, take a screenshot on iPhone and examine it on another working display. On a Face ID iPhone, briefly press Side and Volume Up together; on an iOS 27-compatible Home button model, briefly press Side and Home together. Save the screenshot and compare the same area on the other device.
If the line is visible on your iPhone but absent from that screenshot, a problem in the physical display path becomes more likely. Treat this as a troubleshooting clue rather than a definitive diagnosis. A persistent purple line does not automatically mean OLED damage, because supported iPhones also include LCD models.
Clean and uncover the display
Disconnect cables, turn off the iPhone, and wipe its screen with a soft, slightly damp, lint-free cloth. Keep moisture out of the openings. Remove the case and screen protector, then inspect the uncovered display and test it again.
These checks help distinguish surface contamination or a protector artifact from a line within the display. They cannot repair internal display damage. If the line remains after cleaning and removing the protector, continue with a restart.
When the screen also has intermittent touch or sensitivity problems, disconnect Lightning or USB-C accessories and retest. If touch works normally afterward, try another outlet, cable, or charger. Apple recommends accessory disconnection for touch problems; it is not an established cure for a purple line.
Restart your iPhone
With working touch, open Settings > General > Shut Down, then drag the shutdown slider. Wait 30 seconds before holding Side until the Apple logo appears. Compare the same apps again once the phone starts.
For a button-based shutdown on Face ID models, hold either Volume Up or Volume Down together with Side until the slider appears. On iPhone SE models from the second or third generation, hold Side alone to reach the slider. Drag it, wait 30 seconds, then hold Side until the Apple logo appears.
If the phone is unresponsive, force restart your iPhone instead. On every iOS 27-compatible model, quickly press and release Volume Up, quickly press and release Volume Down, then hold Side until the Apple logo appears. Release it at the logo; this sequence also applies to second- and third-generation iPhone SE models.
Fix a line confined to one app
Close and reopen the affected app if it is malfunctioning. On Face ID models, swipe up from the bottom and pause; on Home button models, double-click Home. Find the app, swipe its preview upward, and reopen it. Apple advises against routinely closing every app.
If the defect returns, update the affected iPhone app. Open App Store, tap your profile icon, then tap App Updates and install an available update for that app. Recheck it before moving to a more disruptive step.
Preserve any needed app data before you delete the malfunctioning iPhone app, because deletion can remove locally stored data. Touch and hold the app, tap Remove App, then Delete App and Delete. Removing its icon from the Home Screen alone does not uninstall it.
To reinstall the deleted iPhone app, open App Store and tap your account photo. Open Apps & Purchase History > Your Apps > Not on this iPhone, find the app, and tap its cloud download control using the Apple Account associated with it. Redownloading depends on the app's availability and compatibility.
If the problem remains confined to that app, contact its developer. Find its product page in App Store, scroll to Ratings & Reviews, and tap App Support. For an app obtained outside App Store, contact its developer directly.
Check color settings for a purple tint
For an overall purple tint or unexpected colors, open Settings > Accessibility > Display & Text Size > Color Filters and temporarily turn off Color Filters. Return to Display & Text Size and turn off Smart Invert and Classic Invert if enabled. These controls affect rendered colors rather than repairing a damaged display column.
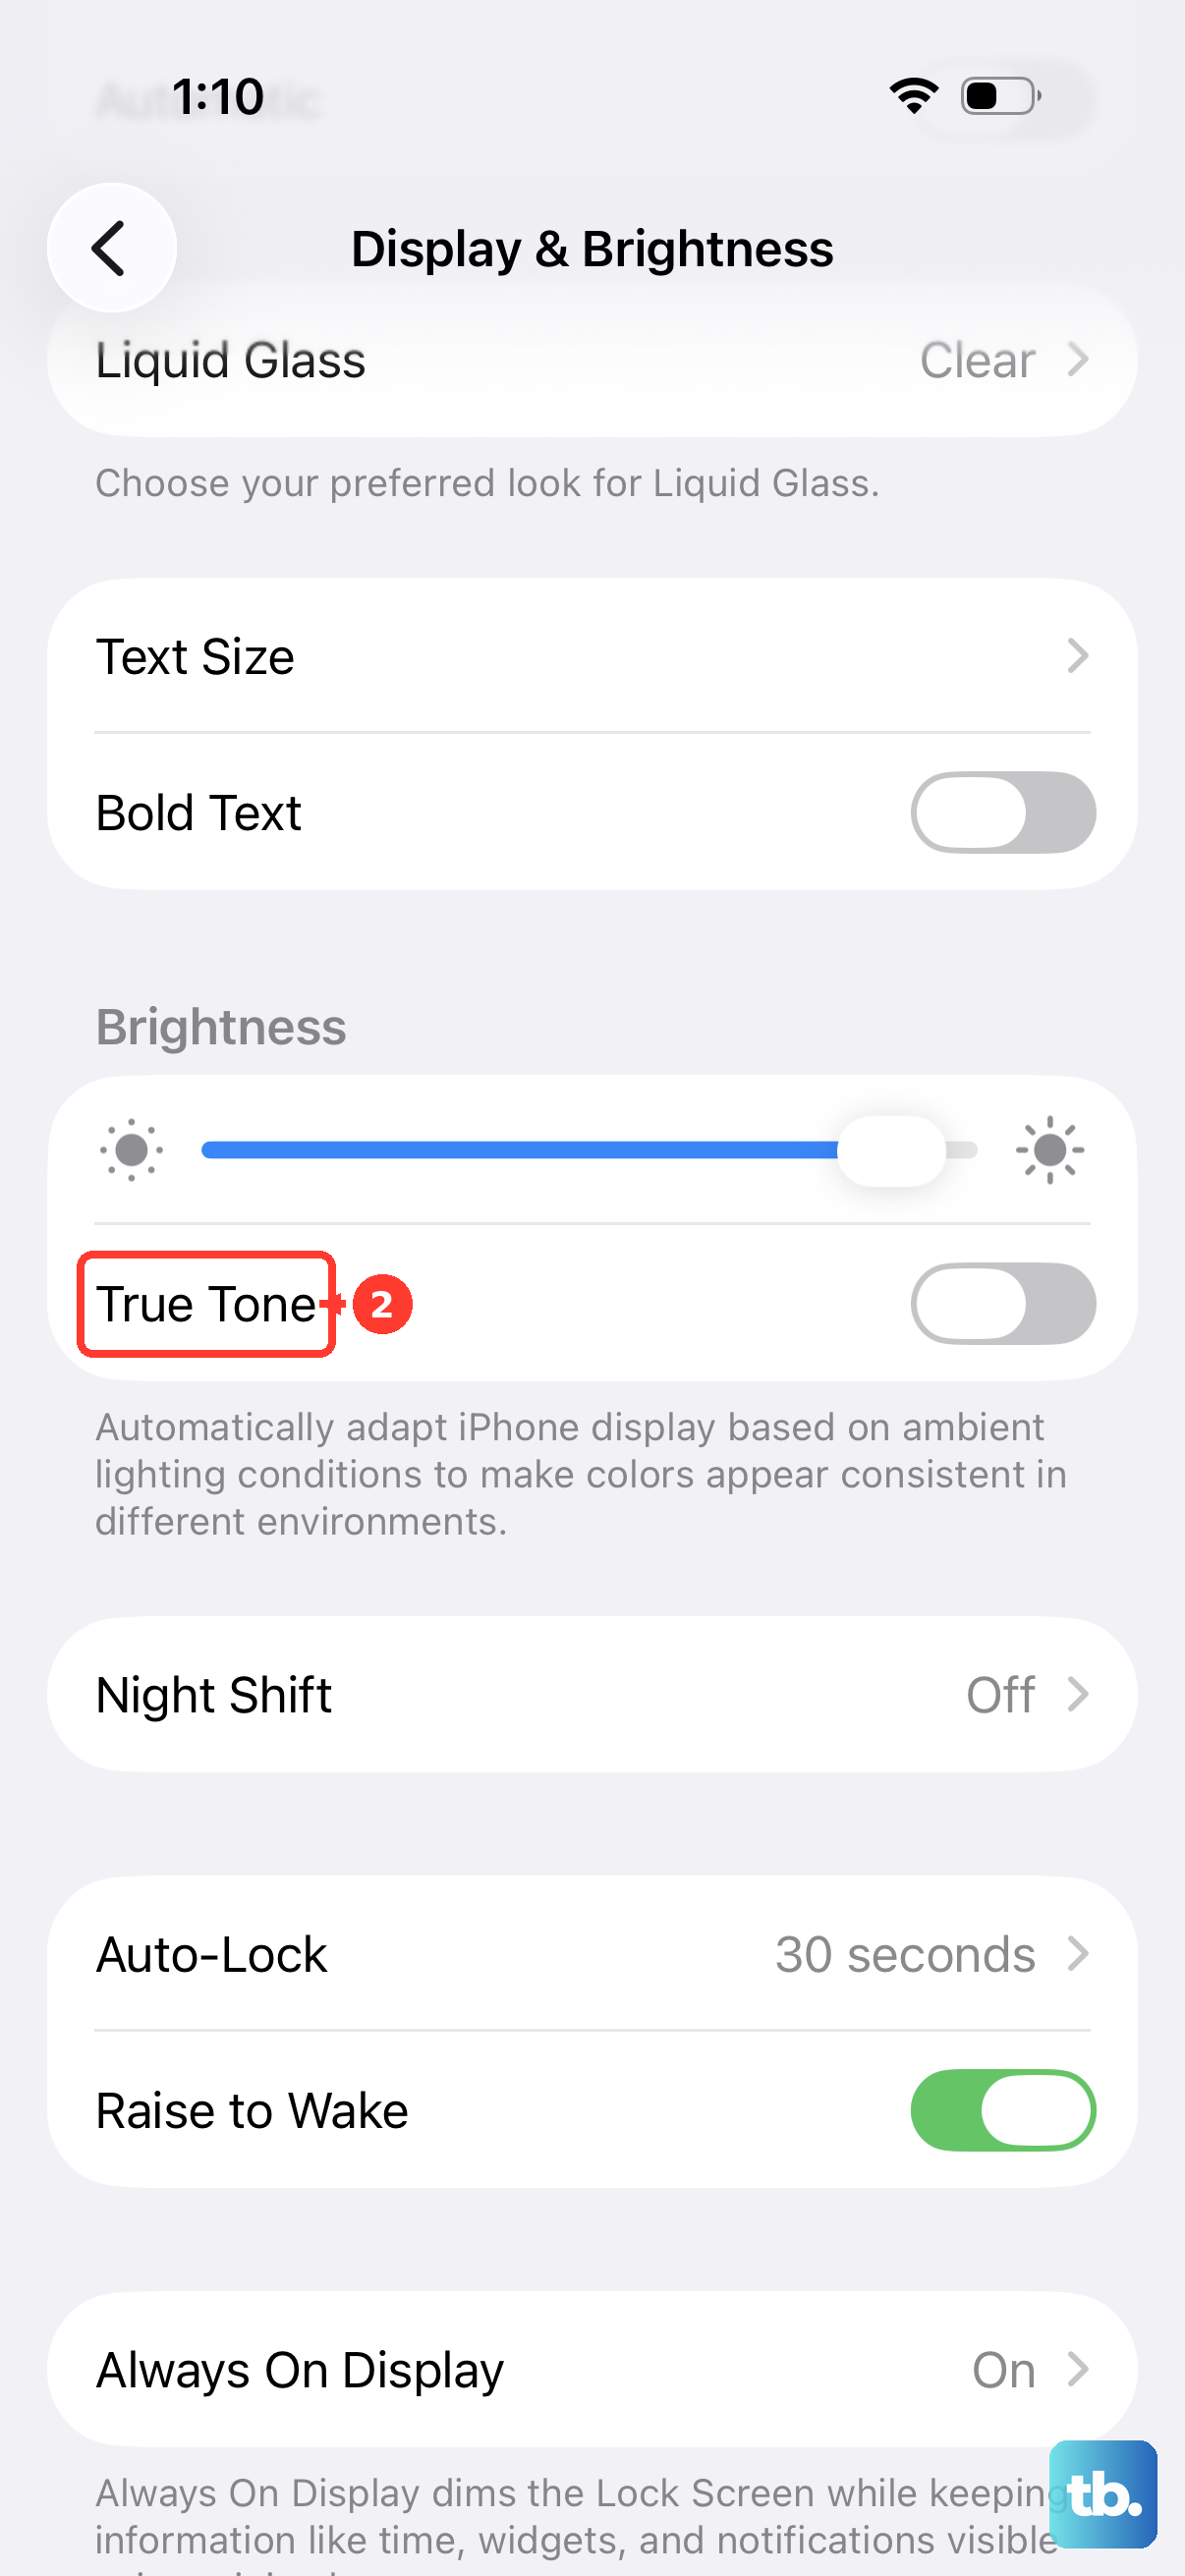
On an iOS 27-compatible iPhone, open Settings > Display & Brightness, adjust the brightness slider, temporarily turn off True Tone, and select Light to compare appearances. In Control Center, hold the brightness control and turn off Night Shift if active. To stop its scheduled return, open Settings > Display & Brightness > Night Shift and turn off Scheduled.
If a color filter or inversion keeps returning on iOS 27, inspect the selected features under Settings > Accessibility > Accessibility Shortcut. An assigned shortcut can turn those effects back on. If a sharply defined line persists despite these comparisons, move toward display inspection rather than repeatedly changing appearance settings.
Back up and update iOS
Before updating, resetting, or arranging repair, preserve your data. With sufficient iCloud storage, connect to Wi-Fi and open Settings > your name > iCloud > iCloud Backup. Tap Back Up Now, stay connected until it finishes, and check the completed backup time.
Connect the iPhone to power and Wi-Fi, then open Settings > General > Software Update. Tap Download and Install when offered to install the latest compatible release for your model. If temporary app removal is requested to make room, tap Continue; the removed apps reinstall afterward. An update can address software defects, but it cannot guarantee a fix for a hardware line.
If updating on the phone fails, you can use a compatible, updated Mac running macOS Catalina 10.15 or later. After backing up, connect the iPhone, open Finder, and select the phone in the sidebar. Click General > Check for Update > Download and Update, then supply the iPhone passcode if requested.
On a Windows PC compatible with Apple Devices, connect the iPhone and open Apple Devices. Select the phone in the sidebar, then select General. Select Check for Update if necessary, then Update.
Keep resets as a last software step
Apple calls Reset All Settings rarely necessary, so save it for cases where settings remain a plausible cause. Open Settings > General > Transfer or Reset iPhone > Reset, then tap Reset All Settings. Photos, apps, and documents remain, but network connections, pairings, payment cards, and other preferences need reconfiguration.
A full erase is a last software-isolation step after less disruptive checks or at Apple's direction. Back up before you erase and reset your iPhone through Settings > General > Transfer or Reset iPhone > Erase All Content and Settings. Supply the requested credentials, tap Continue, and choose whether to keep the eSIM. Erasing deletes the phone's content and cannot repair a damaged display.
A computer restore also erases information and settings while reinstalling compatible iOS. To take this route after backing up, open Settings, select your name, open Find My, then open Find My iPhone. Turn off Find My iPhone and authenticate.
Connect the phone to a supported Mac or Windows PC, and click Allow if requested. Open Finder or Apple Devices, select the iPhone, and approve access using Trust on both devices if requested. Click Restore iPhone, then click Back Up if prompted and Restore. Review the software terms and click Agree.
If a fixed line survives restarts and appears across apps, professional inspection is a more direct next step than repeated resets. You do not need to treat an erase as a prerequisite for asking Apple to inspect the display.
Arrange display inspection and repair
Apple includes horizontal and vertical lines in its display troubleshooting. When preliminary checks and diagnostics do not resolve the problem, a qualified repairer can follow the model's repair manual to inspect display flex cables and connectors, reconnect undamaged connections, and retest. Apple directs repairers to replace the display if the problem remains unresolved.
After a previous screen repair, inspect the display history under Settings > General > About on iPhone 11 and later, excluding second- and third-generation SE models. If Parts and Service History appears, review the Display entry for Genuine, Used, Unknown, or Finish Repair information. Identification of a used display requires iPhone 15 or later with iOS 18 or later.
If a supported iPhone 12 or later needs completion after a display replacement, connect to Wi-Fi, charge above 20 percent, and install the latest iOS. Open Settings > General > About > Parts & Service History, tap Restart & Finish Repair, and complete Repair Assistant. This applies to supported display replacements, not an untouched defective panel. If another provider installed the part and completion fails, ask that provider to finish it.
To book inspection, open Apple's iPhone screen service page and select Get started. Describe the purple line and choose an available service arrangement, such as in-person or mail-in service. Options depend on your location, coverage, model, and parts availability.
Frequently Asked Questions
Can you use a TV to compare the purple line?
Yes, you can compare the image using AirPlay with an Apple TV, AirPlay-compatible TV, or compatible Mac on the same Wi-Fi network. Open Control Center by swiping down from the upper-right corner on a Face ID model or up from the bottom on a Home button model. Tap Screen Mirroring, select the receiver, and enter its displayed AirPlay passcode if requested. This comparison helps isolate the symptom but does not repair it.
Can you take a screenshot without pressing the buttons?
On supported iPhone 8 and later models running iOS 14 or later, open Settings > Accessibility > Touch > Back Tap. Select Double Tap or Triple Tap and assign the screenshot action. Tap the back of the phone the selected number of times.
Should you cool the iPhone if a purple line appears?
If a temperature warning appears, turn the phone off, move it away from sunlight into a cooler environment, and let it cool before retesting. Apple describes temperature-related dimming and black screens, but cooling is not a proven cure for a persistent purple line.
Will Apple repair the purple line for free?
Coverage information alone does not establish that your purple-line repair will be free. Open Settings > General > AppleCare & Warranty and select your device to check its coverage.
Can an independent repair shop use genuine Apple parts?
You can ask a participating Independent Repair Provider to inspect an eligible out-of-warranty iPhone and quote a repair using genuine Apple parts. Verify the provider's repair warranty before proceeding. These repairs are not covered by Apple's warranty or AppleCare.
How do you prepare the iPhone for a service appointment?
Back up the phone and let iCloud syncing finish first. On iOS 27, open Find My, select the device, tap the More control, then tap Repair or Trade In and Enable. On iOS 26 or earlier, open Settings, select your name, open Find My, then open Find My iPhone and turn off Find My iPhone.