

Your computer camera can stop working because a privacy control blocks it, Windows denies access, another app is using it, or its connection or driver needs attention. Check those controls first, then compare the Windows Camera preview with the app that is failing. These steps use Windows 11 menus.
The short version
- Check the hardware: A privacy shutter, camera toggle, or webcam connection can prevent the camera from working.
- Test Camera: Compare the Windows Camera app preview with the app that is failing.
- Allow access: Enable Windows camera permissions for the affected app or desktop applications.
- Follow the symptoms: Check app settings when only one app fails, then investigate drivers when the camera fails across apps.
| Fix | When to try it |
|---|---|
| Open the shutter or use the camera toggle | Your model has a physical camera control |
| Reconnect a USB webcam | An external camera is undetected |
| Connect the monitor’s USB upstream cable | A monitor’s integrated webcam is unavailable |
| Close competing apps | The camera is already in use |
| Restart Windows | The camera remains stuck after closing apps |
| Compare the Windows Camera preview | You need to identify an app-specific failure |
| Allow Windows camera access | Windows or an app blocks access |
| Enable a disabled camera | The camera is disabled in Windows |
| Check Chrome permissions and camera selection | A Chrome video site fails |
| Restart the Chrome video session | A call still fails after permission changes |
| Check Edge permissions | An Edge video site cannot access the camera |
| Try Edge’s InPrivate window | You suspect profile permissions or extensions |
| Remove a Firefox camera block | Firefox blocks the video site |
| Select the camera in Zoom or Google Meet | The calling app uses the wrong camera |
| Run the camera troubleshooter | Basic checks have not helped |
| Repair the affected app or desktop program | Only that application fails |
| Update Microsoft Store apps | An affected Store app needs updating |
| Install Windows updates and optional drivers | The camera fails across apps |
| Scan for hardware changes | The camera is missing from Device Manager |
| Roll back the camera driver | The failure started after a driver update |
| Get the matching manufacturer driver | The driver is missing or incorrect |
| Reinstall the camera driver | Other driver fixes fail on an applicable device |
| Enable the camera in Dell BIOS | A supported Dell model has this control |
| Contact hardware support | Connection and software checks point to hardware failure |
| Use System Restore | A restore point predates the camera failure |
| Reset Windows | Other remedies have failed to resolve persistent software trouble |
Check the camera controls and connection
On an ASUS computer with a camera privacy shield, slide it open and remove any cover or film obstructing the lens. Gently clean a dirty lens with a soft, clean cloth. On an ASUS laptop with a camera symbol on F10, press F10 or Fn + F10, depending on its hotkey configuration, and check for the Camera on notification.
On selected HP notebooks, use the webcam privacy switch or shutter key to enable the camera. On HP’s documented shutter-key design, an illuminated key means the webcam is off. Check your model’s manual for the control’s location.
For a Logitech USB webcam, connect it directly to the computer, bypassing any hub or dock, and try another USB port. Logitech also suggests testing a USB 2.0 port instead of USB 3.0, depending on the webcam’s compatibility. If that does not help, test the webcam on another computer.
For a monitor with an integrated webcam, including the Dell P2724DEB and S2422HZ, connect its USB upstream cable to the computer. Check the webcam’s USB connection and try another USB port. For an external Dell webcam, check its USB connection as well.
Close competing apps and test Windows Camera
Close other camera apps and browser calls before checking again. To force quit a stuck app, right-click the taskbar, select Task Manager, then right-click the app and select End Task. This is especially useful when an error says the camera is already in use.
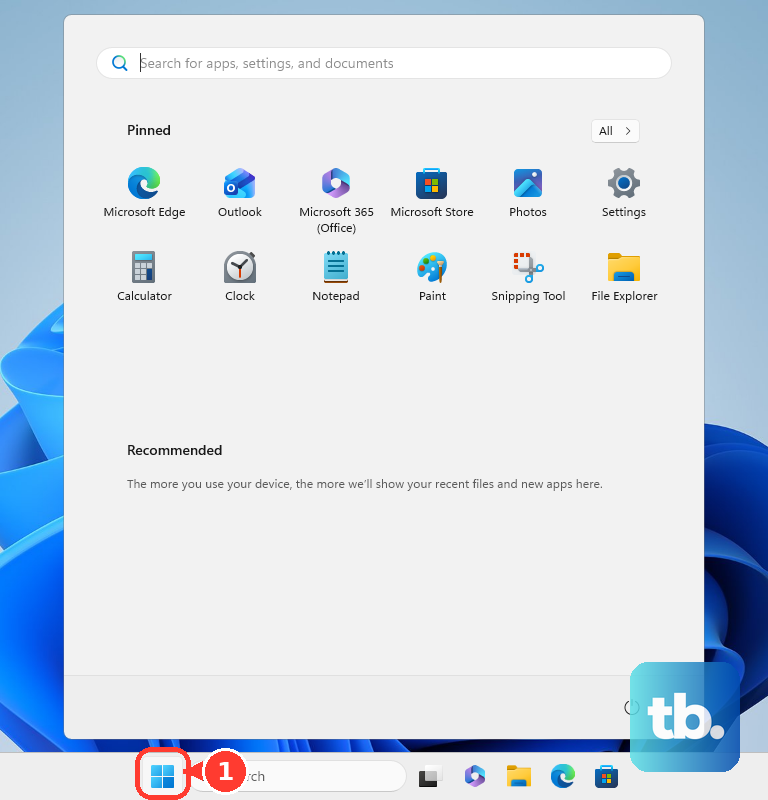
Next, select Start > Power > Restart. After Windows restarts, open Start > Camera and select Yes if prompted to allow camera access. Compare its preview with the app that was failing.
If Camera shows a working preview, focus on the failing app’s permissions and camera selection. If Camera also fails, continue with Windows permissions, troubleshooting, and drivers.
Allow camera access in Windows
On Windows 11, open Settings > Privacy & security > Camera and turn on Camera access. Then turn on Let apps access your camera and enable the affected app in the list. If the device-wide control is unavailable or greyed out, ask your device administrator to change it.
Browsers and desktop programs also need permission. On the same Windows 11 camera permissions page, turn on Let desktop apps access your camera.
A camera can also be disabled separately from its privacy permissions. On Windows 11, open Settings > Bluetooth & devices > Cameras; for a camera listed under Disabled cameras, select Enable. This requires administrator access.
Alternatively, right-click Start, select Device Manager, and expand Cameras. For a disabled camera, right-click its entry and select Enable device. If the camera is not listed under Cameras, Imaging devices, or Sound, video and game controllers, continue to the hardware scan under the driver fixes below.
Check the browser or video calling app
In Chrome, open More > Settings > Privacy and security > Site settings > Camera. Select a blocked video site and change its camera permission to Allow. When several cameras are connected, use the camera dropdown to select the intended device.
At a new Chrome permission prompt, select Allow while visiting the site or Allow this time. Leave and rejoin the video call after addressing the permission. If the session still fails, restart Chrome, then restart the computer if necessary. On a managed browser, ask your administrator about policies that prevent permission changes.
For Edge, enter edge://settings/content/camera in the address bar and allow the intended site. You can also check the site in an InPrivate window and grant camera access when requested. A working preview there points toward permissions or extensions in your normal profile. If a managed Edge browser prevents permission changes, ask IT to review its camera policies.
In Firefox, open the menu and select Settings > Privacy & Security, then find Permissions > Camera > Settings…. The alternate Firefox layout places these controls under Permissions and data. Set the website to Allow, uncheck Block new requests asking to access your camera, and select Save Changes.
For Zoom on Windows, use the arrow beside Start / Stop Video, select Video Settings, and choose the intended device under Camera. With multiple camera sources, you can also press Alt + N to switch cameras. In Google Meet, open Settings > Video, select the intended device under Camera, then select Done.
Run the troubleshooter and repair the app
On Windows 11, open Settings > System > Troubleshoot > Other troubleshooters, then select Run beside Camera. Alternatively, open Get Help and enter camera troubleshooter in its search field. Use this current camera troubleshooter when following older instructions that mention MSDT.
When the failure is limited to an app with repair controls, use its repair option. On Windows 11, open Settings > Apps > Installed apps; beside the affected app, select More > Advanced options > Repair. If the app does not expose these controls, check the desktop repair or Store update options next.
For a desktop program whose installer supports repair, open Control Panel > Programs > Programs and Features. Right-click the program and select Repair, or Change when Repair is unavailable. For Microsoft Store apps, also open Microsoft Store > Library > Get updates.
Update Windows and repair the camera driver
On Windows 11, open Settings > Windows Update and select Check for updates. Also inspect Advanced options > Optional updates for camera drivers. Install applicable updates and restart.
If the camera is missing from Device Manager, select Action > Scan for hardware changes. Restart the computer and check Camera again. If the camera remains missing, use your computer or webcam maker’s model-specific support.
When the problem started after a driver update, rolling back replaces the current camera driver with the available previous driver. In Device Manager, right-click the camera and select Properties > Driver > Roll Back Driver, select Yes, and restart. If a previous driver is unavailable, continue with the matching manufacturer driver.
To identify that driver, open the camera’s Properties > General in Device Manager and check Manufacturer and the model. Obtain the matching driver from the manufacturer’s support page; for an integrated camera, use your computer maker’s model-specific support.
For Dell hardware, open Dell Drivers & Downloads, identify the computer or webcam by its Service Tag or model, or select Browse all products. Choose downloads matching your hardware and operating system. For ASUS hardware, use the ASUS Download Center to locate your exact device model and its applicable driver downloads.
Do not perform camera-driver removal on Surface Pro X, because Microsoft warns that restoring those drivers requires a full reset. Uninstalling the camera device removes it and, with the removal option selected, attempts to remove its driver. On other applicable Windows 11 computers, right-click the camera in Device Manager, then select Properties > Driver > Uninstall Device.
Select Attempt to remove the driver for this device, then select OK. On applicable Surface devices, select Uninstall when that confirmation appears instead. Choose Action > Scan for hardware changes, then restart.
Check model specific controls and hardware
On supported Dell laptops and all-in-one computers with a BIOS camera option, you can get to BIOS on Windows by restarting and repeatedly pressing F2. Under Integrated Devices, enable Enable Camera, then save changes and exit. Other models use different BIOS layouts, so this path applies only to Dell models exposing that option.
A USB webcam that remains undetected on a second computer may have defective hardware. Contact its manufacturer for repair or replacement after the connection and software checks. For an integrated camera, use the computer manufacturer’s hardware support.
Use Windows recovery for persistent software failure
If the camera problem developed recently and an earlier restore point exists, System Restore can return Windows to that point. This can remove apps, drivers, and updates installed afterward. Search for Create a restore point, select Open > System Restore > Next, and choose a restore point from before the failure.
Select Scan for affected programs to review what will be affected, then select Close > Next > Finish and confirm with Yes. If no suitable restore point exists, skip System Restore. Reserve a Windows reset for persistent software failure after the other camera remedies have failed.
A Windows reset removes installed apps and drivers, so back up your files and retain any required BitLocker recovery key before proceeding. To reset Windows while keeping personal files, search for Reset this PC, select Open > Reset PC, then choose Keep my files and Local reinstall. Review Change settings and select Confirm.
Select Next and review View apps that will be removed. Select Back, then Reset to begin.
Frequently Asked Questions
Can basic camera mode help when the usual fixes fail?
On Windows 11 24H2 and later where the option is available, open Settings > Bluetooth & devices > Cameras, select the camera, then choose Advanced camera options > Edit and enable Turn on basic camera. This disables acceleration, applicable manufacturer plug-ins, and Windows Studio Effects.
Why did an external camera stop working after rotating its video?
On Windows 11, non-default video rotation removes compressed video formats and can break apps that require them. Open Settings > Bluetooth & devices > Cameras, select the external camera, set Video rotation to No rotation, and reopen the camera app.
What can help when Google Meet video stalls?
In Google Meet, open Settings > Video and lower Send resolution, for example to Standard definition (360p), then select Done. The available resolutions depend on your account and hardware.
How can you check a Surface camera without removing its driver?
On a supported Surface with the Surface app installed, open Surface > Help & support > Check for updates. Select Get help to describe the camera problem and run available diagnostics.