


To fix the Windows Update “Something went wrong” error, restart your PC, run the Windows Update troubleshooter, then clear the update cache if the error persists. Retry Windows Update after each fix so you can stop when it works.
The steps below use Windows 11 menus. Connection, storage, and software fixes apply when those problems are blocking updates, so choose the repair that matches your symptoms. Save your work before restarting, and back up your files before using recovery options.
The short version
- Start simply: Restart your PC and check for updates again.
- Run diagnostics: Use the Windows Update troubleshooter through Settings or Get Help.
- Match the symptom: Address connection or storage problems before attempting deeper repairs.
- Escalate gradually: Clear the update cache, repair system files, and consider a repair reinstall last.
| Fix | When to use it | What to expect |
|---|---|---|
| Restart and retry | First attempt or pending restart | Lets Windows finish pending updates |
| Resume paused updates | Updates are paused | Removes the pause restriction |
| Disconnect accessories | Installation fails with external devices connected | Removes a possible installation obstacle |
| Windows Update diagnostics | Error returns after restarting | Guided repairs through Get Help |
| Background transfer diagnostics | Update downloads keep failing | Checks the background transfer service |
| Reconnect and run network diagnostics | Internet access is unreliable | Addresses connection failures |
| Disconnect a VPN | A VPN may interfere with downloading | Lets you retry without that connection |
| Correct the clock | Date, time, or time zone is wrong | Addresses clock-related connection failures |
| Allow metered downloads | Metering restricts updates | May increase data charges |
| Storage cleanup | Windows reports insufficient space | Removes files you choose |
| Move personal files | Large files occupy needed space | Requires another storage location |
| Use external update storage | Windows offers storage assistance | Requires at least 10 GB free externally |
| Start the update service | The service is stopped | Requires administrator access |
| Clear the update cache | Simpler fixes have failed | Removes cached update files |
| DISM and SFC | Windows components or files need repair | Run DISM before SFC |
| Alternative DISM repair source | DISM cannot obtain repair files | Requires a compatible source prepared by an administrator |
| Clean boot | You suspect background software interference | Temporarily disables services and startup apps |
| Remove conflicting security software | Third-party protection interferes with updating | Reinstall compatible protection afterward |
| Repair reinstall through Recovery | Earlier repairs fail on an eligible PC | Preserves apps, files, and settings |
| Repair with installation media | The Recovery repair is unavailable or fails | Requires compatible media and the option to keep apps |
| Reset Windows | You choose a more disruptive recovery option | Removes apps and settings |
| Contact support | The error persists or you need repair assistance | Contact options vary |
Restart and retry Windows Update
Save your open work, select Start > Power, then choose Restart. Choose Update and restart when that option is offered. After signing back in, give Windows Update another attempt.
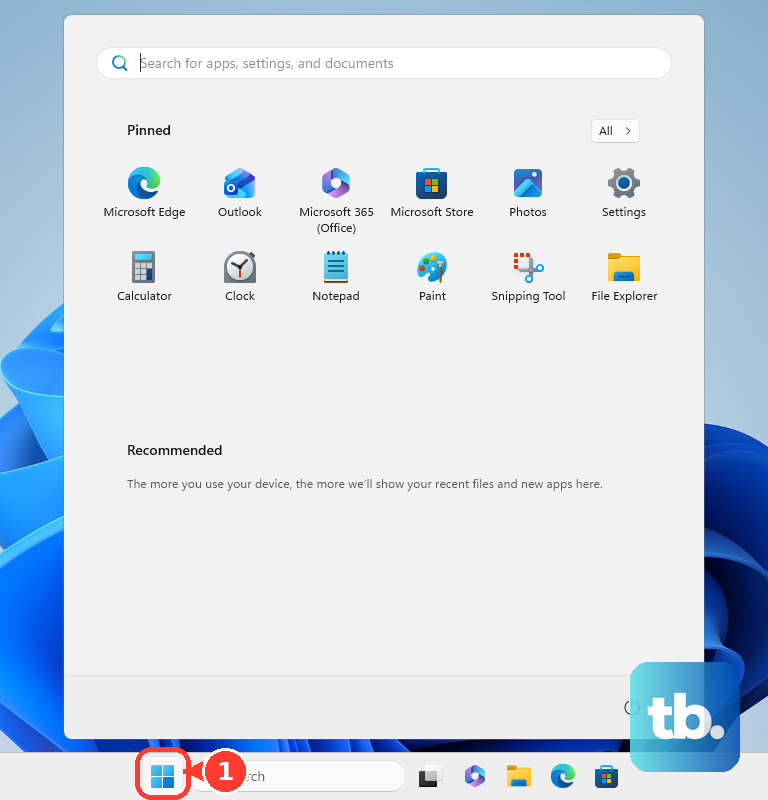
On Windows 11, open Settings > Windows Update and select Check for updates. Install available updates and complete any requested restart. When updates are paused, resume them manually so Windows checks for updates again; ending a pause removes that restriction but does not itself repair the generic error.
Disconnect unnecessary external drives, docks, and accessories before retrying an update that fails during installation. Keep your PC connected to power and the internet. If the same message returns, run the Windows Update troubleshooter.
Run the Windows Update troubleshooter
On Windows 11, open Settings > System > Troubleshoot > Other troubleshooters. Beside Windows Update, select Run and follow the diagnostic prompts. Current Windows troubleshooting uses Get Help, with Settings providing an entry point.
When that route is blocked, open Start, search for Get Help, and open it directly. Enter windows update troubleshooter in Search and complete the suggested steps. Restart afterward, then retry the update.
For downloads that keep failing, open Get Help and enter Background Intelligent Transfer Service troubleshooter in Search. Follow its steps before trying Windows Update again. On current Windows 11, use these troubleshooting routes instead of older MSDT or downloaded diagnostic packages.
Resolve connection and clock problems
Address an unreliable internet connection before attempting a deeper Windows repair. On Windows 11, open Settings > Network & internet > Wi-Fi and reconnect to your network, or connect Ethernet. For guided troubleshooting, open Get Help, enter connect to network and internet in Search, then select Run network diagnostics and complete the suggested repairs.
If you use a VPN, disconnect it temporarily before retrying the update. For a built-in Windows VPN, select the taskbar Network, Volume, Battery area, select VPN, and turn the connected VPN off. For a third-party VPN, disconnect through its own app.
Check the clock when the date, time, or time zone is incorrect. On Windows 11, open Settings > Time & language > Date & time and turn on Set time automatically. Turn on Set time zone automatically, or select the correct Time zone manually.
A metered connection can also restrict downloads. On Windows 11, open Settings > Windows Update > Advanced options and turn on Download updates over metered connections when you want updates to use that connection. Consider your data-plan charges before enabling it, then retry Windows Update.
Make room when storage blocks installation
Use storage cleanup when Windows reports that it needs more space for the update. On Windows 11, open Settings > System > Storage, turn on Storage Sense, then open Cleanup recommendations. Review the suggested files, select items you no longer need, and select Clean up.
You can also move large personal files to external storage. Connect the drive, then in File Explorer, select the files, choose Cut, open the destination drive, and choose Paste. If you delete unneeded files instead, review them before emptying Recycle Bin.
If Windows still needs space, it may offer external-storage assistance. Connect a drive with at least 10 GB free, then on Windows 11 open Settings > Windows Update and select Fix issues when the insufficient-space prompt offers it. Choose the external drive, select Next, and leave it connected until installation finishes.
Start the update service and clear its cache
When the earlier steps do not help, check the Windows Update service before clearing its cached files. This repair requires administrator access. Press Windows + R, enter the following command, then press Enter.
services.mscFind Windows Update in Services. If it is stopped, right-click it and select Start, then retry Windows Update. If the error persists, return to Services to clear the cache.
Right-click Windows Update and select Stop. Open File Explorer and go to C:\Windows\SoftwareDistribution, then delete the contents of that folder. Return to Services, right-click Windows Update, and select Start.

Try checking for updates again after the service starts. Keep this cleanup limited to the named folder's contents. If it makes no difference, continue with system-file repair.
Repair Windows system files
Use DISM followed by System File Checker to repair Windows components and system files. Open Start, search for Command Prompt, select Run as administrator, then select Yes. For more detail, follow the steps for repairing Windows using Command Prompt.
Run the following command first. Wait for it to complete successfully before starting System File Checker.
DISM.exe /Online /Cleanup-image /RestorehealthNext, run the following command and wait for the scan to finish. Restart your PC afterward and retry Windows Update.
sfc /scannowIf DISM cannot obtain files through Windows Update, you may need an alternative repair source. That source must match your installation and include the required servicing and language files. Ask an administrator to prepare a compatible source, or use an appropriate repair reinstall if DISM cannot complete.
Isolate conflicting background software
A clean boot helps you check whether background software is interfering with installation. Sign in as an administrator, open Start, search for msconfig, and open System Configuration. Select the Services tab, check Hide all Microsoft services, then select Disable all and Apply.
Open the Startup tab and select Open Task Manager. In Windows 11, open Startup apps, record which enabled items you change, and disable those items. The steps to stop apps from opening on startup explain those controls in more detail.
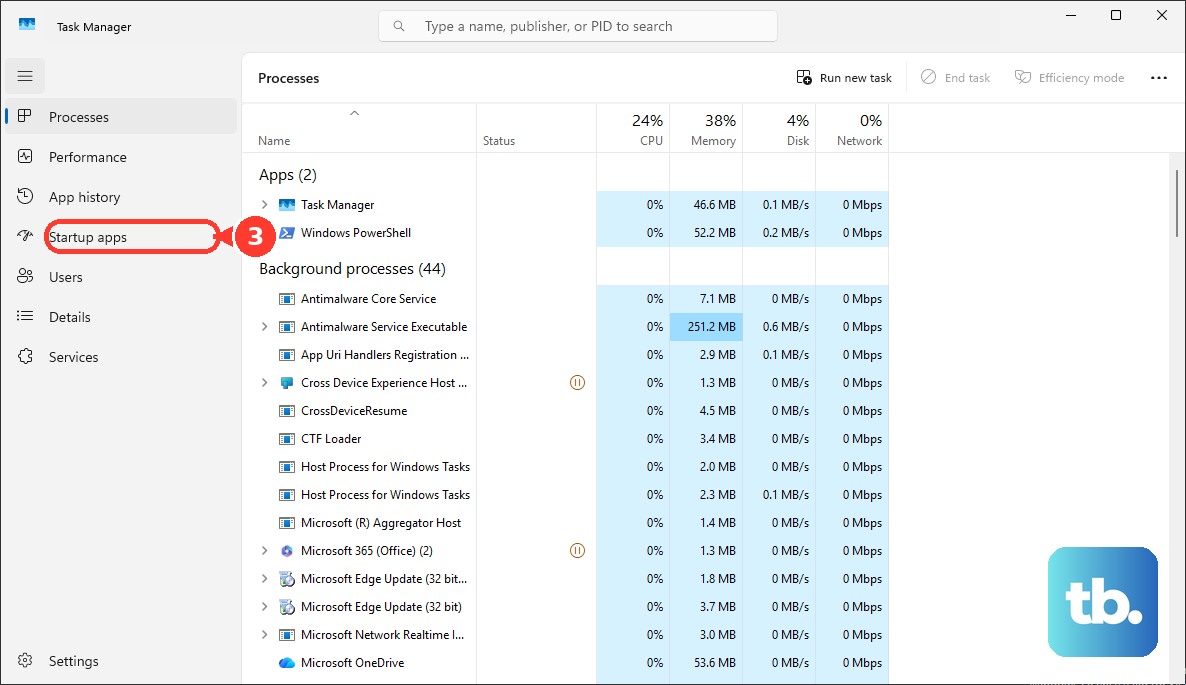
Close Task Manager, select OK in System Configuration, and restart. Retry the update in that clean boot state. Afterward, restore Normal Startup, reenable the services and startup items you changed, and restart again.
If updating succeeds during a clean boot, background software may be interfering. Microsoft recommends temporarily removing third-party security software when it conflicts with updating. On Windows 11, open Settings > Apps > Installed apps, find the conflicting application, select More, then select Uninstall. Retry the update and reinstall compatible security software afterward.
Reinstall Windows to repair persistent errors
Back up your files before moving to recovery operations. On eligible Windows 11 installations, a repair reinstall preserves your apps, files, and settings. On Windows 11, open Settings > System > Recovery, find Fix problems using Windows Update, and select Reinstall now.
Select OK and keep power and internet connected throughout the repair. Restart after completion if Windows has not restarted automatically. This option requires Windows 11 22H2 or later with the February 2024 optional update or a later update, and it may be unavailable on managed PCs.
When that option is unavailable or cannot complete, compatible Windows installation media provides another repair route. While signed into Windows, connect the media, open setup.exe, and select Yes. Select Change what to keep, choose Keep personal files and apps, then select Next and Install.
The media must match your Windows edition, language, and architecture. Before proceeding, confirm that you can choose Keep personal files and apps. A general Windows 11 ISO is not suitable repair media for every device-specific Windows release.
Resetting Windows is a more disruptive option because it removes apps and settings. Before choosing that route, review how to reset Windows without losing files; choose Keep my files to retain personal files, while still backing them up first. If you need help deciding how to proceed, open Get Help and describe the update failure.
If offered, select Contact Support, choose the affected product and any further options, then select Confirm. Choose an available contact method; the options depend on your product, subscription, region, and opening hours.
Frequently Asked Questions
Can I install a failed update without using the Windows Update page?
Yes, when Microsoft offers a standalone package, you can search Microsoft Update Catalog by the failed update's KB number. Match the package to your Windows version and processor architecture, then select Download and install the required .msu files in the order specified for that update. This bypasses the download route in Settings but may leave the error there unresolved.
Does the error code 0xC1900101 need a different fix?
That code can indicate a driver-related installation failure. Right-click Start, open Device Manager, expand the affected device category, then right-click the device and select Update driver. Use automatic search or a compatible driver from the device manufacturer. Reinstalling the driver is another option when you have identified a specific device problem.
What if Windows no longer starts after an update?
If you can reach the power controls, hold Shift while selecting Power > Restart to enter Windows Recovery Environment. Select Troubleshoot > Advanced options > Uninstall Updates > Uninstall latest quality update, then complete the removal prompts. An encrypted device may require its BitLocker recovery key.
Is the Windows 10 ESU enrollment error the same problem?
No, the ESU enrollment-wizard failure is separate from the Windows Update page failing to load. Microsoft identifies KB5071959 as a fix for affected, unenrolled Windows 10 22H2 consumer PCs. Install it when offered, restart, and retry enrollment. Windows 10 standard support has ended, so continued updates depend on applicable ESU coverage or another supported servicing configuration.
Should I use Windows 11 Installation Assistant to repair this error?
Installation Assistant upgrades an eligible PC to Windows 11; it is not a same-version repair tool. It supports eligible x64 PCs and does not run on Arm-based PCs. Use a repair reinstall when your goal is to repair the existing Windows installation.