


To fix a blurry computer screen, restore its native resolution and recommended scaling, then check text rendering and the monitor connection if the blur remains. Adjust the affected screen separately, since each monitor can need different settings. Choose your next fix based on whether the blur affects the whole desktop, text, one application, or moving images.
The short version
- Whole screen: Restore the native resolution and recommended scaling first.
- Blurry text: Run ClearType on Windows after correcting the display resolution.
- External monitor: Reconnect the video cable and compare a direct connection without a dock or adapter.
- One application: Reopen it and check its zoom or display preferences.
- Moving images: Check the refresh rate and your monitor’s response settings.
| Fix | When to use it |
|---|---|
| Restore native resolution | The entire desktop looks soft |
| Restore recommended scaling | Windows apps look blurry at the current scale |
| Disable unintended magnification | The desktop looks unexpectedly enlarged |
| Increase accessibility text size | You need larger text without lowering resolution |
| Adjust ClearType | Windows text remains fuzzy |
| Compare font smoothing | Chrome text remains blurry after ClearType |
| Check cables, ports, and adapters | An external monitor looks blurry |
| Replace VGA with a digital connection | Analog signal quality affects the image |
| Tune a VGA image | You use VGA on a supported Dell monitor |
| Change duplication or mirroring | Different monitors cannot use suitable resolutions |
| Redetect a Mac display | An external display is detected incorrectly |
| Reopen apps or sign back in | Office becomes blurry after docking |
| Match monitor scaling | Office has trouble across mixed scaling settings |
| Change Office display preferences | An Office app exposes rendering options |
| Reset website zoom | Only a browser page looks soft |
| Use Firefox Troubleshoot Mode | Blur appears only in Firefox |
| Disable Firefox extensions or change its theme | Troubleshoot Mode improves clarity |
| Reset the graphics driver and restart | A temporary Windows display problem persists |
| Install system updates | A display software fix may be available |
| Install optional Windows drivers | Windows offers a graphics or monitor driver |
| Roll back a graphics driver | Blur began after a driver update |
| Increase the supported refresh rate | Movement looks smeared while stationary text is clear |
| Compare monitor response settings | Moving objects leave trails |
| Compare another monitor or computer | You need to isolate an external display problem |
| Inspect the monitor’s own menu | You suspect a monitor defect |
| Run a Dell laptop LCD self-test | You need to check a supported laptop panel |
| Arrange display service | The monitor menu or hardware test shows a defect |
| Reset Windows | Hardware and simpler software fixes have been ruled out |
Restore the correct screen resolution
On Windows 11, open Start > Settings > System > Display and select the blurry screen. Under Scale & layout, open Display resolution and choose the option marked (Recommended). Repeat this separately for each monitor.
On a Mac, open the Apple menu > System Settings > Displays, select the affected display, and choose Default. Compare the available scaled choices if you need a different size, but avoid a low-resolution mode just to make text larger. The available choices depend on your Mac and display.
On a Chromebook, select the time, then open Settings > Device > Displays. Select Built-in Display or your external monitor and review Display and text size. For an external monitor, set Resolution to its native value.
On Ubuntu Desktop with GNOME, open Activities, search for Displays, and open it. Select your screen, adjust Resolution, then choose Apply and Keep Changes. Other Linux desktops can use different settings paths.
Correct scaling and unintended magnification
In Windows Settings > System > Display, select the affected screen and set Scale under Scale & layout to the value marked (Recommended). Reopen affected applications after changing it. Microsoft discourages custom scaling, so start with the recommended preset.
If your Windows desktop is unexpectedly magnified, press Windows + Esc to close Magnifier. For larger text while keeping the correct screen resolution, open Settings > Accessibility > Text size and adjust the size.
On a Mac, open System Settings > Accessibility > Zoom and turn off the control causing unwanted enlargement. For larger text, use Accessibility > Display > Text size, although application support varies. On a Chromebook, press Ctrl + Shift + 0 to reset screen size.
Sharpen blurry text on Windows
When the resolution is correct but letters still look fuzzy, open Start, search for ClearType, and select Adjust ClearType Text. Select Turn on ClearType, choose Next, and complete the text-sample comparisons. Select Finish after choosing the clearest samples.
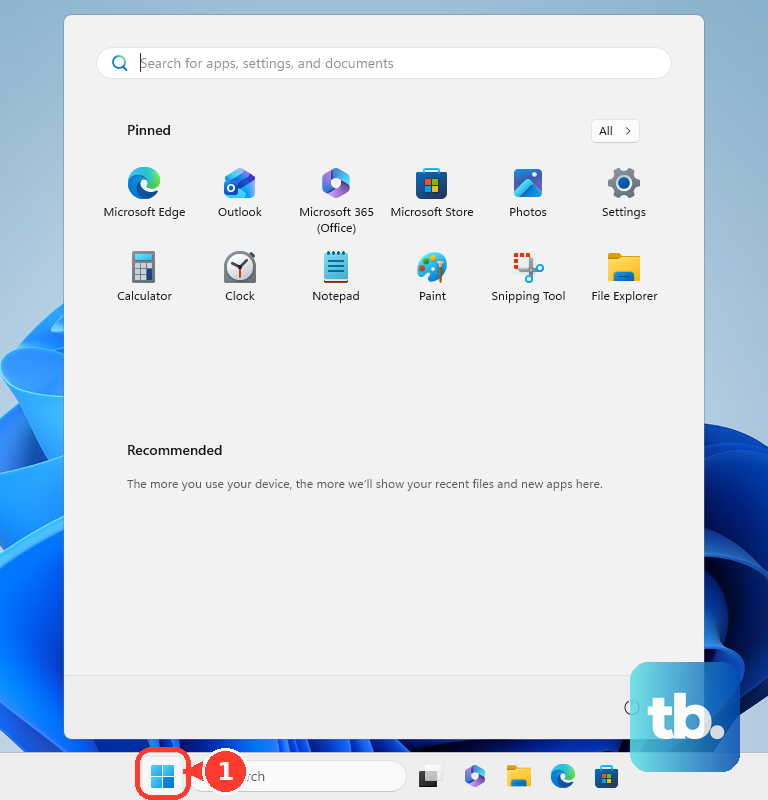
If Chrome text remains blurry, Google recommends trying Windows with font-edge smoothing disabled. Open Start, search for Appearance, and select Adjust the appearance and performance of Windows. Clear Smooth edges of screen fonts, select Apply, and reopen Chrome. Restore the setting if readability gets worse.
Check external monitor connections
Reconnect both ends of the video cable, then compare the image at the monitor’s native resolution. If the blur remains, try a known-good cable and another output port. Connect the computer directly to the monitor to rule out a dock, dongle, adapter, or extension cable. The connection must support your required resolution and refresh rate.
A VGA connection can introduce blur from analog signal quality. When both devices support it, switch to HDMI, DisplayPort, or USB-C video, then select the native resolution again. If you must keep VGA on a Dell E2422H, E2422HN, or E2422HS, open the monitor menu and run Auto Adjust. If needed, adjust Display > Pixel Clock, then Phase; these controls do not apply to digital input.
Duplicating screens can constrain the available display mode when the monitors differ. On Windows, press Windows + P, select Extend, and set each monitor’s recommended resolution and scaling independently. On a Mac, open System Settings > Displays, select the display, and review Use as. If you keep mirroring, use Optimize for to favor the display whose resolution matters most.
For an external Mac display that is detected incorrectly, open System Settings > Displays. Hold Option to reveal Detect Displays, then click it. If that does not help, reconnect the display, disconnect and reconnect its power, or restart the Mac before checking the resolution again.
Fix blur limited to one app or website
Close and reopen a blurry application before changing settings for the whole computer. For Microsoft 365 or Office apps that become blurry after docking or moving between monitors, save your work before reopening the app. If needed, sign out of Windows and sign back in. Matching the monitors’ scaling percentages is another workaround for affected Office apps.
In Office applications with multiple-display preferences, open File > Options > General. Under User Interface options > When using multiple displays, compare Optimize for best appearance with Optimize for compatibility. Restart when requested; these options vary by application.
If only a website looks soft, reset its zoom before changing display settings. In Chrome, open More and use the controls beside Zoom to return to 100%. In Firefox, press Ctrl + 0 on Windows or Linux, or Command + 0 on Mac. In Safari, open Safari > Settings > Websites > Page Zoom and set the website’s percentage to 100%.
If Firefox alone remains blurry, open Menu > Help > Troubleshoot Mode…, then choose Restart and Open. Your version may name the help menu Help and Report. This mode temporarily disables extensions, themes, and hardware acceleration for comparison.
If clarity improves, return to normal mode and disable extensions individually under Extensions and themes > Extensions to identify a trigger. Under Themes, enable System theme to compare it with your customized theme. If Troubleshoot Mode makes no difference, continue with the display software checks.
Reset graphics and update display software
On Windows, press Windows + Ctrl + Shift + B to reset the graphics driver. The screen may flash and the computer may beep. If the problem persists, select Start > Power > Restart; follow the steps to restart an unresponsive computer if you cannot use the menu.
Open Settings > Windows Update > Check for updates, install offered updates, and restart when requested. For graphics or monitor drivers, open Windows Update > Advanced options > Optional updates. Select applicable driver updates, choose Download and install, then restart.
If blur began immediately after a graphics-driver update, right-click Start and open Device Manager > Display adapters. Right-click your graphics device, choose Properties > Driver > Roll Back Driver, and complete the prompts. Rollback requires administrator access and a retained previous driver, so it may be unavailable.
On a Mac, open the Apple menu > System Settings > General > Software Update and install compatible updates. Apple display firmware can also arrive with macOS updates. On a Chromebook, select the time, open Settings > About ChromeOS > Check for updates, and select Restart when offered. Chromebook update availability depends on the device and any management restrictions.
Address blur during movement
If stationary text looks clear but scrolling or moving images look smeared, check the refresh rate. On Windows, open Settings > System > Display > Advanced display, select the monitor, and use Choose a refresh rate to select a supported higher rate. Keep the native resolution, since some offered refresh rates also change the resolution.
Monitor response settings can also affect moving-image clarity. On Dell E2422H, E2422HN, and E2422HS monitors, open Display > Response Time in the monitor menu and compare Normal with Fast. Keep whichever looks clearer; the fastest setting is not necessarily best, and other models use different controls.
If only a picture or video looks soft, check whether the content itself has a low resolution. Enlarging a low-resolution image cannot restore its missing detail. Keep the screen at its native resolution rather than lowering it to compensate for one blurry image.
Check for a monitor or screen defect
Connect the affected external monitor to another compatible computer, or connect a known-good monitor to your computer. Compare the results using a suitable cable and native resolution. This helps separate a monitor problem from a computer or connection problem.
Open the monitor’s own menu using its physical menu button or joystick and compare it with the computer image. Samsung directs you toward service when the monitor-generated menu itself is blurry. That result calls for checking the monitor rather than repeatedly changing desktop settings.
On a Dell laptop supporting the LCD self-test, shut down, disconnect external devices, and connect the charger. Hold D while pressing Power, then release D when test colors appear. Inspect the display for blur or distortion and press Esc to stop.
If the Dell self-test shows blur or distortion, record the result and contact Dell Technical Support. A defect during that hardware-generated test points toward service. For an Apple display that needs service, open Apple Displays Support and, under Start a repair, select Get started with a repair.
Reset Windows only as a last resort
Consider a Windows reset only after hardware problems and simpler software fixes have been ruled out. Open Settings > System > Recovery > Reset PC. Review Keep my files and the Cloud download or Local reinstall choices before you factory reset your laptop. Even Keep my files removes applications and resets settings.
Frequently Asked Questions
Can cleaning a screen help when it looks blurry?
Cleaning can help if dirt on the screen surface is affecting clarity. For a standard Mac display, shut down and unplug the device, then gently wipe it with a soft, lint-free cloth dampened with water. Nano-texture displays need separate cleaning instructions, and other monitor coatings require their manufacturer’s instructions.
How do you turn off a Chromebook magnifier?
Press Ctrl + Search + M to toggle the full-screen magnifier, or Ctrl + Search + D to toggle the docked magnifier. On a keyboard with a Launcher key, substitute Launcher for Search. These controls work separately from the screen-size setting.
What else should you check when computer text looks unclear on a TV?
Check that the output color format matches the TV. On supported NVIDIA-controlled displays, open NVIDIA Control Panel > Display > Change Resolution and review Output color format for an appropriate RGB setting. Supported AMD systems offer RGB 4:4:4 Pixel Format PC Standard (Full RGB) or YCbCr 4:4:4 under Display Settings > Pixel Format. Match the format and range to your display; full RGB range alone does not correct the resolution.
What can you change when only Mac Terminal text looks blurry?
Open Terminal > Settings > Profiles, select the active profile, and open Text. Compare Antialias text on and off, or use Change under Font to choose a more readable font or size. These changes affect Terminal rather than the entire display.
How can you make translucent Mac menus easier to read?
Open System Settings > Accessibility > Display and turn on Reduce transparency. This improves interface contrast without changing the monitor’s resolution.
Can you repair a blurry Windows application without resetting the computer?
For an app that supports repair, open Settings > Apps > Installed apps, select its More menu, and choose Advanced options > Repair. Consider Reset only if repair fails, because it can remove app data and preferences. For a supported traditional program, open Control Panel > Programs > Programs and Features, right-click the program, and select Repair or Change.