


To delete an administrator account on Windows 11, sign in with another administrator, open Settings > Accounts > Other users, expand the target account, and select Remove beside Account and data. Confirming the deletion removes that account and its data from the PC, so back up the user's files first. These steps use Windows 11 menus.
Removing a Windows sign-in does not delete the person's online Microsoft account. The built-in Administrator account cannot be deleted, but you can disable its sign-in. If you only want to remove administrator privileges from an ordinary account, change its account type instead.
The short version
- Before deletion: Back up the target user's files and keep another working administrator account.
- Main method: Remove an ordinary account through Settings > Accounts > Other users.
- Built-in Administrator: Disable this protected account instead of trying to delete it.
- Keep the account: Change an ordinary administrator to a standard user when you only want to remove administrator privileges.
| Method | Result | Use it for |
|---|---|---|
| Settings account removal | Removes the account and its data from this PC | Ordinary accounts listed under Other users |
| Command Prompt deletion | Deletes a local account | Windows 11, including Home |
| PowerShell deletion | Deletes a local account | Systems with Microsoft.PowerShell.LocalAccounts |
| Computer Management deletion | Deletes an ordinary local account | Pro, Enterprise and Education with the snap-in |
| Command Prompt disabling | Prevents sign-in and preserves files | Built-in Administrator or ordinary local accounts, including on Home |
| PowerShell disabling | Preserves the account and its files | Systems with Microsoft.PowerShell.LocalAccounts |
| Computer Management disabling | Disables the built-in Administrator | Editions with Local Users and Groups |
| Settings account type change | Removes administrator privileges and keeps data | Ordinary administrator accounts |
| System Properties profile cleanup | Deletes remaining profile data | Cleanup after account deletion |
| Reset through Settings | Resets the whole PC and removes data | Starting over or transferring the computer |
| Reset through Windows RE | Removes user data across the installation | A PC with a functioning recovery environment |
| Clean installation | Removes the previous Windows installation | A compatible PC with matching media and licensing |
Keep another administrator and back up files
Sign in with a different administrator account that you will keep. Back up the files belonging to the account you plan to remove before continuing. Keep that other administrator available throughout the process.
Choose the action that matches what you want to change. Deletion removes an account, disabling stops sign-in while preserving the account and files, and changing the account type removes administrator privileges while keeping the account and its data.
A Microsoft-account Windows sign-in can be removed through Other users, just like an ordinary local account listed there. Sign in only through Microsoft’s own app or website, and never share a code, password, or remote access with someone who contacts you.
Delete the account through Settings
Open Settings, select Accounts, then open Other users. Expand the administrator account you want to delete. This path applies to ordinary local accounts and Microsoft-account Windows sign-ins listed on that page.
The removal deletes the account and its data from this PC, so back up the target user's files before proceeding. Next to Account and data, select Remove, then select Delete account and data. The person's online Microsoft account remains intact.
If your target is the built-in Administrator account, use the disabling steps below. For an ordinary local account, Command Prompt and Windows PowerShell provide alternative deletion methods. With those commands, profile cleanup is a separate task.
Use a command to delete a local account
Command Prompt can delete an ordinary local account on Windows 11, including Home, with administrator privileges. Open Command Prompt with Run as administrator. Identify the actual local account name by running:
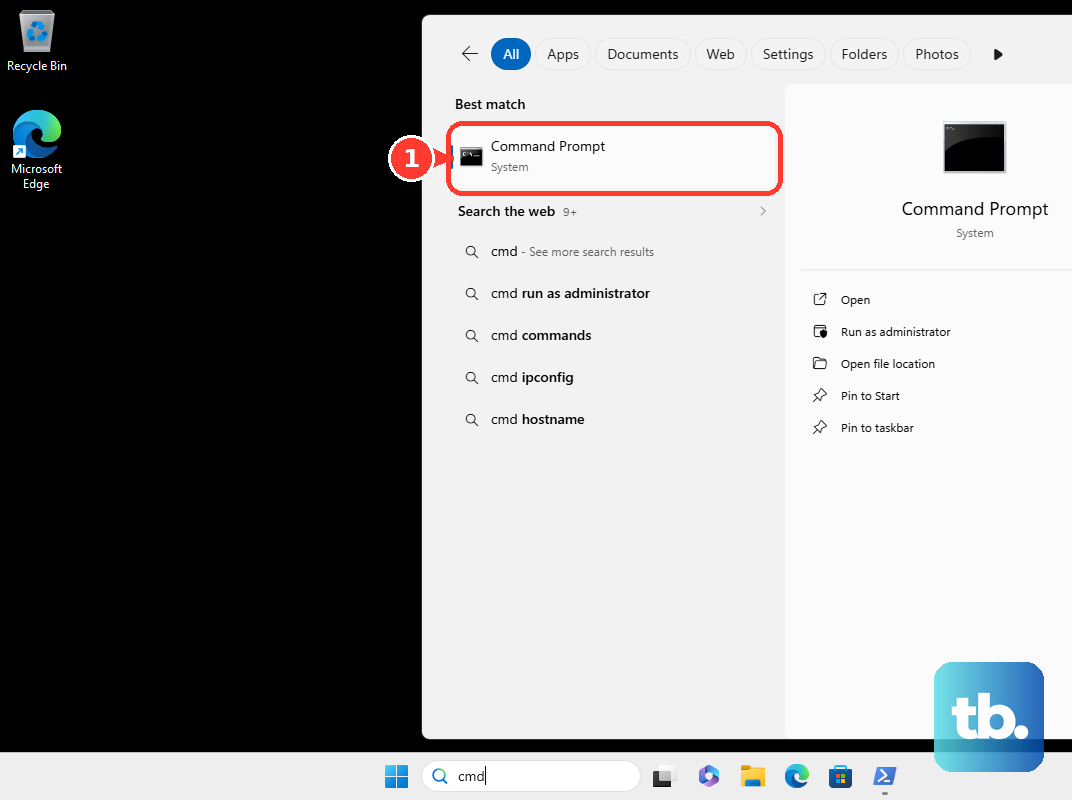
net userReplace AccountName in the following command with the name identified in the account list. The command deletes that local account, so back up its files and keep another working administrator before running it.
net user "AccountName" /deleteKeep /domain out of the command for a local deletion. Treat any remaining profile data as a separate cleanup task. This command cannot delete the built-in Administrator account.
Windows PowerShell provides another route on systems with Microsoft.PowerShell.LocalAccounts. On a 64-bit system, use native 64-bit Windows PowerShell because the module is unavailable in 32-bit PowerShell there. Open Windows PowerShell with Run as administrator, then identify the account with:
Get-LocalUserReplace AccountName below with the correct account name. This command deletes the selected local account, so back up its files and keep another working administrator before running it.
Remove-LocalUser -Name "AccountName"Profile cleanup remains separate from this account-deletion command. Protected built-in accounts are excluded from this method, so use disabling for the built-in Administrator.
Delete a local account through Computer Management
On Windows 11 Pro, Enterprise or Education with the snap-in, open Computer Management > System Tools > Local Users and Groups > Users. This method applies to ordinary local accounts. Windows 11 Home does not include this snap-in, so use Settings or Command Prompt there.
Deleting the selected account removes that local account, so back up its files and keep another working administrator before proceeding. Right-click the target account and select Delete. If profile data remains afterward, use the profile cleanup procedure below.
Disable the built-in Administrator account
The built-in Administrator account cannot be deleted with the ordinary account-deletion methods. Disabling it prevents sign-in while preserving the account and its files. Start from another administrator account so that you retain administrator access.
Open Command Prompt with Run as administrator. Run the following command, substituting the account's actual name if it has been renamed or localized:
net user "Administrator" /active:noThis method works on Windows 11 Home as well as other Windows 11 editions. You can also disable an ordinary local account by substituting that account's name. Its files remain on the PC.
You can instead use Windows PowerShell with Microsoft.PowerShell.LocalAccounts, using native 64-bit PowerShell on 64-bit Windows. From another administrator account, open Windows PowerShell with Run as administrator. Substitute the account's actual name if necessary and run:
Disable-LocalUser -Name "Administrator"On editions with Local Users and Groups, another option is Computer Management > System Tools > Local Users and Groups > Users. Right-click the built-in Administrator account, select Properties, then select Account is disabled. On Home, use a command method instead.
Remove administrator privileges while keeping the account
If the person should retain their Windows account and data, change their account type. This option applies to ordinary user accounts and requires keeping another working administrator. It does not apply to demoting the built-in Administrator.
Open Settings > Accounts > Other users and expand the target account. Next to Account options, select Change account type. Choose the standard-user account type, then select OK.
Remove profile data left after deletion
If profile data remains after account deletion, you can remove it separately with administrator rights. Deleting a profile removes its data; it does not replace deleting the account itself.
Open Control Panel, set View by: to Large icons, then select System. Windows 11 opens Settings; select Advanced System settings. Under User Profiles, select Settings.
Deleting a profile removes its profile data, so back up the target user's files before proceeding. Select the target profile, then select Delete.
Reset the whole PC when starting over
For starting over or transferring the computer, you can reset Windows 11 and remove everything. This affects the whole PC rather than selectively deleting one administrator. Back up needed files and obtain the BitLocker recovery key if applicable before beginning.
Resetting with Remove everything removes personal files, apps and settings, so back up needed files first. Open Settings > System > Recovery, then select Reset PC under Recovery options. Select Remove everything, choose Cloud download or Local reinstall, and continue through the reset wizard. If you plan to donate, recycle or sell the PC, turn on Clean data in the reset options so the reset removes files and cleans the drive.
You can also use Windows recovery options when Windows Recovery Environment is functioning. Hold Shift while selecting Power > Restart to enter Windows RE. Alternatively, open Settings > System > Recovery > Advanced startup and select Restart now; other entry options include a manufacturer-specific recovery button or booting recovery media.
Resetting through Windows RE with Remove everything broadly removes user data, so back up needed files first. Select Troubleshoot > Reset this PC, then choose Remove everything. BitLocker recovery credentials may be required.
Reinstall Windows when replacing the installation
A clean installation lets you reinstall Windows 11 from installation media, but it removes the previous installation rather than just one account. Use this option for starting over on a Windows 11-compatible PC with matching installation media and licensing.
Create official installation media suitable for the device architecture and boot from it. Choose the language and keyboard settings, selecting Next after each. Select Install Windows 11.
A clean installation deletes files, apps and settings from the previous installation, so back up needed files before proceeding. Select I agree everything will be deleted including files, apps, and settings, then select Next. Supply the product key or use the digital-license route with the matching edition, then select Accept.
Removing partitions deletes data on the Windows disk, so back up needed files before proceeding. At the disk screen, follow the partition-removal procedure for the Windows disk without modifying other disks. Select the resulting unallocated space, select Next, then select Install.
Frequently Asked Questions
Can you stop using a Microsoft account without deleting your Windows account?
Yes, when you currently sign in with a personal Microsoft account and the option is available, open Settings > Accounts > Your info and select Sign in with a local account instead. Supply the requested local username, password and password hint, select Next, then select Sign out and finish. This changes the sign-in association without deleting the Windows account or removing administrator privileges.
Do you need to download software to delete an administrator account?
No download is required for ordinary account deletion. Microsoft's Windows 11 download page provides installation media and disk images for installation scenarios.
Can PowerShell identify a local account by SID instead of its name?
Yes, Remove-LocalUser accepts the -SID parameter as an alternative to -Name. Disable-LocalUser also accepts -SID, which can identify a renamed account. Deletion removes the account, while disabling preserves it.
How do you disconnect a work or school account?
Open Settings > Accounts > Access work or school and expand the relevant account. Disconnecting removes the organizational account's connection to the device without deleting the organization's identity. Select Disconnect, then select Yes. Organization policy and the device's join configuration can constrain removal.