Your Windows 10 PC still turns on and runs your apps, so it is easy to assume nothing has changed. The reality is less comfortable. Microsoft confirms that support for Windows 10 ended on October 14, 2025, and from that day eligible machines stopped receiving software updates, security fixes, and technical support. The good news is that for most Windows 10 users the move to Windows 11 is free, and you can start it yourself today.
This guide covers confirming your eligibility, checking your hardware with Microsoft's own tool, and running whichever of the three official upgrade paths fits your situation, plus what to do when Windows Update stalls or throws an error, using only the steps Microsoft documents.
What the End of Windows 10 Support Actually Means
Microsoft's wording is direct: "Support for Windows 10 ended on October 14, 2025." Your computer does not shut off or stop working on that date. What stops is the steady stream of updates that keep the system patched.
After that cutoff, Windows 10 PCs no longer receive software updates, security updates or fixes, or technical support. Microsoft warns that this puts the device at greater risk for viruses and malware, since newly discovered vulnerabilities will no longer be closed. Version 22H2 is the final version of Windows 10, so there is no newer Windows 10 release waiting in the wings.
If upgrading is not an option for a particular machine, Microsoft offers Extended Security Updates (ESU), which keep security fixes coming to an enrolled Windows 10 PC through October 12, 2027, or you can move to a new Windows 11 PC. Our Windows 10 end of life guide explains the free and paid ways to enroll. For most people, the free in-place upgrade is the cleanest route.
Confirming the Free Upgrade Applies to Your Machine
Microsoft is specific about who gets the upgrade at no cost: "It's free. But only Windows 10 PCs that are running Windows 10, version 22H2 and meet the minimum hardware specifications will be able to upgrade." That is two conditions to satisfy, not one.
First, your PC needs to be running Windows 10, version 22H2. Second, the hardware has to meet the Windows 11 minimum requirements. Meet both and the upgrade costs nothing. Fall short on the hardware side and your options are staying on Windows 10 with ESU coverage, which has free and paid ways to enroll, or moving to a new Windows 11 device.
Run the Free PC Health Check App First
Before you touch any installer, let Microsoft's own compatibility tool tell you where you stand. The PC Health Check app is free and gives a comprehensive eligibility verdict, including the reason a device is or is not eligible and what you can do about it.
- 1.Download the PC Health Check app from
aka.ms/GetPCHealthCheckAppand install it. - 2.Use Search on the taskbar to find PC Health Check and open it.
- 3.Select
Check nowto run the eligibility scan.
If the app reports your PC is ready, you can proceed. If it flags a problem, the result names what is missing, so you know whether it is something fixable or a hard hardware limit.
The Exact Windows 11 Hardware Requirements
It helps to know the actual bar your machine has to clear, because the PC Health Check verdict maps directly to these specifications.
Processor: 1 GHz or faster with 2 or more cores on a compatible 64-bit processor that appears on Microsoft's list of approved CPUs.
RAM: 4 GB.
Storage: 64 GB or larger.
System firmware: UEFI, Secure Boot capable.
TPM: Trusted Platform Module (TPM) version 2.0.
Graphics: compatible with DirectX 12 or later with a WDDM 2.0 driver.
Display: high definition (720p) greater than 9 inches diagonal, 8 bits per color channel.
One more thing to plan for: Windows 11 Home, and Windows 11 Pro for personal use, require internet connectivity and a Microsoft account during initial device setup. Have those ready before you begin so the process does not stall at the sign-in screen.
Upgrade Method 1: Let Windows Update Do It
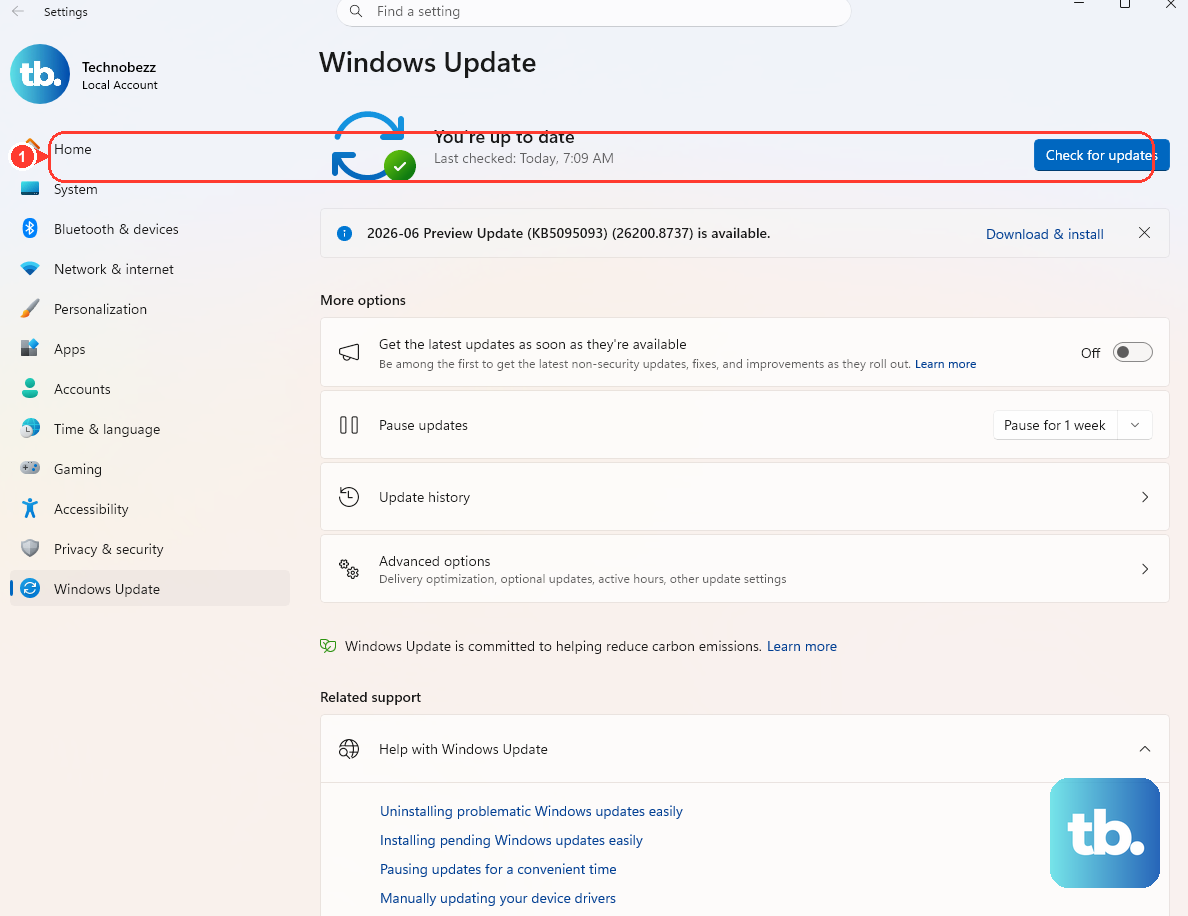
This is the path Microsoft recommends. The company suggests waiting until Windows Update offers the upgrade for your specific device, because that timing reflects when your hardware has been cleared as ready.
On Windows 10, open Settings > Update & Security > Windows Update, then select Check for updates. If your device is eligible, you will see the option to download and install Windows 11. Follow the prompts and accept the license terms.
Because it is delivered through Windows Update itself, this method tends to be the smoothest of the three. If the upgrade is not offered yet, that is normal, and one of the next two methods can get you there sooner.
Upgrade Method 2: The Windows 11 Installation Assistant
When Windows Update has not surfaced the offer and you do not want to wait, the Windows 11 Installation Assistant lets you start the upgrade manually on the machine you are already using.
Download the Installation Assistant from Microsoft's official Download Windows 11 page. It requires a Windows 10 or 11 license, Windows 10 version 2004 or higher, and an x64 processor (it does not run on ARM). Microsoft still recommends running PC Health Check first to confirm the device meets the minimum requirements.
Run the Windows 11 Installation Assistant. If the device meets the hardware requirements, it offers to install Windows 11. Select Accept and install, and when prompted, select Restart now to complete the installation.
Upgrade Method 3: Build Installation Media
The third option creates bootable installation media, which is useful if you want a reusable USB drive or prefer to run setup yourself. You must be an administrator to use this tool.
On Microsoft's official Download Windows 11 page, under Create Windows 11 Installation Media, select Download Now to get MediaCreationTool.exe. After that, run the tool to create a bootable USB or DVD. From within Windows, run setup.exe from the media to upgrade in place, or boot from the media to install.
A Windows 11 license, or a qualifying Windows 10 device, is required for this route. For most home users upgrading an eligible PC, the in-place option started from within Windows keeps your files and apps intact.
When Windows Update Stalls: Run the Troubleshooter
If the upgrade or any update refuses to install, start with the official Windows Update Troubleshooter before doing anything more involved. The path differs depending on which version of Windows you are on right now.
On Windows 10, go to Start > Settings > Update & Security > Troubleshoot > Additional troubleshooters > Windows Update and choose Run the troubleshooter. On Windows 11, run the troubleshooter in the Get Help app, or go to Start > Settings > System > Troubleshoot > Other troubleshooters and select Run next to Windows Update.
When it finishes, restart the device and check for updates again. The troubleshooter resolves many common stalls on its own, without a single command.
Resetting Windows Update Components by Hand
If the troubleshooter does not clear the problem, Microsoft documents a manual reset of the Windows Update components. Every command below must be run from an elevated Command Prompt (Command Prompt opened as administrator), with the syntax exactly as Microsoft publishes it.
Start by stopping the relevant services, one command at a time. Run net stop bits, then run net stop wuauserv. After that, run net stop cryptsvc.
Next, delete the BITS queue files with this command: Del "%ALLUSERSPROFILE%\Application Data\Microsoft\Network\Downloader\qmgr*.dat"
Only if the earlier steps did not resolve the issue, rename the cache folders so Windows rebuilds them. Run Ren %Systemroot%\SoftwareDistribution\DataStore DataStore.bak, then run Ren %Systemroot%\SoftwareDistribution\Download Download.bak. Once that is done, run Ren %Systemroot%\System32\catroot2 catroot2.bak.
Then restart the services you stopped. Run net start bits, then run net start wuauserv. Finally, run net start cryptsvc.
Microsoft also notes a shorter alternative for resetting the Windows Update Agent from an elevated Command Prompt: run net stop wuauserv, then rd /s /q %systemroot%\SoftwareDistribution, then net start wuauserv. This deletes the SoftwareDistribution folder, which Windows rebuilds on the next update check, so use it only after the steps above have not worked.
Making Sense of Error 0x80070643 During the Process
If you see error 0x80070643, shown as ERROR_INSTALL_FAILURE, tied to a Windows Recovery Environment (WinRE) update, do not panic. Microsoft says the message can be misleading: "This error message is not accurate and does not impact the update or device functionality." The WinRE update is typically applied successfully after the device restarts.
Microsoft adds that Windows Update "might continue to display the update as failed until the next daily scan, at which point the update is no longer offered and the failure message is cleared automatically." A restart followed by patience often resolves the cosmetic failure on its own.
A genuine WinRE update failure, by contrast, is usually caused by a recovery partition that is too small. The update needs at least 250 MB of free space in the recovery partition to install, and the related event is System event ID 4502, "Windows Recovery Environment servicing failed." You can check WinRE status and partition location safely with reagentc /info.
To actually fix an undersized partition, Microsoft provides two remediations: KB5028997, which walks through manually resizing the partition, and KB5035679, which runs a script to resize the recovery partition for you. Resizing a partition involves disk-level commands that differ by hardware configuration and can risk data if done wrong, so follow the chosen Microsoft article exactly rather than improvising. Back up important files first, and do not run partition commands without working through that article step by step.
Frequently Asked Questions
Is upgrading from Windows 10 to Windows 11 really free?
Yes, for qualifying machines. Microsoft states the upgrade is free, but only Windows 10 PCs running version 22H2 that also meet the Windows 11 minimum hardware specifications can take it. If your hardware does not qualify, your alternatives are Extended Security Updates on Windows 10, which run through October 12, 2027, or a new Windows 11 PC.
What happens if I stay on Windows 10 after support ended?
The PC keeps working, but it no longer receives software updates, security updates or fixes, or technical support. Microsoft warns this leaves the device at greater risk for viruses and malware, because newly found vulnerabilities will not be patched. Version 22H2 is the final Windows 10 release.
How do I know whether my PC can run Windows 11?
Install the free PC Health Check app from aka.ms/GetPCHealthCheckApp, open it from the taskbar Search, and select Check now. It gives a comprehensive eligibility verdict and explains why a device is or is not eligible, plus what you can do if it falls short.
Should I use Windows Update, the Installation Assistant, or the Media Creation Tool?
Microsoft recommends waiting for Windows Update to offer the upgrade through Settings > Update & Security > Windows Update, since that is the smoothest path. If the offer has not appeared, use the Installation Assistant to start manually, or the Media Creation Tool to build bootable installation media and run setup.exe yourself.
Is the 0x80070643 error during a recovery update a serious problem?
Often it is not. For the WinRE update, Microsoft says the 0x80070643 message can be inaccurate and does not impact the update or device functionality, and the update typically applies after a restart with the failure clearing on the next daily scan. A real failure usually means the recovery partition lacks the required 250 MB of free space, which is fixed by following KB5028997 or KB5035679.