

To turn off Private Wi-Fi Address on iPhone, open Settings > Wi-Fi, tap the More Info button (ⓘ) beside your connected network, then tap Private Wi-Fi Address and choose Off. These steps use the menus in iOS 18 or later. On iOS 14 through iOS 17, open Settings and tap Wi-Fi, tap Edit if you aren’t currently connected to the network, then tap its More Info button and turn Private Wi-Fi Address off. The change applies separately to each network, so repeat it for any other network where you want private addressing turned off.
The short version
- Connected network: Open its details in Wi-Fi, tap Private Wi-Fi Address, then choose Off.
- Saved network: Tap Edit in Wi-Fi to access a saved network while disconnected.
- Address choice: Off uses your iPhone’s hardware MAC address, while Fixed still uses a private address.
- Network scope: Change the setting separately for each network you want to use without a private address.
| Method or place | Where to start | What it does |
|---|---|---|
| Connected network | Settings > Wi-Fi > More Info | Lets you choose Off for the connected network on iOS 18 or later. |
| Saved network while disconnected | Wi-Fi > Edit > More Info | Lets you choose Off for a saved network on iOS 18 or later. |
| Administrator-managed configuration profile | Your network administrator | Disables private addressing for the specified network through device management. |
| Manually installed configuration profile | A profile supplied by your network administrator | Sets private addressing to disabled for the specified network. |
| Configuration profile installation | Settings > Profile Downloaded | Installs the supplied profile; this is the delivery step for the manual method. |
Turn it off for your connected network
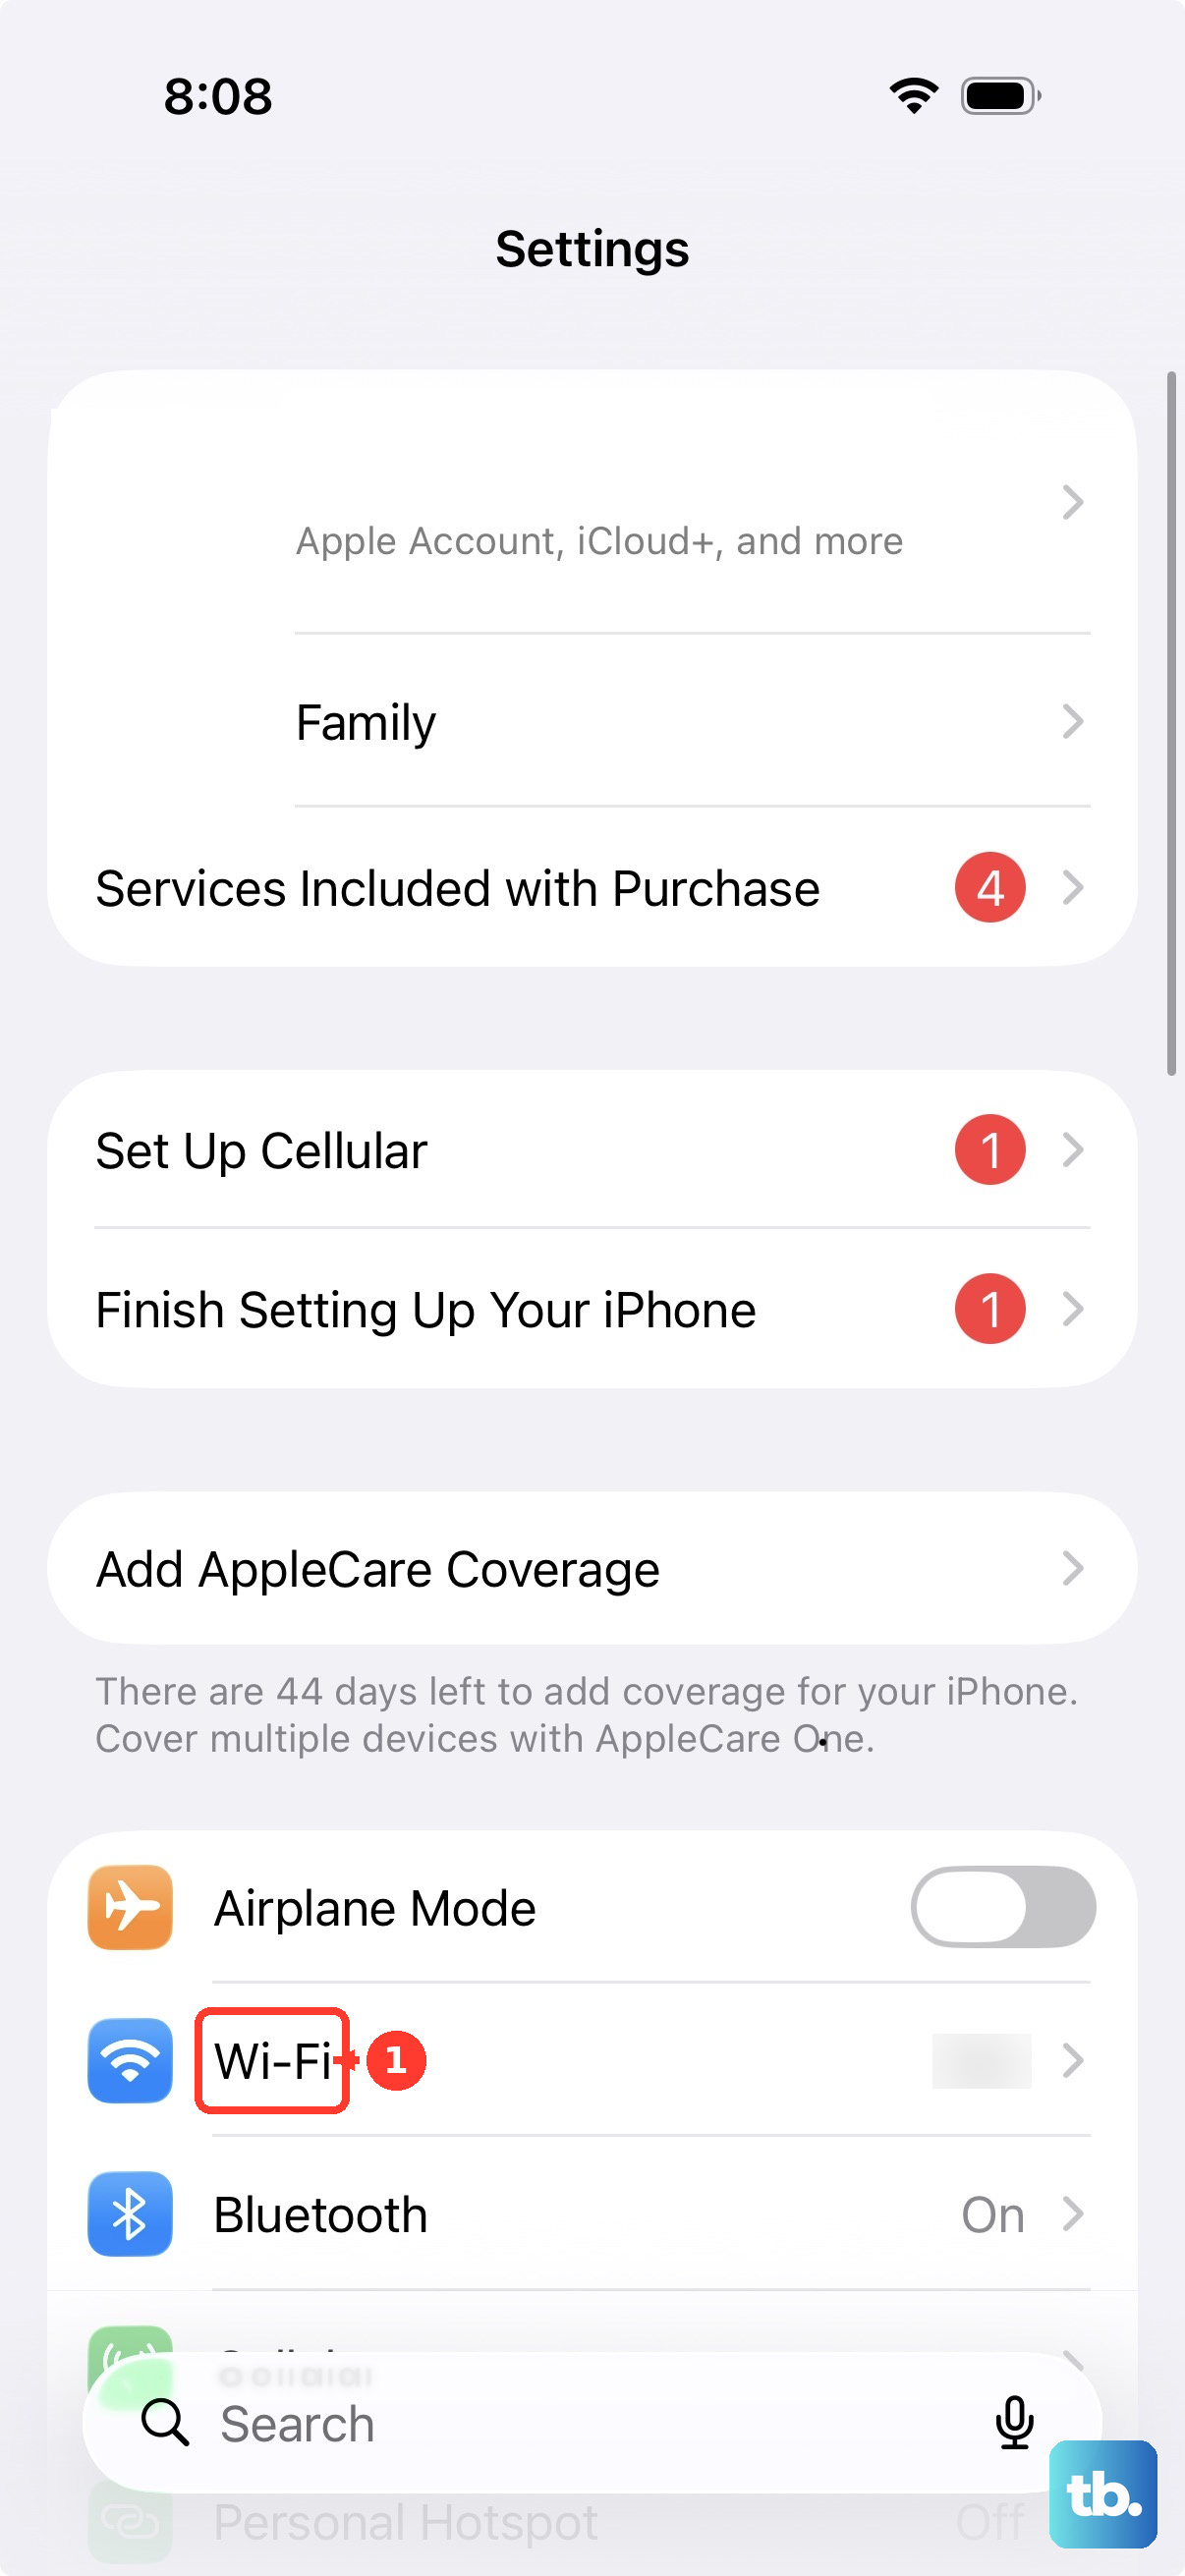
Open Settings and tap Wi-Fi. Find the network your iPhone is connected to, then tap its More Info button (ⓘ). Tap Private Wi-Fi Address, then choose Off.
With Off selected, your iPhone uses its hardware MAC address for that network. If you need to identify that address, you can find the MAC address on iPhone.
Change a saved network while disconnected
For a saved network you are not currently connected to, open Settings > Wi-Fi and tap Edit. Tap the More Info button (ⓘ) beside the saved network. Open Private Wi-Fi Address and choose Off. You can make this change while disconnected, without first connecting to that network.
Check your choice for each network
Choose Off to disable private addressing, since Fixed still uses a private address. To check your selection, return to the network’s Private Wi-Fi Address setting and confirm that Off is selected.
Repeat the change for each additional network where you want to use the hardware MAC address. For another connected network, open its details with the More Info button in Wi-Fi. For another saved network while disconnected, start with Edit, then open that network’s details and select Off under Private Wi-Fi Address.
Forgetting a network or resetting network settings does not constitute disabling private addressing. Use the network’s Private Wi-Fi Address setting for this task. If you instead want to stop the Wi-Fi connection itself, follow the steps to turn off Wi-Fi completely on iPhone.
Ask your administrator to configure a managed iPhone
On a managed iPhone running iOS 14 or later, your network administrator can disable private addressing for a specified network through device management. Ask the administrator to configure the network’s com.apple.wifi.managed payload with DisableAssociationMACRandomization set to true, then deploy it through mobile device management (MDM). Management-console menu labels depend on the provider.
Apple says installation through MDM also locks the setting for that network, with an enforcement bug affecting earlier iOS 26 releases. If the setting is locked on your work or school iPhone, ask your administrator to handle the configuration.
Get a configuration profile for manual installation
On an iPhone running iOS 14 or later, you can also disable private addressing with an appropriately configured profile installed manually. Obtain the network configuration profile from your network administrator. It must contain com.apple.wifi.managed with DisableAssociationMACRandomization set to true for the intended network.
Install the supplied configuration profile
Download the supplied profile from its website or email, then open Settings. Tap Profile Downloaded, then tap Install. Follow the onscreen instructions to finish installation. Install the profile within eight minutes of downloading it.
If you are outside a familiar location, Apple says you must first disable Stolen Device Protection before installing the profile. Re-enable Stolen Device Protection after installation.
Frequently Asked Questions
Why do older instructions show an on and off switch?
Apple assigns the older switch interface to iOS 14 through iOS 17. On iOS 18 or later, the dedicated menu uses Private Wi-Fi Address with an Off option.
Do you need to download anything for the ordinary Settings method?
No product download is required for the ordinary Settings procedure. Downloads apply to the configuration profile method, where your network administrator supplies the profile.
Can you change the setting after installing a profile manually?
Yes, Apple says manual installation sets the configured value but leaves it changeable by the user. A manually installed profile therefore does not lock your selection.
Why could a managed iPhone still allow Fixed or Rotating?
Apple reports that iOS 26.6 fixed a bug that allowed users to select Fixed or Rotating even when MDM had disabled private addressing. If your managed iPhone shows that behavior on an earlier iOS 26 release, ask your administrator about the update containing the fix.