

To record your MacBook screen, press Shift + Command + 5, choose a recording area, and click Record; use Voice Memos for audio only or QuickTime Player for camera video. You can add microphone narration through Screenshot’s Options menu. Capturing sound from your apps uses a separate option that depends on your macOS version.
The short version
- Screen recording: Press Shift + Command + 5 to open Screenshot and choose what to record.
- Sound: Choose a microphone in Options, and on macOS 27 Golden Gate or later select Include System Audio for app sound.
- Audio only: Open Voice Memos, click Record, and click Done to save.
- Camera video: In QuickTime Player, choose File > New Movie Recording.
| What you want to record | App | Starting point |
|---|---|---|
| MacBook screen | Screenshot | Shift + Command + 5 |
| Screen through QuickTime | QuickTime Player | File > New Screen Recording |
| A voice memo | Voice Memos | Record |
| Audio with input and quality choices | QuickTime Player | File > New Audio Recording |
| Camera video with audio | QuickTime Player | File > New Movie Recording |
| A quick camera clip | Photo Booth | Video, then Record Video |
| Audio alongside notes | Notes | Attachment > Record Audio |
| Screen or app sound on macOS Ventura 13 or later | OBS Studio | Sources, then Start Recording |
Record your MacBook screen
Press Shift + Command + 5 to open Screenshot, which requires macOS Mojave 10.14 or later. Choose Record Entire Screen to capture the full display or Record Selected Portion to capture an area. For a portion, adjust the recording area, then click Record to start.
On macOS Tahoe 26 or later, you can also choose Record Selected Window, then click the window to record it. On earlier macOS versions that support Screenshot, choose Record Selected Portion and adjust the area around the content you need.
QuickTime Player provides another way to reach the same controls on current Macs. Open it and choose File > New Screen Recording, then choose your recording area and Options in Screenshot. Click Record to begin.
Add your voice and app sound
Before starting a screen recording, open Options in Screenshot and choose a microphone for narration. Select your built-in microphone or a compatible external microphone to capture your voice.
For sound generated by apps, select Include System Audio in Options on macOS 27 Golden Gate or later. You can also select a microphone to include narration in the recording. Make both selections before you start.
If you use macOS Ventura 13 through macOS Tahoe 26, OBS Studio provides a route to recording app sound. OBS Studio 30 or later can capture all desktop audio or a selected application’s audio without additional audio routing drivers. Follow the OBS setup below to choose the sound you want.
Choose where to save and stop recording
Open Options before recording to choose a Save to destination and adjust the timer. Screen recordings save to the desktop by default. Select Show Mouse Clicks to make clicks visible in the recording.
On a supported Mac running macOS Tahoe 26 or later, you can also choose SDR (Most Compatible) or HDR in Options. These choices depend on both your Mac and its macOS version.
When you finish, click the Stop button in the menu bar or press Command + Control + Esc. Find the recording on your desktop unless you changed the destination. If you started through QuickTime Player, you can stop with the same menu-bar control.
Record audio without video
For a voice recording, open Voice Memos and click Record. Click Pause to take a break and Resume to continue the same recording. Finish by clicking Done to save it.
Voice Memos works with your MacBook’s built-in microphone, a supported headset, or an external microphone. To choose your system input, open the Apple menu > System Settings > Sound > Input and select the device. Adjust its input-volume slider if that control is available.
QuickTime Player lets you choose the microphone and recording quality within the recorder. Open File > New Audio Recording, then open the device-selection menu and choose your Microphone and Quality. Click Start Recording, then Stop Recording when finished. Choose File > Save and name the file to keep your recording.
Record video with your camera
Open QuickTime Player and choose File > New Movie Recording. Open the device-selection menu and select your Camera, Microphone, and Quality. You can use your MacBook’s built-in camera or a compatible external camera.
Click the recording button to start, then click it again to stop. Choose File > Save to save the video. You can select the camera and microphone separately when you want to use a different compatible audio input.
Photo Booth offers another way to open your Mac camera and record a clip. Open Photo Booth, then click View Photo or View Video if you need to return to the capture view. Click Video at the bottom left, then click Record Video to begin. Click Stop when finished.
Keep an audio recording with your notes
In Notes, open the note where you want the recording. Click Attachment > Record Audio, then click Record. Use Pause and Resume as needed, and finish with Pause followed by Done.
To save the audio outside the note, hold Control and click the recording, then choose Save Attachment. Choose a destination and click Save. Use an iCloud note for full functionality, since notes stored with other account providers can have limitations.
Set up OBS for screen and application audio
For control over separate screen, camera, and audio sources, download OBS Studio from its official download page. Choose Mac, then the installer for your Mac’s processor: Download Installer (arm64/Apple Silicon) or Download Installer (x86_64/Intel). The current OBS release requires macOS Ventura 13 or later.
Open OBS and run Tools > Auto-Configuration Wizard. In Sources, click + and add macOS Screen Capture. Set Method to Display Capture, Window Capture, or Application Capture, then select the display, window, or application.
In OBS Studio 30 or later on macOS Ventura 13 or later, add macOS Audio Capture and choose all desktop audio or a particular application. Alternatively, use the audio captured by macOS Screen Capture. Check the source’s audio meter before recording.
Select audio devices under Settings > Audio and configure recording settings under Settings > Output. Click Start Recording in Controls to begin. If an older OBS setup uses the deprecated Window or Display sources, replace those sources with macOS Screen Capture.
Fix missing sound or blocked recording access
If your voice is missing, check the microphone selected in the recording app. You can also troubleshoot microphone input problems by selecting the intended device in System Settings > Sound > Input. Adjust its input-volume slider when that control is available.
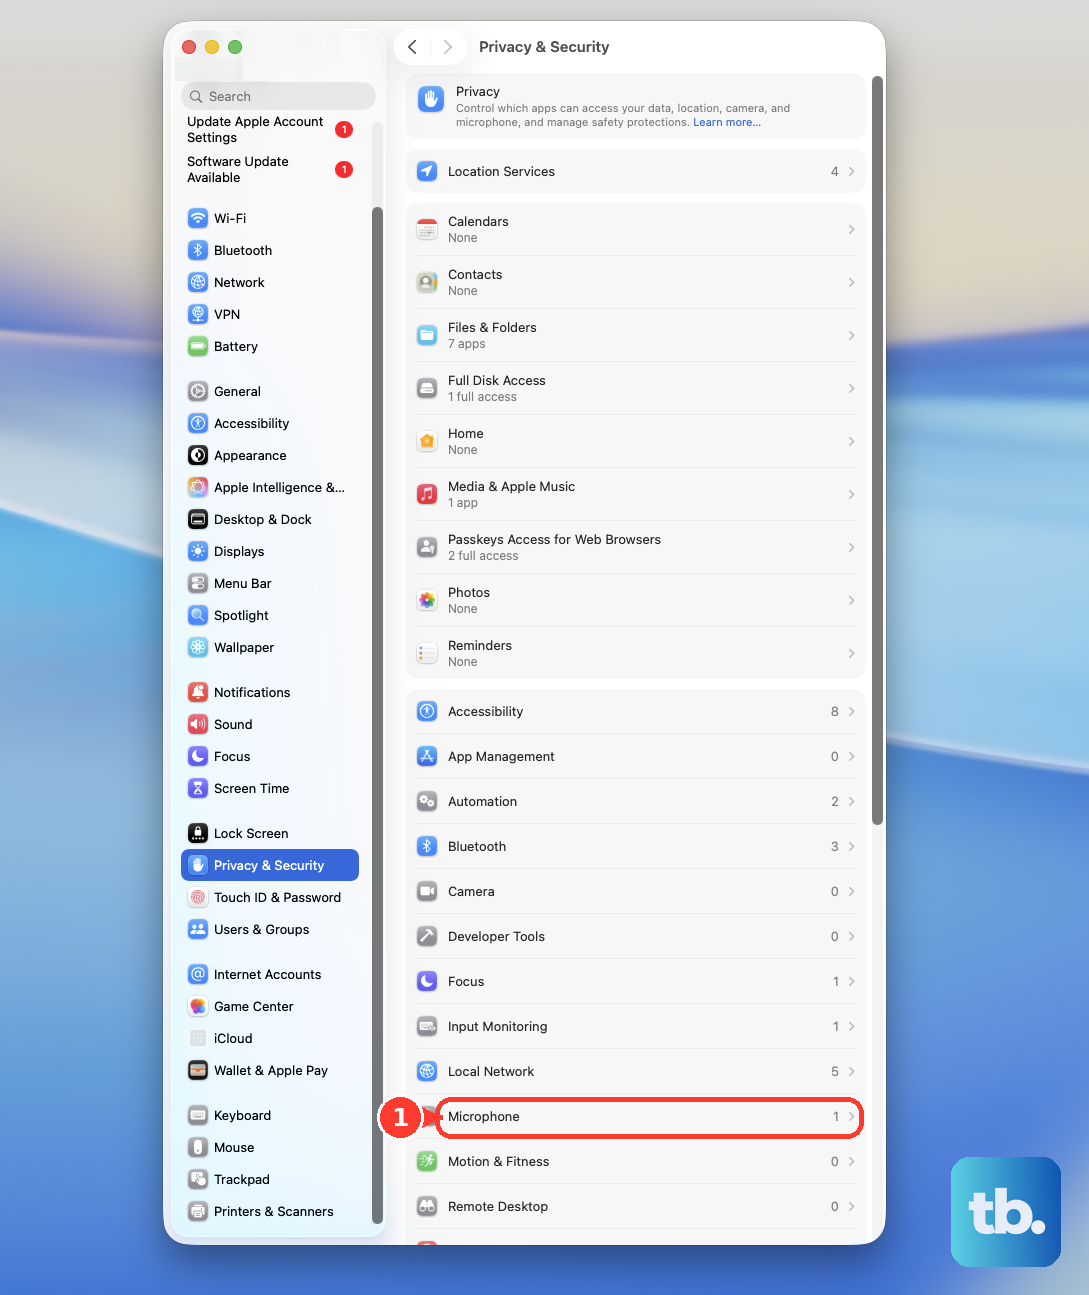
For microphone access on current macOS, open the Apple menu > System Settings > Privacy & Security > Microphone. Turn on access for the recording app or browser. This permission allows capture, but you still start recording inside the app.
For screen capture, open the Apple menu > System Settings > Privacy & Security > Screen & System Audio Recording. Turn on access for the app you are using, or use Add to add the application where available. Current macOS can show separate lists for screen and audio capture together or audio capture alone.
For camera access, open the Apple menu > System Settings > Privacy & Security > Camera and turn on access for the relevant app. Built-in apps such as Photo Booth automatically have camera access and may not appear in this list.
On a managed work or school Mac, administrator restrictions can deny camera, microphone, or screen recording access. Contact your work or school administrator if those restrictions prevent your app from recording.
Frequently Asked Questions
Can you pause an audio recording in QuickTime Player?
Hold Option while clicking the recording control to pause an audio recording. Click the control again to resume.
Can Voice Memos record stereo audio on a MacBook?
You can record stereo audio in Voice Memos when you use a stereo input source. Stereo recording depends on the input source you choose.
Can you record an iPhone or iPad screen onto your MacBook?
You can capture a connected iPhone or iPad screen with QuickTime Player. Connect the device to your Mac, open QuickTime Player, and choose File > New Movie Recording. In the device-selection menu, select the connected device under Camera, choose the microphone, and record. Choose File > Save to save the device’s screen recording.
How do you skip the Photo Booth countdown?
Hold Option while clicking Record Video in Photo Booth. This skips the countdown for that recording.
Can Notes turn a recording into text?
You can get audio transcriptions in Notes on a Mac with M1 or later and a supported device language. Double-click the audio recording to review its transcript, and on macOS 27 Golden Gate also click the Transcription button. Use More > Find in Transcript to search it or Copy Transcript to copy the text.