

To add a horizontal line in Google Docs on a computer, place your cursor where you want the divider, then choose Insert > Horizontal line. Use this built-in command for a simple divider, a paragraph border for adjustable styling, or a drawing for a custom-length line.
The desktop steps use the Google Docs web editor and require editing access to your document. On Android, iPhone, or iPad, you can insert a prepared divider image; Android also offers freehand markups.
The short version
- Simple divider: Position your cursor and choose Insert > Horizontal line on a computer.
- Fast command search: Open toolbar Search and type
horizontal lineto find the insertion command. - Adjustable appearance: Use Borders and shading for a paragraph border or Drawing for a custom line.
- Phone or tablet: Insert a prepared horizontal-line image through Insert > Image.
| Method | Where to use it | Best fit |
|---|---|---|
| Built-in horizontal line | Desktop web editor | Simple divider |
| Toolbar search | Desktop web editor | Finding the insertion command |
| Keyboard menu navigation | Desktop web editor | Inserting without a mouse |
| Voice command | Computer with current Chrome, Edge, or Safari | Spoken insertion with account and document languages set to English |
| Paragraph border | Desktop web editor | Adjustable color, width, and dash |
| New drawing | Desktop web editor | Custom-length divider |
| Drawing from Drive | Desktop web editor with access to the drawing | Reusable linked design |
| Divider image | Desktop web editor | Prepared decorative line |
| Android divider image | Google Docs Android app | Prepared mobile divider |
| iPhone or iPad divider image | Google Docs iOS or iPadOS app | Prepared mobile divider |
| Android markup | Google Docs Android app | Freehand annotation |
| Underscores | Text editing | Text-based signature blank |
| Apps Script | Google Docs with script access and permissions | Repeated automated insertion |
Insert a simple horizontal line
Open your document in the Google Docs desktop web editor and click where the divider should appear. Choose Insert > Horizontal line to insert it at the cursor position. For adjustable color, dash patterns, or a custom-length stroke, use a paragraph border or drawing instead.
Find the command with search or the keyboard
Position your cursor, then click Search in the toolbar or choose Help > Search the menus. Type horizontal line, then select the matching command.
To open search with the keyboard, press Alt + / on Windows or ChromeOS, or Option + / on Mac. Type horizontal line and select the matching command. These shortcuts open command search; they do not insert a line by themselves.
You can also navigate the Insert menu entirely by keyboard after positioning your cursor. On Windows in Chrome, press Alt + I; in other Windows browsers, press Alt + Shift + I. On ChromeOS, press Alt + I, or on Mac, press Control + Option + I. Use Up arrow or Down arrow to reach Horizontal line, then press Enter.
Menu shortcuts depend on your browser, keyboard layout, and language. If a shortcut does not open the intended menu, click toolbar Search and find the command there.
Customize a divider with a paragraph border
Use a paragraph border when you want control over the divider’s width, color, dash pattern, and padding. Click within the paragraph you want to border, or select several paragraphs, then choose Format > Paragraph styles > Borders and shading.
Under Position, activate the bottom, top, or between-paragraph border icon, depending on where the line belongs. Leave unwanted edges inactive so the result has only the borders you want. Adjust Border width, Border dash, Border color, and Paragraph padding, then click Apply. Your divider remains part of the paragraph formatting.
Draw a custom line or reuse one from Drive
For a custom-length or decorative divider, choose Insert > Drawing > New in the desktop editor. Open Select line, choose Line, and drag horizontally across the canvas. Use the drawing toolbar to adjust the stroke appearance, then save the drawing to insert it into your document as a drawing object.
To reuse a design, prepare a Google Drawing containing a horizontal stroke and make sure you can access it in Drive. In your document, choose Insert > Drawing > From Drive. Choose the drawing and click Select.
The inserted drawing stays linked to its source unless you unlink it. When the source changes, select the inserted drawing and click Update to refresh it.
Create a text-based signature blank
For a simple text-based blank, type underscore characters such as __________. This option remains text, so its appearance depends on the font and text layout.
Add a divider image or mobile markup
Prepare an image containing the horizontal line you want to insert. On a computer, choose Insert > Image, then choose Upload from computer, Stock & web, Drive & Photos, Camera, or By URL as appropriate. Select the image and click Insert or Open, depending on the source.
You can also drag an existing image into the desktop document or copy and paste it. These methods insert an image rather than an editable horizontal rule.
On Android, open your document in the Google Docs app and position the insertion point. Tap Insert > Image, choose the image source, then tap your prepared horizontal-line image.
On iPhone or iPad, open the document in the Google Docs app and position the insertion point. Tap Insert > Image, choose the source, then tap the prepared divider image.
For a freehand line in the Android app on a phone, tap Insert > Add markups. On a large screen, tap the Markups toggle in the top toolbar. Choose Pen, draw horizontally with your finger or a stylus, then tap Close in the markups toolbar. This creates a freehand annotation, so use a prepared divider image when you want a particular straight-line design.
Insert a line by voice and fix microphone issues
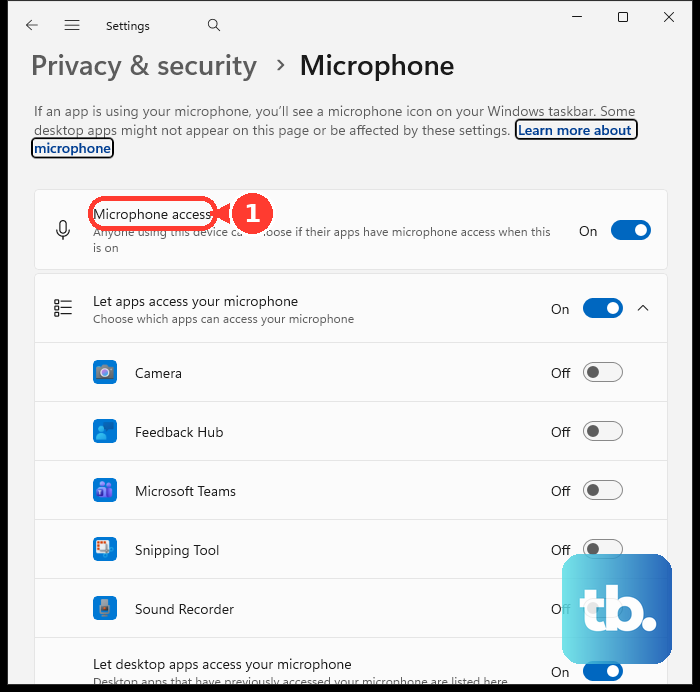
Voice insertion works on a computer using a current Chrome, Edge, or Safari browser. Both your account language and document language must be English for voice commands. Enable the computer’s microphone and position the cursor where you want the line.
Choose Tools > Voice typing, then click the microphone. Say Insert horizontal line, and click the microphone again when you finish. If microphone access prevents voice insertion, use Insert > Horizontal line to complete the task from the menu.
Automate horizontal line insertion with Apps Script
For repeated or automated insertion, use a document-bound Apps Script with appropriate document permissions. This requires Apps Script access and document authorization. Obtain the active document tab’s body with this expression:
DocumentApp.getActiveDocument().getActiveTab().asDocumentTab().getBody()On that body, call appendHorizontalRule() to add a rule at the end. To insert a rule at a specified body-child position, call insertHorizontalRule(childIndex) instead.
Frequently Asked Questions
What document format do you need to position a divider image?
Image wrapping and positioning controls require Pages format in the desktop web editor. Use that format when your divider image needs those layout controls.
Why did a line drawn with Android markups change size?
Android markups attach to nearby content and can change size when that content changes. Your freehand line can therefore resize along with the content it is attached to.
Can your organization disable voice typing?
Yes, your organization’s administrator can disable voice typing. That restriction affects the voice route, so you can use the menu insertion method when you have editing access.
Do you need to install anything to insert a line on a computer?
No download or installation is needed for the web methods. You can insert a line through the Google Docs desktop web editor.
Do you need a Google Workspace account to insert a horizontal line?
No, the built-in horizontal-line command works with both personal and Google Workspace accounts in the desktop web editor. You need editing access to the document in either case.