

To disable the NVIDIA overlay on Windows 10 or Windows 11, open NVIDIA App, select Settings > Features, and turn off NVIDIA overlay under Overlay. Close and relaunch any running game, because the setting takes effect the next time a game launches.
These steps apply to current NVIDIA App 11.x installations where the overlay is available. You can also hide statistics, silence notifications, or stop capture individually. The keyboard shortcuts below assume you have kept their default assignments.
The short version
- Disable everything: Turn off NVIDIA overlay in NVIDIA App, then relaunch your game.
- Hide performance numbers: Press Alt + R while statistics are visible.
- Close the panel: Press Alt + Z while the panel is open to dismiss it temporarily.
- Remove the application: Uninstall NVIDIA App to remove the application that supplies the overlay.
| Method or option | Where to act | Result or requirement |
|---|---|---|
| Disable the entire overlay | NVIDIA overlay switch | Takes effect when you relaunch the game |
| Close the panel with the keyboard | Alt + Z | Dismisses the open panel temporarily |
| Close the panel with its button | Top-right × | Leaves overlay features enabled |
| Dismiss the panel with a click | Outside the panel | Supported from NVIDIA App 10.0.1 onward |
| Hide statistics with the keyboard | Alt + R | Hides visible performance numbers |
| Hide statistics through the menu | Statistics | Turns off the statistics display |
| Hide the activation notice | Open/close in-game overlay notification | Suppresses that notice only |
| Hide all overlay notifications | Show notifications | Also suppresses capture notices |
| Change the activation shortcut | Open/close the in-game overlay shortcut | Changes how you open the panel |
| Disable filters and Photo mode | Game filters and Photo mode | Disables this feature group after a game relaunch |
| Turn off Instant Replay | Alt + Shift + F10 | Stops rolling capture when it is enabled |
| Stop manual recording | Alt + F9 or Record | Stops an active recording |
| Hide statistics with G-Assist | Text or voice request | Requires installed G-Assist and supported hardware |
| Hide statistics with a connected assistant | Compatible assistant with MCP access | Requires NVIDIA App 11.0.9.5xx or later and a running overlay |
| Stop capture with a connected assistant | Request the individual capture feature to stop | Requires NVIDIA App 11.0.9.5xx or later and a running overlay |
| Uninstall through Windows Settings | Windows 11 Installed apps | Removes NVIDIA App |
| Uninstall through Control Panel | Programs and Features | Requires an NVIDIA App entry on Windows 10 or Windows 11 |
| Start removal from Start | NVIDIA App in All apps | Requires the app to appear in that list |
| Uninstall with WinGet | Terminal | Requires WinGet to detect NVIDIA App |
| Install only the graphics driver | NVIDIA Graphics Driver installer choice | Remove an existing NVIDIA App first |
| Get NVIDIA App if needed | NVIDIA's official product page | For installation or reinstallation |
| Get a standalone driver installer | NVIDIA's driver download page | Choose the appropriate GPU and Windows combination |
| Install optional G-Assist | NVIDIA App Home > Discover | Requires a system meeting G-Assist requirements |
Turn off the entire NVIDIA overlay
On Windows 10 or Windows 11, open NVIDIA App and select Settings > Features. Under Overlay, turn off NVIDIA overlay, then close and relaunch your running game. NVIDIA says the change takes effect the next time a game launches, so relaunch before checking whether the overlay is disabled.
You do not need to download anything to switch off an existing overlay. If you need to install or reinstall NVIDIA App separately, use NVIDIA's official product page.
Close the panel or hide performance statistics
With the overlay panel open, press Alt + Z to close it. You can also click the × at the panel's top right or click outside the panel. These actions dismiss the panel while leaving its features enabled.
To hide visible performance numbers, press Alt + R. This shortcut toggles the statistics display while keeping the main overlay available.
For the menu option, press Alt + Z, or click the overlay button at the top right of NVIDIA App. Select Statistics, then turn off Show statistics in heads up display.
Stop overlay notifications
On Windows 10 or Windows 11, press Alt + Z and select the overlay's Settings gear, then Notifications. Under General, uncheck Open/close in-game overlay. This suppresses the activation notice while retaining overlay functionality.
To suppress all overlay notifications, turn off Show notifications on that same page. This includes capture notices, but capture itself continues until you stop it.
Change the shortcut that opens the overlay
On Windows 10 or Windows 11, press Alt + Z, then select the overlay's Settings > Shortcuts. Select Open/close the in-game overlay and assign a different key combination. NVIDIA gives Ctrl + Alt + Z as an example.
Reassigning the shortcut helps prevent accidental activation while keeping the overlay available. After changing it, use your new combination wherever the steps call for Alt + Z.
Turn off capture or game filters separately
When Instant Replay is enabled, press Alt + Shift + F10 to turn it off. This stops rolling capture while leaving other overlay features available. Because the shortcut toggles the feature, use it only when Instant Replay is currently on.
To stop an active manual recording, press Alt + F9 again. Alternatively, open the overlay and use Record to stop it.
On Windows 10 or Windows 11, open NVIDIA App and select Settings > Features. Under Overlay, turn off Game filters and Photo mode, then relaunch your game. This disables that feature group while leaving the main overlay separately controllable.
If you still want occasional screenshots after disabling the overlay, see how to take a screenshot on your device. If you want to retain NVIDIA's other overlay tools, use the individual capture controls above.
Use an assistant for statistics or capture
Project G-Assist can hide statistics through text or voice input on supported Windows 10 and Windows 11 systems. You need NVIDIA App 11.0.7 or later, driver 580.97 or later, and a supported RTX GPU with at least 6GB of VRAM. Voice input requires a GeForce RTX 30 series GPU or newer, and English is supported.
If you want this optional control and your system meets those requirements, open NVIDIA App, select Home > Discover, and install Project G-Assist. With it installed, press Alt + G and type Hide the performance overlay. Alternatively, use voice input and say Hide the performance overlay.
With a compatible assistant already connected to NVIDIA App, you can also ask it to hide the statistics overlay. This requires NVIDIA App 11.0.9.5xx or later, enabled MCP access, and a running overlay. On Windows 10 or Windows 11, you can find the connection settings in NVIDIA App under Settings > Features > AI Agents and App Connections.
Through that configured connection, request that the assistant turn off Instant Replay, turn off Highlights, or stop recording. NVIDIA provides separate controls for those capture features. These requests stop the selected feature while leaving the overlay itself enabled.
Uninstall NVIDIA App through Windows
Uninstalling NVIDIA App removes the application that supplies the overlay. On Windows 11, open Settings > Apps > Installed apps. Find NVIDIA App, select its three-dot menu, choose Uninstall, and complete the application's uninstaller.
On Windows 10 or Windows 11, you can also search Windows for Control Panel and open it. Select Programs > Programs and Features. If NVIDIA App is listed, right-click it, select Uninstall, and complete the application's uninstaller.
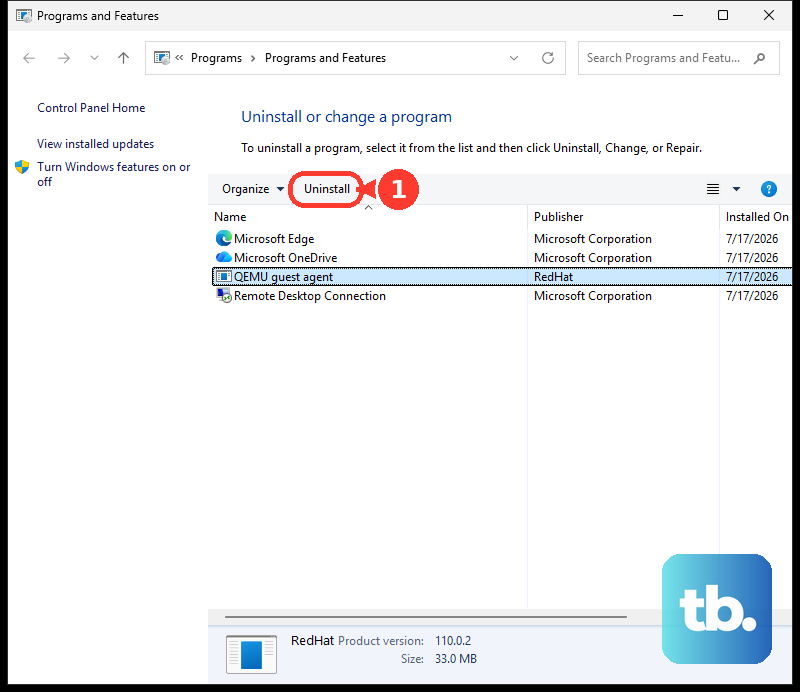
If NVIDIA App appears in your Start application list, open Start > All apps, find NVIDIA App, right-click it, and select Uninstall. If Windows opens Programs and Features, select NVIDIA App there and select Uninstall. Complete the application's uninstaller.
Remove NVIDIA App with WinGet
If you have Windows Package Manager installed, you can use its general application removal command when it detects NVIDIA App. Open a terminal and run the following command to identify the installed NVIDIA App entry:
winget list NVIDIAIf NVIDIA App appears, replace the placeholder in the following command with that entry's actual ID, then run it. Complete the application's uninstaller when it opens:
winget uninstall --id "<ID shown for NVIDIA App>" --exact --interactiveUse the ID belonging to NVIDIA App, since the listing can include other NVIDIA software. If WinGet does not detect the app, use a Windows removal route above where it is listed.
Choose a driver only installation later
For a subsequent standalone driver installation, you can choose the graphics driver without adding NVIDIA App. Remove an already installed NVIDIA App first. NVIDIA does not document the driver-only choice as a way to remove an existing copy of the app.
Get the appropriate standalone installer from NVIDIA's driver download page, then launch it. On the License screen of an installer offering the driver-only choice, select NVIDIA Graphics Driver. Select AGREE AND CONTINUE and complete the driver installation.
If you need help identifying your graphics driver before choosing a download, see how to find and update your graphics driver. Choose an installer appropriate for your NVIDIA GPU and Windows version.
Frequently Asked Questions
Do you need an NVIDIA account to change overlay settings?
You do not need an NVIDIA account to use the overlay settings. NVIDIA App's non-reward features do not require an account.
Does disabling the NVIDIA App overlay also disable the GeForce NOW overlay?
GeForce NOW has a separate overlay. You need to manage its overlay separately from the NVIDIA App setting.
Is Enable overlay in NVIDIA Control Panel the same setting?
No. The Enable overlay setting in NVIDIA Control Panel concerns OpenGL overlay planes, so it controls something different from the NVIDIA App overlay.
Do NVIDIA's MPO registry instructions disable this overlay?
NVIDIA's MPO registry instructions concern Windows Multi-Plane Overlay. They address a different feature from the NVIDIA App overlay.
Why do older instructions mention IN-GAME OVERLAY or SHARE?
Those labels belong to older GeForce Experience interfaces. NVIDIA says GeForce Experience is no longer supported, so use the current NVIDIA App instructions when you have NVIDIA App installed.