

To change the slide size in Google Slides, open the presentation on a computer, choose File > Page setup, pick Standard 4:3, Widescreen 16:9, Widescreen 16:10 or Custom from the list, and click Apply. The new size applies to every slide in the presentation at once, and Custom takes your own width and height in inches, centimeters, points or pixels.
We took our Garden Open Day Plan presentation through all four choices in Chrome and watched what happened to a title slide, a table and a row of coloured boxes. On our deck, Slides stretched the table and the shapes with the slide rather than cutting them off, and going back to the first size brought back the first look.
The short version
- Where: File > Page setup, near the end of the File menu, on a computer.
- Choices: Standard 4:3, Widescreen 16:9, Widescreen 16:10 or Custom, then Apply.
- Custom: the first box is the width, the second the height, and the unit list offers Inches, Centimeters, Points and Pixels.
- Whole deck: the size changes every slide, and our table and shapes were stretched with the slide, so check each slide after a change.
- Phone or tablet: open the presentation on a computer, because the slide size is set there.
Change the slide size on a computer
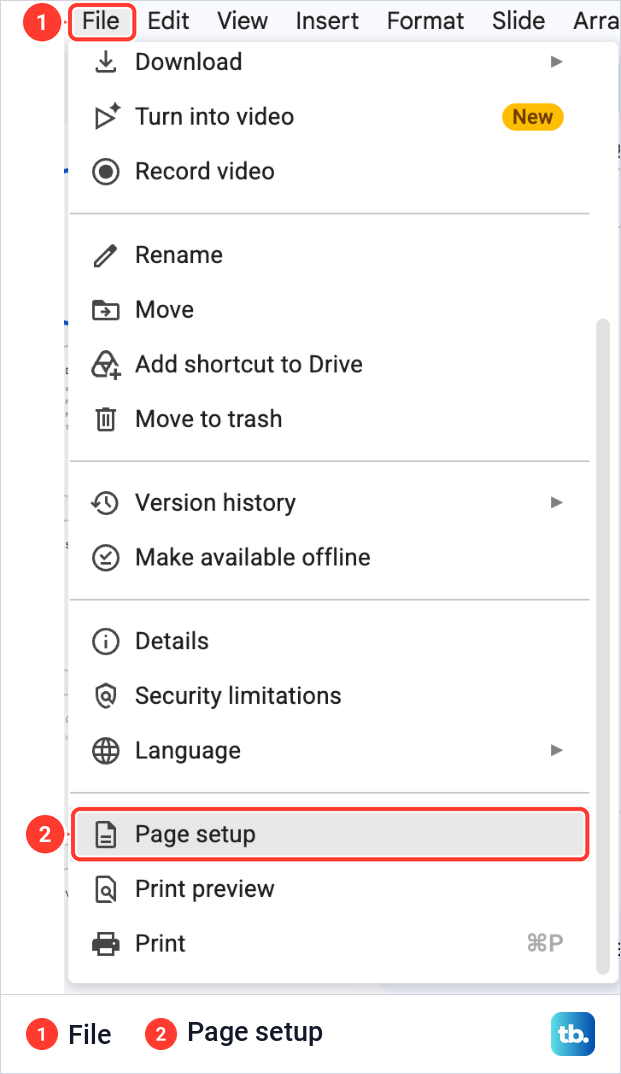
Open the presentation in Google Slides in your browser and click File in the menu bar. Page setup sits near the end of the menu, after Language and just above Print preview and Print. In a short browser window the File menu does not fit on the screen, so scroll down inside it until Page setup appears.
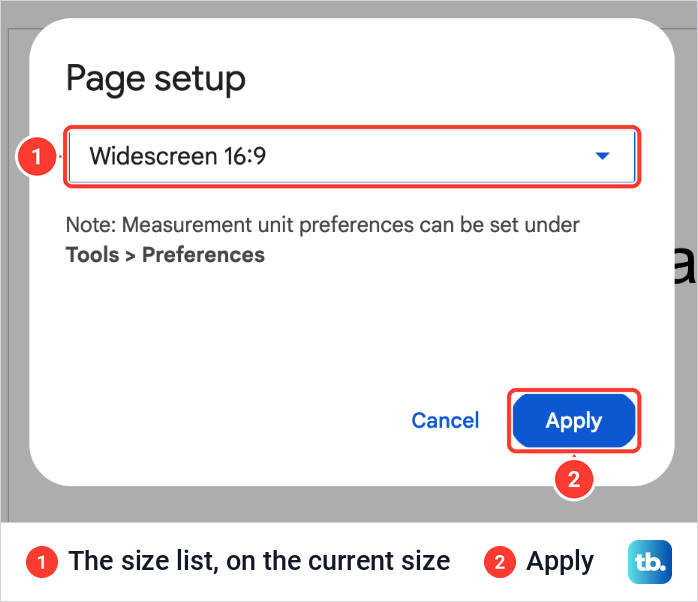
Page setup opens a small box with one list, which shows the size the presentation has now. Ours read Widescreen 16:9. Under the list is a note that measurement unit preferences are set under Tools > Preferences, and at the bottom are Cancel and Apply.
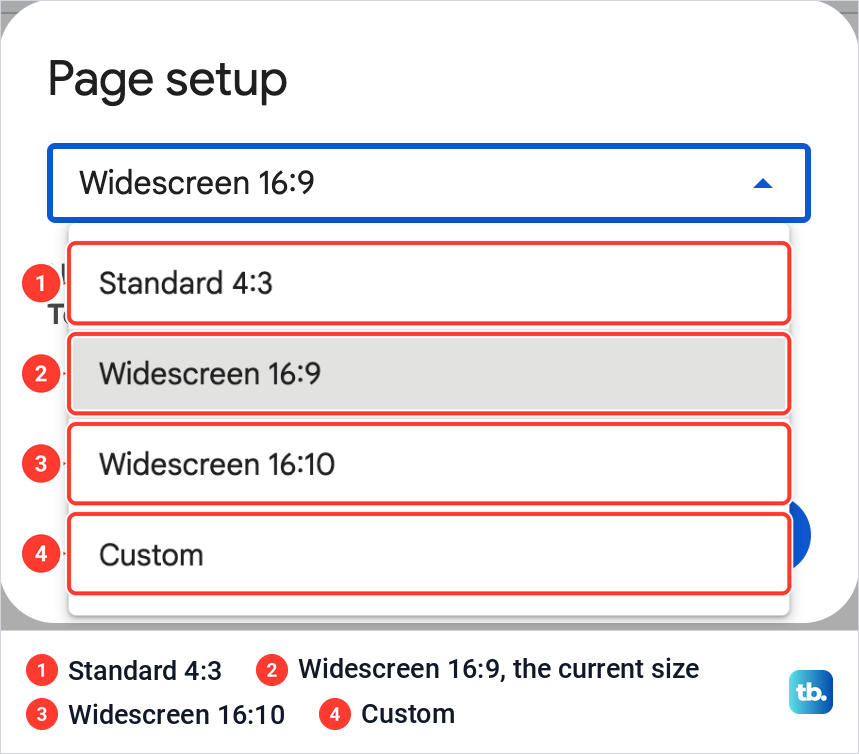
Click the list to open it. It holds four entries, Standard 4:3, Widescreen 16:9, Widescreen 16:10 and Custom, with the current size shaded.
Pick one and click Apply. The button is Apply, not OK, so if a set of instructions tells you to click OK, Apply is the button it means. The slides change the moment you click it, and Google Slides saves the change with the rest of the file as you work.
Google Slides sizes at a glance
The three preset sizes all kept the width at 10 inches on our deck and changed only the height. That is why a switch from 16:9 to 4:3 makes a slide taller rather than narrower, and why it helps to think of a custom size as width first.
| Choice in Page setup | Width x height in inches | In Page setup's Pixels unit | Pick it when |
|---|---|---|---|
| Widescreen 16:9 | 10 x 5.625 | Works out to 960 x 540 | You present on a widescreen monitor, TV or projector |
| Standard 4:3 | 10 x 7.5 | Works out to 960 x 720 | The projector or screen you will use is 4:3 |
| Widescreen 16:10 | 10 x 6.25 | 960 x 600 | The slides will show on a 16:10 laptop or monitor |
| Custom, portrait | 8.5 x 11, a letter-size page | Works out to 816 x 1056 | You need a page taller than it is wide |
| Custom, square | Works out to 11.25 x 11.25 | 1080 x 1080 | You need square slides, such as a square social post |
The pixel figures follow from what the box showed at 16:10. Our 10 by 6.25 inch slide read 960 by 600 once the unit was Pixels, which is 96 pixels to the inch. These are the numbers Page setup works in. No preset is right for every deck, so pick the shape of the screen or page the slides are made for.
The new size changes every slide
Page setup has no option for a single slide. We changed the size with different slides selected, the title slide, the Volunteer roles slide and the Supply checklist, and each time every thumbnail in the filmstrip changed along with the slide on the canvas. The box also opened each time on the size the deck had at that moment.
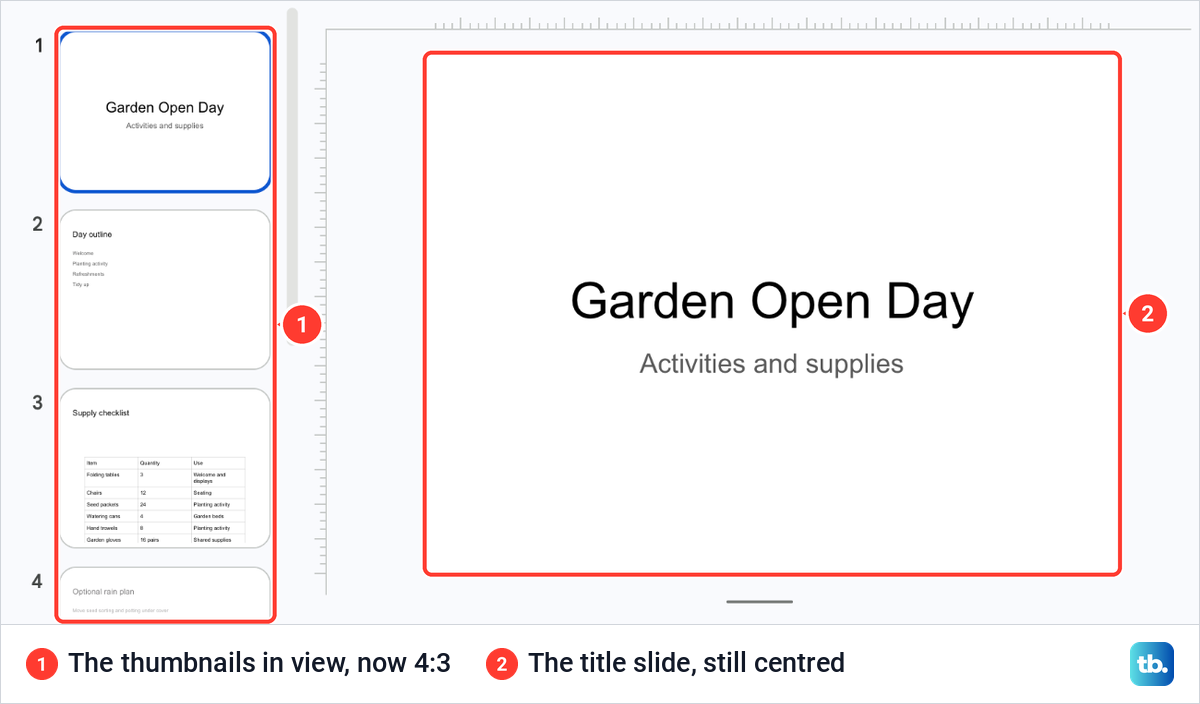
On the title slide, Standard 4:3 made the slide taller in proportion, and the title and subtitle stayed centred. If you need one slide in another shape, such as a portrait page in a widescreen deck, build it in a separate presentation.
How tables and shapes change with the size
On our deck, Slides did not crop the slides or add empty bands when the shape changed. It stretched the table, the rectangles and the text with the slide, and each stayed in its place. At 4:3 the slide keeps its 10-inch width and grows taller, so our Supply checklist table kept its width while its rows and its text grew with the slide's height. Bigger text in a cell of the same width is why Welcome and displays wrapped onto two lines.
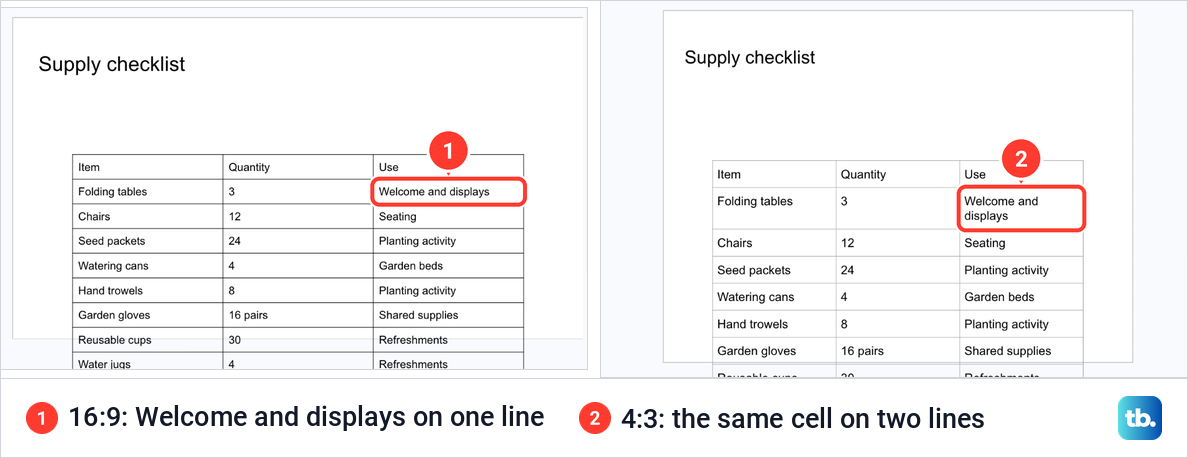
That table already ran past the slide's lower edge at 16:9, as we had built it, and it still did at 4:3. A new size does not tidy a crowded slide, so trim an overflowing table as well.
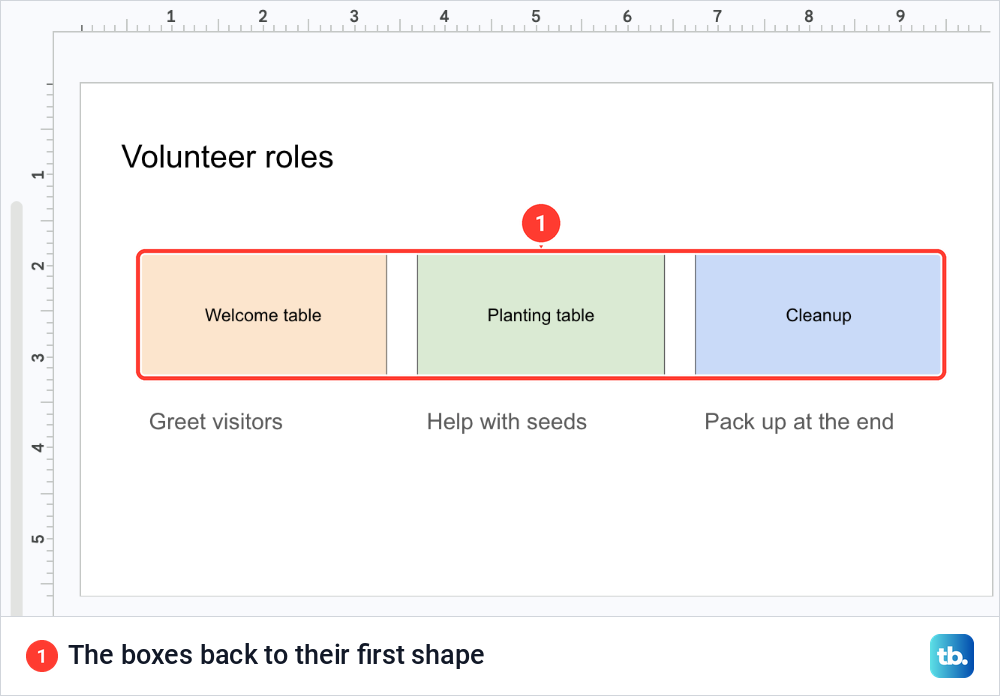
Shapes change shape too. Our Volunteer roles slide has three coloured rectangles with a caption under each. At 4:3 the rectangles kept their width and grew taller with the slide, so they were nearer squares, and the captions stayed under them, with nothing cut off. They can look narrower in the editor, because Fit shows the taller slide smaller in the window.
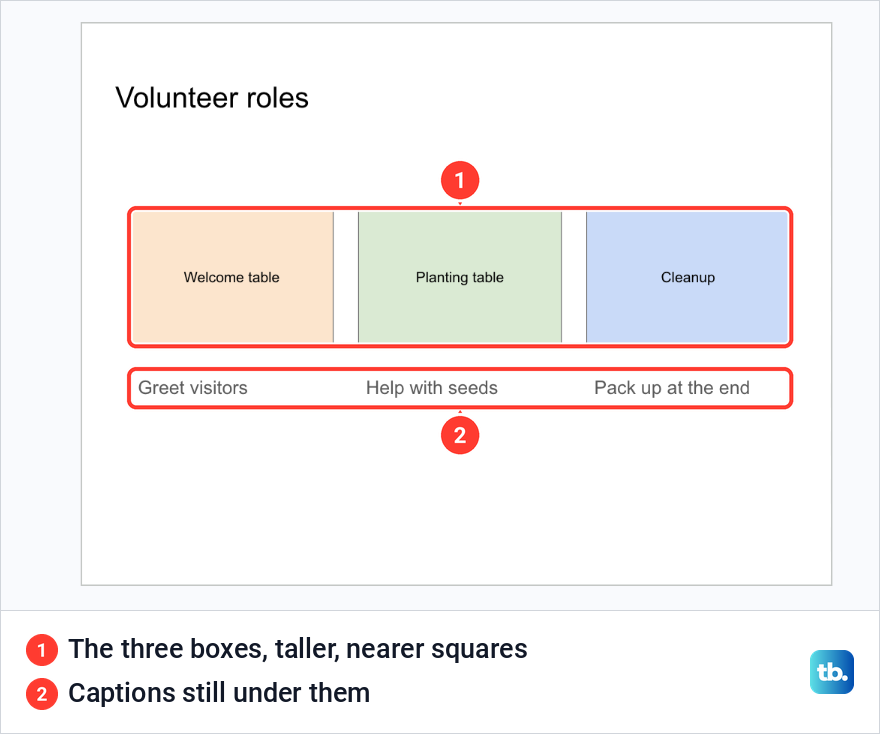
The Page setup box shows no preview, so you see the effect only after Apply. On a busy slide the difference is easy to miss, so look at a slide you know well before and after the switch.
Use the taller widescreen size on a matching screen
Widescreen 16:10 sits between the other two presets. At 16:10 our slide was a little taller than at 16:9, so the ruler down the side ran past 6 inches, where at 16:9 it stopped before 6. The Supply checklist table kept every cell on one line.
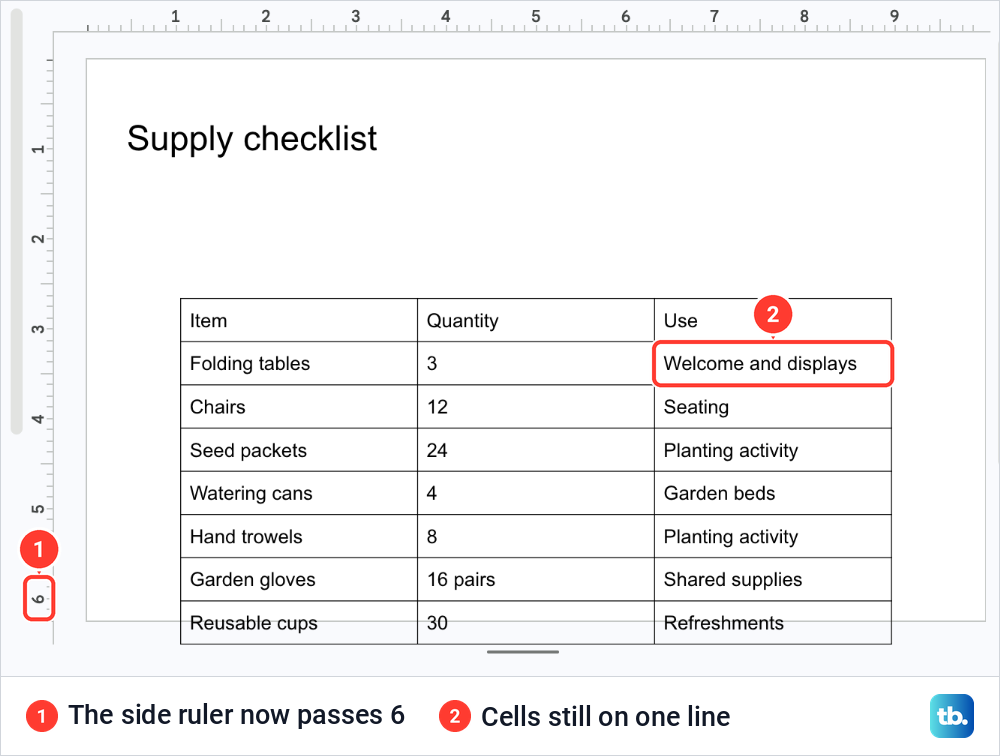
Of the sizes we tried, 16:10 changed our table the least, because the slide's height, and with it the text, grew only a little. Pick it when the laptop or monitor you present on has a 16:10 screen.
Set a custom width and height
Choose Custom in the list and two boxes appear, Width and Height, with a unit list beside them. They open on the size the presentation already has, which makes a handy starting point. Our 16:9 deck read 10 by 5.625, in Inches.
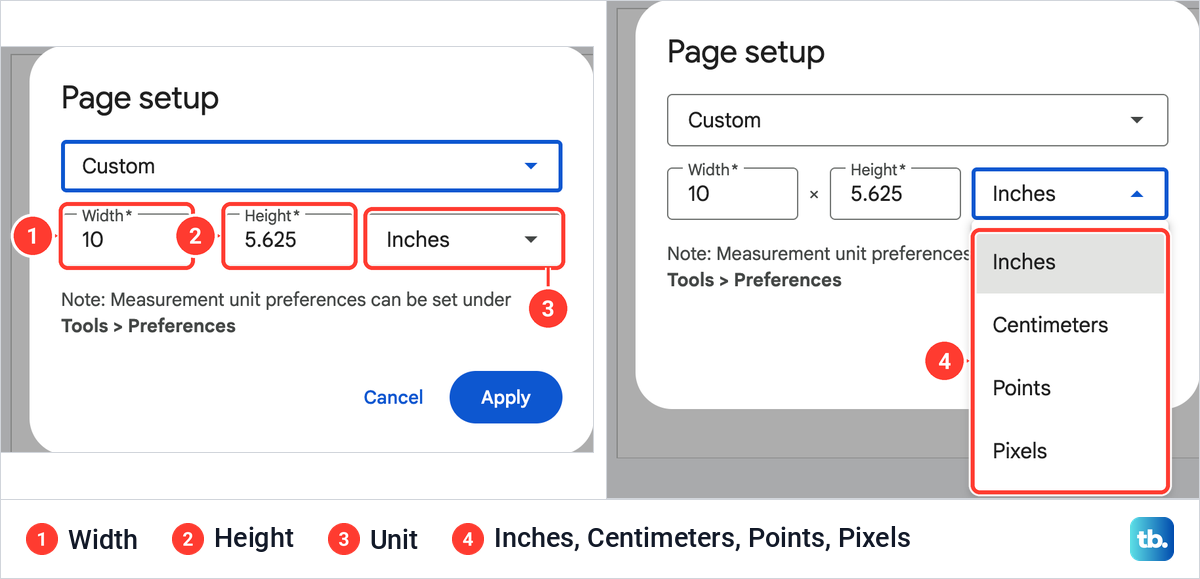
The unit list holds Inches, Centimeters, Points and Pixels. Choose the unit before you type, because the numbers in the boxes switch to the new unit as soon as you change it. Rulers and objects have a unit of their own, set under Tools > Preferences, as the note under the boxes says.
The first box is the width. Opened from 4:3, the boxes read 10 and 7.5, so we typed 8.5 in the first and 11 in the second and clicked Apply. The slide became taller than it is wide, the shape of a letter-size page in portrait.
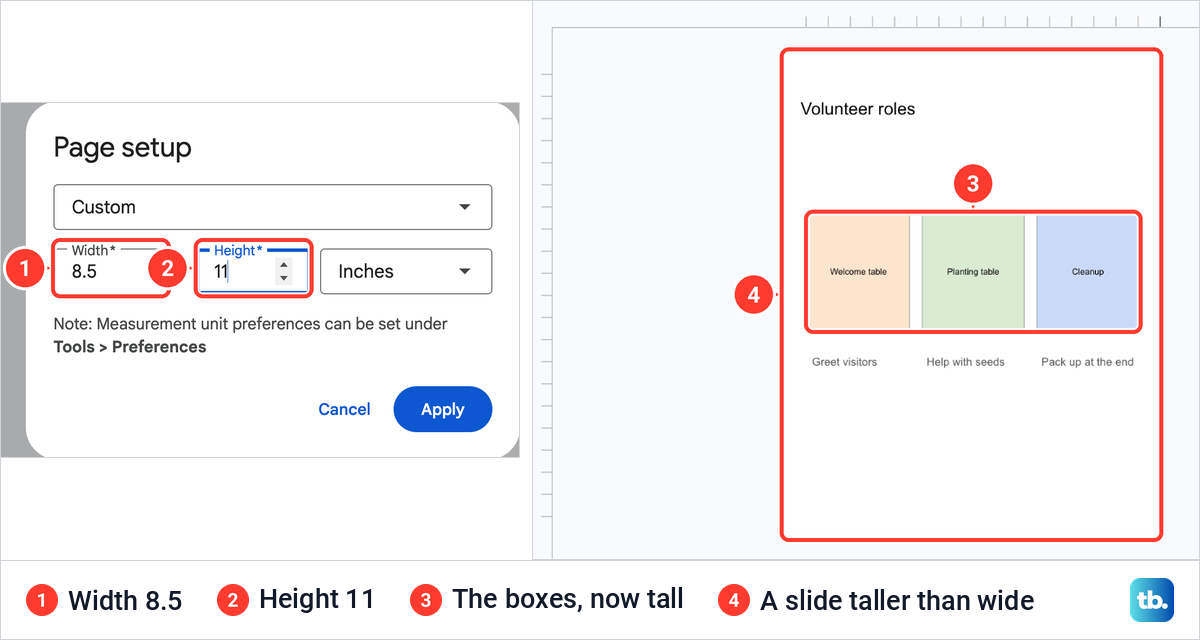
Our table and rectangles followed the new shape. The three rectangles on Volunteer roles turned into tall boxes, and nearly every cell of the Supply checklist table wrapped, with Folding tables, Seed packets and Watering cans each on two lines. Plan a portrait deck from the start where you can, rather than turning a finished widescreen deck on its side.
Make a square slide in pixels
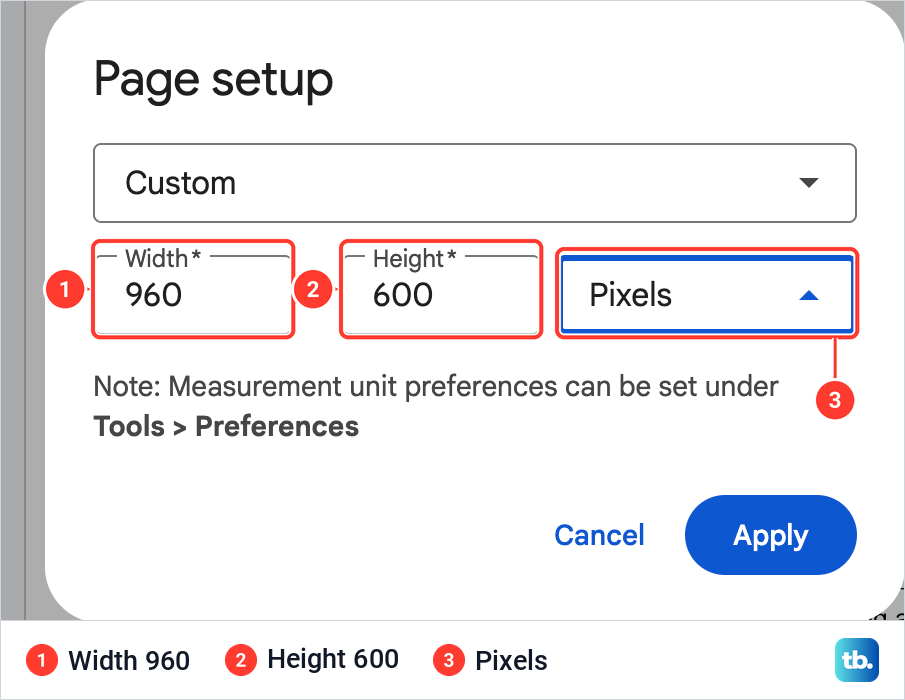
Pixels are the handiest unit when the size you were given is in pixels, such as a square post. At 16:10 the boxes read 10 and 6.25 in Inches, and 960 and 600 as soon as we chose Pixels in the unit list.
For a square, choose Pixels, type the same number in both boxes and click Apply. We typed 1080 in each, and the slide and every thumbnail turned square. The title slide stayed centred, while the table's cells wrapped.
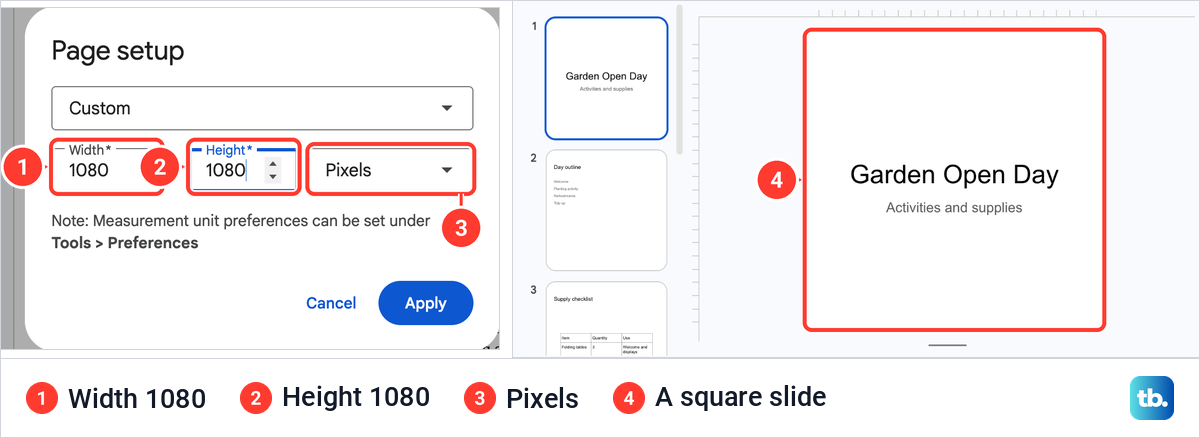
For a square deck, set the size before you add the content. The boxes and tables you draw will then fit the square from the start.
Go back to the original size
A size change can be reversed. After 4:3 and the 8.5 by 11 page, we chose Widescreen 16:9 and clicked Apply, and the deck went back to its first look. The rectangles on Volunteer roles returned to their wide shape, and the table cells went back onto one line.
After the square size we switched to 16:9 once more, and the Supply checklist table again matched its first look. If you fix objects by hand at a new size, check them again after you switch back, because a fix made for one shape may not suit the other.
Before you try several sizes on a presentation that matters, make a copy with File > Make a copy and choose Entire presentation. You can then compare the two side by side and keep the original untouched.
Check every slide after a resize
Click through the filmstrip after any change and look for tables that grew too tall, text that wrapped and shapes that lost their proportions. The thumbnails show most of it, but open each slide at full size to catch text that crosses an edge.
To put an object right, click it and drag a corner handle, or choose Format > Format options and open Size & Position to type exact numbers. Click Lock aspect ratio there to keep its height and width in proportion as you resize it. To bring an object back to the middle, use Arrange > Center on page.
Slide size is not zoom or layout
Two toolbar controls are easy to mistake for the slide size. Fit is the zoom, so it changes how big the slide looks in the window, not its size. Layout changes how the text and pictures are arranged on one slide.
Printing has its own settings as well. File > Print preview, just under Page setup, has its own list of page layouts, handouts among them, which shape the printed page rather than the slides. Page setup is where the size of the slides themselves is set.
Change the slide size on Android, iPhone and iPad
The Google Slides app on Android phones and tablets has no slide size setting. Open the presentation in Google Slides on a computer, choose File > Page setup, pick the size and click Apply.
The Google Slides app on iPhone and iPad works the same way. Open the presentation on a computer and change the size under File > Page setup.
How we tested this guide
We tested this in Google Slides on the web in Chrome on a Mac, changing the size of our Garden Open Day Plan presentation to each of the four choices in Page setup and back to Widescreen 16:9.
Frequently Asked Questions
Where is Page setup in Google Slides?
On a computer, open the File menu. Page setup is near the end, after Language and just above Print preview, so scroll down inside the menu if it is cut off.
Can I set an exact slide size in pixels?
Yes. Choose Custom in Page setup, set the unit list to Pixels, type the width in the first box and the height in the second, then click Apply.
Can one slide have a different size from the rest?
No. Page setup changes the whole presentation, whichever slide is selected. Put a slide that needs another shape in a separate presentation.
How do I make slides portrait in Google Slides?
Choose Custom and make the height larger than the width. We typed 8.5 and 11 in Inches, and the slides became taller than wide.
Will changing the slide size mess up my slides?
On our deck, Slides stretched the table and the shapes with the slide, so table cells wrapped and the rectangles changed proportion, but nothing was cut off. Check each slide after a change, and switch back to the first size if you do not like the result, which brought back our first look.
Can I change the slide size on my phone?
No. The Google Slides app on Android, iPhone and iPad has no slide size setting, so open the presentation on a computer and use File > Page setup.