Your iPhone usually installs carrier settings through a small prompt, but that prompt does not always appear exactly when you expect it. If cellular data, calling, a new SIM, or a new eSIM is acting up, start with Apple's on-device update paths and skip old desktop workarounds.
Here's what to tap, what to leave alone, and when carrier profiles or APN settings are the real issue.
Accept the carrier settings prompt
The most common carrier settings update is the one your iPhone shows automatically.
When Carrier Settings Update appears, tap Update. Keep the iPhone connected to Wi-Fi or cellular while it completes.
If the update is mandatory, tap OK. Mandatory carrier updates are already downloaded and installed, so this confirms the change.
Check manually in About
This fixes the basic iPhone carrier settings update problem when no pop-up appeared on its own.
Connect your iPhone to Wi-Fi or a cellular network.
Open Settings.
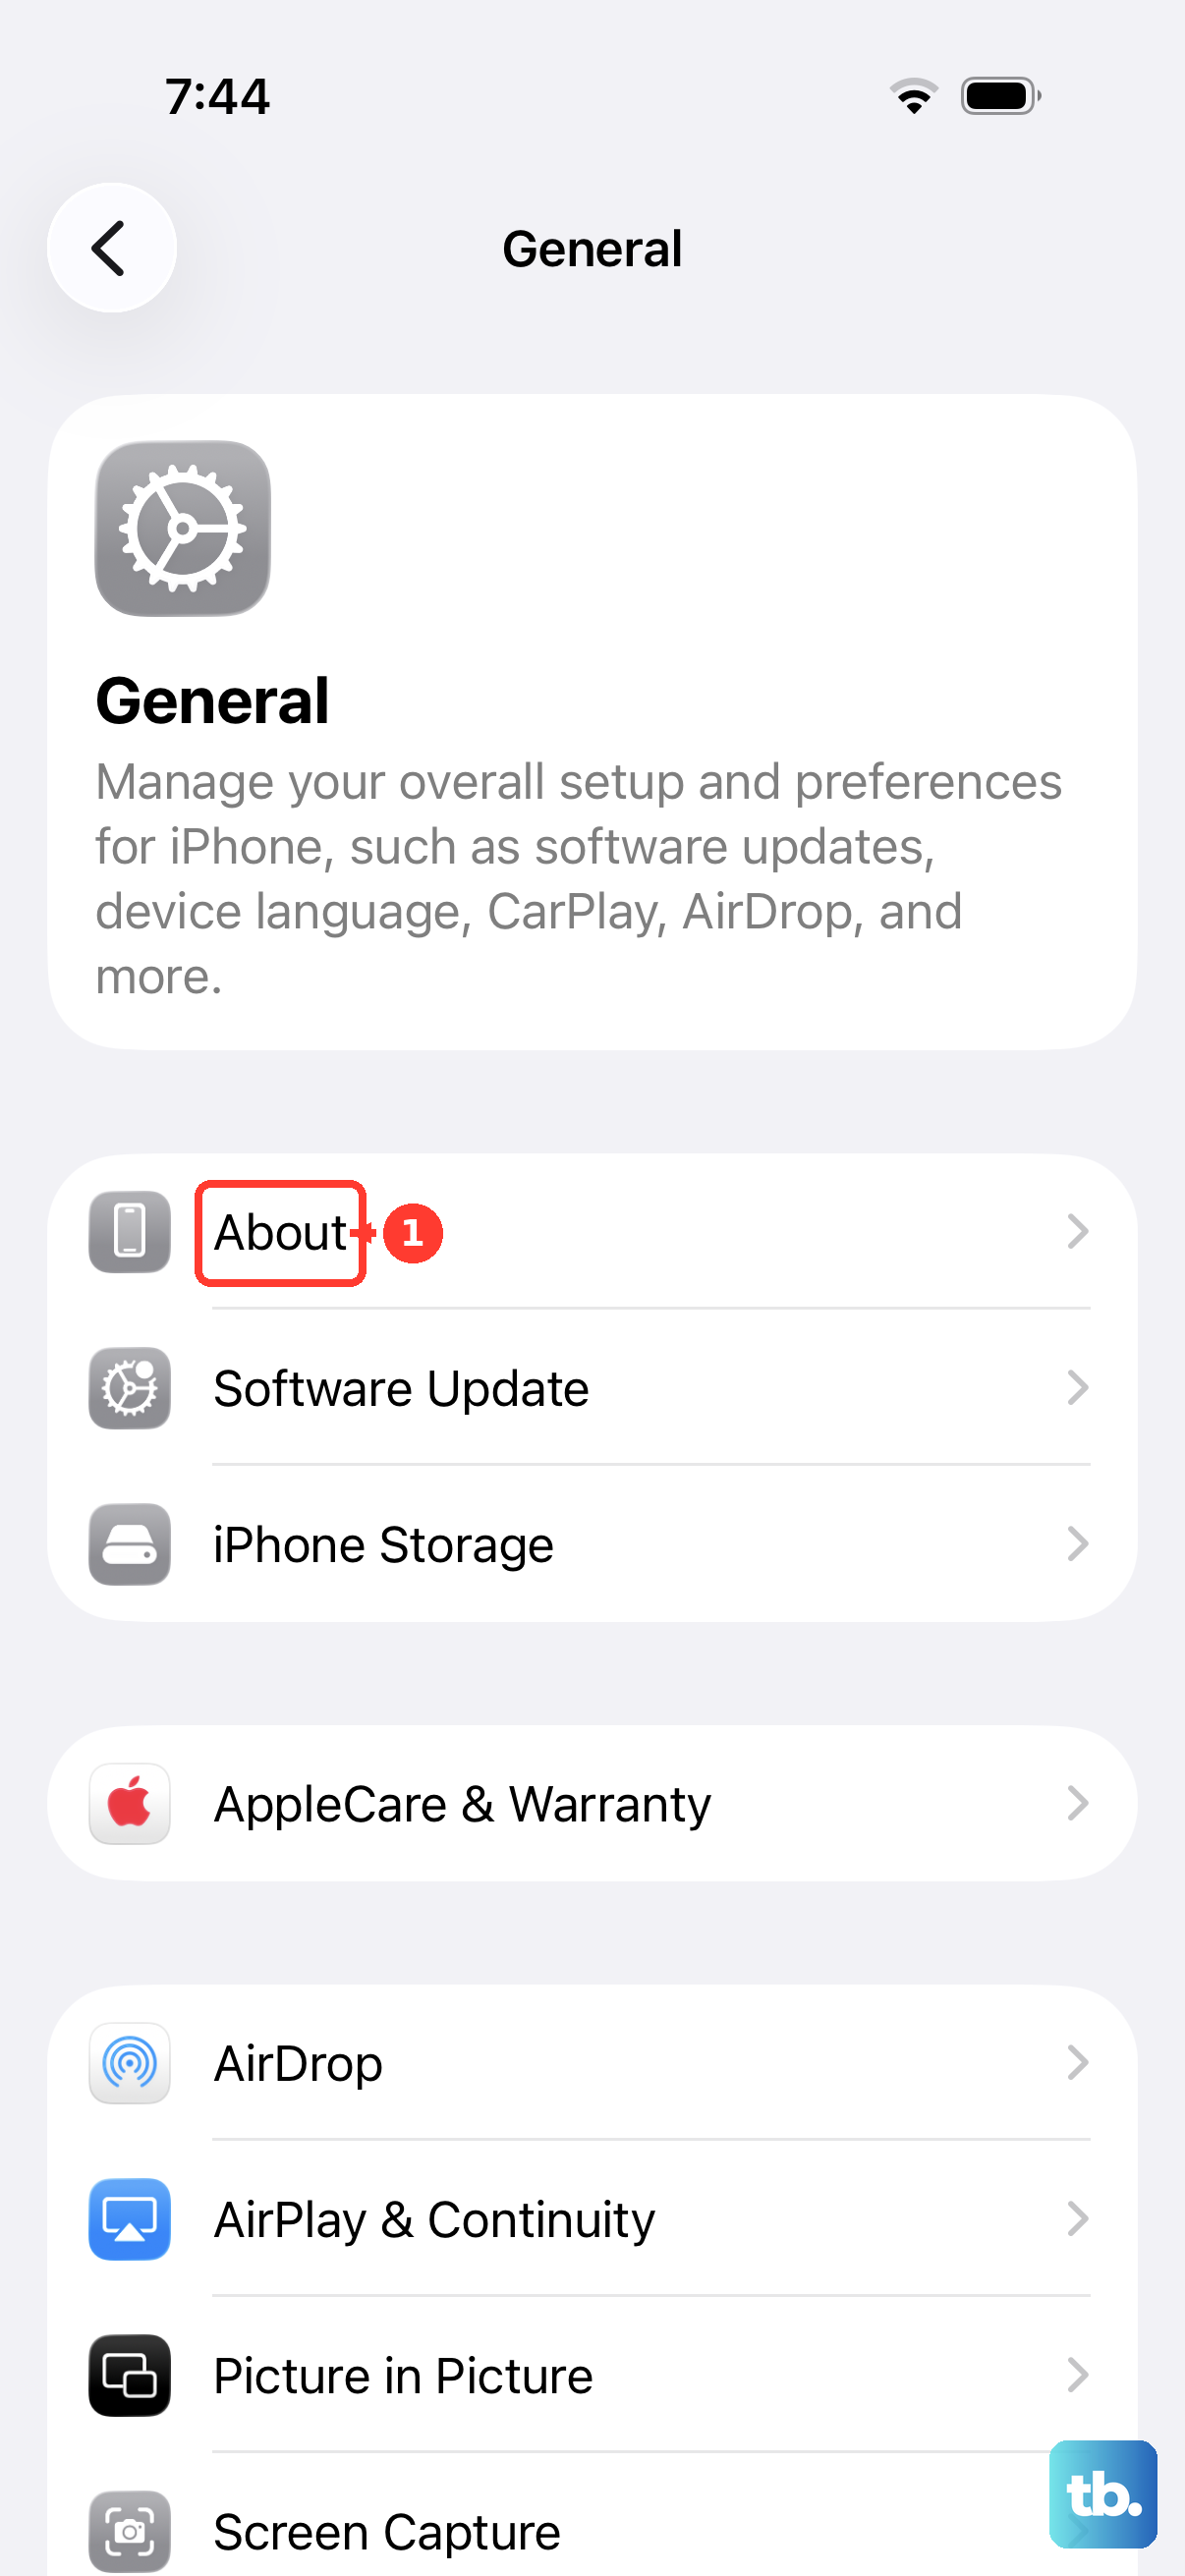
Tap General.
Tap About.
Follow the onscreen instructions if a carrier update prompt appears.
Use the eSIM carrier version check
For an iPhone using eSIM, the carrier version can also appear inside the eSIM section. Open Settings > General > About, then scroll to eSIM.
Next to Carrier, tap the version number. Choose OK or Update when your iPhone offers an update.
If this method fails, run the regular Settings > General > About check again while connected to Wi-Fi or cellular.
Refresh settings after adding a new SIM or eSIM
New service can need fresh carrier settings before everything works correctly.
- 1.Set up the new eSIM or insert the physical SIM.
- 2.Wait for the onscreen carrier settings message.
- 3.Tap Update when your iPhone offers it.
- 4.Tap OK when the update is mandatory.
Set up an eSIM before updating carrier settings
The most common reason a new eSIM cannot receive carrier settings is that the cellular plan has not been added yet.
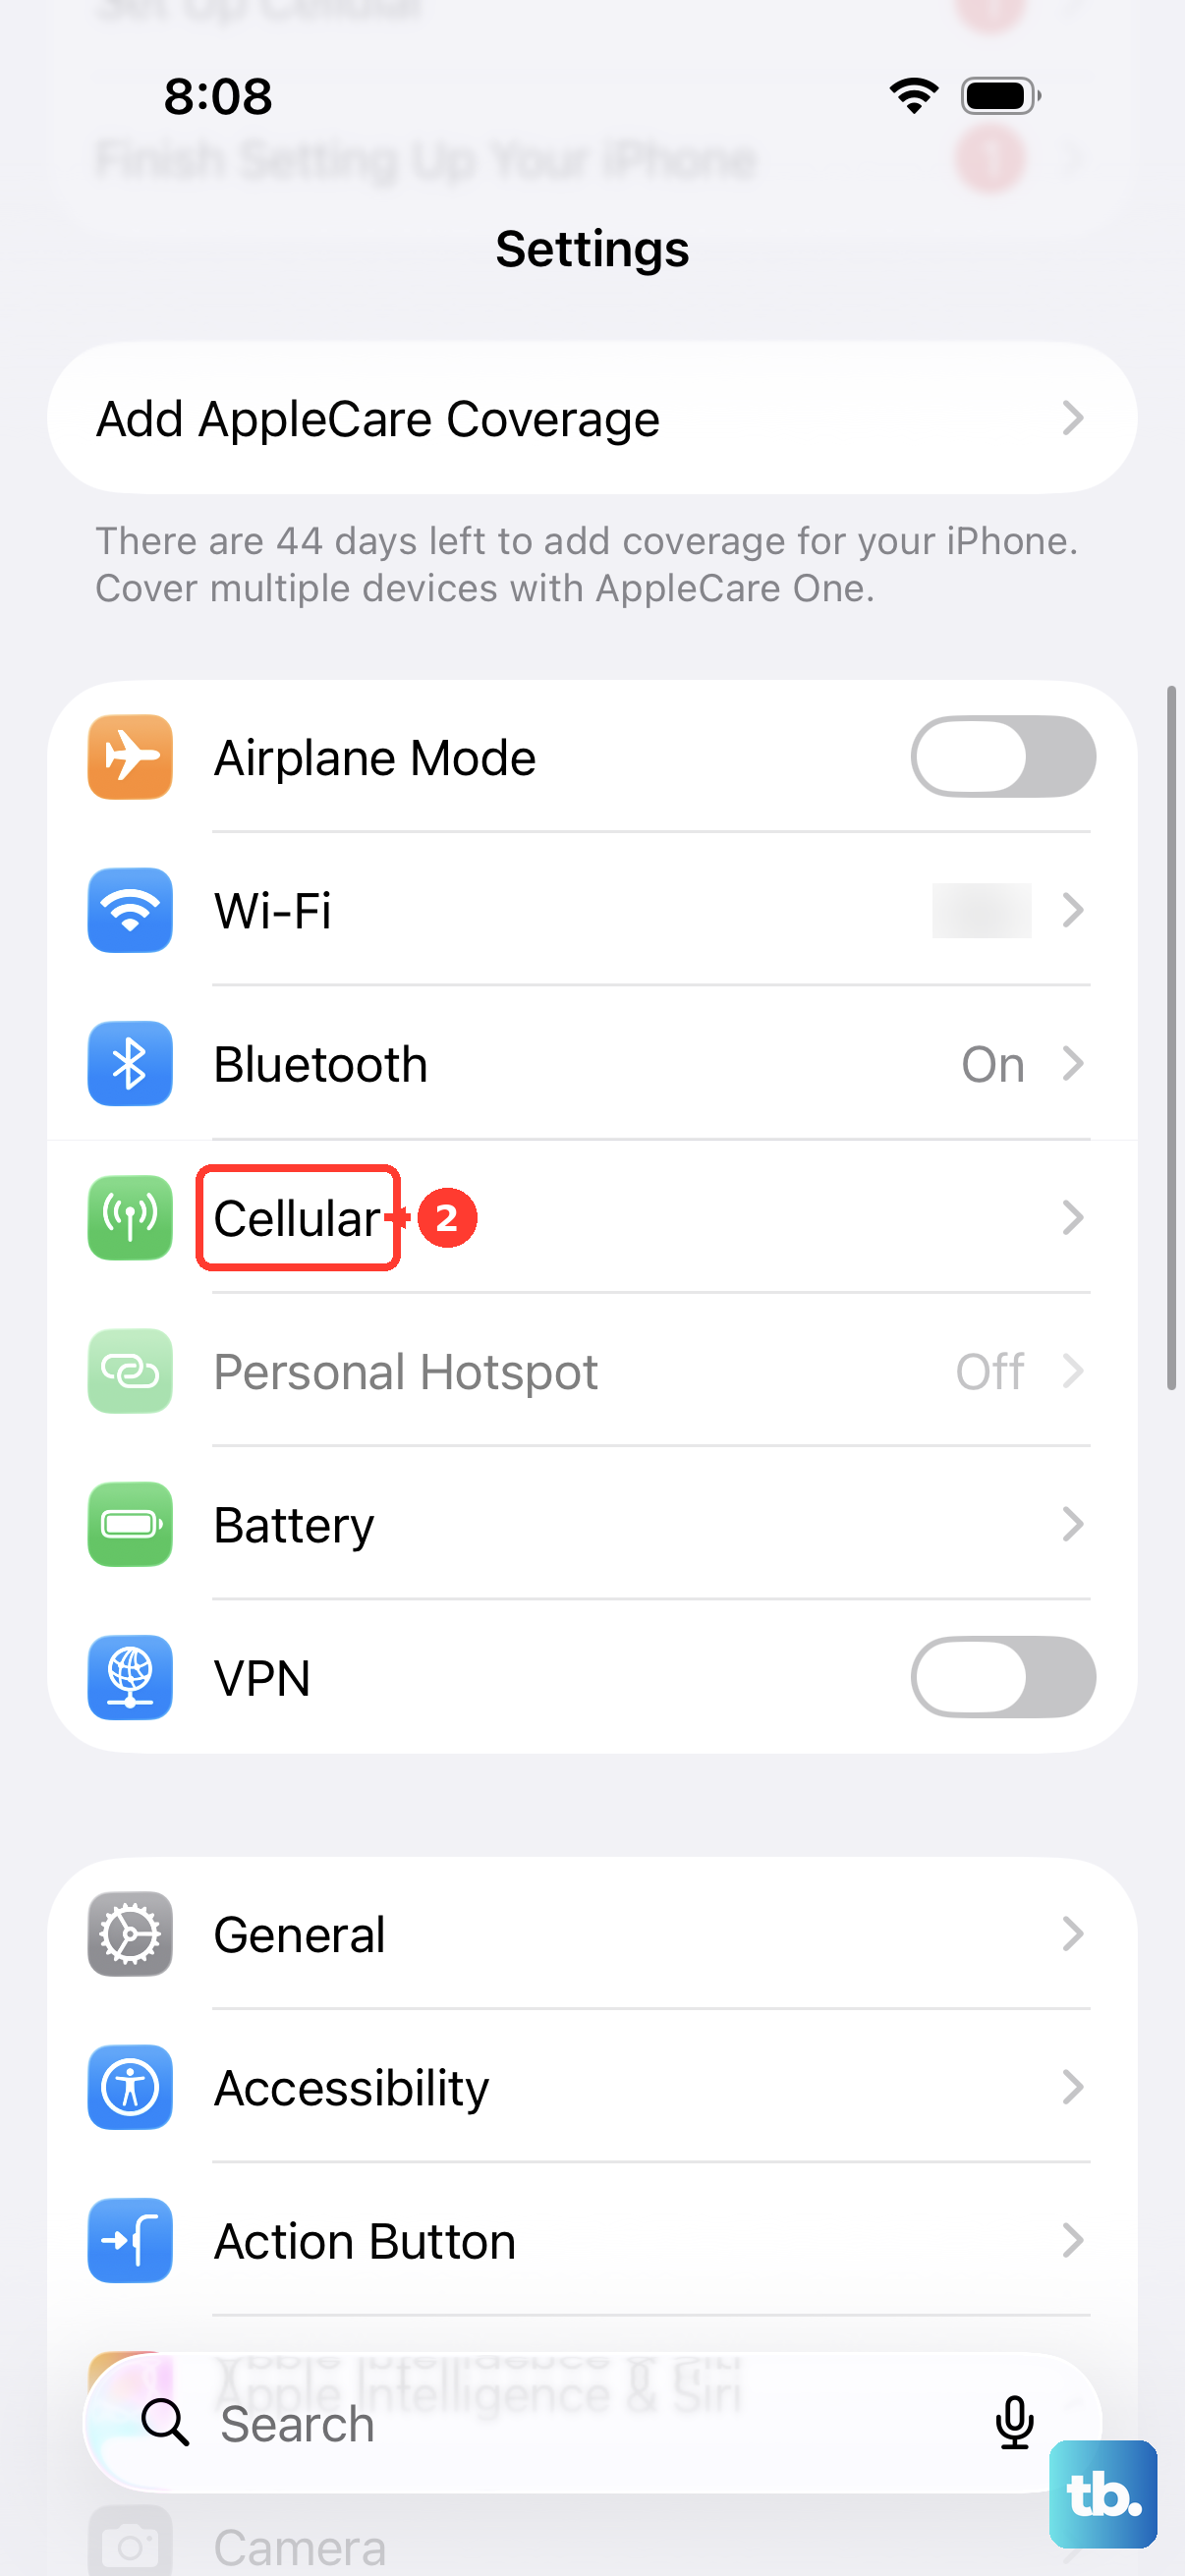
Open Settings > Cellular, then tap Set Up Cellular or Add eSIM.
Use the setup option your carrier supports, such as Transfer From Nearby iPhone, choosing a phone number, Use QR Code, manual details, or the carrier's instructions.
After activation finishes, accept any carrier settings prompt iOS shows.
Some carriers also let you activate service through their app. Open the App Store, download the carrier's app, activate cellular service there, then accept any carrier settings prompt that appears.
Use travel eSIM options
Travel eSIM setup has its own path on supported iPhones and participating regions.
- 1.Make sure your iPhone already has cellular service.
- 2.Open Settings > Cellular.
- 3.Tap Add eSIM.
- 4.Tap View Travel Options.
- 5.Follow the onscreen instructions, then accept any carrier settings prompt iOS presents.
Check APN settings only when your carrier tells you to
APN settings control cellular data details, but they are not the same as a full carrier bundle update. On iOS 16 or later, some carriers support automatic APN filling after you insert a SIM or set up an eSIM.
Open Settings > Cellular > Cellular Data Network. Use the carrier settings option when it appears, or enter APN details manually only when your carrier or mobile device administrator gives you the exact values.
If this method fails, stop editing APN fields and return to the supported carrier update path at Settings > General > About.
Remove a carrier profile you no longer need
Use this when a carrier, administrator, website, or email installed an APN or cellular configuration profile. Removing it can undo profile-supplied settings, but it does not force-download a new carrier bundle.
Open Settings > General > VPN & Device Management.
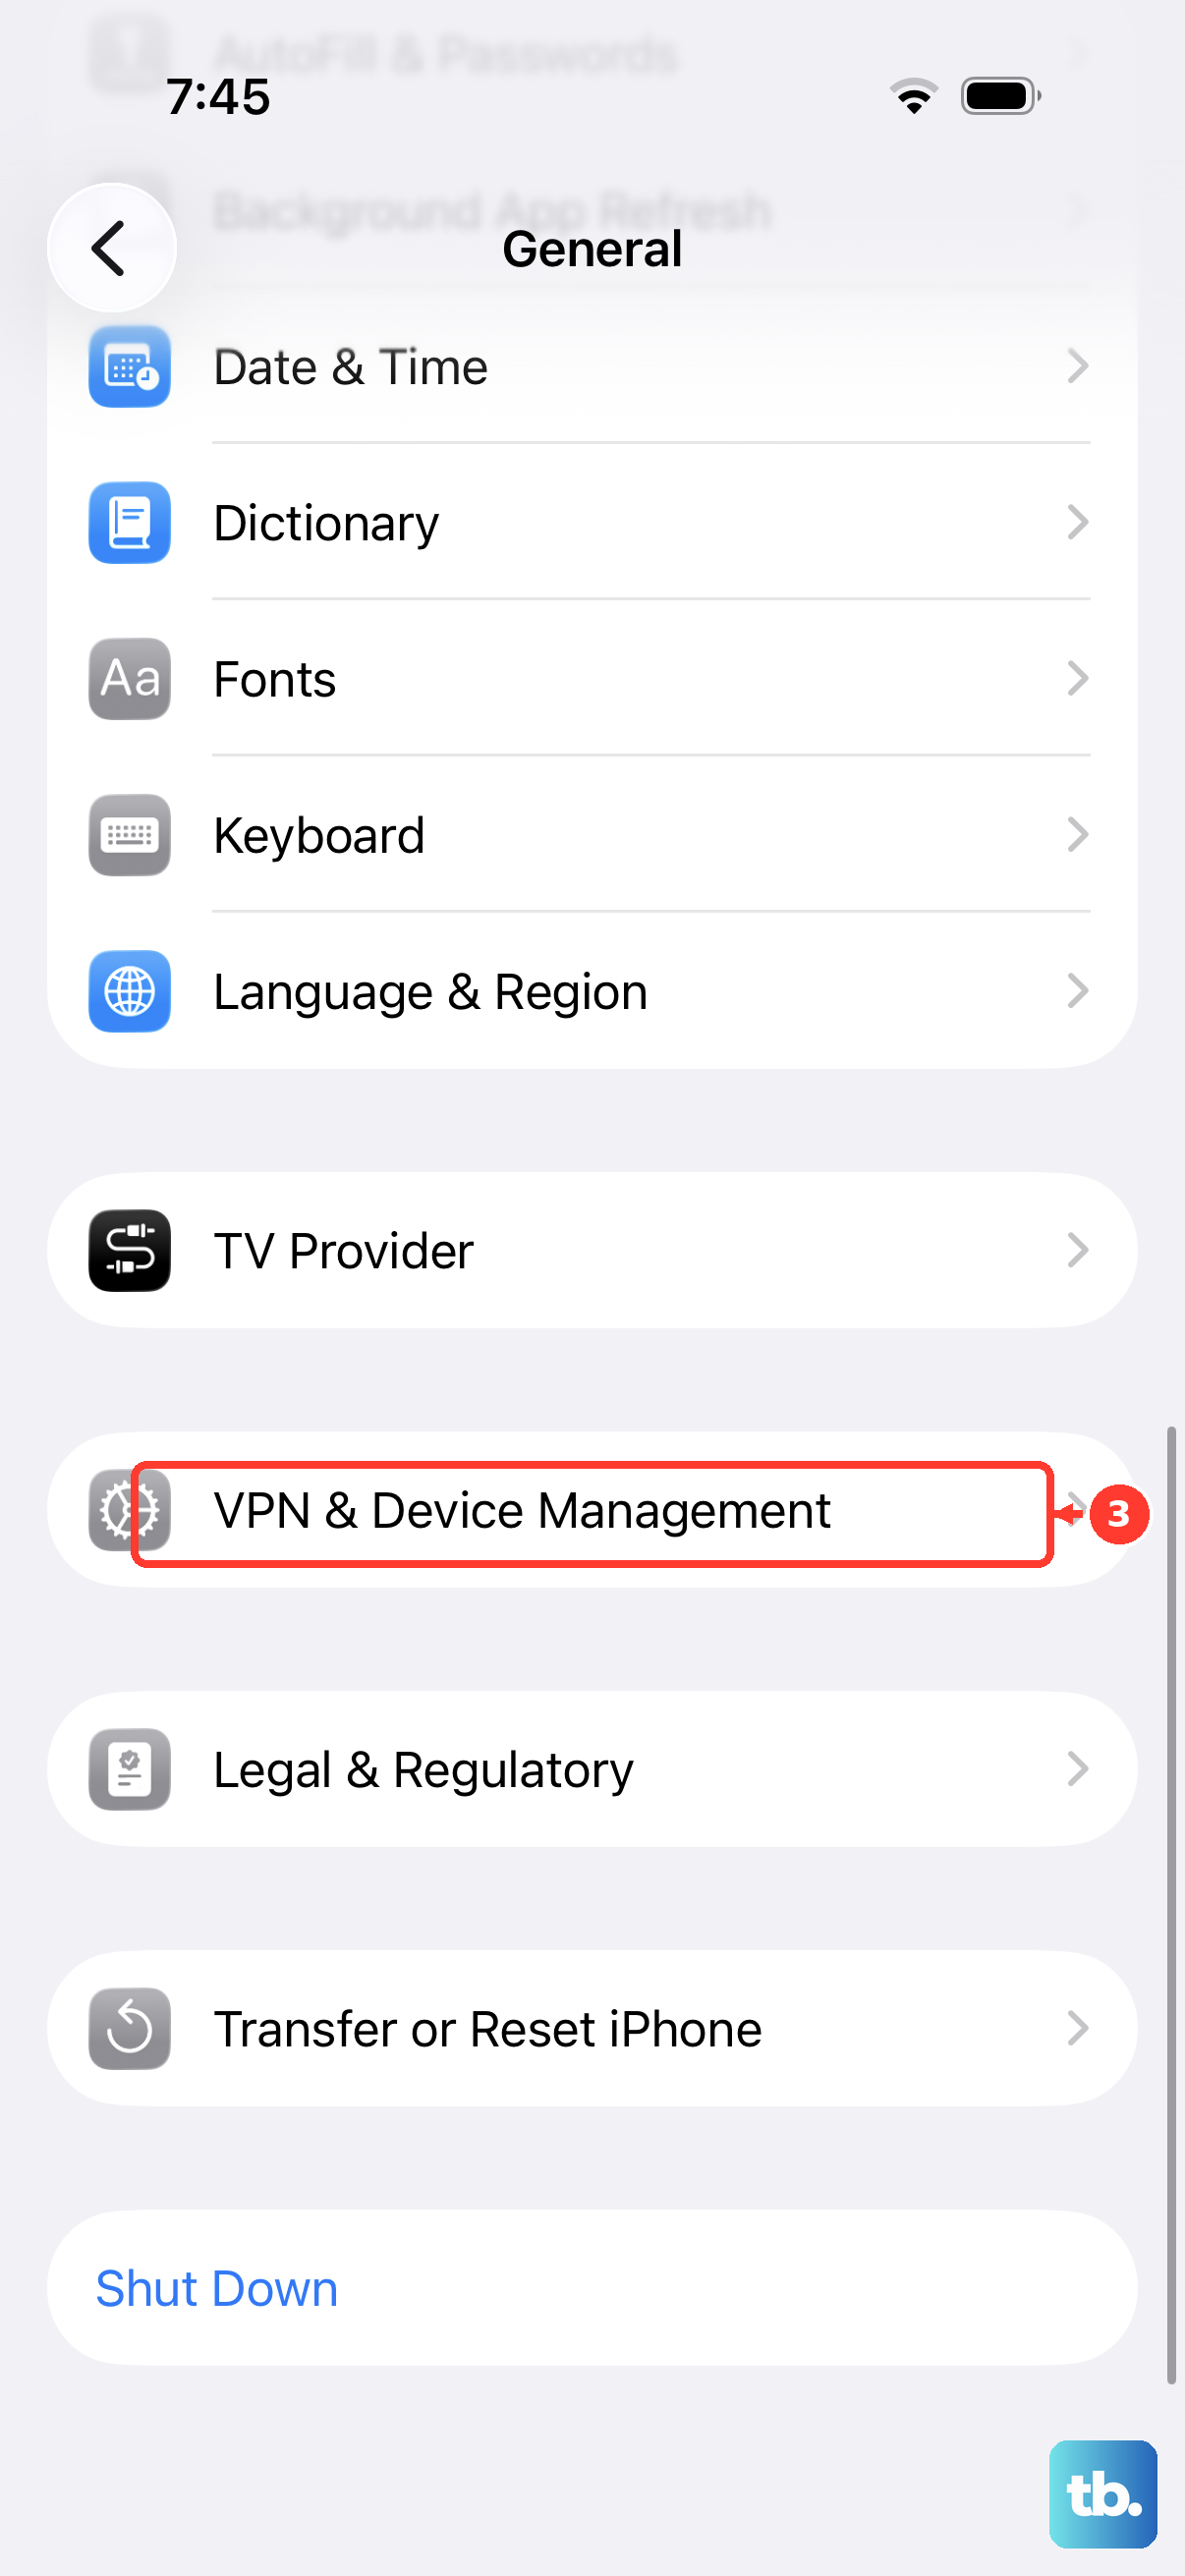
Select the profile, tap Delete Profile, follow the onscreen instructions, then restart the iPhone.
If the profile cannot be removed, contact your workplace, school, carrier, or mobile device administrator because some managed profiles require an administrator.
Skip old iTunes or Finder advice
This avoids wasting time on a desktop workflow Apple no longer publishes as the current consumer method.
Older guides may tell you to connect the iPhone to iTunes or Finder and accept an Update Settings carrier prompt.
Use Settings > General > About instead.
Apple does not provide a consumer-facing direct carrier settings download page, so handle carrier settings updates on the iPhone.
Frequently Asked Questions
How do I know if my iPhone has a carrier settings update?
Go to Settings > General > About while connected to Wi-Fi or cellular. If an update is available, your iPhone shows a prompt with onscreen instructions.
What should I tap when the carrier settings message appears?
Tap Update when the update is optional. Tap OK when it is mandatory; mandatory updates are already downloaded and installed.
Can I download iPhone carrier settings manually from Apple?
No. Apple does not provide a consumer-facing direct download page for carrier settings. Use Settings > General > About on the iPhone.
Are APN settings the same as carrier settings updates?
No. APN settings are cellular data settings and may be editable only when your carrier allows it. The normal carrier settings update flow is still Settings > General > About.