


To turn on network discovery in Windows 10, open Control Panel > Network and Internet > Network and Sharing Center > Change advanced sharing settings, expand Private, select Turn on network discovery, then select Save changes. Use the private profile for a trusted home network. If devices remain invisible afterward, check your connection’s network profile and the discovery services.
The short version
- Main method: Enable Turn on network discovery under Private in Change advanced sharing settings.
- Network profile: Choose Private for your trusted home connection before enabling discovery.
- Explorer shortcut: The Turn on network discovery and file sharing option enables both features.
- When devices stay invisible: Check the discovery services before considering firewall commands.
| Option | When to use it | What to know |
|---|---|---|
| Control Panel | Enable discovery directly | Save the change under Private |
| Settings | Reach the same sharing controls | Microsoft documents two entry points |
| File Explorer | Respond to the disabled discovery banner | Also enables file sharing |
| Network profile | Mark a trusted connection as private | Previously disabled discovery may still need enabling |
| Discovery services | Address devices remaining invisible | Requires administrator access |
| Function Discovery services | Configure modern home or small-business workgroup discovery | Uses delayed automatic startup |
| Command Prompt | Enable discovery firewall rules | Does not restrict changes to private rules |
| Windows PowerShell | Enable the same firewall rule group | Check services and the network profile separately |
| Administrative policy | Configure discovery firewall access on managed computers | Requires administrative permissions |
Enable discovery through Control Panel
Open Control Panel, select Network and Internet, then open Network and Sharing Center. Choose Change advanced sharing settings and expand Private for your trusted home network.
Select Turn on network discovery, then select Save changes. If User Account Control requests administrator credentials, enter them and select Yes. When discovery is enabled but devices still do not appear, continue with the profile and service checks below.
Reach the same controls through Settings
On Windows 10 22H2, select Start > Settings > Network & Internet > Status. Under Advanced network settings, select Network and Sharing Center, then choose Change advanced sharing settings.
Expand Private, select Turn on network discovery, and select Save changes. Microsoft also documents Settings > Network & internet > Sharing options as a Windows 10 route to the same Private discovery setting.
Set your trusted connection to Private
Before using the File Explorer shortcut, set your trusted home connection to Private, the profile Microsoft describes for trusted networks where your PC is discoverable. On Windows 10 22H2, select Start > Settings > Network & Internet, then open Status.
Under your connected Wi-Fi or Ethernet connection, select Properties. Under Network profile, choose Private. If discovery was previously disabled, also return to Change advanced sharing settings and select Turn on network discovery, then select Save changes.
On an organization-managed computer, your network profile may be restricted. If you cannot change it, involve an authorized administrator and use the administrative route below for discovery firewall access.
Turn on discovery from File Explorer
Press Windows + E to open File Explorer, then select Network. If the disabled discovery banner appears, select Network discovery is turned off, then select Turn on network discovery and file sharing.

This action enables file sharing as well as discovery. To enable discovery through its own setting, use the Control Panel route instead. You can also use that route when the banner is absent.
Check services when devices remain invisible
Discovery relies on services as well as the sharing setting, and changing these services requires administrator access. Press Windows + R, enter the following command, then select OK.
services.mscFind Function Discovery Provider Host, Function Discovery Resource Publication, SSDP Discovery, and UPnP Device Host. For each service, right-click its name, select Properties, and set Startup type to Automatic.
If a service is stopped, select Start, then save the changes. After checking all four services, enable discovery again through Control Panel or the File Explorer banner. These changes restore prerequisites for discovery; you still need the discovery setting enabled.
For Windows 10 home and small-business workgroups using WS-Discovery, Microsoft specifies Automatic (Delayed Start) for Function Discovery Provider Host and Function Discovery Resource Publication. For that configuration, open services.msc, open each service’s Properties, and choose Automatic (Delayed Start) under Startup type. Start both services, then open File Explorer, select Network, and enable discovery when prompted.
Enable discovery firewall rules with Command Prompt
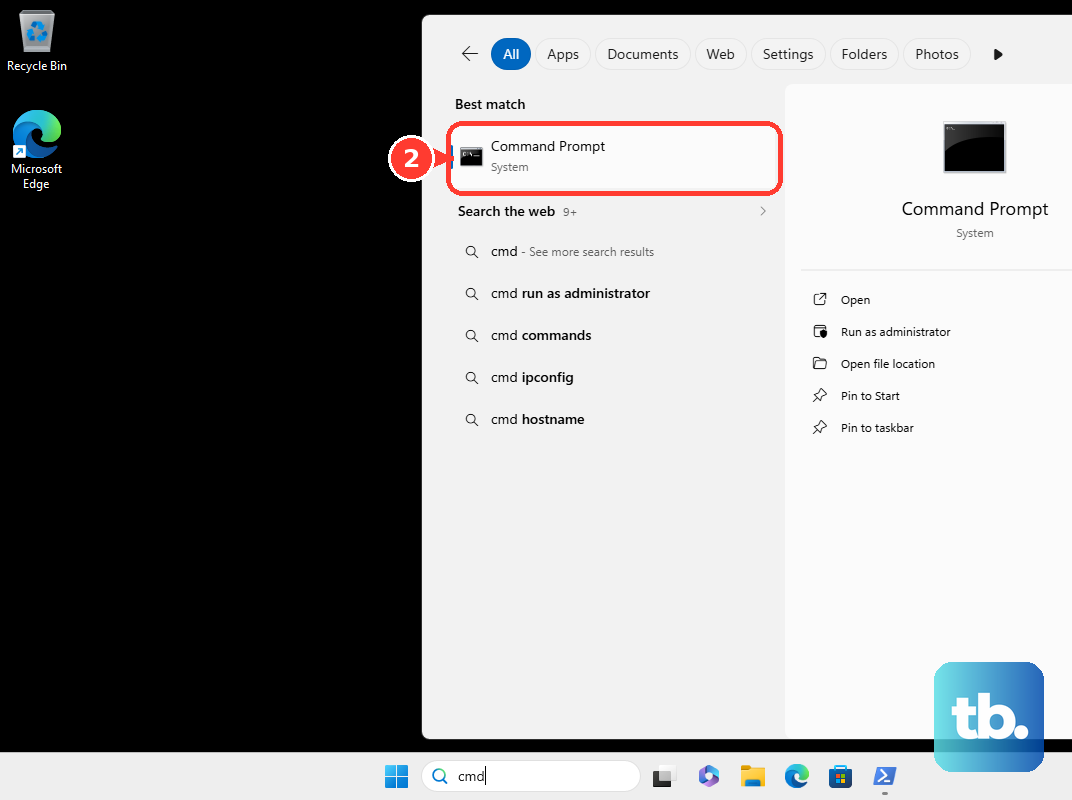
If you need to enable the discovery firewall rules, you can do so from an administrator Command Prompt on Windows 10 with Windows Firewall. The command below uses the English-language rule group name and does not restrict changes to private network rules. It does not start disabled discovery services or change your connection’s network profile.
Open Command Prompt using Run as administrator. Enter the following command and press Enter to enable the matching discovery rules.
netsh advfirewall firewall set rule group="Network Discovery" new enable=YesIf devices remain invisible, check the network profile and services described above. Enabling the firewall rule group alone does not address those separate requirements.
Use PowerShell for the firewall rule group
Windows PowerShell provides an alternative way to enable the matching discovery firewall rules on Windows 10 with the built-in NetSecurity module. This also requires administrator privileges. The displayed group name is language-dependent, so the command below targets English-language Windows and is not restricted to private network rules.
Open Windows PowerShell using Run as administrator. Enter this command and press Enter.
Enable-NetFirewallRule -DisplayGroup "Network Discovery"This command enables the matching firewall rule group, just as the Command Prompt option does. Check your connection’s network profile and discovery services separately if discovery still does not work.
Configure discovery access on managed computers
If you are an authorized administrator managing Windows 10 computers, you can configure discovery firewall access through Group Policy. For domain-joined devices, you must be a member of the Domain Administrators group or have delegated permissions to modify Group Policy objects. Edit a Group Policy object and open Computer Configuration > Policies > Windows Settings > Security Settings > Windows Firewall with Advanced Security, then configure discovery firewall rules for the required network profile.
For a single computer, you can access the corresponding local firewall console with administrator privileges. Open Start, enter the following command, and press Enter.
wf.mscUse this console to configure discovery firewall rules for the required network profile. Check the discovery setting and services separately, since firewall access is only part of the configuration.
Frequently Asked Questions
Can you turn on network discovery in Windows 10 Home?
Yes, the Control Panel procedure applies to Windows 10 Home, including version 22H2. You can use the same procedure in Windows 10 Pro.
Does choosing Private normally enable discovery automatically?
Discovery and device-sharing settings are normally enabled by default for private networks. If discovery was previously disabled, you still need to enable it through the advanced sharing settings.
Why do older instructions tell you to use HomeGroup?
Microsoft removed HomeGroup beginning with Windows 10 version 1803, so it is unavailable in Windows 10 22H2. Use advanced sharing settings or the File Explorer discovery banner instead.
Should you reinstall SMBv1 to make network devices appear?
Microsoft strongly recommends against reinstalling SMBv1. The legacy Computer Browser mechanism depends on that deprecated protocol. For modern Windows 10 discovery, use Function Discovery services and the normal discovery control instead.