

To switch to a local account in Windows 11, open Settings > Accounts > Your info and select Sign in with a local account instead. Complete the prompts, enter your local sign-in details, then select Sign out and finish and sign back in. These steps use Windows 11 menus and change your existing account rather than creating a separate user profile.
The direct switch works on Windows 11 Home and Pro when you currently sign in with a personal Microsoft account. Save your work before starting because the final step signs you out. Sign in only through Microsoft’s own app or website, and never share a code, password, or remote access with someone who contacts you.
The short version
- Keep your existing profile: Choose Sign in with a local account instead under Your info.
- Prepare your credentials: Complete identity verification when prompted, then enter a local username, password, and password hint.
- Finish the change: Select Sign out and finish, then sign back in with your local account.
- Know the alternatives: Creating another user makes a separate profile, while switching users only changes the active session.
| Method or option | What it does | When it applies |
|---|---|---|
| Settings > Accounts > Your info | Converts your existing account | You sign in with a personal Microsoft account |
| Search for Your account info | Opens the same conversion wizard | You prefer Windows Search |
| Settings > Accounts > Other users | Creates a separate local profile | You have administrator access |
netplwiz | Creates a separate local profile | You use a Dell desktop, laptop, or workstation |
| Computer Management | Creates a separate local profile | You administer Windows 11 Pro, Enterprise, or Education |
net user | Creates a separate local profile | You can run an elevated Command Prompt |
| Windows PowerShell | Creates a separate local profile | You have administrator access and Microsoft.PowerShell.LocalAccounts |
| Start or Windows + L | Selects an existing local user | The local account already exists |
| Ctrl + Alt + Delete | Selects an existing local user | Your configuration offers Switch user |
| Disconnect Microsoft Entra join | Leaves the organization join | You have a pure Entra joined device and a working local administrator |
| Accounts: Block Microsoft accounts | Prevents new Microsoft account connections | You administer a supported edition other than Home |
| Unattended answer file | Provisions a local account during installation | You manage a supported Windows deployment |
| Microsoft’s Download Windows 11 page | Provides installation media options | Your deployment needs installation media |
Change your existing account in Settings
Open Settings, select Accounts, then open Your info. Select Sign in with a local account instead to start converting your current Windows account. Use this route when you want to keep using the same profile with a local sign-in.
Complete identity verification when Windows requests it. Enter the local username, password, and password hint you want to use, then select Next. Save any remaining work, select Sign out and finish, then sign back in with the local account.
You can also reach the same wizard through Windows Search using the route ASUS describes. Search for Your account info, select Open, then select Sign in with a local account instead. Select Next and enter your current PIN when requested.
Fill in User name, Password, and Password hint, then select Next. After saving your work, select Sign out and finish and sign back in with the local account. This search route opens the same conversion process as the Settings route.
The conversion option applies when your current Windows sign-in uses a personal Microsoft account. If you want a separate local user, use Other users instead. For a pure Microsoft Entra joined device, follow the organization-disconnection steps below.
Switch to a local account that already exists
Open Start and use your user picture or the Accounts icon to access account switching, then select the local user. The presentation varies by configuration. Save your work first if you choose to sign out.
Alternatively, press Windows + L to lock Windows, select the local account on the sign-in screen, and enter its credentials. On configurations offering Other user, select Other user and enter the local account’s credentials. This changes the active session without converting the account you were previously using.
On configurations with account switching, you can also press Ctrl + Alt + Delete and select Switch user. Select the local account in the lower-left portion of the sign-in screen, select Sign in, and enter its password when requested. The first time you sign in to a newly created local account, Dell notes that Windows shows Choose privacy settings for your device; make your selections and select Accept.
Create a separate local user in Settings
Choose this route when you want another Windows user with a separate profile. Your existing files and application settings are not automatically migrated to the new profile. To change your current profile’s sign-in instead, use the conversion under Your info.
Using an administrator account, open Settings > Accounts > Other users. Under Add other user, select Add account. Select I don't have this person's sign-in information, then select Add a user without a Microsoft account and complete the account-creation prompts.
Save your work, sign out, and select the new account to begin using it. If that account needs administrator access, use an administrator account to return to Other users and expand the new account. Select Change account type, choose Administrator, then select OK.
Create a local user with netplwiz on a Dell PC
Dell describes an alternative account-creation route through the built-in netplwiz tool for its desktops, laptops, and workstations. It creates another account rather than converting your current profile. Press Windows + R and enter this command:
netplwizSelect OK, then select Add. Choose Sign in without a Microsoft account (not recommended), then select Local account. Enter a username and the password details, select Next, then select Finish.
If the new account needs administrator access, select it under Users for this computer: and open Properties > Group Membership. Select Administrator, select Apply, then select OK. Close the dialog and switch to the new account.
Create a local user in Computer Management
On Windows 11 Pro, Enterprise, and Education, you can create a local user through Computer Management. The Local Users and Groups snap-in is unavailable in Windows 11 Home, so use Settings > Accounts > Other users on Home instead. This method creates a separate profile.
Open Computer Management with administrator privileges and go to System Tools > Local Users and Groups > Users. Right-click Users and select New User. Enter the username and password details, configure the password options as needed, then select Create and Close.
Save your work, sign out, and sign in to the new account. You can also access the Local Users and Groups snap-in directly by running lusrmgr.msc.
Create a separate account with commands
Command Prompt is another option on Windows 11 Home and Pro when you have administrator privileges. Open Command Prompt using Run as administrator. Run the following command, replacing LocalName with your desired username:
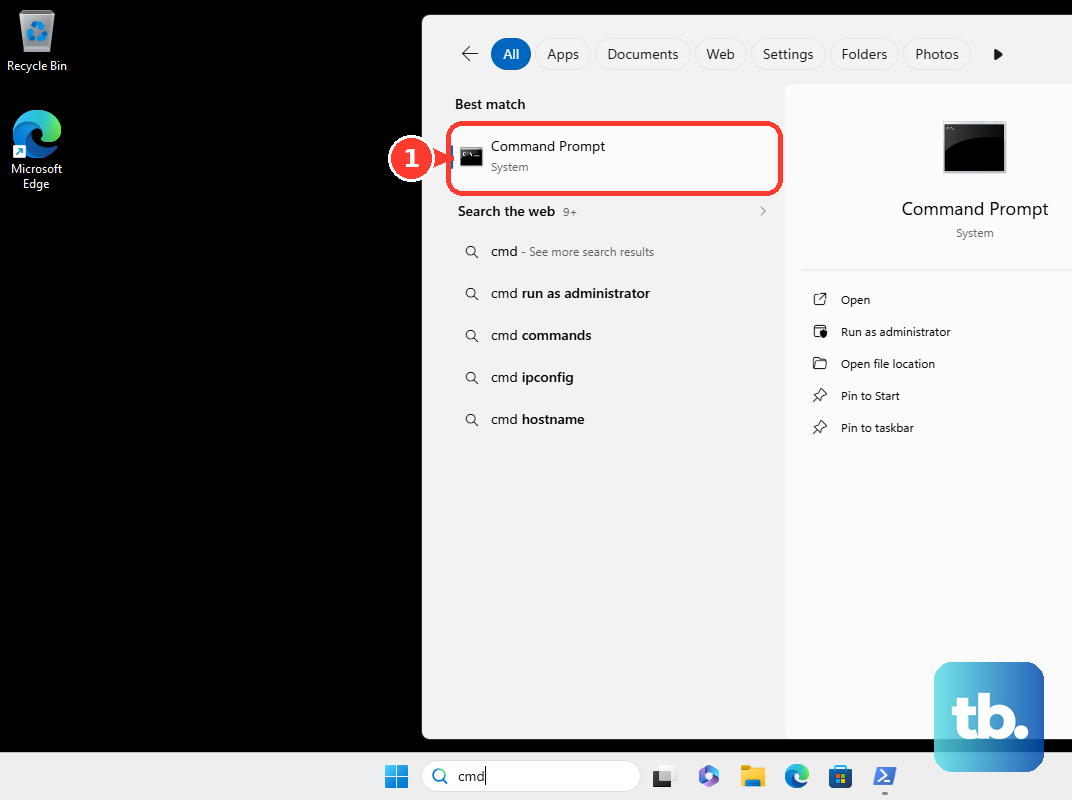
net user "LocalName" * /addEnter and confirm the password when prompted. Leave out /domain so the account is created locally. Save your work, sign out, and sign in to the new account.
Windows PowerShell provides another route when the Microsoft.PowerShell.LocalAccounts module is available. Open 64-bit Windows PowerShell using Run as administrator. The module is unavailable in 32-bit PowerShell on a 64-bit system, so use 64-bit Windows PowerShell or the Command Prompt method above. Run this command and enter the new account’s password:
$LocalPassword = Read-Host -AsSecureStringCreate the account with the following command, which also stores the new account in $LocalUser. Replace LocalName with the username you want:
$LocalUser = New-LocalUser -Name "LocalName" -Password $LocalPasswordAdd the new account to the local Users group with the following command, which uses the account stored in $LocalUser so Windows adds the local user you just created. On non-English Windows, replace Users with the localized group name:
Add-LocalGroupMember -Group "Users" -Member $LocalUserSave your work, sign out, and select the new account. Both command methods create a separate profile; use the Your info conversion to change your existing profile’s sign-in.
Leave a Microsoft Entra joined device
For a pure Microsoft Entra joined Windows 11 device, normally running Pro, Enterprise, or Education, leaving the organization join is a separate process from converting a personal Microsoft account. Disconnecting removes the device’s Microsoft Entra join and does not convert or migrate the Entra user’s profile. First create or verify a working offline local administrator account.
Open Settings > Accounts > Access work or school. Select the connected organization account and select Disconnect. Follow the prompts, supplying local administrator credentials when requested. Restart to complete the process, then sign in with the local account.
Prevent new Microsoft account connections
If you administer Windows 11 Pro, Enterprise, Education, or IoT Enterprise, you can apply an account policy after establishing a working local account. This policy prevents new Microsoft account connections; it does not convert existing accounts. It does not apply to Home.
Open the policy path Computer Configuration > Windows Settings > Security Settings > Local Policies > Security Options > Accounts: Block Microsoft accounts. Select Users can't add Microsoft accounts.
For MDM administration, the corresponding setting is ./Device/Vendor/MSFT/Policy/Config/LocalPoliciesSecurityOptions/Accounts_BlockMicrosoftAccounts with value 1. Value 3 also blocks existing Microsoft account logons and can lock out an administrator, so keep the setting at 1 for preventing new connections.
Provision a local account during deployment
For a Windows deployment that supports Microsoft-Windows-Shell-Setup, you can provision local accounts through an unattended answer file. This creates an account during installation and does not convert an existing Microsoft account profile. It is a deployment mechanism, not a guarantee that every setup screen will be bypassed.
In the installation answer file, configure Microsoft-Windows-Shell-Setup > UserAccounts > LocalAccounts > LocalAccount during auditSystem or oobeSystem. Add a LocalAccount entry with wcm:action="add" and specify Name, Password, and Group. Apply the answer file during deployment.
If the deployment needs installation media, use Microsoft’s Download Windows 11 page. It provides Windows 11 Installation Assistant, Create Windows 11 Installation Media, and disk-image download options. Installation Assistant and Media Creation Tool are for x64 PCs; consult the page’s separate Arm guidance for Arm devices. No download or reinstallation is required for the normal account switch.
Frequently Asked Questions
Does signing out of OneDrive or Edge switch Windows to a local account?
No, signing out of OneDrive or Edge does not convert your Windows sign-in. App-level Microsoft sign-ins are separate from the Windows account type, and disabling sync is not a substitute for conversion.
Should you remove the Microsoft account user after switching?
No Windows account deletion is required for the direct switch. Removing a user through Other users removes that account’s local sign-in information and data rather than converting its profile.
Should you use the old OOBE\BYPASSNRO setup trick?
Complete supported setup and use the Settings conversion afterward. Microsoft announced removal of bypassnro.cmd in Windows 11 Insider Preview Build 26120.3653 in the Beta Channel. That announcement does not establish identical behavior on every retail image.
Are other local account setup commands a dependable replacement?
Use the post-setup conversion instead of relying on local-only setup commands. Microsoft announced removal of known local account creation mechanisms from setup in Windows 11 Insider Preview Build 26220.6772 in the Dev Channel. That announcement does not enumerate every command or establish removal from every production build.