A static IP keeps your Windows 11 PC using the same local network address instead of taking one automatically from your router or another access point. Windows 11 lets you set one from Settings for Wi-Fi or Ethernet, and you can also use Terminal or PowerShell when you need an admin-friendly command. Start with Settings, then use the command-line options only when they fit the job.
Set a static IP for Wi-Fi in Settings
Open Start.
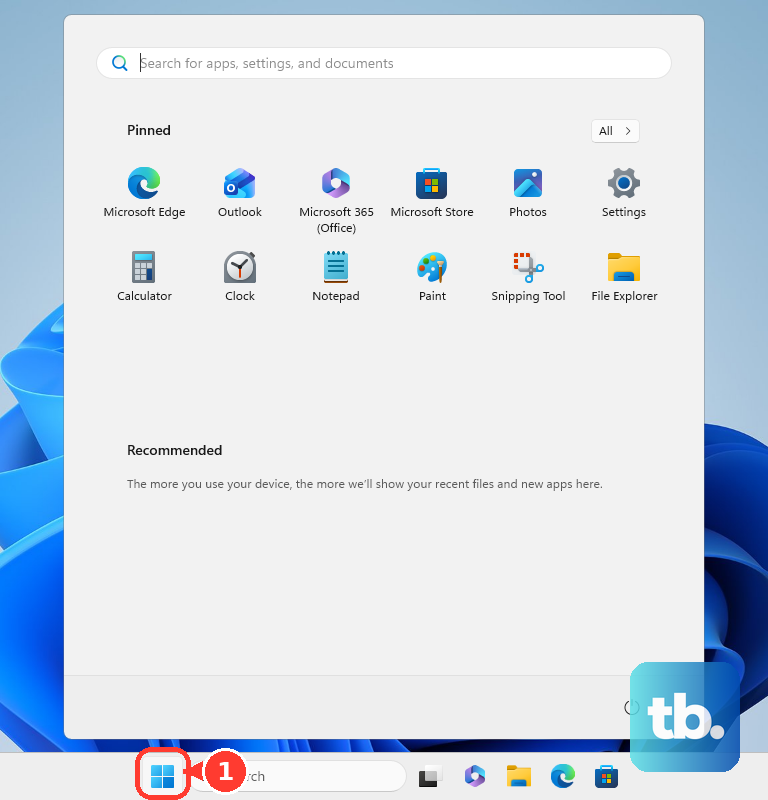
Choose Settings.
Select Network & internet.
Open Wi-Fi.
Choose Manage known networks.
Select the Wi-Fi network you want to change.
Next to IP assignment, select Edit.
Under Edit IP settings, choose Manual.
Turn on IPv4.
Enter the IP address, Subnet mask, Gateway, Preferred DNS, and Alternate DNS.
Select Save.
Use the address details your network requires, because the wrong address, subnet, gateway, or DNS values can stop the connection from working.
Fix Ethernet by editing the connected network
The most common cause is that Windows shows Ethernet IP settings only after the Ethernet connection is present.
Open Start, go to Settings, then select Network & internet.
Choose Ethernet.
Select the Ethernet network you are connected to.
Next to IP assignment, select Edit.
Under Edit IP settings, choose Manual.
Turn on IPv4.
Enter the IP address, Subnet mask, Gateway, Preferred DNS, and Alternate DNS.
Select Save.
Use IPv6 when your network needs it
Use IPv6 when your network or adapter uses IPv6 addresses instead of IPv4 or alongside IPv4. The path starts in the same network settings, but Windows asks for a subnet prefix length instead of an IPv4 subnet mask.
For Wi-Fi, open Start, go to Settings, choose Network & internet, then open Wi-Fi.
Choose Manage known networks.
Select the network.
Next to IP assignment, select Edit.
Under Edit IP settings, choose Manual.
Turn on IPv6.
Enter the IP address, Subnet prefix length, Gateway, Preferred DNS, and Alternate DNS.
Select Save.
For Ethernet, go to Settings, open Network & internet, choose Ethernet, select the connected network, and edit IP assignment the same way.
Adjust DNS in the same dialog
The static IP screen includes Preferred DNS and Alternate DNS, so you can set DNS while entering the address details. Windows 11 also shows DNS over HTTPS choices in that dialog.
For IPv4, fill in IP address, Subnet mask, Gateway, Preferred DNS, and Alternate DNS before selecting Save.
If your goal is only to go back to automatic addressing, change Edit IP settings back to Automatic (DHCP) instead.
Switch back to automatic DHCP
Use this when the static IP breaks your connection or you no longer need a fixed address.
- 1.Open Start, then go to Settings and Network & internet.
- 2.For Wi-Fi, choose Wi-Fi, open Manage known networks, and select the network.
- 3.For Ethernet, choose Ethernet, then select the connected network.
- 4.Next to IP assignment, select Edit.
- 5.Under Edit IP settings, choose Automatic (DHCP), then select Save.
Run Terminal for repeatable changes
Command Prompt or Terminal makes sense when you need a repeatable change or you already know the adapter name. These commands require administrator rights.
Open Start, type cmd or Terminal, then choose Run as administrator. Run netsh interface ipv4 show config to confirm the interface name.
To set a static IPv4 address, run netsh interface ipv4 set address name="Ethernet" source=static address=192.168.1.100 mask=255.255.255.0 gateway=192.168.1.1, replacing the interface name and numbers with the values for your network.
To set DNS, run netsh interface ipv4 set dnsservers name="Ethernet" source=static address=8.8.8.8 validate=no. To return that interface to automatic addressing, run netsh interface ipv4 set address name="Ethernet" source=dhcp and netsh interface ipv4 set dnsservers name="Ethernet" source=dhcp.
Use PowerShell for advanced changes
This fixes scripted or administrator-style static IP changes.
Open Start, type PowerShell or Terminal, then choose Run as administrator.
Run Get-NetIPInterface or Get-NetAdapter to identify the InterfaceIndex or InterfaceAlias.
Create the static address with New-NetIPAddress -InterfaceIndex 12 -IPAddress 192.168.1.100 -PrefixLength 24 -DefaultGateway 192.168.1.1, changing the interface index and address values for your network.
Add DNS with Set-DnsClientServerAddress -InterfaceIndex 12 -ServerAddresses ("8.8.8.8","8.8.4.4") when you need manual DNS servers.
When changing an existing static address object, use Set-NetIPAddress with the correct InterfaceIndex, IPAddress, and PrefixLength. To remove a manual address and move back toward DHCP behavior, use Remove-NetIPAddress, then Set-NetIPInterface with DHCP enabled and Set-DnsClientServerAddress with reset server addresses.
Apply static IPs on managed PCs
Work PCs, lab systems, kiosks, and bulk setup devices may receive network changes through provisioning packages prepared by an administrator.
- 1.Open Settings, then choose Accounts.
- 2.Select Access work or school.
- 3.Choose Add or remove a provisioning package, then select Add a package.
- 4.Choose the delivery method, such as Removable Media.
- 5.Select the administrator-provided .ppkg file, then select Add.
- 6.Select Yes at the User Account Control prompt, then select Yes, add it when Windows asks whether the package comes from a source you trust.
If the package was delivered to you as a file, you can skip Settings and double-click the .ppkg file to install it directly, then approve the same Yes and Yes, add it prompts.
Skip older static IP advice
Windows 11 still exposes the older Control Panel, View Network Connections, adapter Properties, and Internet Protocol Version 4 (TCP/IPv4) path. For a normal Windows 11 static IP change, use the Settings app path above.
Direct registry editing is not a current supported consumer method for setting a Windows 11 static IP. Use Settings, Terminal, PowerShell, or an administrator-prepared package instead.
A router DHCP reservation can also make a PC keep the same local address, but the exact labels vary by router brand and app. That option belongs in your router settings, not in Windows 11.
Frequently Asked Questions
What details do I need before setting a static IP in Windows 11?
For IPv4, you need the IP address, subnet mask, gateway, preferred DNS, and alternate DNS your network should use. For IPv6, Windows asks for IP address, subnet prefix length, gateway, preferred DNS, and alternate DNS.
Can I set a static IP for only one Wi-Fi network?
Yes. In Windows 11 Settings, the Wi-Fi method starts from Manage known networks, then you choose the specific Wi-Fi network profile you want to edit.
How do I undo a static IP address in Windows 11?
Go back to the same IP assignment setting for that Wi-Fi or Ethernet network, choose Automatic (DHCP), and save. Windows then lets the router or access point set the IP address and DNS server address automatically.
Is Control Panel still the best way to set a static IP?
No. Windows 11 still includes the older Network Connections surface, but the current consumer path is Settings > Network & internet, then editing IP assignment for Wi-Fi or Ethernet.