

To initialize a hard drive in Windows, open Disk Management with administrator permissions, right-click the new disk’s label, and select Initialize Disk. Initialization changes the selected disk’s partition setup, so confirm that only the intended new, uninitialized disk is selected before proceeding. If a disk you expected to contain files appears uninitialized, stop. Initialization erases all data on the disk. First save its files to a backup location, or, if the disk has errors, try troubleshooting it to see if you can read the files. Choose GPT (GUID Partition Table) or MBR (Master Boot Record), then select OK.
These steps apply to Windows 11 and Windows 10. After initialization, create and format a volume so you can store files on the disk.
The short version
- Start here: Open Disk Management with administrator permissions.
- Check the target: Ensure only the intended disk is selected in Initialize Disk.
- Offline disk: Select Online before initializing a disk whose status is Offline.
- Finish the setup: Use New Simple Volume to create a volume, assign a drive letter, and format it.
| Method or place | What you can do | Requirement or next step |
|---|---|---|
| Disk Management | Initialize through a graphical interface | New, uninitialized disk |
| Start, Search, Run, or Computer Management | Open the same Disk Management tool | Administrator permissions for initialization |
| Elevated Computer Management | Open Disk Management as an administrator | Select Run as administrator |
| Windows PowerShell | Initialize by disk number | RAW partition style |
| DiskPart | Apply GPT or MBR from Command Prompt | No partitions or volumes |
| Windows Setup | Prepare a disk outside the installed Windows system | Windows 11 installation media in UEFI mode |
| Download Windows 11 page | Obtain installation media | Choose media appropriate to the PC architecture |
| Scripted or remote PowerShell | Automate initialization | Storage module and configured administrative access |
| Windows Admin Center | Initialize through administrative storage tools | Supported managed computer or server |
| Windows Admin Center overview | Find the administrative tool’s download | Follow Windows Admin Center under Download now |
| AOMEI Partition Assistant | Initialize as MBR or GPT | Select Apply after choosing the style |
| AOMEI Partition Assistant Standard page | Obtain the Windows utility | Select Download |
| MiniTool Partition Wizard GPT option | Initialize as GPT | Apply and confirm the operation |
| MiniTool Partition Wizard MBR option | Initialize as MBR | Apply and confirm the operation |
| MiniTool Partition Wizard Free page | Obtain the Windows utility | Use the download option |
| EaseUS Partition Master | Initialize as MBR or GPT | Execute the task and apply it |
| EaseUS Partition Master Free page | Obtain the Windows utility | Select Free Download |
| New Simple Volume | Create and format storage after initialization | Unallocated space on the newly initialized empty disk |
Open Disk Management as an administrator
Search for Computer Management, right-click Computer Management, and select Run as administrator. Select Yes, then open Storage > Disk Management. This opens the disk tool with administrator permissions.
You can also right-click or long-press Start and select Disk Management. If you cannot open the direct search result with administrator permissions, use the elevated Computer Management route above. Both routes open the same tool.
Initialize the intended disk
Locate the new disk and right-click its disk label. If its status is Offline, select Online, then right-click the disk label again. Select Initialize Disk to open the partition-style choices.
Initializing the wrong disk changes that disk’s partition setup, so proceed only with the intended new, uninitialized disk selected. If a disk you expected to contain files appears uninitialized, stop. Initialization erases all data on the disk. First save its files to a backup location, or, if the disk has errors, try troubleshooting it to see if you can read the files. In Initialize Disk, make sure the correct disk is selected. Choose GPT (GUID Partition Table) or MBR (Master Boot Record), then select OK.
You still need a formatted volume to store files after initialization. Continue in Disk Management with the same disk’s unallocated space.
Create and format a volume
Creating and formatting a volume changes the selected disk’s layout, so continue only in the newly initialized empty disk’s unallocated space. Right-click that space and select New Simple Volume. Select Next to begin the wizard.
Choose the volume size and select Next. Choose a drive letter, then select Next again. Under Format Partition, retain the default formatting settings and select Next.
Review the settings, then select Finish. This completes the volume creation and formatting needed to store files on the new disk.
Use Windows PowerShell as an alternative
You can initialize a disk through Windows PowerShell on Windows 11 and Windows 10 using the built-in Storage module. This method requires a disk with the RAW partition style. Open Windows PowerShell with administrator permissions, then run this command to identify the disk:
Get-DiskIdentify the intended uninitialized disk by its number, size, and identity. Replace N in the initialization command with that disk’s actual number. Initializing the wrong number changes a different disk’s partition setup, so confirm the target before continuing. If a disk you expected to contain files appears uninitialized, stop. Initialization erases all data on the disk. First save its files to a backup location, or, if the disk has errors, try troubleshooting it to see if you can read the files.
For GPT, run the following command. Use the MBR alternative below instead if you want the MBR partition style.
Initialize-Disk -Number N -PartitionStyle GPTFor MBR, use this command in place of the GPT command. Choose only the command for the partition style you intend to apply.
Initialize-Disk -Number N -PartitionStyle MBRCheck the result by running the following command again. After initialization, return to Disk Management and complete the volume creation and formatting steps above.
Get-DiskUse DiskPart for an empty disk
You can also use DiskPart on Windows 11 and Windows 10, provided the target disk contains no partitions or volumes. Open Command Prompt with administrator permissions, then start DiskPart:
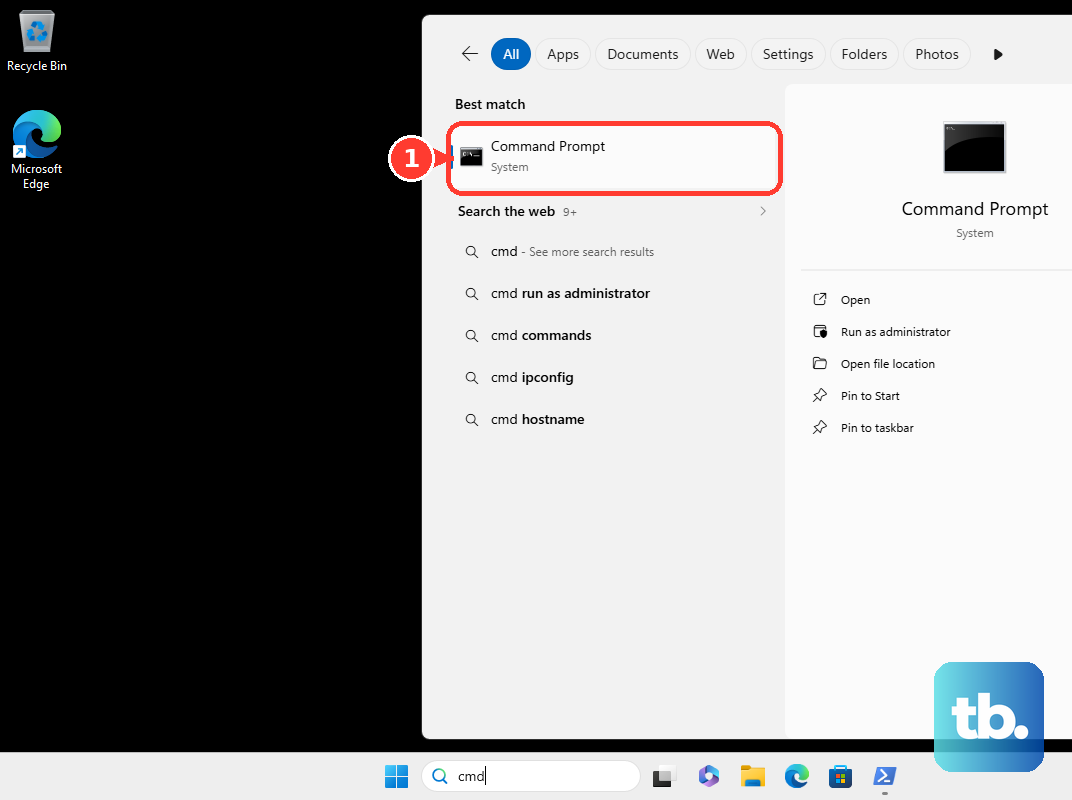
diskpartList the disks with the following command. Identify the intended empty disk before selecting a disk number.
list diskReplace N with the intended disk’s number in the command below. Selecting the wrong disk directs the subsequent partition-style change to that disk.
select disk NThe next command changes the selected empty disk’s partition style. For GPT, run this command:
convert gptFor MBR, use the following command instead. Run only the conversion command for the style you want.
convert mbrMicrosoft says you can skip clean when the disk contains no partitions or volumes. That command deletes existing partition and volume information, so it is not a routine prerequisite for a new disk. Once the conversion finishes, leave DiskPart with this command:
exitReturn to Disk Management to create and format a volume on the empty disk. Use New Simple Volume, choose the size and drive letter, and finish the formatting wizard as described above.
Prepare a disk from Windows Setup
If Windows is not installed or cannot start, you can prepare the disk from the Windows 11 installation environment. To obtain installation media, open Microsoft’s Download Windows 11 page and choose media appropriate to your PC’s architecture. The page includes Create Windows 11 Installation Media and Download Windows 11 Disk Image (ISO) for x64 devices.
Boot the Windows installation media in UEFI mode. From Windows Setup, press Shift + F10 to open the command window, then run these commands:
diskpart
list disk
Identify the intended disk in the list before continuing. Replace N with its verified disk number and select it:
select disk NThe following wipe-and-convert sequence destroys the selected disk’s existing partition information, so do not run it on a disk containing files you need. For a disk you intend to wipe and prepare as GPT, run these commands in order:
clean
convert gpt
exit
Initialize disks through administrative tools
If you administer Windows systems, you can run the same Initialize-Disk command in a script. For remote initialization, the target system must expose the Storage module and have appropriately configured administrative remote access. The remote command below requires an existing authenticated CIM session stored in $session.
Identify disk N on the remote computer before running the command. If a disk you expected to contain files appears uninitialized, stop. Initialization erases all data on the disk. First save its files to a backup location, or, if the disk has errors, try troubleshooting it to see if you can read the files. Initialization changes that remote disk’s partition setup, so confirm its identity and RAW partition style before proceeding:
Initialize-Disk -Number N -PartitionStyle GPT -CimSession $sessionThe cmdlet also accepts -UniqueId, -FriendlyName, and -VirtualDisk for alternative targeting. These are options for identifying the disk when building administrative commands.
Windows Admin Center provides another administrative route for supported managed computers and servers. If you need to install it, open Microsoft’s Windows Admin Center overview page and follow Windows Admin Center under Download now to Microsoft’s Evaluation Center. Open the managed computer or server connection, then open Storage to access its disk initialization tools.
Initialize through a partition utility
AOMEI Partition Assistant, MiniTool Partition Wizard, and EaseUS Partition Master provide graphical initialization options. If you already use one of these utilities, follow its own sequence below and confirm the target disk before applying a change. After initializing an empty disk, complete the volume creation and formatting steps in Disk Management.
For AOMEI, open the official Partition Assistant Standard product page and select Download if you need the utility. Open AOMEI Partition Assistant, right-click the target raw disk, and select Initialize Disk. Initialization changes the selected disk’s partition setup, so confirm the target before applying it. Choose MBR or GPT, select OK, then select Apply.
For MiniTool, open the official MiniTool Partition Wizard Free product page and use its download option if needed. Open MiniTool Partition Wizard and select the intended disk. Initialization changes that disk’s partition setup, so confirm the selection before choosing a partition style.
For GPT, select Initialize to GPT Disk from Convert Disk in the left action panel, the disk’s right-click menu, or the Disk menu. Select Apply, then select Yes. Select OK when initialization finishes.
For MBR instead, select Initialize to MBR Disk from Convert Disk in the left action panel, the disk’s right-click menu, or the Disk menu. Select Apply to execute the pending operation, then select Yes to confirm the change. Select OK when initialization finishes.
For EaseUS, open the official EaseUS Partition Master Free product page and select Free Download if you need the utility. Open EaseUS Partition Master and go to Partition Manager. Initialization changes the selected disk’s partition setup, so confirm the target before continuing.
Right-click the target disk and select Initialize to MBR or Initialize to GPT. Select Execute Task, then select Apply.
Frequently Asked Questions
Can I use the same initialization procedure for an SSD?
Yes. Disk Management’s initialization procedure applies to new, uninitialized HDDs and SSDs on Windows 11 and Windows 10.
Can I open Disk Management from the Run window?
Yes, you can open it through Run on Windows 11 and Windows 10. Press Windows + R, enter diskmgmt.msc, then select OK.
What should I select when searching for Disk Management?
Select Search and enter Disk Management. Choose the result named Create and format hard disk partitions to open the tool.
What partition style does PowerShell use if I omit the option?
The Initialize-Disk command uses GPT when you omit -PartitionStyle. Specify -PartitionStyle MBR when you intend to initialize the disk as MBR.