Your iPhone has the conversation, but your Mac is missing the latest replies or entire threads. Start with a quick connection check, then check the iCloud settings and account details that keep your messages together. If only carrier texts or individual conversations are missing, jump to the fix that matches.
Check your connection and Apple’s service status
Open a webpage on your Mac to test its internet connection. Both iMessage and iCloud synchronization need internet access, so restore the connection before changing Messages settings.
Visit Apple’s System Status page and check iMessage. If Apple reports an outage, retry after service is restored.
Just added your Mac? Allow time for existing conversations to appear after enabling Messages in iCloud on every device. Apple notes it may take some time for all your messages to appear on each device, and you can keep sending and receiving messages while it finishes.
Enable Messages in iCloud on both devices
Turn on history synchronization at both ends, then request a sync from your Mac.
- 1.On your Mac, open Messages > Settings > iMessage and confirm that you use the same Apple Account as your other devices.
- 2.Select Enable Messages in iCloud.
- 3.On your iPhone, open Settings > [your name] > iCloud > See All > Messages in iCloud. Some versions use the labels Show All and Messages.
- 4.Turn on Use on this iPhone. On an iPad, enable the corresponding iPad control.
- 5.Back on the Mac, open Messages > Settings > iMessage and click Sync Now.
Match accounts and addresses for missing conversations
If only some conversations reach your Mac, check its account and receiving addresses. Your devices need the same Apple Account in Messages and in iCloud.
Compare the account in your Mac’s Messages > Settings > iMessage with the one in your iPhone’s Settings > Apps > Messages > Send & Receive.
If the Mac uses a different account, click Sign Out in its iMessage settings.
Sign in on the Mac with the account used on your iPhone.
On the iPhone’s Settings > Apps > Messages > Send & Receive screen, choose Use your Apple Account for iMessage if offered.
Select your phone number and Apple Account on that screen.
On the Mac, select the matching number and email addresses under Messages > Settings > iMessage > You can be reached for messages at.
Set Start new conversations from to the number or email you want to use consistently. This addresses split conversation identities; it does not merge existing threads.
Restore carrier texts through your iPhone
Check that your iPhone is powered on, connected to Wi-Fi or cellular service, and able to send and receive messages itself. SMS, MMS, and supported RCS messages reach your Mac through that phone. RCS availability depends on its carrier and service.
If you are not using Messages in iCloud on both devices, enable your Mac under the iPhone’s Settings > Apps > Messages > Text Message Forwarding, completing the verification-code prompt if requested. Messages in iCloud already includes forwarding, so devices using it do not need this separate setup.
If Text Message Forwarding is missing, toggle iMessage off and back on in Settings > Apps > Messages.
Sign in again through Send & Receive.
Check iCloud security requirements and storage
Enable Two-Factor Authentication in System Settings > [your name] > Sign-In & Security if it is off, completing the verification prompts. Messages in iCloud requires it.
Turn on Sync this Mac under Apple menu > System Settings > [your name] > iCloud > Passwords. On macOS Sonoma and earlier, the pane is called Passwords & Keychain; iCloud Keychain is another requirement for Messages in iCloud.
Click Done.
Complete any approval prompt using an existing device or its previous passcode.
Inspect the storage bar in System Settings > [your name] > iCloud for an almost-full or full account.
Click Manage to review stored data.
Preserve copies of anything you want to keep before deleting content.
Remove unneeded content to free space.
To increase storage instead, use Upgrade to iCloud+ or Manage Plan, depending on your current plan.
Remember that deleting synced Messages content affects your other devices too.
Restart the app and check your Mac
For a frozen Messages app, quit with Command-Q before reopening it. If it will not quit, use Option-Command-Esc to select Messages and click Force Quit.
Restart through Apple menu > Restart, confirming when prompted. After signing back in, reopen Messages.
Correct an inaccurate clock in Apple menu > System Settings > General > Date & Time. Apple recommends checking the date, time, and time zone for Messages and activation problems.
Install an offered compatible update through Apple menu > System Settings > General > Software Update. Messages comes with macOS, so the system update also updates the bundled app.
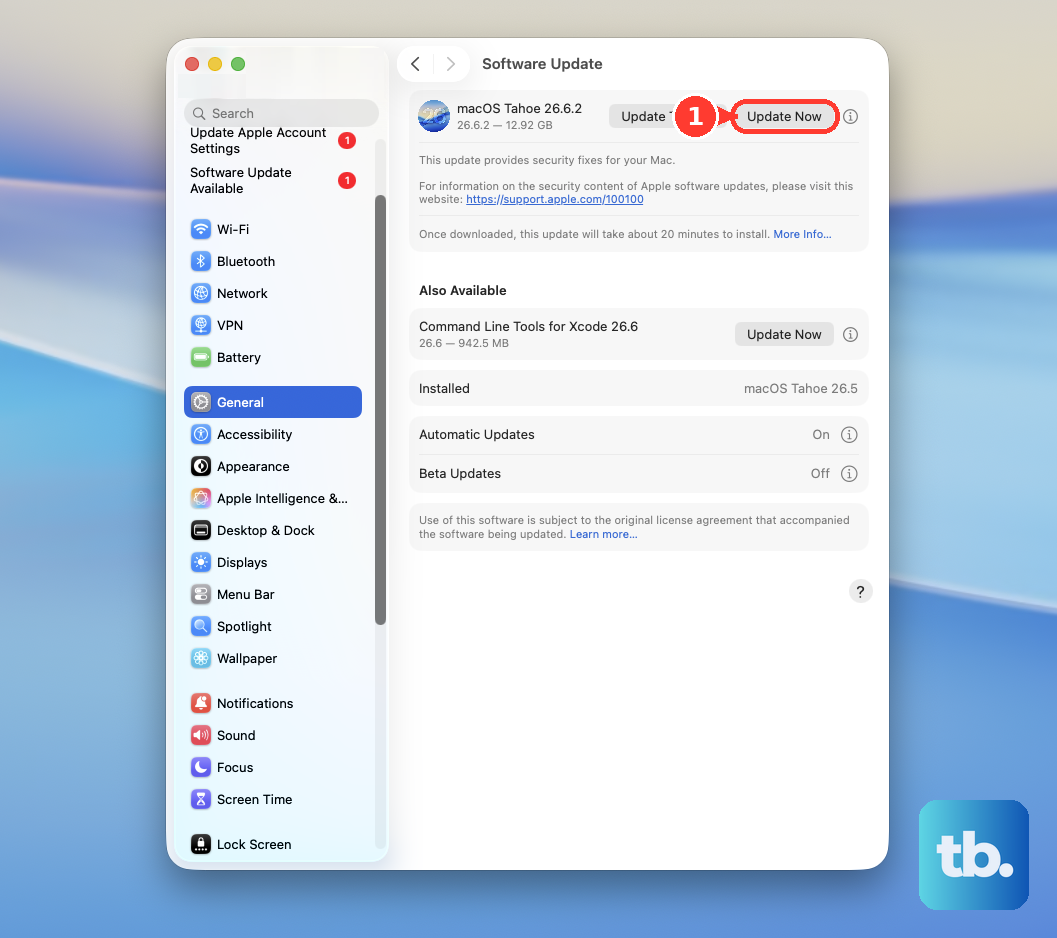
Find hidden or recently deleted conversations
These checks bring filtered or recently deleted conversations back into view.
In Messages, click the Filter button above the sidebar.
Choose Unknown Senders.
Open a legitimate conversation there.
Click Mark as Known.
Check Filter > Spam for a conversation that was filtered incorrectly.
Open the affected conversation.
Click Not Spam.
For a recent deletion, choose View > Recently Deleted. Deleted conversations are generally recoverable within 30 days.
Select the conversation you want back.
Click Recover. With Messages in iCloud enabled, recovery syncs to participating devices.
Reset your iMessage sign-in for an account error
Use this targeted reset when Messages reports a sign-in or activation problem.
- 1.Sign in at account.apple.com to confirm that your Apple Account works. If Messages reports an unverified email address, complete email verification there.
- 2.On the Mac, open Messages > Settings > iMessage and click Sign Out.
- 3.Choose Apple menu > Restart and confirm.
- 4.Return to Messages > Settings > iMessage and sign in with the same account used on your other devices.
- 5.If activation still fails, visit Apple’s activation portal. Under Enable Apple Account, select Get Started and complete the prompts. Apple emails the outcome.
Test another network if syncing still fails
Test your Mac on another internet connection. If Messages works there, focus on the original network.
Restart the original network’s modem or router.
Test Messages on that network again.
For a continuing network problem, contact your internet provider or network administrator.
Temporarily turn off network features in any VPN, filtering, or security app you control, using that app’s controls. These features can interfere with connections.
Retest Messages.
If messages still will not sync, use the contact Apple Support link on Apple’s Mac Messages troubleshooting page. Explain whether you are missing old history, new iMessages, carrier texts, or messages on only one device, and mention any activation error.
Frequently Asked Questions
How do I stop older conversations from being removed automatically?
Open Messages > Settings > General and set Keep messages to Forever. This prevents age-based deletion; it does not restore permanently removed history.
Does the 24-hour activation window apply to syncing message history?
No. The up-to-24-hour window applies to iPhone phone-number verification. Ask your carrier to confirm international SMS support, and avoid repeatedly toggling iMessage while verification is running. For temporary iMessage access, select a verified email under the iPhone’s Settings > Apps > Messages > Send & Receive and enable the same address on the Mac. This does not restore SMS or RCS forwarding by itself.
What should I do about missing shared photos after an iPhone update or transfer?
For missing shared media or an indexing alert after an update or transfer, leave the iPhone locked and connected to the internet over Wi-Fi or Ethernet. Apple says indexing shared photos, links, and other conversation media can take up to a few days. This is separate from general Mac history synchronization.
Can I reinstall Messages separately on my Mac?
Not as a standalone app. Messages is built into macOS, and Apple updates it through macOS updates. Apple’s macOS download and installation page provides the official system installation options.