A monitor docking station not working can look like a black screen, a monitor stuck in mirror mode, or a dock that charges your laptop but never sends video. Start with the fixes that confirm the display path, then move into updates, permissions, and vendor tools for the dock you own. These steps use official Windows, Mac, Surface, Dell, DisplayLink, and Chromebook support paths verified in August 2026.
Start with display mode and monitor input
On Windows, press Windows logo key + P and choose Extend or Duplicate. If it is set to PC screen only, the dock can be connected while the monitor stays blank.
Use the monitor’s physical buttons or joystick to open its on-screen display menu, then choose the active input such as USB-C, DisplayPort, HDMI, DVI, or VGA. Some monitors stay on the last source until you change it yourself.
If the screen still does not wake up, restart the computer and power-cycle the dock next.
Make Windows detect the docked monitor
Open Start > Settings > System > Display > Multiple displays > Detect. Use this when the monitor is cabled through the dock but Windows has not added it to the display layout.
Then go to Start > Settings > Windows Update > Check for updates. Windows Update is the supported path for OS, graphics, USB-C, and dock-related updates that Microsoft exposes there.
If the display went dark after a graphics glitch, press Windows logo key + Ctrl + Shift + B. That resets the Windows graphics driver.
Fix the USB-C or Thunderbolt path
The most common hardware cause is a dock plugged into a USB-C or Thunderbolt port that does not support the display mode the dock needs.
Move the dock cable from any intermediate hub to the PC itself.
If the computer has more than one USB-C port, use the USB-C or Thunderbolt port marked for display or Thunderbolt.
Plug the dock into its external power adapter, then plug the PC into external power.
If Windows reports that the USB device might need more power, disconnect unused USB devices from the PC or dock, then reconnect the dock and monitor.
Turn on USB-C alerts by selecting Search, typing usb, opening USB settings, and turning connection notifications on.
Correct daisy chain and port settings
Use this when the monitor lights up, but the resolution, daisy chain, or multi-monitor behavior is wrong. The dock may be fine while the monitor’s own port setting is blocking the setup you want.
Open the monitor’s built-in menu and find the DisplayPort or port-version setting.
For a DisplayPort daisy chain, set both external displays to DisplayPort 1.2 or the manufacturer’s equivalent Multi-Stream Transport setting.
Do not use a passive display splitter when you want two independent extended monitors. Use a supported docking station, USB display adapter, Thunderbolt or USB4 dock, or a PC with enough native display outputs.
Run the Mac dock checks
On a Mac, disconnect the display from the Mac and from power, then reconnect it.
If the display is connected through a hub or dock, plug the display directly into a Mac port to isolate the dock or cable path.
Put the Mac to sleep and wake it again. On a Mac laptop, close the lid for a few seconds, then open it.
If that fails, open Apple menu > Restart. If the Mac cannot restart, press and hold the power button for about 10 seconds, then press and release the power button to turn it back on.
If none of that fixes it, check the Mac’s display limit next, especially when you are trying to run more than one external monitor through a dock.
Check Mac display limits
This fixes setups where the dock is connected correctly, but the Mac does not support the number, resolution, or refresh rate you are trying to run.
Open Apple menu > System Settings.
Choose Help in the menu bar.
Select [your Mac’s name] Specifications.
Scroll to Display Support or Video Support.
Compare your connected displays with the Mac’s supported number, resolution, and refresh rate. A standard dock, hub, splitter, or daisy chain does not increase that limit, because those still run through the Mac’s own display outputs. A DisplayLink dock is the exception: it draws extra screens over USB as virtual displays, within DisplayLink’s own limits and the software steps in the next section.
Give DisplayLink docks permission
For a DisplayLink dock on macOS, handle the driver and permission together.
- 1.Install or update DisplayLink Manager from Synaptics’ official DisplayLink macOS software page.
- 2.Connect the DisplayLink dock, adapter, or monitor after installation finishes.
- 3.Open System Settings > Privacy & Security > Screen & System Audio Recording. On macOS Sonoma and earlier, that pane is called Screen Recording.
- 4.Turn on DisplayLink Manager and authenticate with your login details.
- 5.Choose Quit & Reopen.
Update Surface and Dell docks
For a Surface dock, open Surface app > Help & support > Check for updates. If the app is missing, open Microsoft Store, download Surface app, then open it from Start.
For Surface Thunderbolt 4 Dock or Surface Dock 2, connect the dock, open Surface app, select the dock from connected accessories, then expand Firmware Update or Device Information. Select the update option if it appears.
On a Dell PC, open Start menu, search for SupportAssist, then use Home > Update Software > Start. Restart if SupportAssist prompts you.
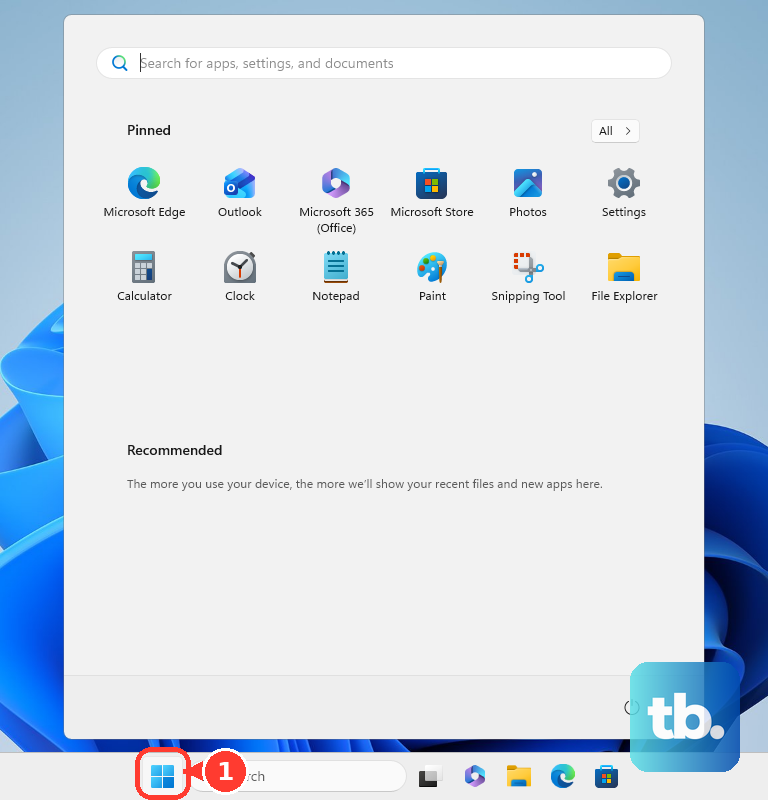
To test a supported Dell dock, open SupportAssist > Support > Test my hardware > Get started > Dock Devices > Run test.
For Dell Universal USB docks such as UD22, D6000, D6000S, and D3100, use Dell’s official Drivers & Downloads page to get the DisplayLink Dock Driver. For Dell dock models with firmware packages, use the Dell Dock Firmware Update Utility from the same official Dell driver path.
Reset wireless and Chromebook docks
This fixes Windows wireless dock pairing problems and Chromebook USB-C or Thunderbolt dock blocks.
For a Windows wireless display or dock, open Settings > Bluetooth & devices > Devices > Wireless displays & docks.
Select the wireless display or adapter, choose Remove device, then reconnect it.
On a Chromebook, replace the USB-C cable when the monitor does not respond or ChromeOS says Cable may not support displays.
For a Pixelbook or ChromeOS dock reset, leave the hub or dock connected to the device’s USB-C port.
Unplug the monitor from the hub or dock, then plug the monitor back in.
On a Chromebook with USB4 or Thunderbolt, select the time at the bottom right and open Settings > Privacy and security.
Turn off Block Thunderbolt or USB4 accessories from accessing and sharing memory (RAM).
If the accessory still does not work properly, wait a few seconds, disconnect and reconnect it, then turn that setting off and on again.
For a managed Windows laptop, ask your IT administrator to review the Windows image, Group Policy, or Intune settings that control USB-C and Thunderbolt dock access before login.
Frequently Asked Questions
Why does my laptop charge from the dock but the monitor stays black?
Charging can work through USB-C even when the port, cable, or dock path is not carrying the required display signal. Use a USB-C or Thunderbolt port marked for display, connect the dock directly to the computer, and set the monitor to the correct input.
Why does my second monitor only mirror instead of extend?
On Windows, press Windows logo key + P and choose Extend. On a Mac, check Display Support or Video Support for your exact model, because a standard dock, hub, or daisy chain does not increase the number of displays the Mac can drive natively. A DisplayLink dock is the separate exception: it adds virtual displays over USB and needs DisplayLink Manager installed.
Do DisplayLink docks need special software on a Mac?
Yes. DisplayLink docks and adapters on macOS need DisplayLink Manager, and DisplayLink Manager needs screen recording permission under System Settings > Privacy & Security > Screen & System Audio Recording, which macOS Sonoma and earlier calls Screen Recording.
Should I install dock drivers from third-party download sites?
No. Use the official Microsoft Surface, Dell Drivers & Downloads, or Synaptics DisplayLink pages for your dock or software.