A deleted Word document is usually sitting in the computer trash, a cloud recycle bin, Word recovery, or a backup. Start with the fastest restore paths before the file ages out of a recovery window. Use the steps below in order until the .doc or .docx file is back.
Check the Windows Recycle Bin first
This fixes Word documents deleted from local Windows storage before the Recycle Bin was emptied.
Open Recycle Bin from the desktop.
Select the deleted .doc or .docx file, or select the folder that contained it.
Right-click the item and choose Restore.
Open the original folder and confirm the file returned there.
If the Recycle Bin icon is missing, open Settings.
Go to Personalization.
Choose Themes.
Open Desktop icon settings.
Check Recycle Bin.
Select OK.
Recover a Word file from Mac Trash
The most common Mac cause is a normal delete, which moves the Word document to Trash until Trash is emptied.
Click Trash in the Dock.
Select the missing Word document.
Open File.
Choose Put Back.
You can also drag the item out of Trash to a folder or the desktop.
If files disappear after 30 days, open Finder, choose Settings, then Advanced, and check whether Remove items from the Trash after 30 days is enabled.
Look in OneDrive deleted files
For Word documents saved in OneDrive, use the OneDrive website when the file disappeared from File Explorer, Finder, or another synced device. Sign in to OneDrive, open Recycle bin, select the Word document, and choose Restore.
Personal OneDrive recycle bin items are normally deleted 30 days after they are put there, and if the recycle bin is full the oldest items can be deleted after only three days. Work and school accounts use 93 days by default unless an administrator changes that window.
On iPhone or Android, open the OneDrive app, tap the Me icon, select the account, open Recycle Bin, choose the files, and tap Restore. If the document was in Personal Vault, unlock Personal Vault or use Show Personal Vault items to see deleted vault files.
After a large deletion, ransomware event, or many unwanted changes, use OneDrive restore. Restoring an entire OneDrive requires Microsoft 365, and it can only undo actions from the last 30 days. On the OneDrive website with a personal Microsoft account, open Settings, choose Options, then choose Restore your OneDrive. With a work or school account, open Settings, then choose Restore OneDrive. Pick a date or Custom date and time, review the activity, and select Restore.
Use Word recovery for unsaved work
Word recovery applies when the document was never saved, Word crashed, or you closed a saved file without keeping recent changes. It does not restore a normally deleted file after every copy is gone.
In Word for Windows, open Word, go to File, choose Info, open Manage Document, then select Recover Unsaved Documents. Choose the recovered file, select Open, then save it with Save As.
Word for Mac has no File and Info route. After an unexpected shutdown, reopen Word and let it open the AutoRecover file for you, or open Finder, choose Go, select Go to Folder, and enter /Users/<username>/Library/Containers/com.Microsoft.Word/Data/Library/Preferences/AutoRecovery to reach the hidden AutoRecovery folder. If you closed the file and selected Don't Save, Word deleted the AutoRecover file, so use a recycle bin, version history, or a backup instead.
If Word or another Microsoft 365 app closed unexpectedly, reopen the app and use the Document Recovery pane when it appears. Open or view the recovered file, choose Save As, and choose Yes, I want to view these files later when closing the pane if you still need to inspect them.
In Word for Windows, for a saved file closed without saving, open the document, go to File, select Info, and under Manage Documents choose the file labeled (when I closed without saving), then select Restore. If this method fails, move to version history or backups, because Word recovery only works when Word retained a recovery copy.
Restore an earlier Word version
This fixes Word documents that were overwritten, changed, or closed in the wrong state while a copy still exists in OneDrive or SharePoint.
Open the file in Word desktop or Word for the web.
Choose File.
Open Version History, or click the document title and choose Version history.
Select the version you want.
Choose Restore.
To do the same from OneDrive, open OneDrive at onedrive.com.
Select the Word file.
Right-click the file and choose Version history.
Select the ellipsis next to the version.
Choose Restore.
Try Windows backups and local recovery
File History restores a deleted Word document only when it was configured before deletion and the folder was included in the backup. Open File Explorer, go to the folder that used to contain the document, right-click the folder name, choose Restore previous versions, open the Previous Versions tab, select a version, then use Open, Open in File History, Restore, or Restore to....

If Windows Backup was protecting Desktop, Documents, Pictures, Videos, or Music, recovery happens through the matching OneDrive folder and the OneDrive restore options above. To check the setup, open Start, type backup, open Windows Backup, expand Folders, and see which folders are toggled on.
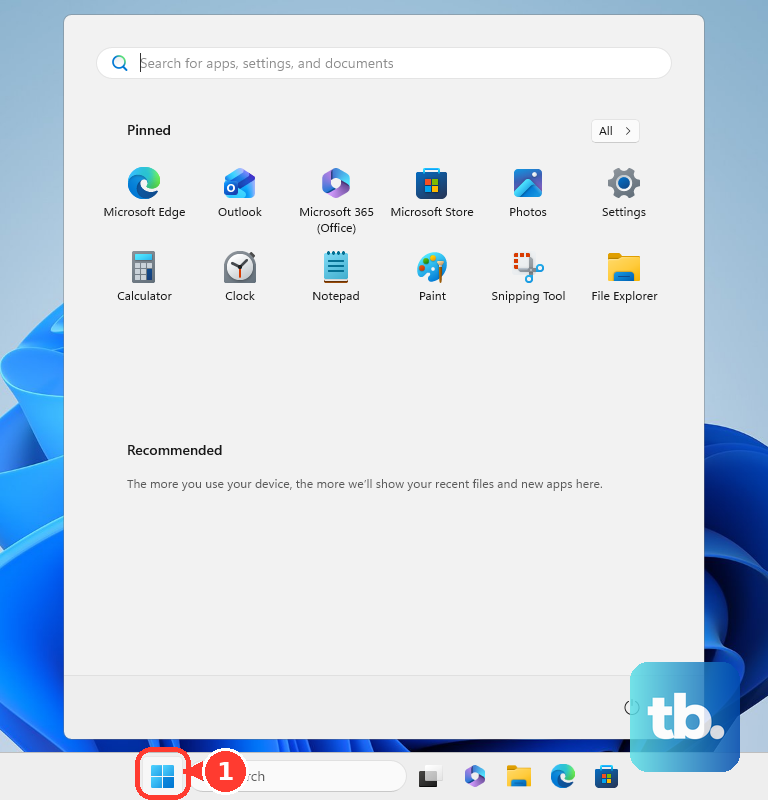
When a local file is not in Recycle Bin and was not backed up, install Windows File Recovery from the Microsoft Store. Open Windows File Recovery, approve the prompt with Yes, and recover to a different destination drive with a command such as winfr C: E: /regular /n *.docx or winfr C: E: /regular /n \Users\<username>\Documents\.
If this method fails, try the cloud service that stored or synced the document; Windows File Recovery is not supported for cloud storage or network file shares, and Windows 10 support ended on October 14, 2025.
Find the file in iCloud or Time Machine
Open a Finder window for the folder that used to contain the Word document, such as Documents.
Open Time Machine from Spotlight or choose Browse Time Machine backups from the Time Machine menu.
Use the arrows or timeline to move through backups.
Select the Word document and choose Restore.
If you do not remember the folder or file name, search in Finder first.
Open Browse Time Machine backups from the Time Machine menu.
Restore the document from the search results.
For iCloud Drive, go to iCloud.com, open iCloud Drive, choose Recently Deleted, select the file, then choose Recover; iCloud Drive keeps deleted files recoverable for 30 days unless they were permanently deleted earlier.
On iPhone or iPad, open Files, tap Browse, go to Locations, open Recently Deleted, tap More, choose Select, select the files, and tap Recover.
For future recovery, turn on Time Machine from Apple menu, System Settings, General, Time Machine, then Add Backup Disk.
Search Google Drive and Dropbox trash
This fixes Word documents uploaded to Google Drive or Dropbox, including files synced from a computer.
In Google Drive on the web, open Trash.
Right-click the Word document and choose Restore.
Sort Google Drive by Trashed date to find recent deletions faster.
In the Google Drive app for Android, tap Menu or More next to the file.
Tap Restore.
In the Google Drive app for iPhone or iPad, open Menu.
Choose Trash.
Tap Menu or More next to the file.
Choose Restore.
In Dropbox on the web, open Deleted files.
Click the deleted Word file or folder name.
Choose Restore.
When you remember the Dropbox folder, open that folder.
Choose the settings icon.
Select Folder settings.
Turn on Show deleted files.
Select the file.
Open the top-screen ellipsis.
Choose Restore.
Use work or school recovery paths
This applies when the Word document lived in a managed Microsoft 365, Teams, SharePoint, or Google Workspace account. Your restore options depend on permissions, retention windows, and administrator settings.
For Teams files stored in your OneDrive area, open Teams, choose OneDrive, open Recycle bin, right-click the file, and select Restore.
For Teams channel files, open Teams, go to Chat, choose Channels, select the channel, open Shared, choose More options, select Open in SharePoint, open Recycle bin, select the file with the circled check mark, and choose Restore.
SharePoint Online keeps deleted items in recycle bins for 93 days. If the file is missing from the first recycle bin, ask the site owner or admin to check the site collection recycle bin.
For Google Workspace, contact your administrator quickly after the file leaves Trash. Admin restore covers Drive items within 25 days after Trash is emptied, and personal Google accounts do not have that admin path.
Skip older tips that tell you to use System Restore or Word ~$ owner files for deleted documents. System Restore does not recover personal Word files, and ~$ files are temporary lock files rather than recoverable document copies.
Frequently Asked Questions
Can I recover a Word document after emptying Recycle Bin or Trash?
Yes, when a backup, cloud recycle bin, OneDrive restore point, Time Machine backup, File History backup, or Windows File Recovery result still contains the file. Without one of those recovery paths, the document is not recoverable through Word itself.
Why is my deleted Word document not in the Windows Recycle Bin?
The file was permanently deleted, stored as an online-only OneDrive file, removed from a cloud service, or deleted from a location that does not use the Windows Recycle Bin.
Does Word Version History recover deleted documents?
No. Version History restores earlier versions of a file that still exists in OneDrive or SharePoint. Use a recycle bin, trash folder, backup, or admin restore path for a deleted file.
How long do cloud services keep deleted Word files?
OneDrive personal keeps recycle bin items for 30 days, OneDrive work or school defaults to 93 days, iCloud Drive keeps deleted files for 30 days, and Google Drive Trash keeps files for 30 days. Dropbox recovery windows vary by plan.