Edge blocks pop-ups until you tell it otherwise, which is useful until a bank, school, government, or workplace page opens the exact window you need. The clean fix is to allow pop-ups for the site you trust, or switch them on everywhere when that is what the task requires. Here are the current Edge paths for desktop, Android, iPhone, iPad, and managed devices.
1. Allow pop-ups for one trusted website
Best choice: allow only the site that needs a sign-in window, payment page, document viewer, or confirmation screen. Open Microsoft Edge, select Settings and more (...), and choose Settings.
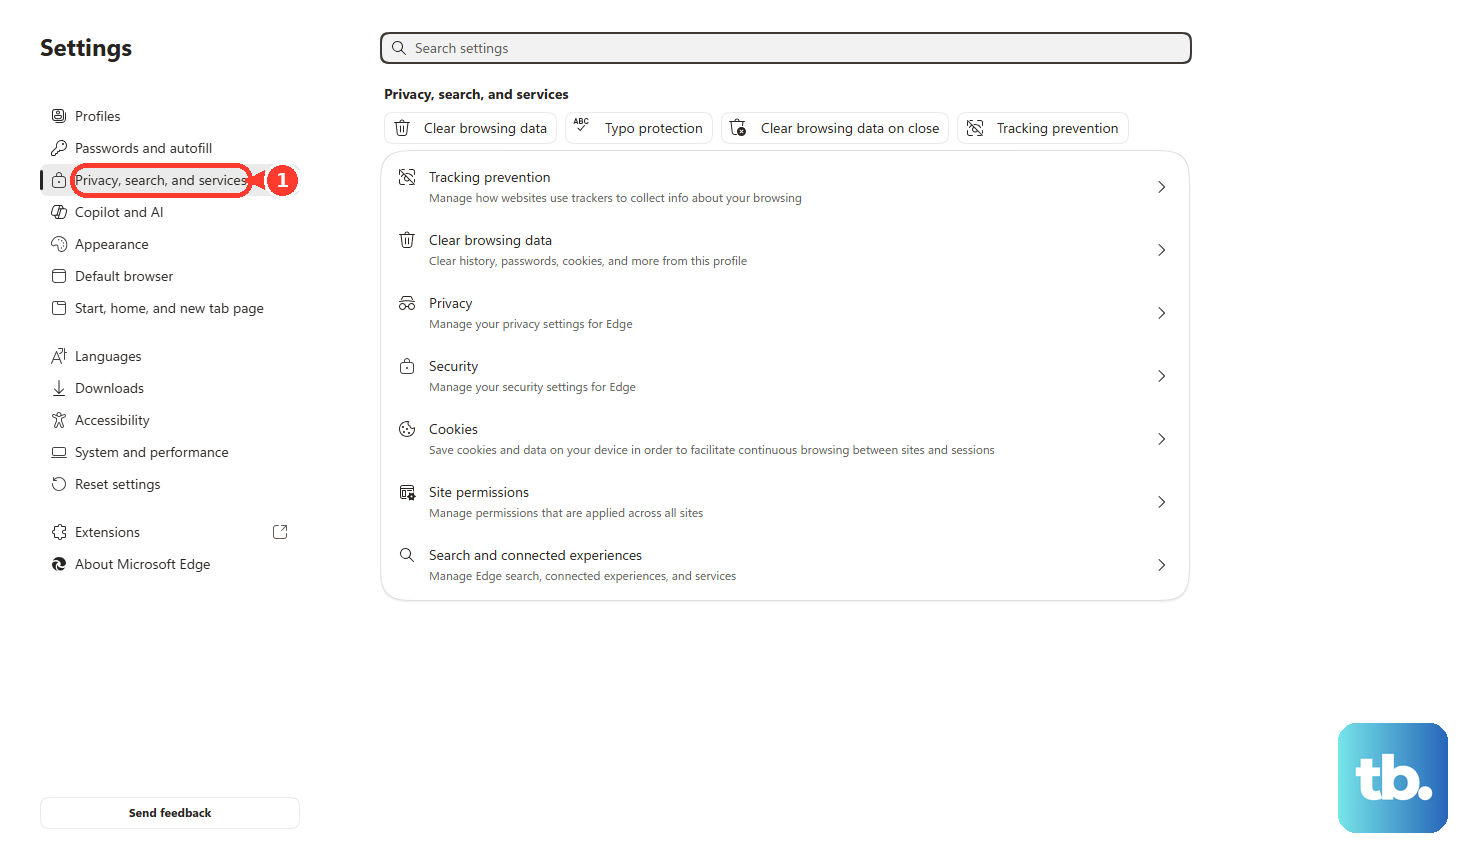
Go to Privacy, search, and services, select Site permissions, and open All permissions. Choose Pop-ups and redirects.
Under Allowed to send pop-ups and use redirects, select Add site. Enter the site URL starting with https://, then select Add.
Edge keeps blocking pop-ups on other websites while letting this one work. Go back to the website and try the same button or link again.
2. Use the pop-up blocked icon when Edge stops a window
- 1.Return to the page that triggered the pop-up, or repeat the action that opened it.
- 2.In the address bar, select the Pop-up blocked indicator.
- 3.Choose Always allow pop-ups and redirects from this site.
- 4.Select Done.
If Edge just blocked the window, this address-bar option lets you allow that site directly. The blocked pop-up is gone once Edge blocks it, so after you allow the site, repeat the same action on the page to open the window again.
3. Let every site show pop-ups on desktop
Use the global switch only when you need pop-ups across many sites. In desktop Edge, open Settings and more (...), choose Settings, then go to Privacy, search, and services > Site permissions > All permissions > Pop-ups and redirects.
Open Microsoft Edge, select Settings and more (...), and choose Settings. Go to Privacy, search, and services, select Site permissions, and open All permissions. Choose Pop-ups and redirects, then turn off Blocked (recommended). With Blocked (recommended) turned off, Edge allows pop-ups instead of blocking them.
4. Change pop-up settings with a keyboard or screen reader
You can reach the same desktop setting without a mouse. Press Alt+F, use the Down arrow to reach Settings, then press Enter.
Press Tab until you reach the settings categories. Use the Down arrow to choose Cookies and site permissions, then press Enter.
Press Tab to reach Pop-ups and redirects, then press Enter. Press Tab to reach Block (recommended), then press Spacebar to clear the selected checkbox or toggle. Clearing Block (recommended) allows pop-ups in desktop Edge.
5. Enable pop-ups in Edge on Android
On Android, Edge keeps this control inside mobile site permissions. Open Edge, tap menu (...), and tap Settings.
Choose Site permissions, tap Pop-ups and redirects, and turn Pop-ups and redirects on. Once the switch is on, Edge for Android allows pop-ups on that device.
6. Turn off the pop-up blocker on iPhone and iPad
Open Edge, tap menu (...), and tap Settings. Open Privacy and security, turn Block pop-ups off, and tap Done. Edge for iOS and iPadOS uses a different menu name, but the job is the same: turn off the blocker.
7. Ask IT when Edge settings are locked
A work or school device can have Edge pop-up settings controlled by policy. If the setting is locked, missing, or changes back after you edit it, ask your IT team to allow pop-ups for the site you need.
For managed desktop Edge, IT can allow all pop-ups with DefaultPopupsSetting = AllowPopups (1), or allow only specific sites with PopupsAllowedForUrls. On managed Edge mobile, IT can also set DefaultPopupsSetting to 1 or use PopupsAllowedForUrls for specific URL patterns.
8. Skip old Internet Explorer pop-up settings
Microsoft currently documents two desktop routes to the same control. The general consumer path is Settings > Privacy, search, and services > Site permissions > All permissions > Pop-ups and redirects.
Microsoft's keyboard and screen reader guide still uses Settings > Cookies and site permissions > Pop-ups and redirects. Use whichever category your copy of Edge shows, because both land on the same Pop-ups and redirects page.
Do not use Internet Options, Privacy, or Internet Explorer's old pop-up blocker settings for current Microsoft Edge. Edge's current control is Pop-ups and redirects under site permissions.
Frequently Asked Questions
Why does Edge still block a pop-up after I allowed it?
Edge cannot bring back a pop-up it already blocked. Allow the site, then repeat the same action on the page to open the window again.
Is it better to allow one site or all sites?
Allow one trusted site when only one bank, school, government, or workplace page needs pop-ups. Use the all-sites setting only when you need pop-ups broadly.
What URL should I enter when adding an allowed site?
Enter the site's address starting with https://, then select Add.
Can my employer or school control Edge pop-ups?
Yes. Managed devices can use Edge policies that lock pop-up behavior or allow pop-ups only for approved sites.