Your Windows microphone settings control which apps, desktop programs, websites, and speech features get access to your mic. If the mic is blocked, always start with the Windows 11 privacy switch, then tighten access for specific apps, browsers, and voice features.
Turn The Main Microphone Permission On Or Off
This fixes microphone access blocked at the Windows privacy level.
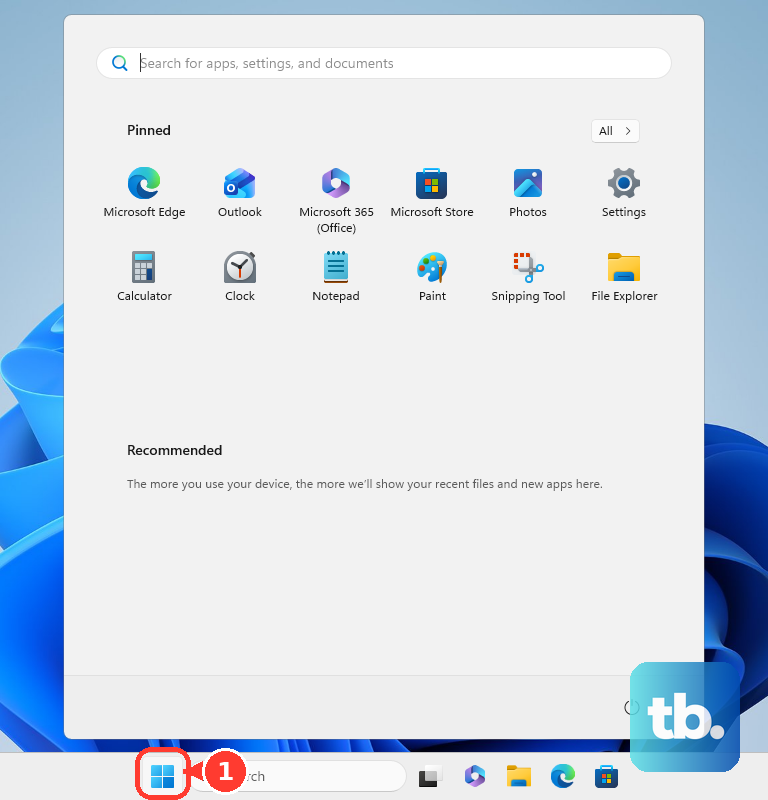
Open Start.
Select Settings.
Choose Privacy & security.
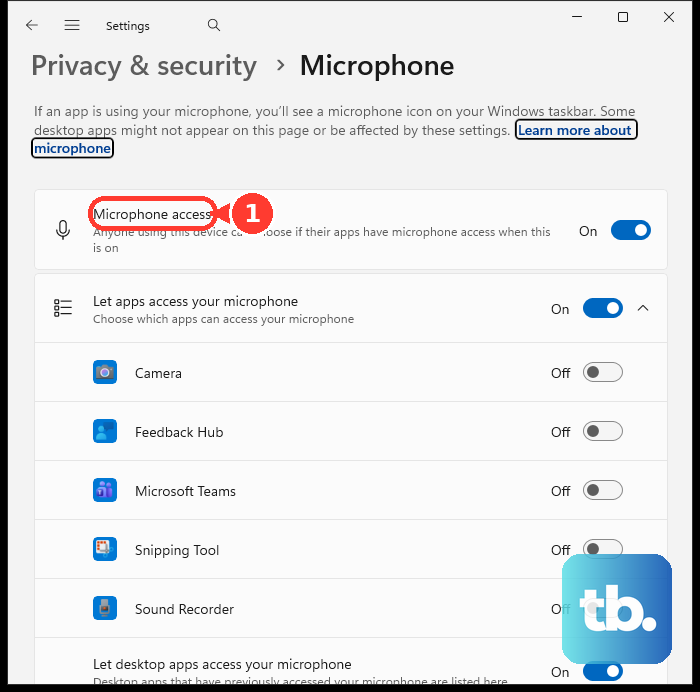
Select Microphone.
Set Microphone access to On to allow microphone use, or set it to Off to block it.
Choose Which Microsoft Store Apps Use The Mic
Once the main mic permission is on, use the same page to control Microsoft Store apps.
- 1.Open Start and select Settings.
- 2.Go to Privacy & security and choose Microphone.
- 3.Set Let apps access your microphone to On or Off.
- 4.Under Choose which apps can access your microphone, find the app.
- 5.Switch that app's toggle On or Off.
Control Desktop App Microphone Access
Open Start.
Select Settings.
Go to Privacy & security.
Select Microphone.
Set Let desktop apps access your microphone to On or Off.
Expand Let desktop apps access your microphone.
Select an app listed there to see details about the file that accessed the microphone.
Use this as a broad desktop-app control. Windows does not provide individual desktop-app toggles here, and Microsoft says desktop apps are not always listed and some still access the microphone when this setting is off.
Manage Website Permissions In Your Browser
Website microphone permission is separate from Windows microphone permission. In Microsoft Edge, open the site and choose Allow in the permission dialog, or choose Block or close the dialog box to deny access.
To change a saved Edge rule, open Settings and more > Settings > Privacy, search, and services > Site Permissions > All sites, select the website, then set the Microphone dropdown to Block.
In Chrome, open the site and choose Allow while visiting the site, Allow this time, or Never allow when prompted. To edit saved Chrome rules, go to More > Settings > Privacy and security > Site settings > Permissions > Microphone, set the default, review allowed and blocked sites, use Delete next to a site to remove an exception, or open a blocked site and change Microphone to Allow. Use the Down arrow on that page to choose the default microphone for websites.
In Firefox, open a site, choose Allow or Block in the pop-up, and select Remember this decision when you want Firefox to save it. To edit saved rules, use Firefox menu button > Settings > Privacy & Security > Permissions > Microphone > Settings..., change a site to Allow or Block, use Remove Website, select Block new requests asking to access your microphone to stop new prompts, then choose Save Changes.
Select The Right Input Microphone
Use this when apps have microphone permission but Windows is listening to the wrong input device. This changes the active input microphone; it does not grant privacy permission by itself.
Open Start.
Select Settings.
Go to System > Sound.
Under Input, open Choose a device for speaking or recording.
Select the microphone you want to use.
If your PC shows the device audio switch, choose the microphone device.
Set Allow apps and Windows to use this device for audio to Allowed or Don’t allow.
Mute The Mic Without Changing Privacy Settings
Use the mute switch or button on your headset, microphone, keyboard, or accessory.
On Surface keyboards or Type Covers with a microphone key, press the top-row microphone key to toggle microphone muting on or off.
In supported Windows 11 apps, press Windows key + Alt + K to mute or unmute the microphone.
Use these controls for quick silence during a session, not for long-term microphone privacy.
Separate Voice Activation From Mic Access
The most common cause of confusion is that Voice activation and Speech are separate from the main Microphone permission.
Open Start > Settings > Privacy & security > Voice activation.
Set Let apps access voice activation services to On or Off.
Expand Let apps access voice activation services.
Control whether apps activate when the device is locked.
Manage individual app voice activation permissions.
For Microsoft cloud speech recognition, go to Start > Settings > Privacy & security > Speech.
Set Online speech recognition to On or Off.
Online speech recognition affects Windows speech features such as voice typing; it does not block all microphone access.
Remove An App That Should Not Request Mic Access
Use this when you do not want the app on the PC at all. Once the app is removed, it no longer requests microphone access.
Open Start > Settings > Apps > Installed apps.
Find the app.
Select More.
Choose Uninstall.
For a classic desktop program, search the taskbar for Control Panel.
Open Control Panel > Programs > Programs and Features.
Right-click the program.
Choose Uninstall or Uninstall/Change.
Follow the on-screen directions.
Some built-in apps do not uninstall from Settings.
Fix Grayed Out Microphone Switches
On a work or school Windows PC, your organization controls microphone access when the normal Settings switches are grayed out or your changes do not stick.
Use the current Windows 11 path: Start > Settings > Privacy & security > Microphone. Windows 10 support ended on October 14, 2025, so the older Start > Settings > Privacy > Microphone path is not the current consumer Windows path.
For speech settings, use Privacy & security > Speech > Online speech recognition. On Windows 11 version 22H2 and later, use Voice access instead of Windows Speech Recognition.
If this method fails, check the browser permission, the active input device setting, and the main Windows microphone privacy switch on a personal PC; for a managed device, contact your work or school support team.
Frequently Asked Questions
Can I turn off the microphone for one desktop app?
Not through the current stable Windows privacy page. Desktop apps use the class-level Let desktop apps access your microphone switch, and Microsoft says desktop apps are not always listed there and some still access the microphone when the setting is off.
Why does a website still ask for mic access after Windows is allowed?
Windows permission lets the browser use the mic. Each website still has its own browser permission, so allow or block the site in the browser prompt or saved site settings.
Does Online speech recognition turn the microphone off?
No. It controls Microsoft cloud speech recognition for Windows speech features such as voice typing. It does not block all microphone access.
What should I do if a microphone switch is grayed out?
On a work or school PC, your organization controls that setting. Change the permissions still available to you, then contact your work or school support team for the locked control.