Changing DNS helps when your device is using the wrong resolver, your router is handing out DNS you do not want, or you want a specific DNS provider. You can set it for one device, one Wi-Fi network, one browser, or your whole home network. Start with the device you use most, then move to router or profile settings only when you need broader control.
Change DNS on Windows in Settings
Most Windows DNS changes start in the Settings app because Microsoft puts the main Wi-Fi and Ethernet IP assignment controls there.
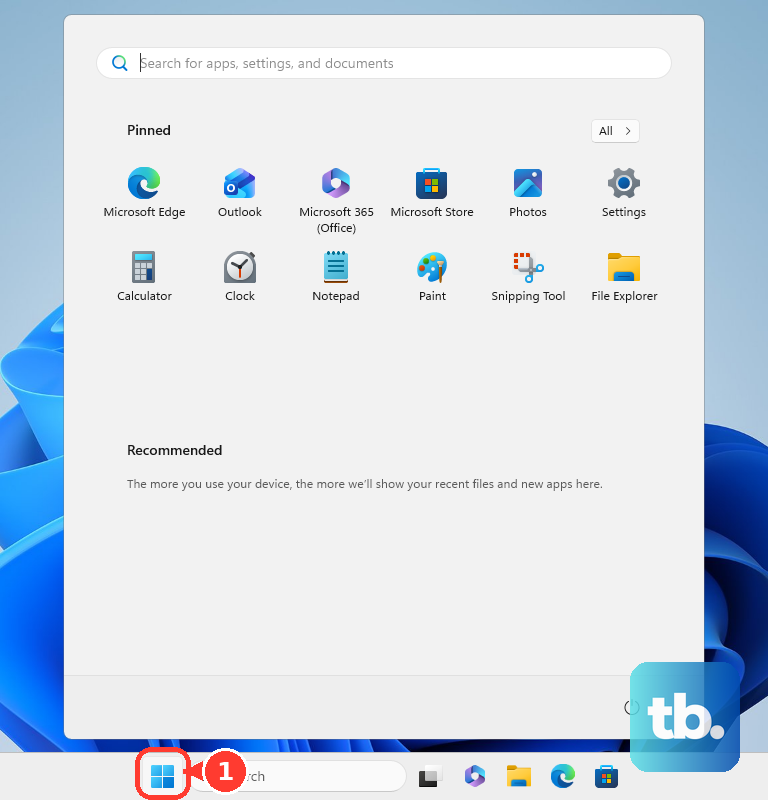
Open Start, then Settings, then Network & internet.
For Wi-Fi, choose Wi-Fi, open Manage known networks, and select your network.
For Ethernet, choose Ethernet and select the wired network.
Next to IP assignment, select Edit. Under Edit IP settings, choose Manual, turn on IPv4, enter your preferred and alternate DNS addresses, then select Save.
For IPv6 DNS, use the same IP assignment edit screen, turn on IPv6, enter the preferred and alternate DNS addresses, then select Save. On Windows 11, choose the DNS over HTTPS setting shown on that screen; that setting is not available in Windows 10.
Open Windows DNS Settings Faster
Use the taskbar shortcut when you are already connected and want the quickest path into the active network settings.
- 1.Right-click the Network or Wi-Fi icon on the taskbar.
- 2.Open Network and internet settings.
- 3.Choose Wi-Fi and then Manage known networks, or choose Ethernet for a wired connection.
- 4.Select the active network and choose Edit next to IP assignment.
- 5.Choose Manual, turn on IPv4 or IPv6, enter the DNS addresses, and select Save.
Set DNS on a Mac
On current macOS versions, DNS is set per network service. That means Wi-Fi and Ethernet can use different DNS servers.
Open the Apple menu, then System Settings, then Network. Click the network service you use, choose Details, then open DNS.
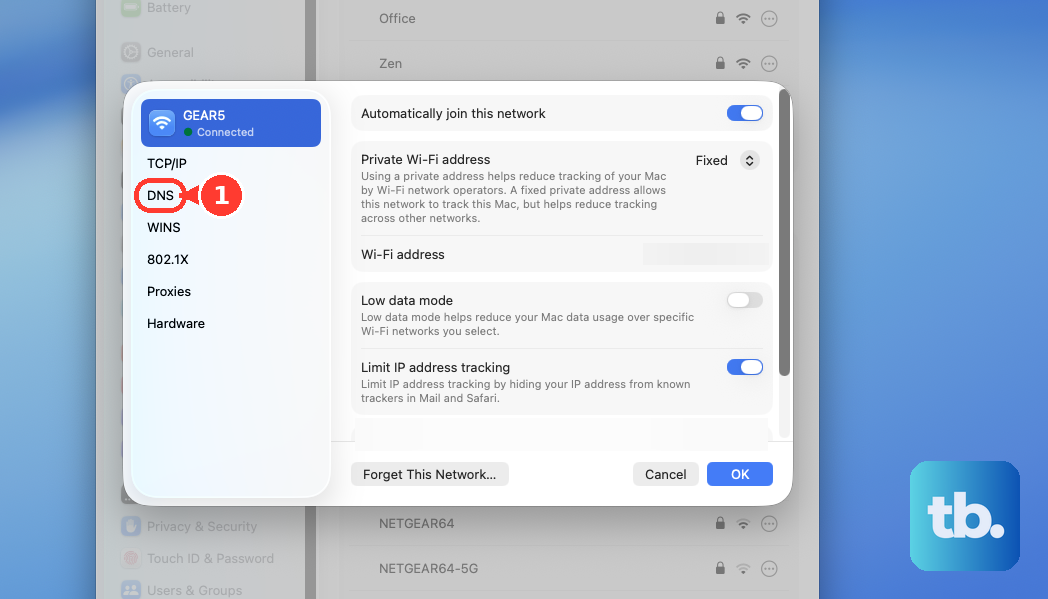
Under DNS Servers, click the Add button and enter an IPv4 or IPv6 DNS address. To remove one, select the DNS server, click the Remove button, then choose OK.
Macs can also use search domains from the same screen. Under Search Domains, use the Add or Remove button, then choose OK.
If this does not change DNS behavior, open System Settings, then General, then Device Management, and check for a DNS or network profile that controls the Mac.
Set DNS on iPhone for Wi-Fi
The most common iPhone mistake is expecting one built-in DNS setting to cover everything, but the Wi-Fi DNS control applies only to the selected Wi-Fi network.
Open Settings, then Wi-Fi, and tap the info icon next to the network.
Select Configure DNS, switch it to Manual, and add the DNS server addresses you want to use.
Remove the default DNS servers from that same screen when you do not want the Wi-Fi network's DNS to remain in the list.
To undo the change, return to Configure DNS and switch it back to Automatic.
This does not change cellular DNS or any other saved Wi-Fi network. For DNS across all iPhone networks, use a trusted VPN or DNS provider app, or install a configuration profile from a provider you trust.
Use Android Private DNS
Android's main current DNS setting is Private DNS, and it uses a provider hostname instead of raw IPv4 or IPv6 addresses.
- 1.Open the Settings app.
- 2.Go to Network & internet.
- 3.Open Private DNS.
- 4.Choose Off, Automatic, or Private DNS provider hostname.
- 5.Enter the provider hostname when using a custom provider, then tap Save.
For Google Public DNS on Android 9 or higher, choose Private DNS provider hostname, enter dns.google, and tap Save. Private DNS is on by default for networks that can use it; if you do not see the screen, search Settings for Private DNS or check your device maker's settings layout.
Edit Android Wi-Fi DNS Only
This fixes Android devices that need custom DNS only on one Wi-Fi network. It is an advanced-user option, because Android exposes per-network DNS fields only when you switch that network to a static IP configuration, which means you enter the rest of the network information by hand. On Android 9 and higher, Private DNS is the supported way to set DNS for every network at once.
Open the Wi-Fi settings screen, then press and hold the network you want to edit, or tap its settings icon, and choose Modify network.
Open Advanced options and change IP settings from DHCP to Static.
Write down the existing values before changing them, then fill in the IP address, Gateway, and Network prefix length your network uses, because static mode does not fill them in for you.
Enter the new IPv4 or IPv6 addresses in the DNS 1 and DNS 2 fields.
Select Save, then reconnect to the network if it keeps using the old DNS.
Because this pins a static address, it can stop you from joining public Wi-Fi networks that use captive portals. Set IP settings back to DHCP to undo it.
Switch DNS in Chrome or Firefox
Browser DNS settings are useful when you only want secure DNS behavior inside that browser, not across the entire computer or phone.
In Chrome on desktop, open More, then Settings, then Privacy and security, then Security. Under Advanced, turn Use secure DNS on or off, then select your current service provider or choose a custom service provider from the drop-down menu.
In Chrome for Android, open More, then Settings, then Privacy and security. Under Security, open Use secure DNS, turn it on or off, and select your current or another service provider.
In Firefox on desktop, open the Firefox menu, then Settings, then Privacy & Security. In DNS over HTTPS, open Advanced settings and choose Default protection, Increased Protection, Max Protection, Custom protection, or Off.
If this method fails, use the operating system DNS settings instead, because Chrome Secure DNS is unavailable when the device is managed or parental controls are on, and Firefox can disable DNS over HTTPS when VPN, parental control, enterprise policy, or network signals call for system DNS.
Set DNS on Your Router
The most common reason to change DNS on a router is wanting every device at home to use the same DNS automatically.
Open the router's configuration webpage or the manufacturer's companion app, then sign in with the router or admin password.
Find the DNS server settings screen.
Write down the existing primary and secondary DNS values first.
Enter the new primary and secondary DNS servers, then save or apply the change.
Restart your browser or reconnect devices if they keep using the old DNS.
Some ISP-provided routers hard-code DNS and cannot be changed. When that happens, set DNS on each device instead.
Remove Work School or Profile Controlled DNS
This applies when your computer or phone is managed by work, school, or another organization, or when you installed a DNS, VPN, or network configuration profile yourself. These controls can override the DNS settings you change by hand.
On iPhone and iPad, open Settings, then General, then VPN & Device Management. Select the profile, choose Delete Profile, and follow the onscreen instructions. Removing a profile also removes settings, apps, and data associated with that profile.
On Mac, open System Settings, then General, then Device Management. Select the profile and click the Remove button.
If removal is blocked, contact the administrator that manages the device.
For iPhone cellular DNS or all-network DNS, Apple does not provide a regular built-in per-cellular DNS field. Use a trusted VPN or DNS app, a trusted configuration profile, or the DNS settings your organization requires.
Skip older instructions that point to Chrome flags, the old iPhone blue-arrow Wi-Fi screen, or macOS System Preferences, Network, Advanced, then DNS. Current consumer paths are Chrome Settings for Secure DNS, iPhone Configure DNS, and macOS System Settings.
Frequently Asked Questions
Does changing DNS make my internet faster?
It can improve lookup performance or reliability if your current DNS is slow, but it does not increase the speed of your internet plan.
Can I change DNS for iPhone cellular data without an app?
No. The built-in iPhone DNS control applies to a selected Wi-Fi network. For all networks, including cellular, use a trusted VPN or DNS provider app, a trusted profile, or managed settings.
What is the safest way to undo a DNS change?
On Windows, set IP assignment back to Automatic (DHCP). On iPhone, switch Configure DNS back to Automatic. On Mac, remove the custom DNS server. On Android, return Private DNS to Automatic.
Should I change DNS on my router or each device?
Use the router when you want your whole home network to use the same DNS. Change each device separately when your router will not allow DNS changes or you only want one device affected.