Your MacBook needs a separate backup to protect your files if its storage fails or the computer goes missing. Start with Time Machine and an external drive, then make sure your cloud files and original photos are included. A second copy stored elsewhere protects against losing the Mac and its nearby backup drive together.
Set up Time Machine on an external drive
Time Machine automatically backs up your data, applications, and settings, excluding macOS itself and the apps supplied with it.
Choose a compatible USB or Thunderbolt drive with about twice your MacBook’s storage capacity, as Apple recommends.
Connect the drive to your MacBook.
On macOS Ventura 13 or later, including Tahoe 26, open Apple menu > System Settings > General > Time Machine.
Click Add Backup Disk.
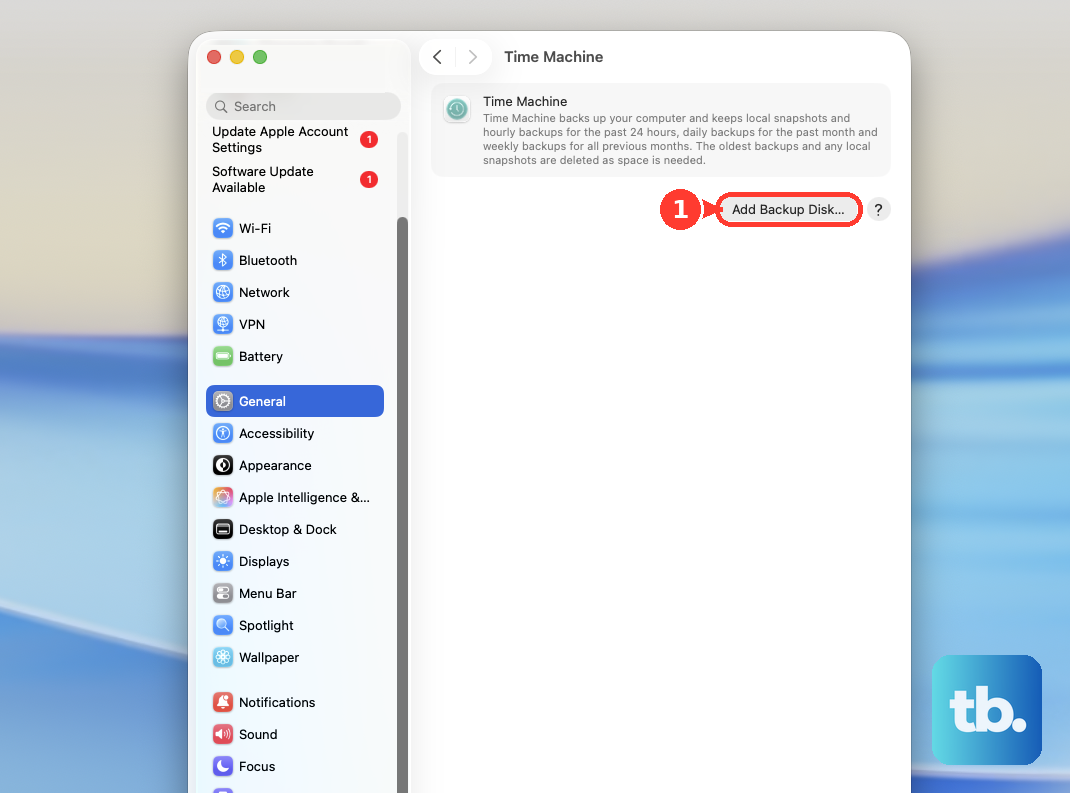
Select your external drive.
Click Set Up Disk. Formatting erases the selected destination if setup requires it, so that drive must not hold your only copy of other files.
Enable Encrypt Backup during setup to protect the backup with a password.
Create the backup password.
Keep that password somewhere you can retrieve it for restoration.
Complete the remaining setup prompts. The first backup starts automatically.
Check that the backup has finished
Adding a disk does not mean the first backup is complete. The Time Machine menu in the menu bar shows progress and the latest completed backup.
On Tahoe 26, open Apple menu > System Settings > Menu Bar if the control is missing.
Select Time Machine to add it. Earlier macOS releases use different menu-bar settings.
Make your configured backup destination available.
Choose Time Machine > Back Up Now from the menu bar to start a backup immediately.
Check the latest completed backup in the Time Machine menu.
If you cannot start because no destination is configured, add a disk through Apple menu > System Settings > General > Time Machine > Add Backup Disk.
Adjust the schedule and included files
Set Backup Frequency to an automatic interval or manual operation in Apple menu > System Settings > General > Time Machine > Options. An automatic schedule removes the need to start each backup yourself.
Enable Back up on battery power if you want backups while your MacBook is unplugged; this option appears with an automatic schedule. With automatic backups and APFS storage, macOS also creates local snapshots for recovering previous file versions when the destination is absent. Those snapshots remain on the original disk and cannot protect against its failure or loss of the Mac.
In the same Options settings, select an item under Exclude from Backups that you want included again.
Click the minus button to remove that exclusion. The plus button adds exclusions, so this setting determines which files Time Machine leaves out.
Keep independent copies of iCloud files
Connect or mount separate storage for your copies. iCloud Drive synchronizes selected files, and deletions propagate; it does not back up the complete MacBook.
Open Finder > iCloud Drive.
Select the files you want to preserve.
Choose Edit > Copy [items]. Optimized files download before copying.
Open your separate storage destination under Locations in Finder.
Paste the copied files into that destination.
Check the copies before disconnecting the drive.
Eject the external drive through File > Eject.
For other selected files already on your MacBook, drag them in Finder to a separate storage device under Locations.
Protect the original photos in your library
Download full-resolution iCloud originals before relying on a local backup of your photo library.
- 1.Open Photos > Settings > iCloud.
- 2.Enable iCloud Photos if you use it for your collection.
- 3.Select Download Originals to this Mac. You need sufficient Mac and iCloud storage.
- 4.Wait for the originals to finish downloading.
- 5.Copy the Photos library, normally in the Pictures folder, to separate external storage. Time Machine also backs up the local library; an external photo library and its Time Machine backup must use different storage devices.
- 6.Copy any additional libraries and referenced images stored outside those libraries to separate storage too.
Add a backup away from your MacBook
A backup stored elsewhere gives you a copy beyond the Mac and the drive beside it. Backblaze offers automatic off-site computer backup and lists support for macOS Sonoma 14, Sequoia 15, and Tahoe 26. It does not support primary disks formatted as case-sensitive HFS+ or case-sensitive APFS.
Download the Mac client from Backblaze’s Computer Backup page.
Install the client.
Complete account setup.
Open System Settings > Privacy & Security > Full Disk Access.
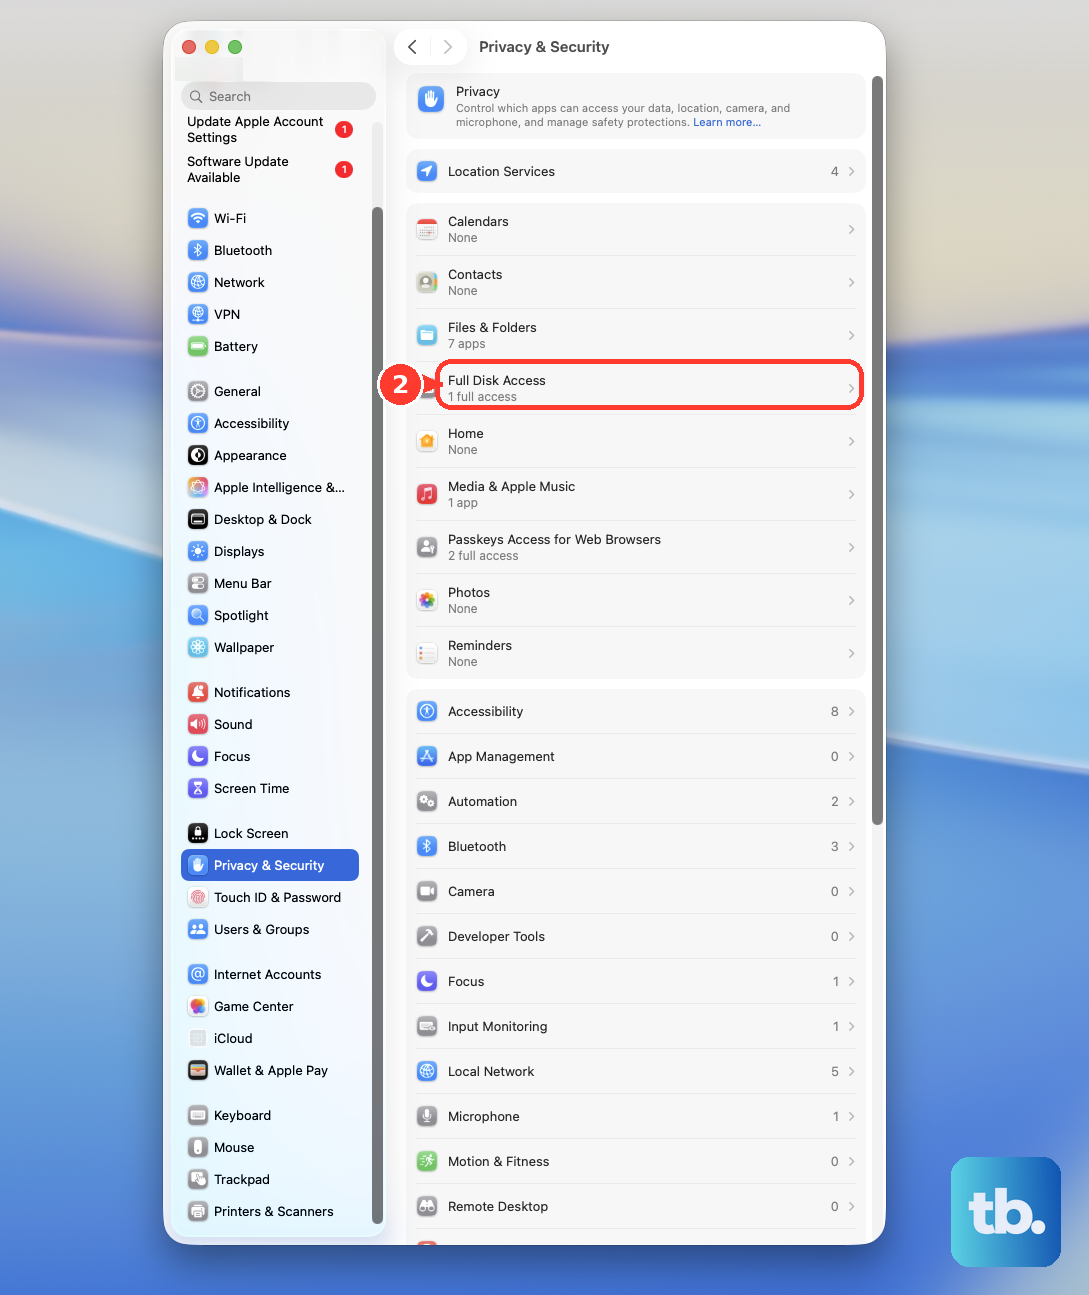
Enable Backblaze.
Enable bzbmenu.
Restart as instructed. The client scans your files and begins backing up.
If Backblaze does not work for your setup, add a second compatible disk through Apple menu > System Settings > General > Time Machine > Add Backup Disk for off-site rotation. Time Machine rotates among available destinations, updating each from its previous backup. Once its backup is complete, a disconnected disk stored elsewhere provides that off-site copy.
Frequently Asked Questions
Can Time Machine back up a MacBook over a network?
Yes. Supported destinations include a NAS explicitly supporting Time Machine over SMB and a shared folder configured as a Time Machine destination on another Mac. NAS setup follows the manufacturer’s instructions.
Can I save files if my MacBook will not start normally?
Yes, provided its storage remains readable and you have another Mac. Apple-silicon MacBooks use Share Disk in macOS Recovery; Intel MacBooks use target disk mode. These methods let you copy accessible files.
Does a Disk Utility image create a bootable MacBook backup?
A folder image creates a selected-data archive, not automatically a bootable backup. Whole-startup-disk imaging is not generally available on modern MacBooks: Apple excludes individual APFS volumes and APFS containers on Apple-silicon or T2 Macs.
Can AirDrop serve as a backup?
AirDrop can place copies of selected files on another Apple device. Confirm that the receiving device saved them. It does not create a complete Mac backup.