Windows audio can fail with no clear reason: no speaker output, broken device switching, or a sound setting that refuses to behave. The fastest built-in check is the audio troubleshooter, and on current Windows 11 releases Microsoft runs it through Settings and Get Help.
Start with the supported Windows 11 path below, then use the alternate entry points if Settings sends you elsewhere or Get Help is missing.
1. Start in Windows 11 Settings
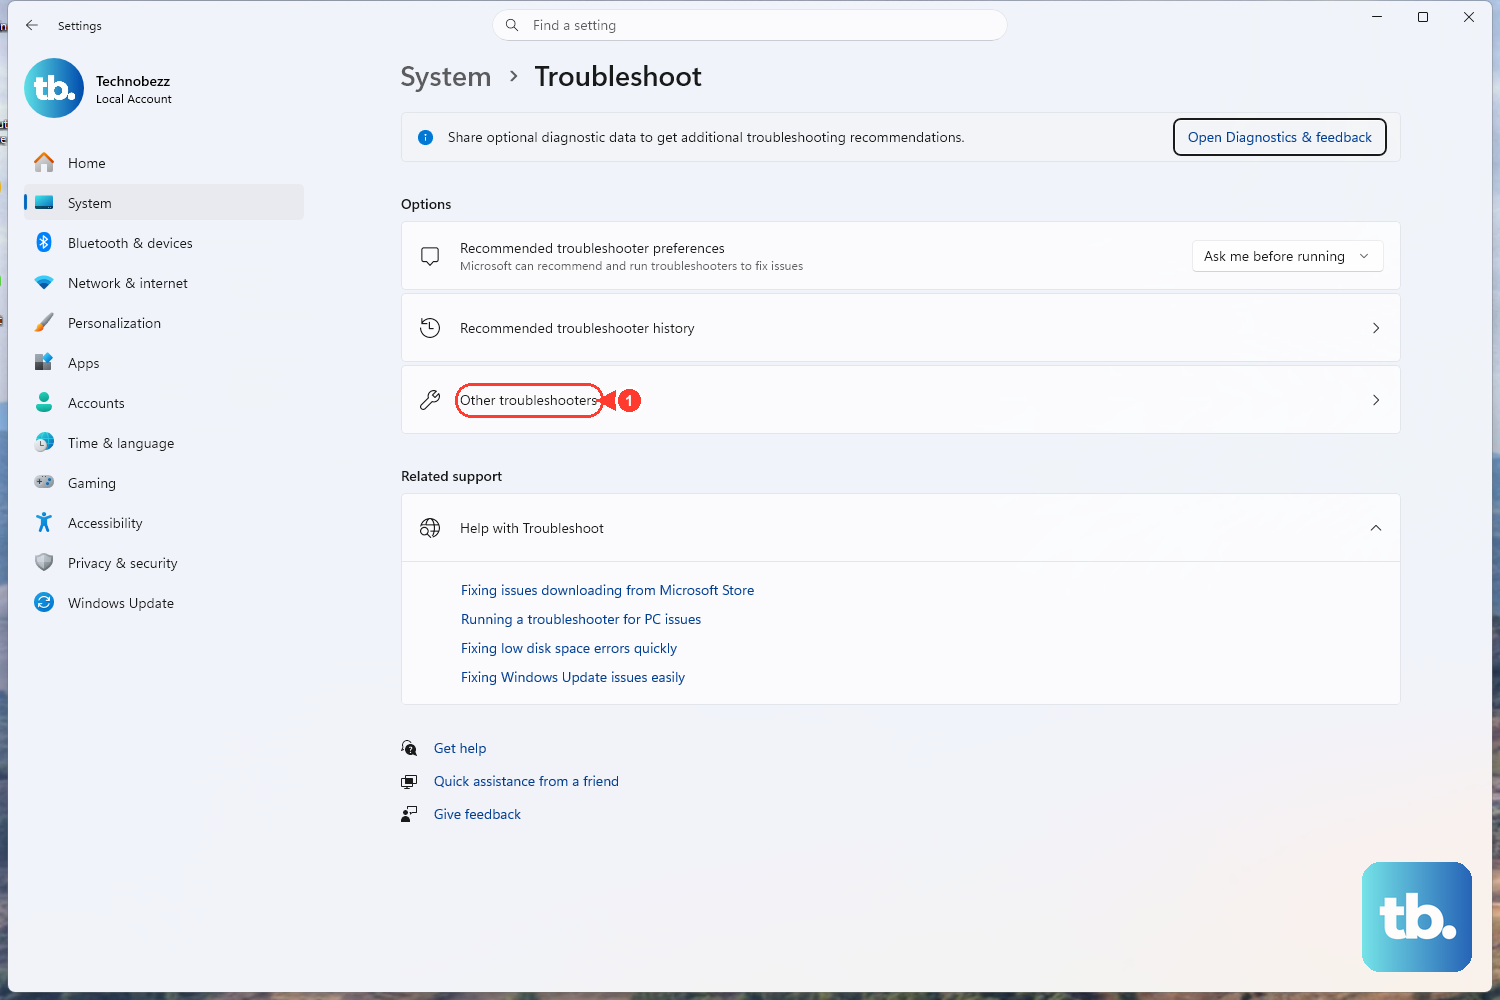
Use this path first on a current Windows 11 PC. It is Microsoft’s supported Settings entry point for audio troubleshooting, and redirected troubleshooters continue in Get Help.
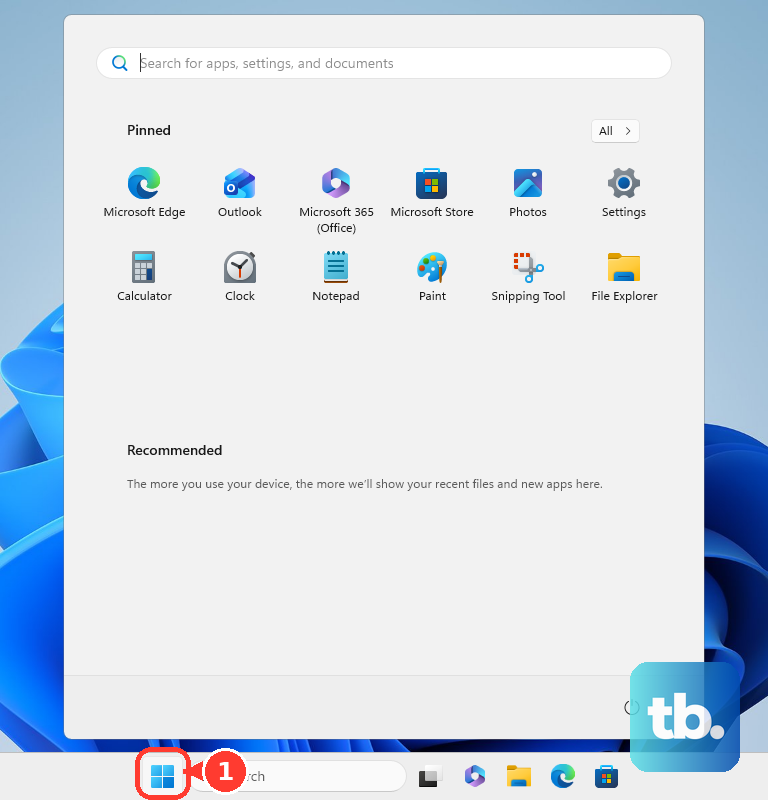
Select Start, open Settings, then select System. Select Troubleshoot, open Other troubleshooters, and find Audio, then select Run.
If Get Help asks to run diagnostics, select Yes. Wait for the scan to finish, then follow the on-screen prompts.
2. Run it directly from Get Help
Open Get Help, then select the Search bar. Enter audio troubleshooter, and if diagnostic consent appears, select Yes. Let the scan complete, then follow the recommended prompts.
If you already have Get Help open, this skips the Settings menu and starts the same diagnostic flow there. This is also the path Windows 11 uses when a redirected audio troubleshooter opens through Microsoft’s current troubleshooting platform.
3. Find Get Help from Start
No desktop shortcut needed: select Start, type get help in the search box, then select Get Help from the results.
Once the app opens, select the Search bar, enter audio troubleshooter, approve diagnostics with Yes if prompted, and follow the diagnostic prompts until the scan finishes.
4. Launch it from Microsoft Support
Microsoft’s Windows troubleshooters page can hand off to the same Get Help audio tool. Open the Microsoft Support Windows troubleshooters page, go to Audio troubleshooter, then select Start.
If your browser asks to open Get Help, allow it. In Get Help, select Yes if diagnostics consent appears, then follow the prompts shown by Get Help.
The browser page is only the doorway. The audio diagnostics run in Get Help on Windows.
5. Restore Get Help if it is missing
Open Microsoft’s official Get Help app page, then select the Microsoft Store or Get option shown on the page or in the Store app. Install Get Help, open Get Help, then select the Search bar and enter audio troubleshooter.
If Windows cannot open Get Help, reinstall it from Microsoft’s official app listing. On work or school PCs, Microsoft Store access can be controlled by organization policy. If Get Help is blocked, use your organization’s support channel.
6. Skip old MSDT and Control Panel fixes
Do not use older Control Panel or MSDT instructions as the current Windows 11 fix. Those instructions point to Control Panel > Troubleshooting > Hardware and Sound > Playing Audio, or to MSDT audio commands.
Microsoft has deprecated the MSDT troubleshooter platform, and the audio troubleshooter is one of the legacy troubleshooters redirected to Get Help. For Windows 11, use Settings, Get Help, or the Microsoft Support handoff above.
7. Handle Windows 10 separately
Use a supported Windows 11 device for the current Microsoft-supported troubleshooting flow. Windows 10 used a different legacy Settings route for Playing audio, but standard Windows 10 support ended on October 14, 2025. Extended Security Updates provide security updates only, not general technical support.
On Windows 11, run the audio troubleshooter through Settings or Get Help.
8. Check restrictions on managed PCs
Company and school devices can restrict troubleshooting features, legacy scripted diagnostics, and Microsoft Store access. Try the supported path first: Start > Settings > System > Troubleshoot > Other troubleshooters > Audio > Run.
If Get Help will not open, contact your workplace or school support team. If diagnostics are blocked, contact your workplace or school support team. If the Store install is unavailable, contact your workplace or school support team.
Those restrictions are controlled outside the audio troubleshooter itself.
Frequently Asked Questions
What is the fastest way to run the Windows 11 audio troubleshooter?
Use Settings: Start > Settings > System > Troubleshoot > Other troubleshooters > Audio > Run. Select Yes if Get Help asks for diagnostic consent.
What should I type in Get Help for sound problems?
Type “audio troubleshooter” in the Get Help search bar, then approve diagnostics if prompted and follow the scan results.
Why does the audio troubleshooter open Get Help?
Microsoft redirects supported Windows 11 troubleshooters through Get Help. Settings remains the supported starting point, but the diagnostic session can continue in Get Help.
Can I run the audio troubleshooter from a browser?
You can start from Microsoft’s Windows troubleshooters support page by selecting Start under Audio troubleshooter. The page then hands off to the Get Help app on Windows.
Should I use MSDT to troubleshoot audio in Windows 11?
No. Microsoft deprecated MSDT troubleshooters, and Windows 11 audio troubleshooting now uses Get Help through supported entry points such as Settings and Microsoft Support.