Display settings are where you fix a screen that looks too large, too small, dim, blurry, sideways, or wrong on a second monitor. In Windows 11, the main controls live in the Settings app, with a few faster shortcuts for brightness, projection, and direct access. Start with the Display page, then move into the deeper options only when the basic controls do not solve it.
1. Open Display Settings From Start
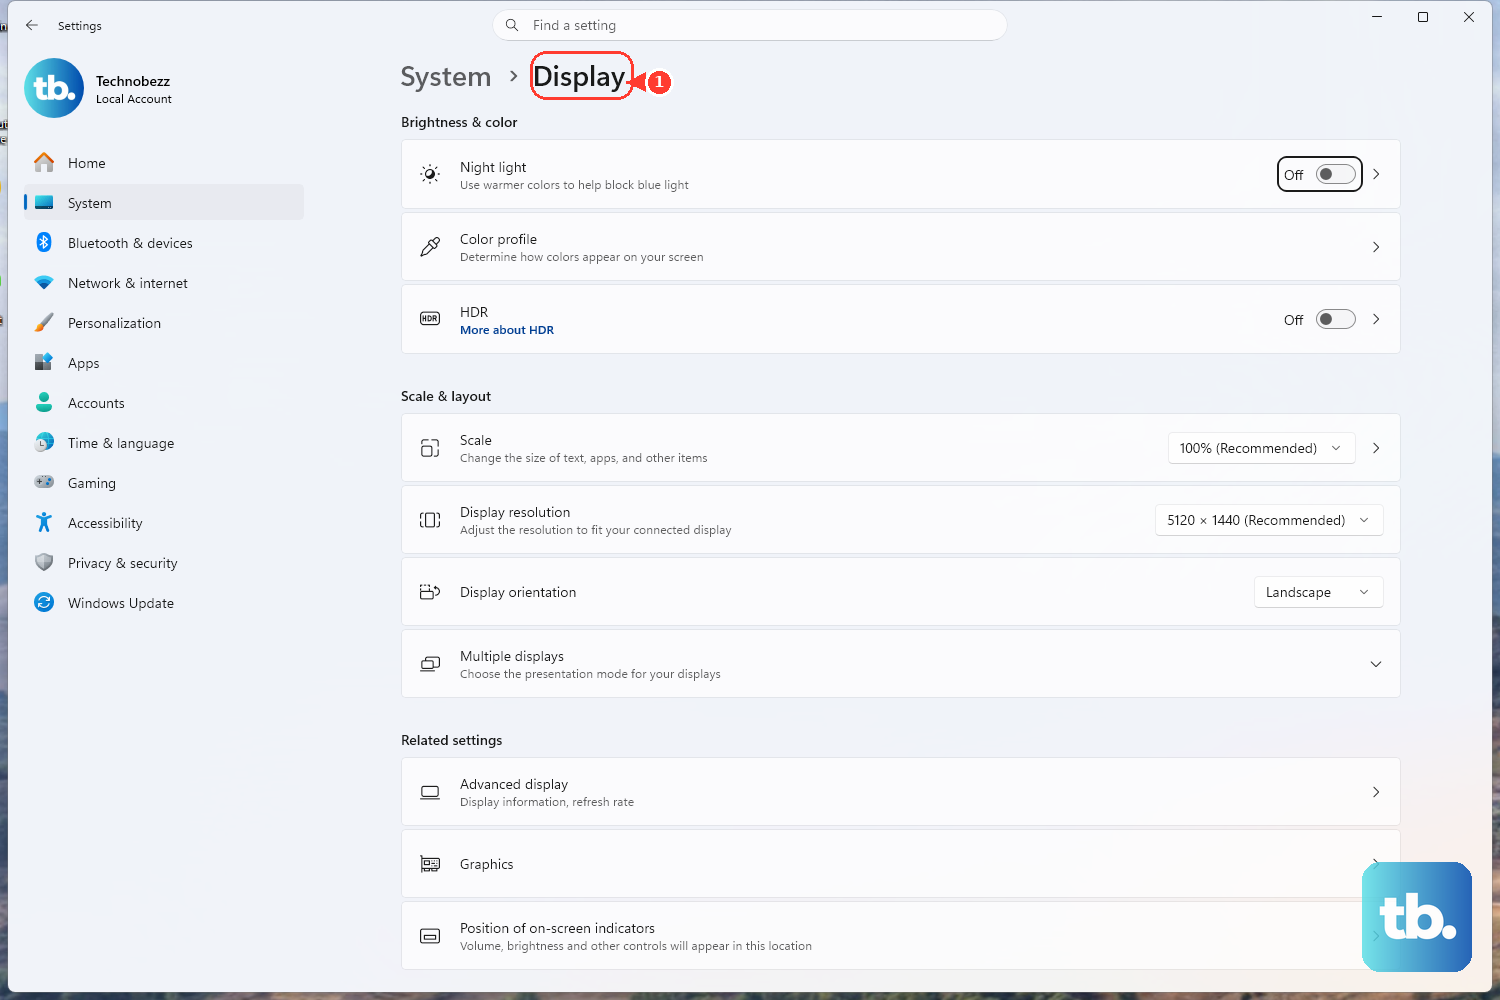
The main Windows 11 path is Start > Settings > System > Display.
- 1.Select Start.
- 2.Select Settings.
- 3.Select System.
- 4.Select Display.
- 5.If more than one screen is connected, select the display you want to change at the top of the page.
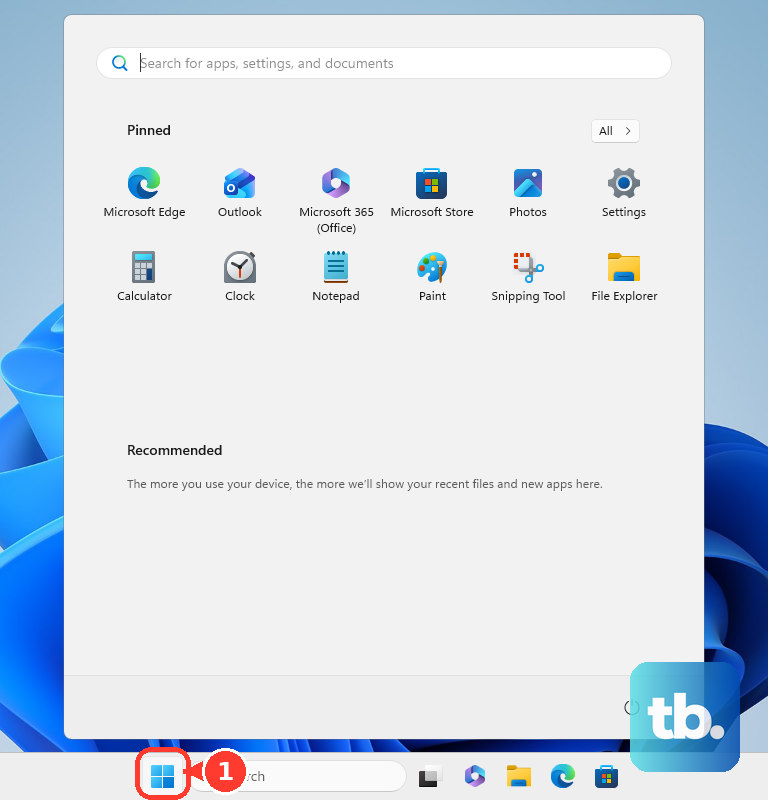
You can also press Windows logo key + I, then select System > Display.
If your hand is already on the mouse, right-click Start, select Settings, then open System > Display.
2. Jump To Display Settings Faster
Right-click a blank area of the desktop.
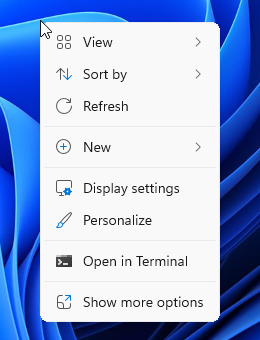
Then select Display settings.
After that, select the display you want to adjust.
Use the desktop menu when the screen looks wrong and you want the shortest route.
Two more quick routes work from inside Windows. Open Settings, click the search bar, type display, then choose the relevant Display result.
Or press Windows logo key + R, type ms-settings:display, and press Enter.
3. Fix Scale Resolution And Orientation
Most everyday screen fixes sit on Settings > System > Display.
Use Scale when text and apps look too small or too large.
Use Display resolution when the image looks blurry, stretched, or less sharp than expected.
Use Display orientation when the picture is sideways or upside down.
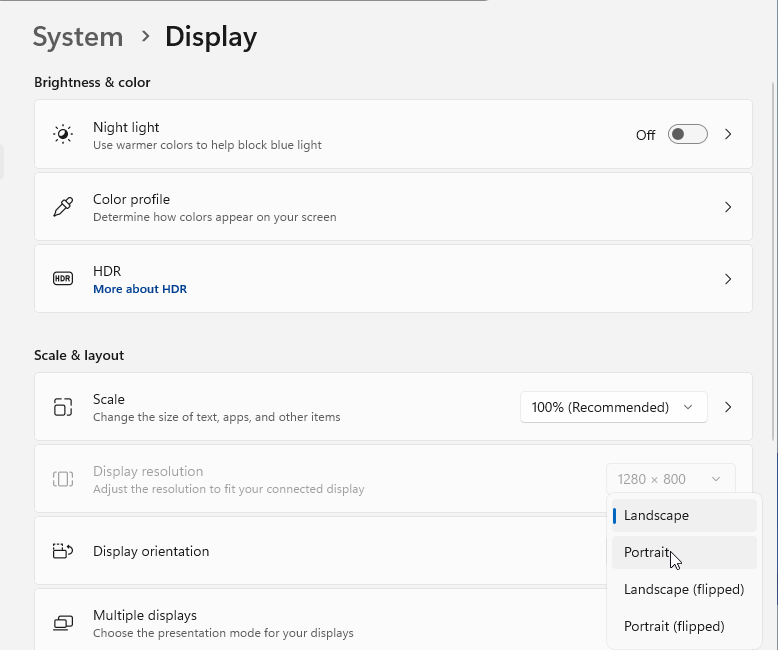
If Windows asks you to confirm a new resolution, keep it only when the picture looks correct.
If you only want larger text, skip full-screen scaling and go to Start > Settings > Accessibility > Text size, then move the Text size slider.
4. Adjust Brightness And Night Light
For a fast brightness change on a built-in display, select the Network icon on the right side of the taskbar, then move the Brightness slider.
To toggle Night light quickly, select the Network or Speakers icon on the right side of the taskbar, use the down arrow to find Night light, then select Night light.
To change Night light strength or schedule, open Start > Settings > System > Display > Night light.
Move the Strength slider, or turn on Schedule night light and choose Sunset to sunrise or Set hours.
To use automatic brightness on a supported built-in display, open Start > Settings > System > Display, select Brightness, then turn on the option to change brightness automatically when lighting changes.
To control content adaptive brightness, open Brightness, then set Change brightness based on content to Off, Always, or On Battery Only.
If the Brightness slider is missing on an external desktop monitor, use the monitor's physical buttons or on-screen display menu to change brightness and picture settings.
On some Dell Latitude laptops, F6 and F7 change brightness when Fn Lock is off.
When Fn Lock is on, use Fn + F6 or Fn + F7.
5. Arrange Multiple Monitors
Need to switch from mirrored screens to an extended desktop? Press Windows logo key + P, then choose PC screen only, Duplicate, Extend, or Second screen only.
For the full monitor layout, open Start > Settings > System > Display.
Select Identify to see which screen is which.
Open Multiple displays, then select Detect when Windows is not seeing a connected display.
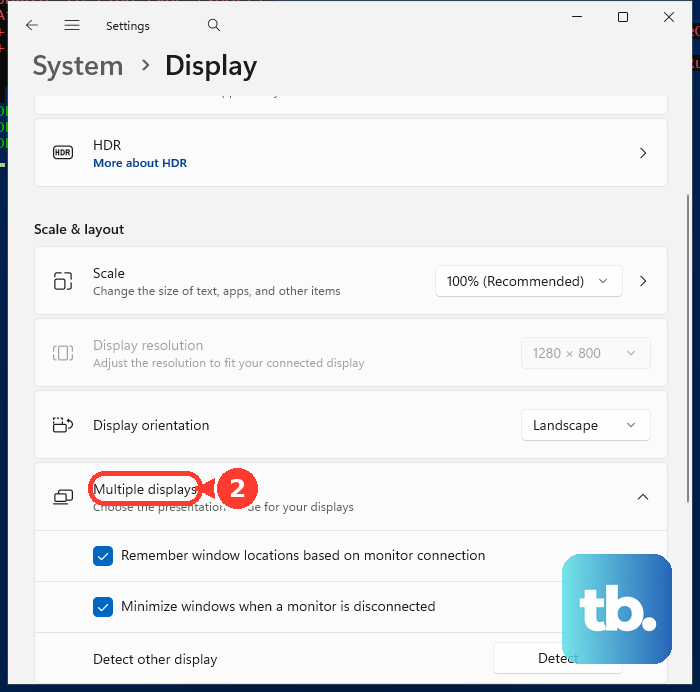
Drag the display boxes to match your desk setup, then select Apply.
Open Multiple displays for the options that remember window locations based on monitor connection and minimize windows when a monitor is disconnected.
6. Change Refresh Rate HDR And Color
For refresh rate, open Start > Settings > System > Display > Advanced display.
Choose a value next to Choose a refresh rate.
On supported Windows 11 hardware, turn on Dynamic refresh rate.
For HDR, open Settings > System > Display, select the HDR-capable display, select HDR, then turn on HDR.
To use Auto HDR, expand the HDR toggle section and turn on Auto HDR.
On Dolby Vision certified monitors, expand the same section and clear Use Dolby Vision mode to disable Dolby Vision HDR mode.
For color profiles, go to Settings > System > Display > Color profile.
Select your display, then use Add profile, Remove, Set profile, or Calibrate display.
7. Make The Screen Easier To See
When the display works but still feels hard to read, use the accessibility settings instead of changing random monitor options.
For text only, open Start > Settings > Accessibility > Text size, then use the Text size slider.
For everything on screen, open Start > Settings > System > Display, then change the Scale drop-down menu.
For stronger contrast, open Start > Settings > Accessibility > Contrast themes, choose a theme from Contrast themes, then select Apply.
To toggle high contrast from the keyboard, press left Alt + left Shift + Print screen.
Voice access can control Settings too.
Turn it on from Start > Settings > Accessibility > Speech > Voice access, then use commands such as Click System, Click Display, Press Tab, or Click followed by the setting name shown on screen.
8. Use Graphics Apps For Advanced Changes
On supported Intel PCs, open Intel Graphics Command Center from the Start Menu, select Display, open the General tab, choose a value under Resolution, then select Yes to keep the change.
On supported NVIDIA PCs, open NVIDIA Control Panel, select Change resolution under Display, select the display image, then choose the resolution options.
For a custom resolution, select Customize > Create Custom Resolution, enter the custom values, select Test, then select Save if the test passes.
On supported AMD Radeon PCs, open AMD Software, search for Custom, select Custom Resolution, select the display, expand Custom Resolutions, and on first use select Read & Accept the EULA then I Accept.
Then select Create New, enter the settings, and select Create.
Windows Settings is the right first stop.
Use Intel, NVIDIA, or AMD tools when you need hardware-specific controls such as custom resolutions.
9. Check Work Or School Limits
A managed PC can hide or block parts of Settings.
Administrators can control which Settings pages appear and can manage display behavior on organization-owned Windows devices.
If a display option is missing on a work or school device, use the settings that remain available to you.
For changes blocked by policy, contact the organization that manages the PC.
Frequently Asked Questions
What is the quickest way to open display settings in Windows 11?
Right-click a blank area of the desktop and select Display settings. You can also press Windows logo key + I, then open System > Display.
How do I open display settings with a command?
Press Windows logo key + R, type ms-settings:display, and press Enter.
Why don't I see a brightness slider in Windows?
The Windows brightness slider is for devices that expose brightness control, usually built-in displays. For many external desktop monitors, use the monitor's physical buttons or on-screen display menu.
Where do I change the refresh rate?
Go to Start > Settings > System > Display > Advanced display, then choose a value next to Choose a refresh rate.
Can I change display settings with voice access?
Yes. Turn on voice access from Start > Settings > Accessibility > Speech > Voice access, then use commands such as Click System, Click Display, Press Tab, or Click followed by the visible setting name.