Spotlight isn't much help when it won't open or can't find a file you know is there. Start by checking how it opens, then work through the settings that control your results. If those checks don't solve it, rebuild the affected folder or disk's index.
Get Spotlight open first
Press Command-Space bar to open Spotlight.
If nothing happens, click the Spotlight magnifying glass in the menu bar. If that works, start with the keyboard shortcut.
Enable the search shortcut's checkbox in Apple menu > System Settings > Keyboard > Keyboard Shortcuts > Spotlight.
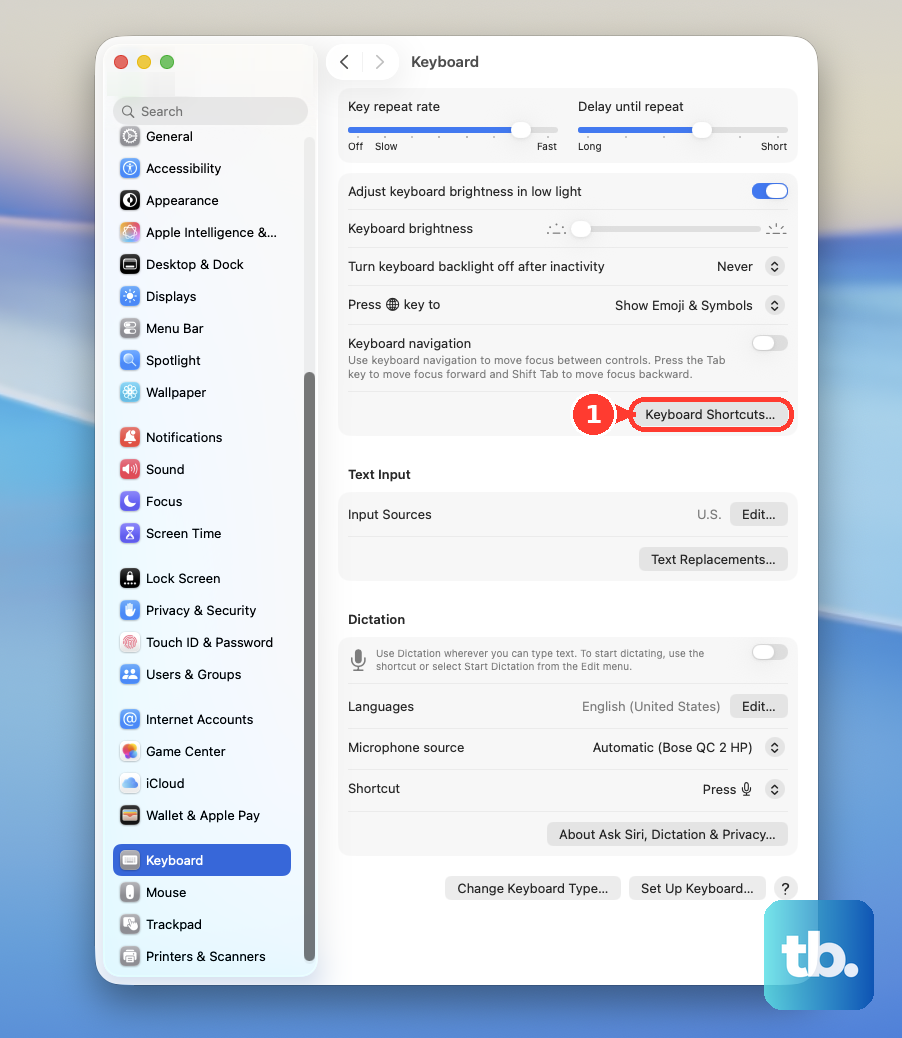
To assign a different shortcut, double-click its key combination and enter a new one.
Check the categories in Keyboard Shortcuts for warning icons indicating conflicts.
Replace a conflicting shortcut by double-clicking its combination and entering a different one.
If Command-Space bar fails only inside one app, check that app's shortcuts too.
Quit and reopen the affected app after changing its shortcut.
If Spotlight still won't open, save your work.
Choose Apple menu > Restart.
If restarting doesn't help, press Option-Command-Space bar to try Finder search, then continue below. Finder search still uses Spotlight: it provides another search window, but it doesn't bypass a broken index.
Let indexing finish after an update
Unfinished indexing leaves search results incomplete after setup, migration, an update, or substantial changes to your files.
Connect your Mac to power.
Connect it to Wi-Fi or Ethernet.
Leave the Mac idle to let indexing finish. Apple says initial indexing takes hours or days, depending on the amount of data.
Press Command-Space bar to check for an indexing progress indicator.
Wait for indexing to finish before testing the results or starting another rebuild.
Enable the results you want to see
On macOS 27 and Tahoe, enable the relevant entries under Results from Apps and Results from System in Apple menu > System Settings > Spotlight. Earlier interfaces use Search results.
Check System Settings > Spotlight > Search Privacy for an accidentally excluded folder or disk. Older interfaces use the labels Siri & Spotlight and Spotlight Privacy.
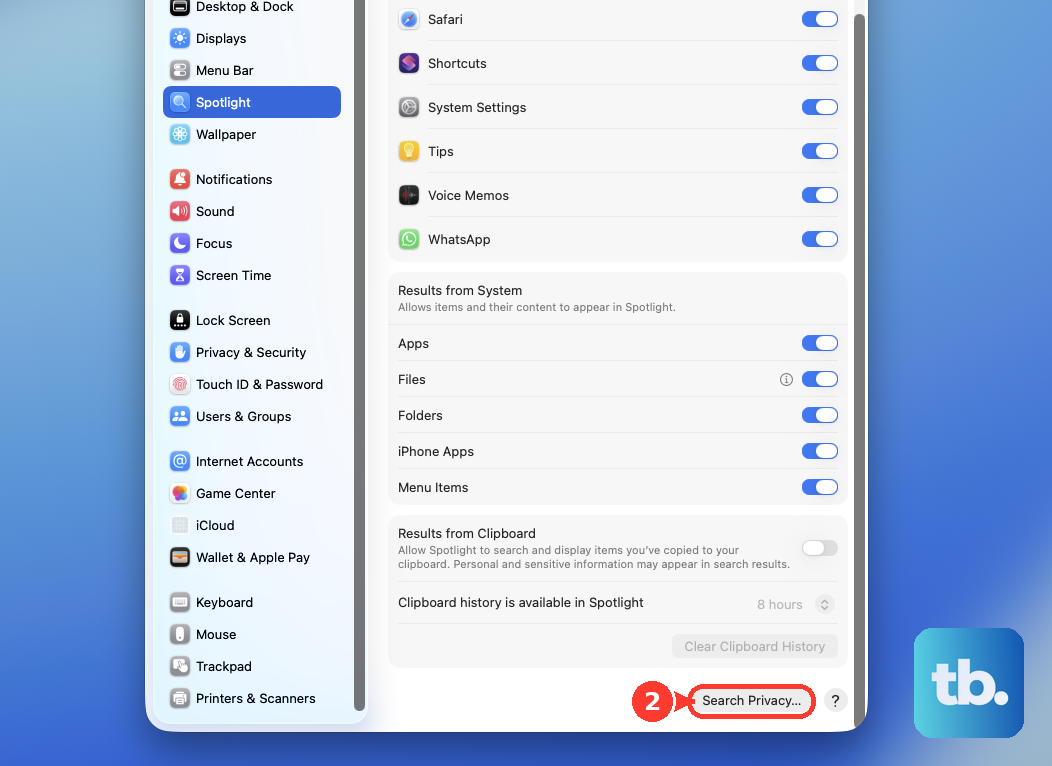
Remove an accidental exclusion by selecting the item and clicking the remove button –. This makes its contents eligible for searches again.
For missing web and partner suggestions on macOS 27 or Tahoe, turn on Show Related Content in System Settings > Spotlight. That switch controls supplemental suggestions, not the local file index.
Track down missing files and app content
If Spotlight finds most things but misses a particular item, check that item before rebuilding the whole disk's index. Search wording, content availability, and app settings each deserve a look.
Retry your search with corrected spelling.
Put an exact phrase in quotation marks when you need those words together.
Use Spotlight to search for email, calendar events, and app content. Finder search has a different scope.
On Tahoe and later, press Command-2 in Spotlight to narrow the search to Files.
To search within an app, enter its name in Spotlight and press Tab.
For a file inside a ZIP archive or disk image, double-click the archive or image in Finder to expand or open it.
Search for the file again.
For a cloud-only file whose contents aren't appearing in searches, open Finder > iCloud Drive.
Control-click the affected item and choose Download Now.
Wait for downloading and indexing to finish before searching again. This tests whether unavailable content is the problem; cloud-only status doesn't make every filename unsearchable.
When content from one app is missing, open Apple menu > System Settings > General > Login Items & Extensions.
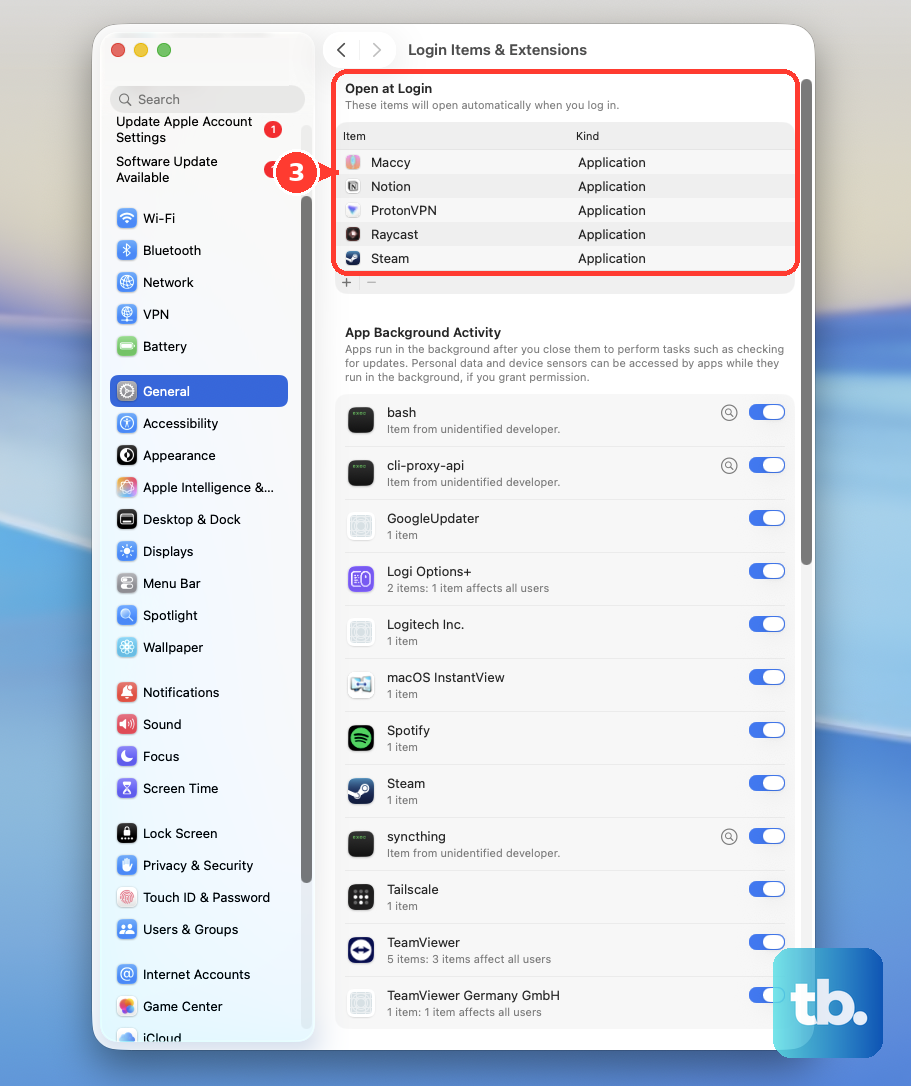
Under Extensions, click the information button beside Spotlight.
Enable the relevant installed extension.
Click Done.
If Apple Mail also misses relevant messages in Entire Message searches, select the affected mailbox in Mail's sidebar.
Choose Mailbox > Rebuild. This repairs that mailbox rather than rebuilding the whole disk's search index.
Rebuild the Spotlight index
For persistent missing or unexpected results, rebuild the index for the affected folder or disk:
- 1.Open Apple menu > System Settings > Spotlight > Search Privacy. On older interfaces, use Siri & Spotlight > Spotlight Privacy.
- 2.Click the add button + and choose the affected folder or disk, or drag it into the privacy list.
- 3.Wait a few seconds, then select that same folder or disk.
- 4.Click the remove button – to take it out of the list.
- 5.Click Done and quit System Settings.
- 6.Allow reindexing to finish before testing your search again.
Install an available macOS update
If results remain wrong after indexing finishes, check for a macOS update. Apple recommends updating macOS for unexpected Spotlight results.
Back up your Mac.
Open Apple menu > System Settings > General > Software Update.
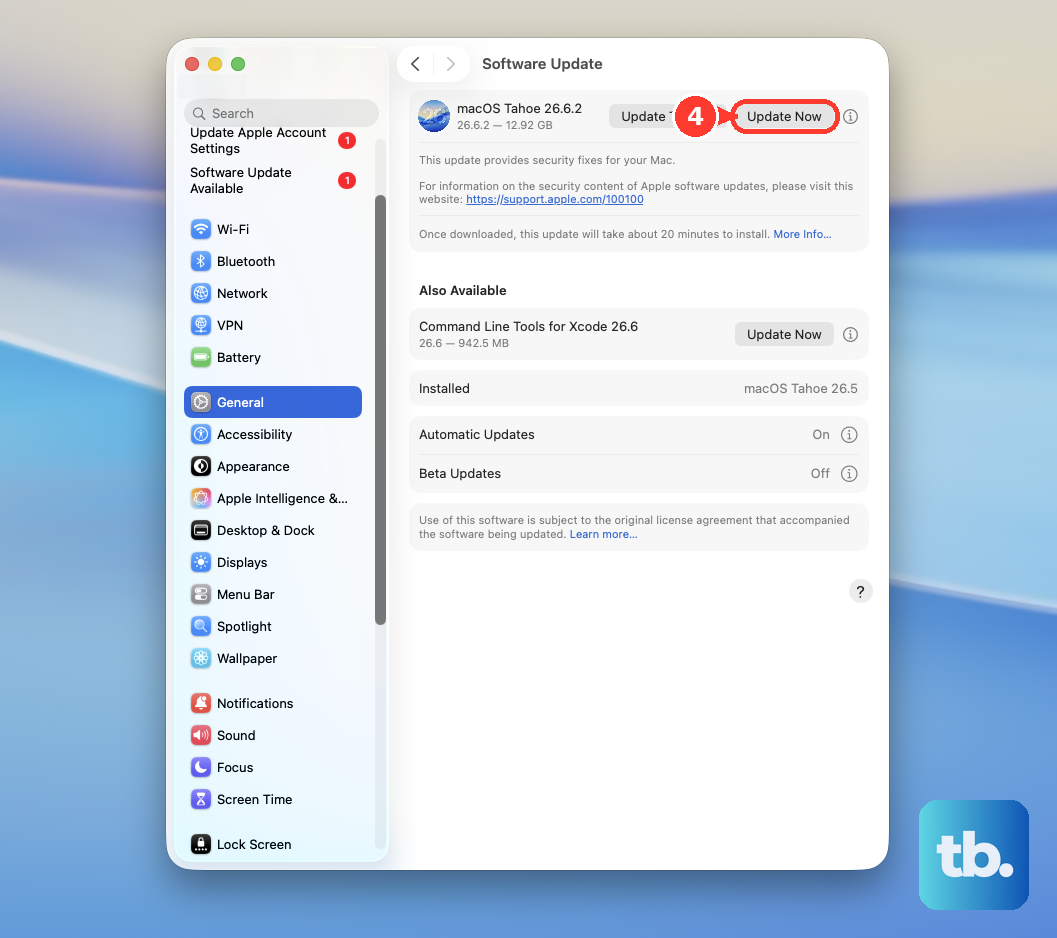
To refresh the update check, press Command-R while in Software Update.
Install the compatible update offered.
Complete any required restart.
Wait for any post-update indexing to finish before testing your searches again.
Use safe mode to narrow down stubborn failures
Safe mode helps isolate interference from software that loads at startup. On an Apple silicon Mac, shut down, then hold the power button until Loading startup options appears. Select the startup volume, hold Shift, and click Continue in Safe Mode.
On an Intel Mac, start or restart while holding Shift until the login window appears.
Test Spotlight in safe mode. Restart normally and test again. A difference between the two points toward startup software; safe mode is a diagnostic test, not a guaranteed search repair.
If Spotlight still fails, contact Apple Support through its online support resources or the Apple Support app. Describe whether Spotlight won't open, misses local files, or fails only with one app. Include what happened after reindexing and the safe-mode test.
Frequently Asked Questions
Can I reinstall Spotlight separately?
Spotlight is built into macOS rather than being a separate app you install, so it isn't uninstalled or reinstalled on its own. Reinstalling macOS is a broader repair option after narrower troubleshooting: Apple notes that reinstalling doesn't remove your apps or personal data, but back up your Mac first.
Why is Spotlight's magnifying-glass icon missing from the menu bar?
In the Menu Bar settings interface introduced in macOS Tahoe, open Apple menu > System Settings > Menu Bar. Under Menu Bar Controls, select Spotlight.
Why can't Spotlight find older clipboard entries?
On macOS 27, open System Settings > Spotlight > Results from Clipboard. Under Clipboard history is available in Spotlight, choose 30 minutes, 8 hours, or 7 days. Entries outside the selected interval aren't shown. On Tahoe 26, press Command-Space bar, then Command-4, and click Enable if prompted. The retention choices above apply to macOS 27.
Does rebuilding Spotlight recover deleted files?
Rebuilding the index doesn't recover deleted files. If you have a Time Machine backup, start a search in Finder. Click the Time Machine menu-bar icon and choose Browse Time Machine backups. Browse the timeline and select the item, then click Restore to return it to its original location.