You’ve connected your laptop to the TV, but the screen is blank or the sound still comes from the laptop. Getting both working takes the right cable connection, the matching TV input, and your laptop’s display and audio settings. Start with the connection below, then follow the instructions for your operating system.
Connect the cable and select the TV input
This gets the cable connected and the TV showing the correct input.
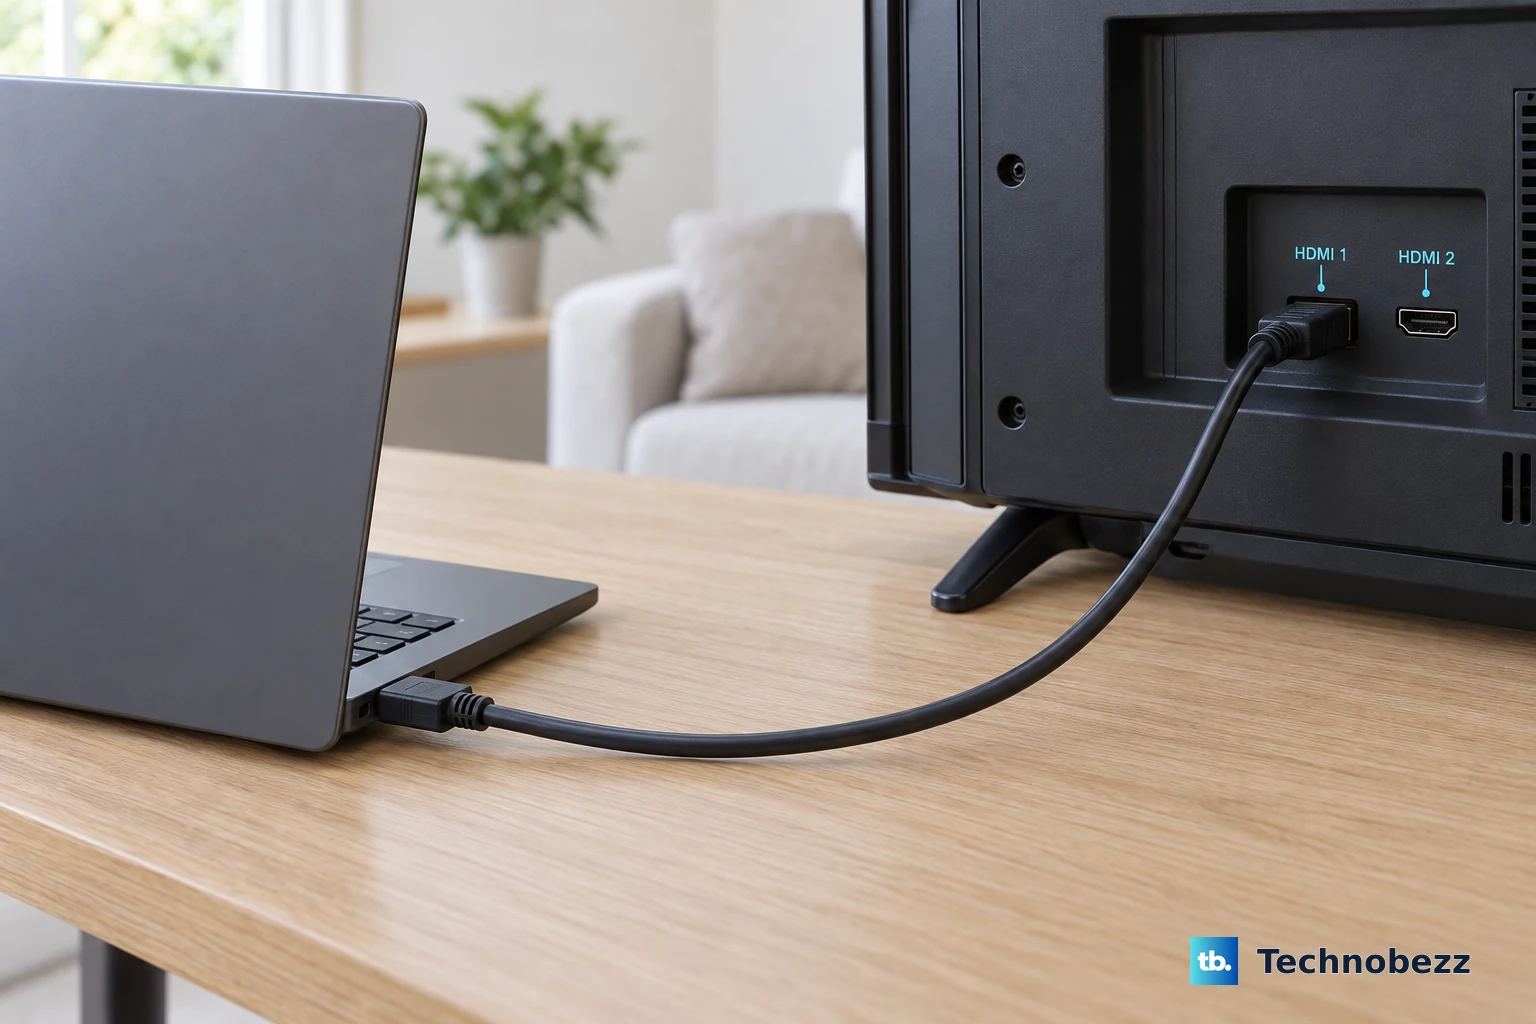
Connect the laptop’s HDMI output to a numbered HDMI input on the TV, or to the One Connect Box on Samsung One Connect models.
Turn on the TV.
Select the matching numbered HDMI input using the instructions for your TV below.
On an LG remote with these controls, press External Input or Home Hub.
Select the connected port, such as HDMI 1.
On a Samsung TV with this interface, open the left sidebar on Smart Hub Home.
Select Connected Devices.
Press the remote’s right button.
Select the connected HDMI device or numbered port.
If Windows still shows no picture on the TV, press Windows+P.
Choose Duplicate or Extend.
Add an adapter when your laptop has no HDMI port
A USB-C or Thunderbolt-to-HDMI adapter provides the connection on laptops with a compatible video output. The USB-C connector’s shape alone does not establish video support.
Check your laptop’s video-output specifications and the adapter’s supported resolution before choosing an adapter.
Connect the compatible adapter to the laptop’s video-capable USB-C or Thunderbolt port.
Connect the adapter to the TV with an HDMI cable.
Select the TV’s matching HDMI input.
A compatible dock with HDMI output is another option. Check the laptop and dock specifications for supported video outputs. Surface and Chromebook dock compatibility depends on the model.
If this route fails because the laptop lacks a compatible video output, check for a supported DisplayLink dock or adapter. DisplayLink requires specific USB graphics hardware and compatible software; a passive USB cable does not provide that connection.
Choose how Windows uses the TV
On Windows 11, press Windows+P to open the projection selector.
Select Duplicate for the same picture on both screens, Extend for additional desktop space, or Second screen only to use only the TV. PC screen only returns the picture to the laptop.
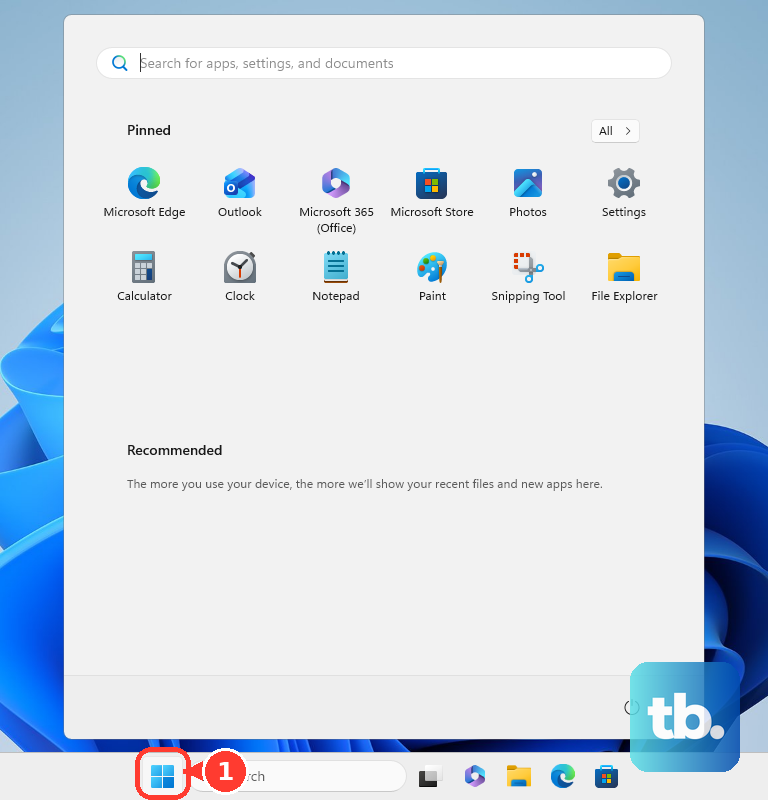
To arrange an extended desktop, open Start > Settings > System > Display.
Select Identify to see which screen each diagram represents.
Drag the screen diagrams into positions that match your setup.
Select Apply to save the arrangement.
For text or picture sizing, select the TV in Display settings.
Adjust Scale under Scale & layout, starting with the recommended option.
Set Display resolution to the recommended option as your starting point.
Tip: On a Surface without an attached keyboard, open the taskbar’s Network, Sound, or Battery area and select Project to choose a display mode.
Set up the TV on a Mac
Use your Mac’s display settings to mirror your screen or give yourself more desktop space.
- 1.Connect the HDMI cable or compatible adapter. On an Apple-silicon Mac laptop that requests accessory approval, unlock the Mac and click Allow.
- 2.Open the Apple menu > System Settings > Displays.
- 3.Select the TV and use Use as to configure mirroring, an extended desktop, or the main display.
- 4.Use Arrange to position an extended display, or Optimize for when mirroring.
- 5.Select a resolution or Default to adjust the picture. On compatible TVs, enable Overscan if the picture does not fill the screen.
Adjust your Chromebook’s display
These controls apply once your Chromebook is connected through HDMI or a compatible video adapter or dock. Supported outputs and dock compatibility depend on your Chromebook model.
Select the time to open the system controls.
Open Settings > Device > Displays.
Select Mirror Built-in Display to show the same picture on the TV and Chromebook. This option appears when an external display is connected.
To adjust the TV’s picture, select it in Displays.
Adjust Display and text size to change the sizing.
Choose a resolution under Resolution. Your hardware determines the available modes.
For TV-only output, press and hold the Decrease brightness key while the TV is connected.
Send the sound through the TV
If the picture works but sound stays on the laptop, use the matching audio controls below.
On Windows 11, open Start > Settings > System > Sound.
Under Output, select the TV or HDMI audio device.
Check that the volume is raised and audio is not muted.
On a Mac, open the Apple menu > System Settings > Sound > Output.
Select the HDTV in the device list.
On a Chromebook, select the time.
Then open Settings > Device > Audio.
Under Output > Device, select the TV or HDMI device.
If only one Windows app has the wrong sound output, open Start > Settings > System > Sound > Volume mixer.
Under Apps, choose the TV as the affected app’s Output device.
Check that app’s mute and volume controls.
Detect the TV when there’s still no picture
First, confirm that the TV’s selected HDMI input matches the port holding the laptop’s cable. The TV needs to be showing that input before the laptop’s picture can appear.
On Windows 11, open Start > Settings > System > Display.
Expand Multiple displays.
Select Detect when the TV is missing.
On a Mac, open the Apple menu > System Settings > Displays.
Hold Option to reveal Detect Displays in place of Night Shift.
Click Detect Displays to look for the TV.
For an adapter or dock connection, check its supported video outputs against your laptop’s specifications. The laptop, TV, cable, and adapter all affect the available display modes.
If detection fails on a previously working Windows connection, press Windows+Ctrl+Shift+B to reset the graphics driver.
If the picture does not recover, select Start > Power > Restart.
Frequently Asked Questions
Can I close my laptop while using the TV?
On a Windows 11 laptop with these power controls, search for and open Control Panel. Open Power Options > Choose what closing the lid does. Set When I close the lid to Do nothing for the intended power condition, then select Save changes. For a compatible MacBook, connect the TV, an external keyboard and mouse, and power before closing the lid.
Why can’t I select the resolution or refresh rate I want?
The available modes depend on the TV, laptop, cable, and adapter. To choose a supported refresh rate on Windows 11, open Start > Settings > System > Display > Advanced display. Select the TV, then use Choose a refresh rate.
Where do I get the software for a DisplayLink adapter?
On Synaptics’ DisplayLink Windows download page, choose a compatible package under Latest Official Drivers. For a Mac, use its macOS download page and choose a DisplayLink Manager release that lists your macOS version. Check the dock manufacturer’s instructions for any additional software requirements.
Do I need to use Cast or AirPlay too?
No. Windows Cast, AirPlay, and browser casting are wireless alternatives. They are not required for a wired HDMI connection.