When your iPhone 13 suddenly stops sending or receiving emails, it can throw a real wrench in your day. You might be missing important messages or unable to reply to anyone. I've found that on the iPhone 13, especially after updating to iOS 18, email issues are almost always caused by a few specific settings or a temporary glitch that's easy to fix.
Before we get into the detailed steps, let's try the quickest fix that works most of the time. Force restart your iPhone 13 by pressing and quickly releasing the Volume Up button, then the Volume Down button, and finally holding the Side button until you see the Apple logo. This clears the phone's memory and can resolve a surprising number of email sync problems instantly.
Check Your Internet Connection First
Email needs an active internet connection to work. Start by making sure you're actually online. Open Safari and try loading a website. If it doesn't load, your connection is the issue.
Try toggling Airplane Mode on and off. Swipe down from the top-right corner to open Control Center and tap the airplane icon. Wait about 15 seconds, then tap it again to turn it off. This resets all your iPhone 13's radios in one go.
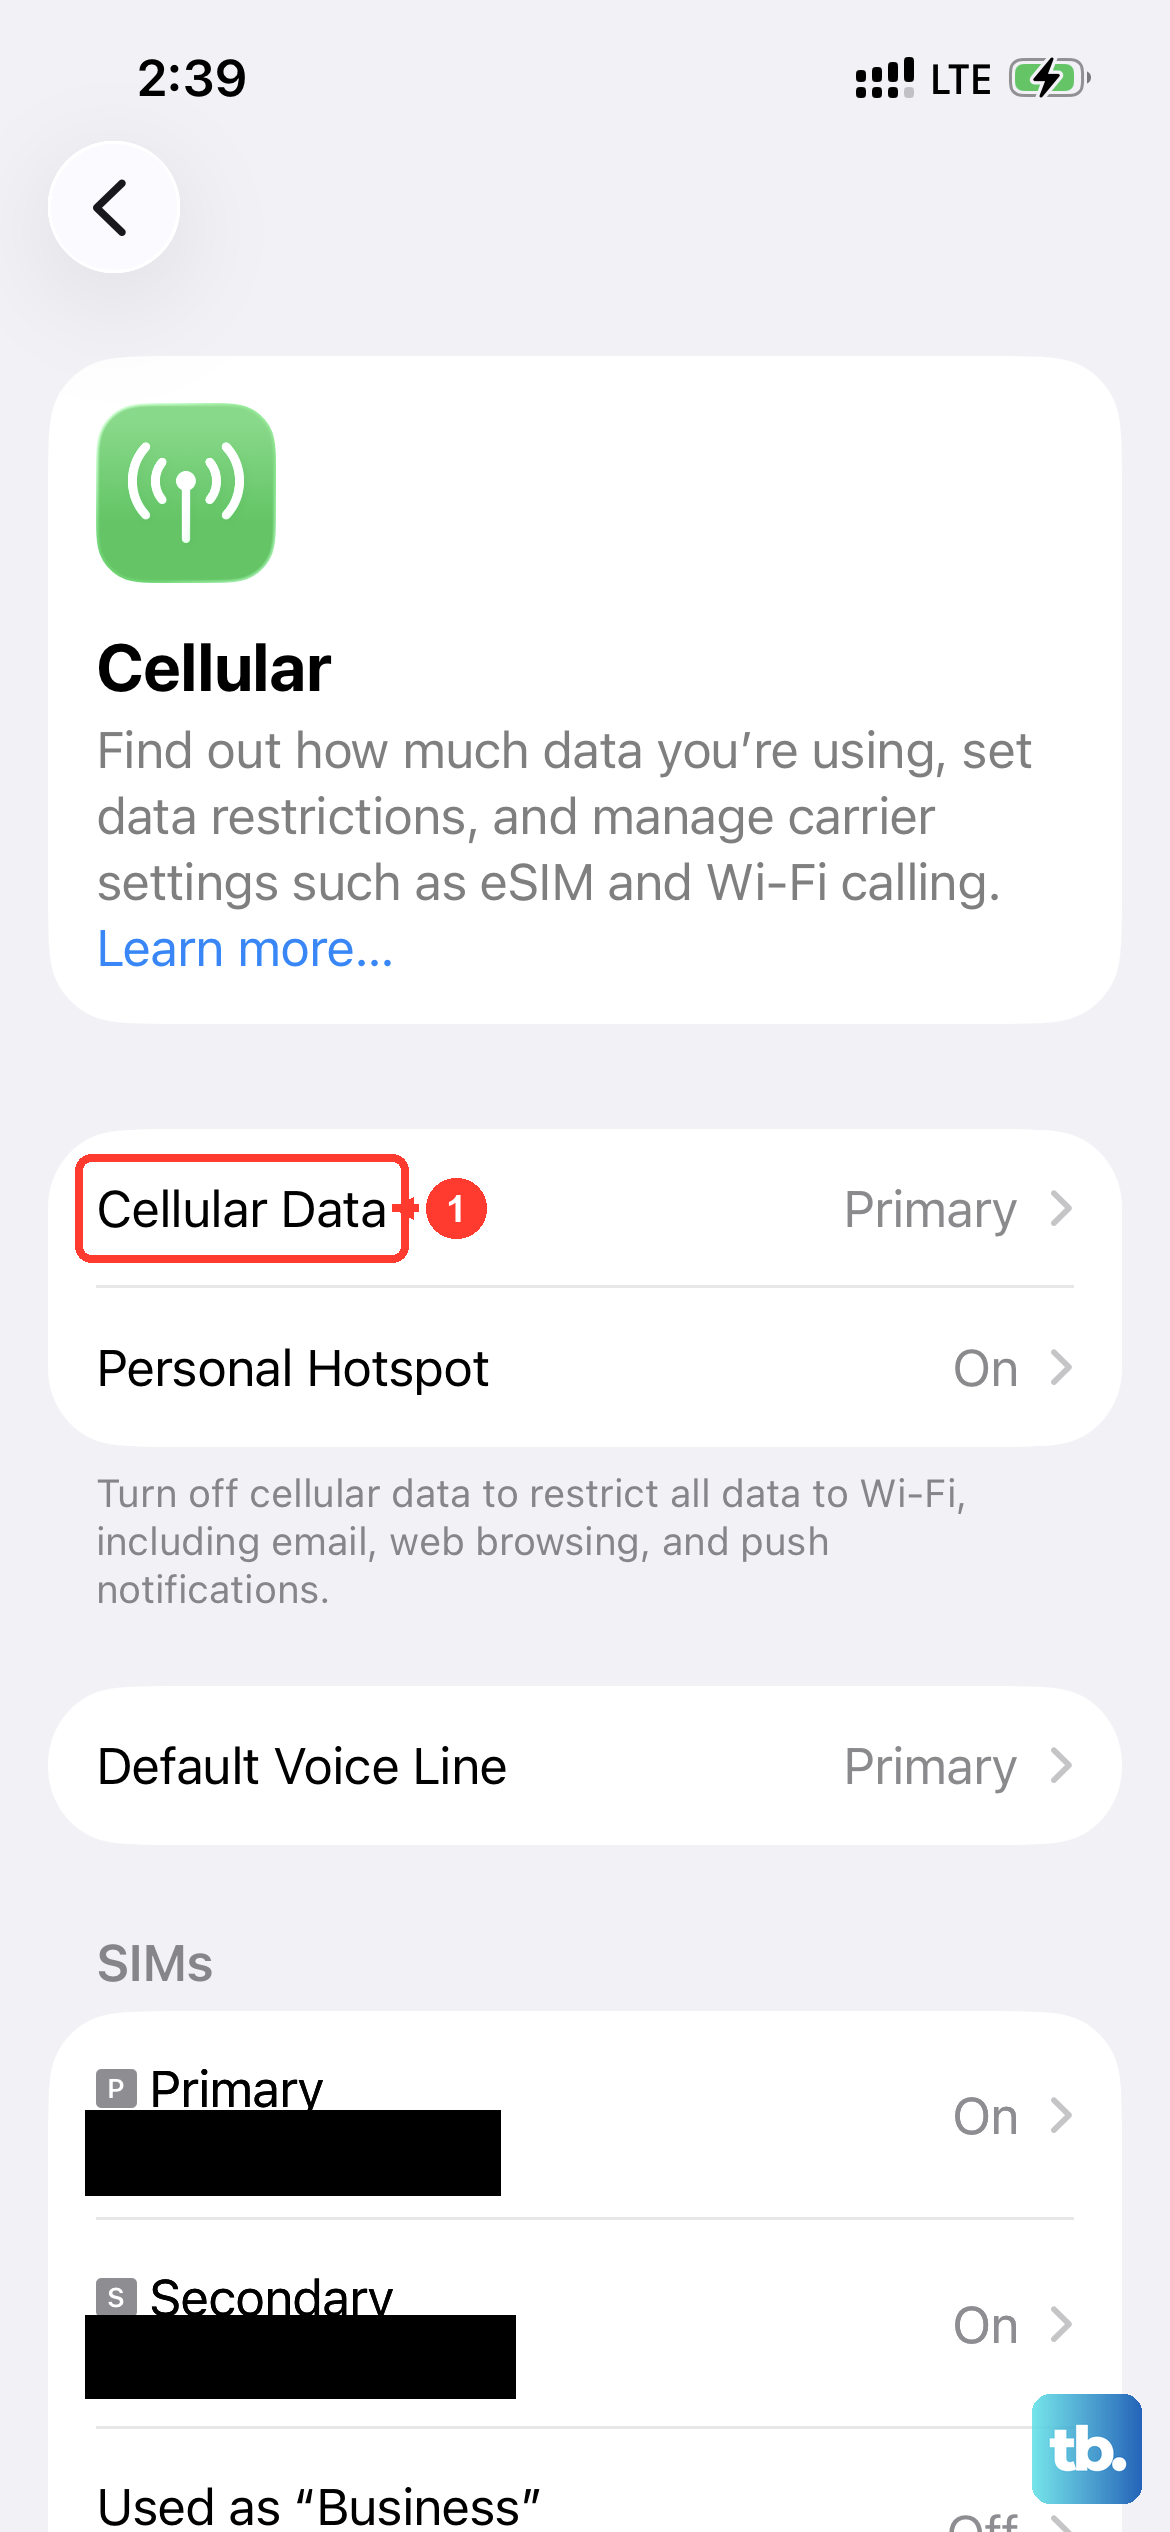
If you're on Wi-Fi, try switching to cellular data, or vice versa. Sometimes a network can have a hiccup that specifically affects mail servers. You can turn cellular data off in Settings > Cellular.
Verify Your Mail Fetch and Push Settings
How your iPhone 13 checks for new mail is controlled by the Fetch settings. If these are set incorrectly, new messages won't appear. Go to Settings > Mail > Accounts > Fetch New Data.
At the top, make sure "Push" is turned on if your email provider supports it (iCloud and some others do). If Push is off or unavailable, your phone will "Fetch" mail on a schedule. I'd recommend setting the fetch schedule to "Automatically" for the best balance of battery life and timely updates.
Remember, with Fetch, your iPhone 13 will only check for new data in the background when it's connected to power and Wi-Fi, unless you change this. Scroll down and ensure your specific email account is set to fetch automatically as well.
Restart the Mail App and Your iPhone
A simple app restart can clear out a temporary software bug. If you're using the stock Mail app, swipe up from the bottom of the home screen and pause in the middle to enter the app switcher. Find the Mail app preview and swipe it up off the top of the screen to close it completely. Then reopen it.
For a more thorough refresh, give your entire iPhone 13 a restart. Press and hold the Side button and either volume button, then slide the "power off" slider. Wait 30 seconds, then press and hold the Side button again to turn it back on. This is different from the force restart and is a good general maintenance step.
Confirm Your Email Account Credentials
Passwords expire, or you might have recently changed yours on another device. The quickest way to check is to try logging into your email account's web portal using Safari on your iPhone. If you can't log in there, you need to reset your password with your email provider.
If your password has changed, you need to update it on your phone. Go to Settings > Mail > Accounts, tap on your email account, then tap "Password" to re-enter the current one. Your iPhone 13 will often tell you "Password Incorrect" here if that's the problem.
Ensure Mail Can Use Cellular Data
If emails only come through on Wi-Fi, cellular data might be disabled for Mail. Go to Settings > Cellular and scroll down through the list of apps. Make sure the toggle next to "Mail" is switched on (green). This is a common oversight, especially if you've been managing your data usage.
Also, check that Background App Refresh is enabled for Mail. This allows the app to check for new messages even when you're not actively using it. The path is Settings > General > Background App Refresh. Make sure it's on for Wi-Fi & Cellular and that Mail is enabled in the list below.
Check for iOS and App Updates
Apple frequently releases iOS updates that fix bugs, including ones related to mail. Go to Settings > General > Software Update to see if the latest iOS version is available. Installing the latest update can resolve underlying issues.
If you're using a third-party app like Gmail or Outlook, make sure it's also updated. Open the App Store, tap your profile icon in the top right, and scroll down to see pending updates. An outdated app can have compatibility problems.
Review Your Date, Time, and VPN Settings
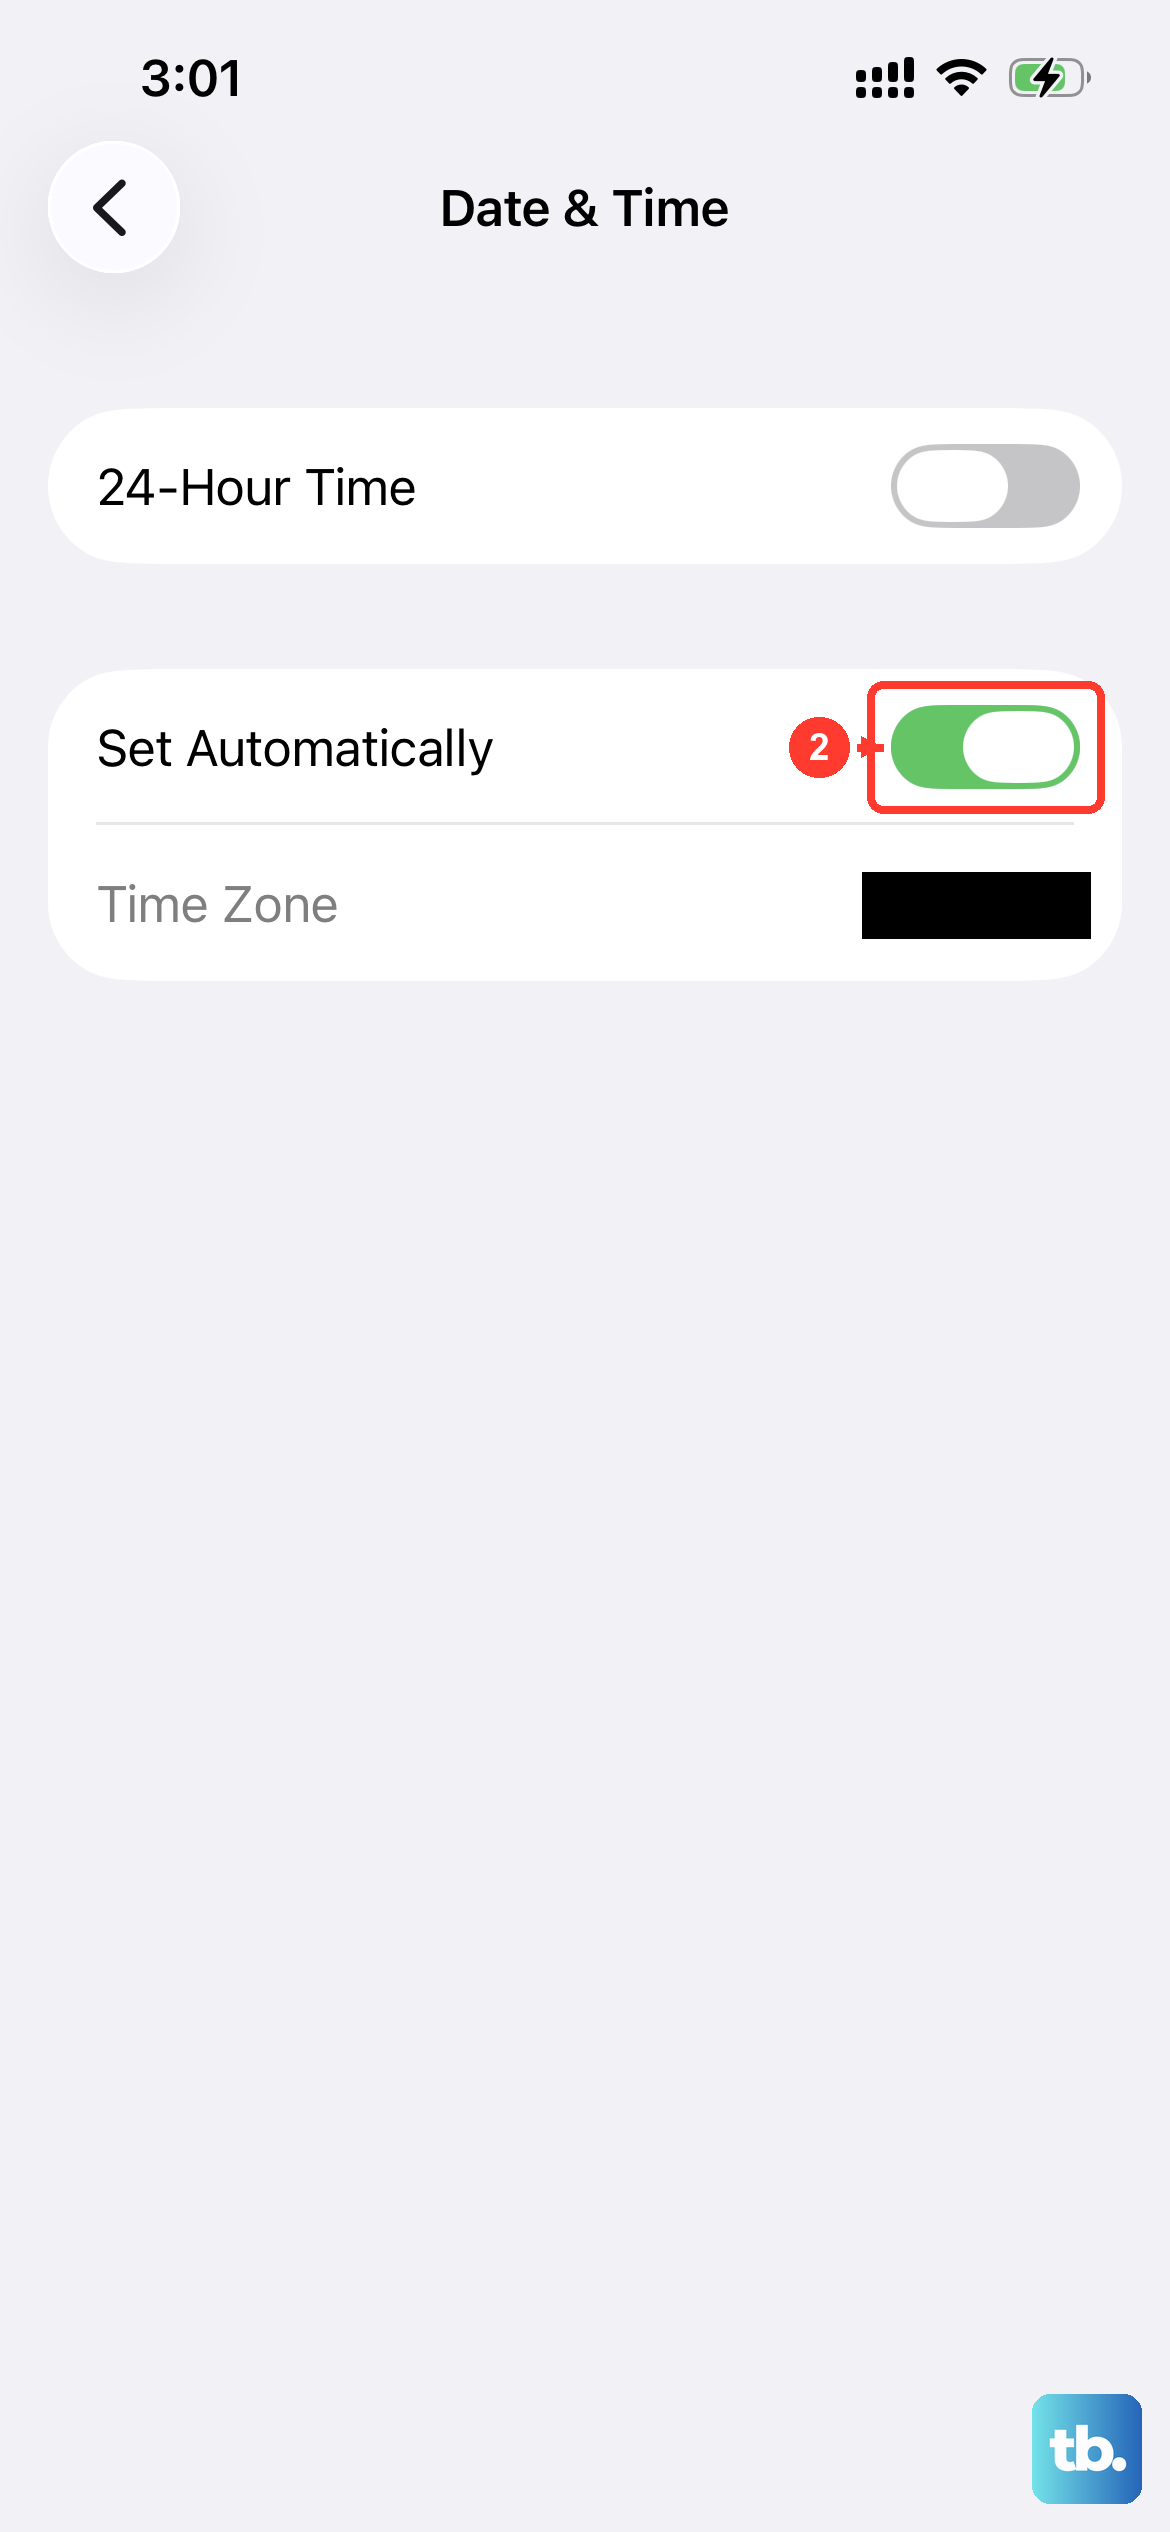
Incorrect date and time settings can break secure connections to mail servers. Go to Settings > General > Date & Time and make sure "Set Automatically" is turned on. This ensures your iPhone 13's clock is always accurate.
If you use a VPN for privacy, try temporarily disabling it. VPNs can sometimes interfere with the specific ports used for sending and receiving email. You can turn it off in Settings > General > VPN & Device Management.
Delete and Re-add Your Email Account
This is the nuclear option for a single account, but it often works for stubborn sync issues. It essentially gives you a fresh start. Go to Settings > Mail > Accounts, tap the problematic account, and then tap "Delete Account." Don't worry, this only removes it from your phone, not from the email service itself.
Immediately after deleting, tap "Add Account" and go through the setup process again. For services like iCloud, Google, or Microsoft, your iPhone 13 will usually configure the settings automatically. For other accounts, you may need your provider's incoming and outgoing server details handy.
Inspect Notification and Focus Settings
Are emails arriving but you're just not getting alerted? Your notification settings might be off. Go to Settings > Notifications > Mail. Make sure "Allow Notifications" is on and check your alert style.
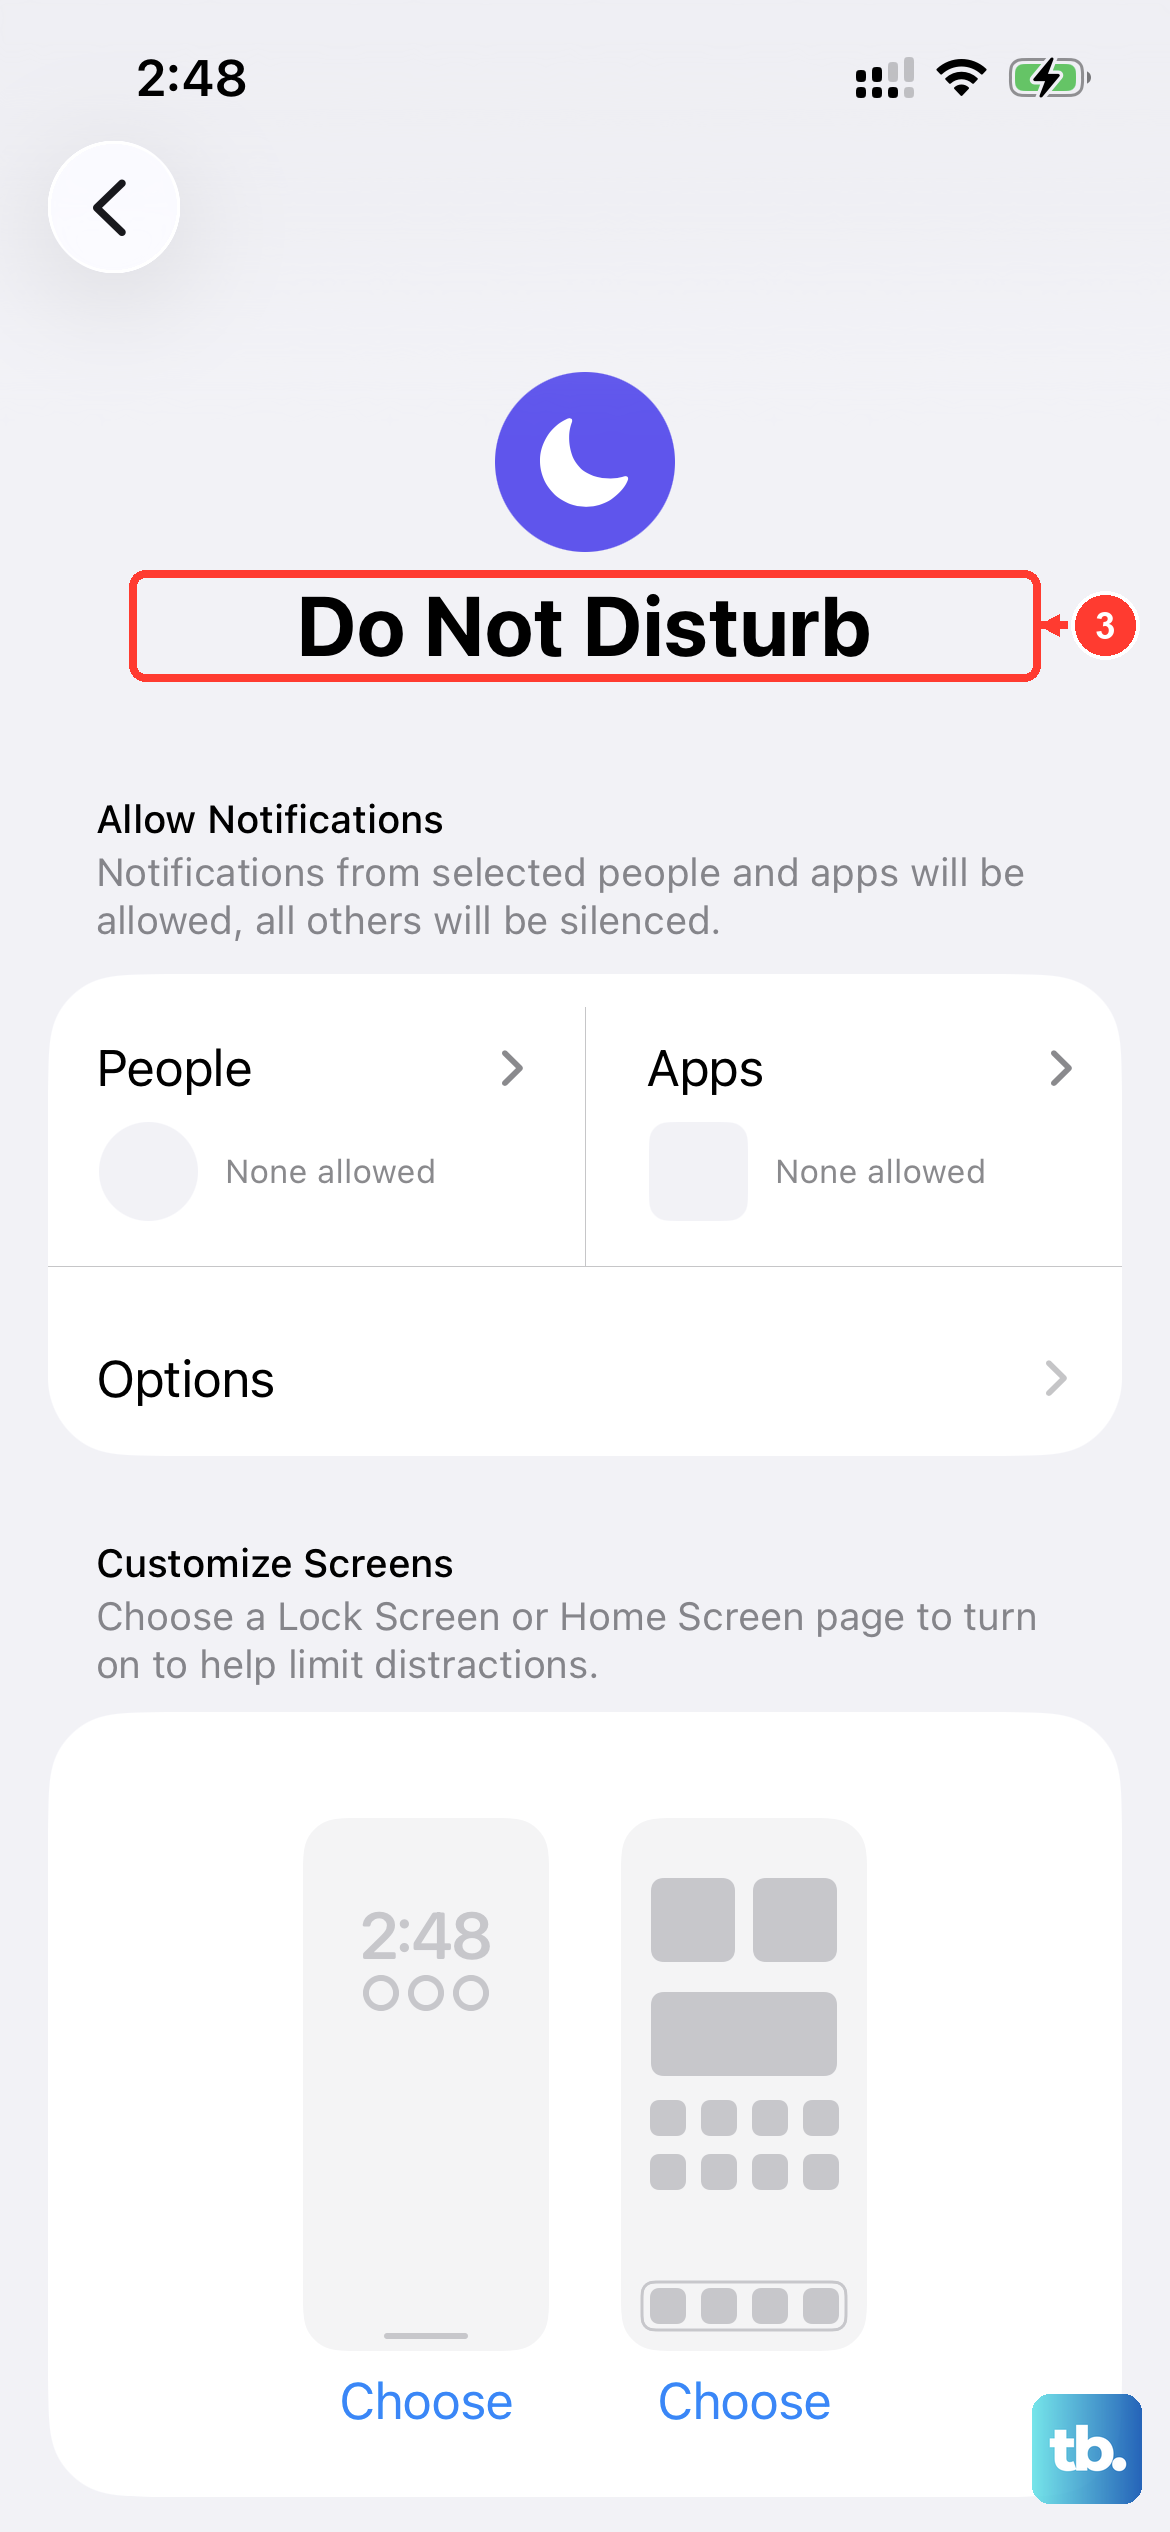
Also, check if a Focus mode (like Do Not Disturb or a custom one) is silencing your mail alerts. Swipe down to open Control Center and see if a Focus icon (like a crescent moon) is highlighted. Tap it to turn the active Focus off, or go to Settings > Focus to configure which apps can notify you during each mode.
Reset All Network Settings
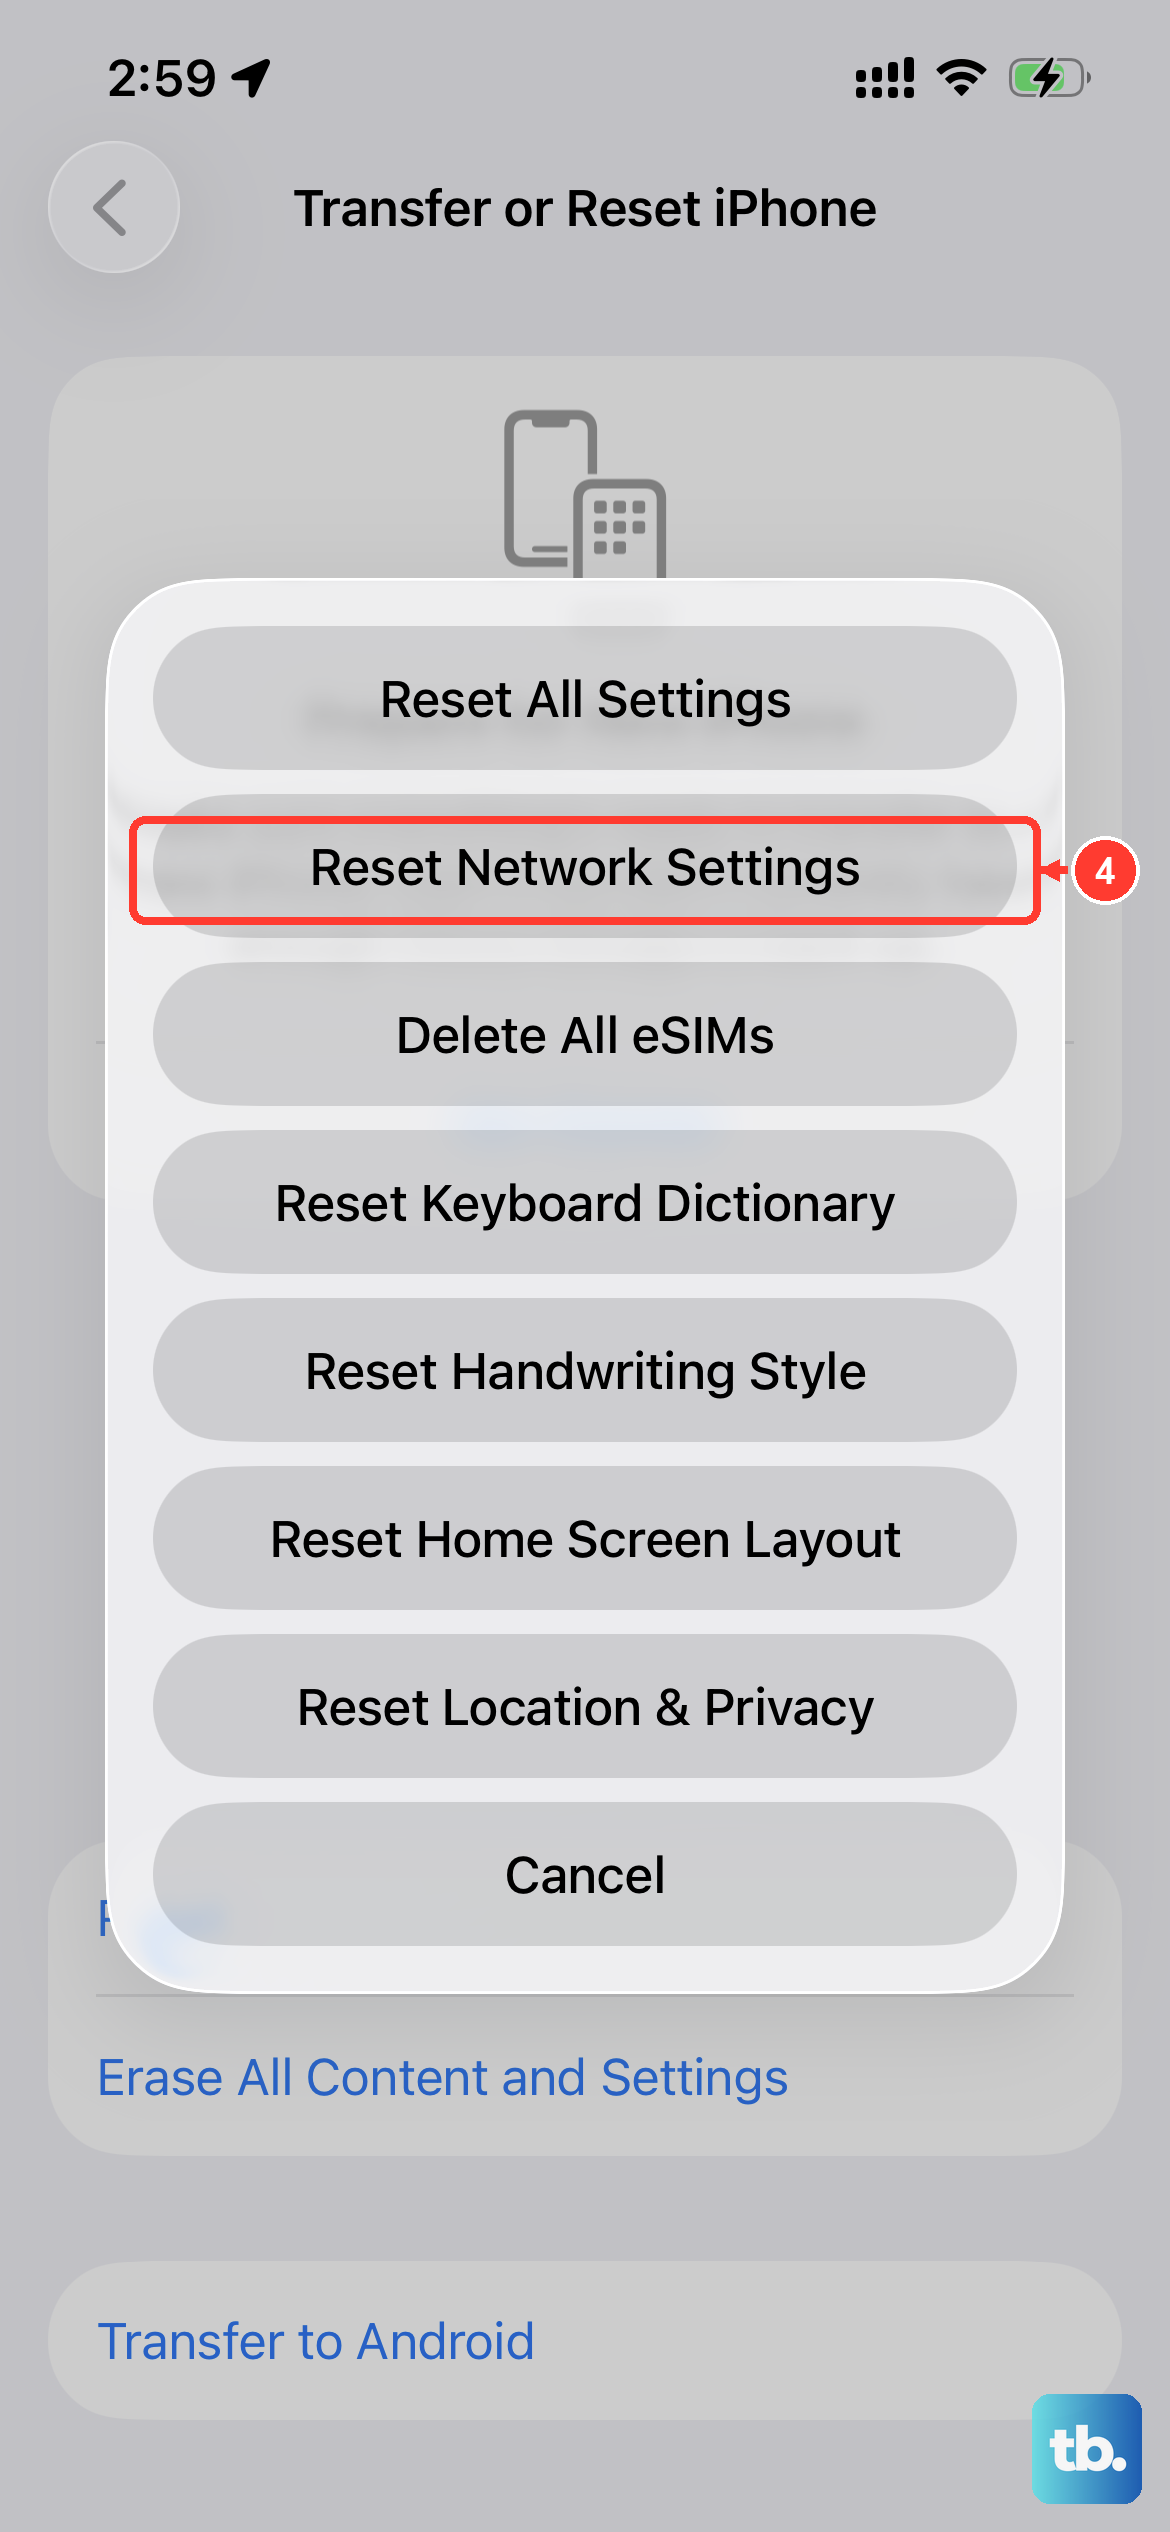
If you're still having connection-related mail issues, resetting network settings can help. This clears all Wi-Fi networks and passwords, cellular settings, and VPN configurations, then restores them to defaults. Go to Settings > General > Transfer or Reset iPhone > Reset and choose "Reset Network Settings."
You'll need to re-join your Wi-Fi networks afterward, but it can fix deep-seated network glitches that affect Mail. This does not erase your personal data or email accounts.
As a Last Resort, Reset All Settings
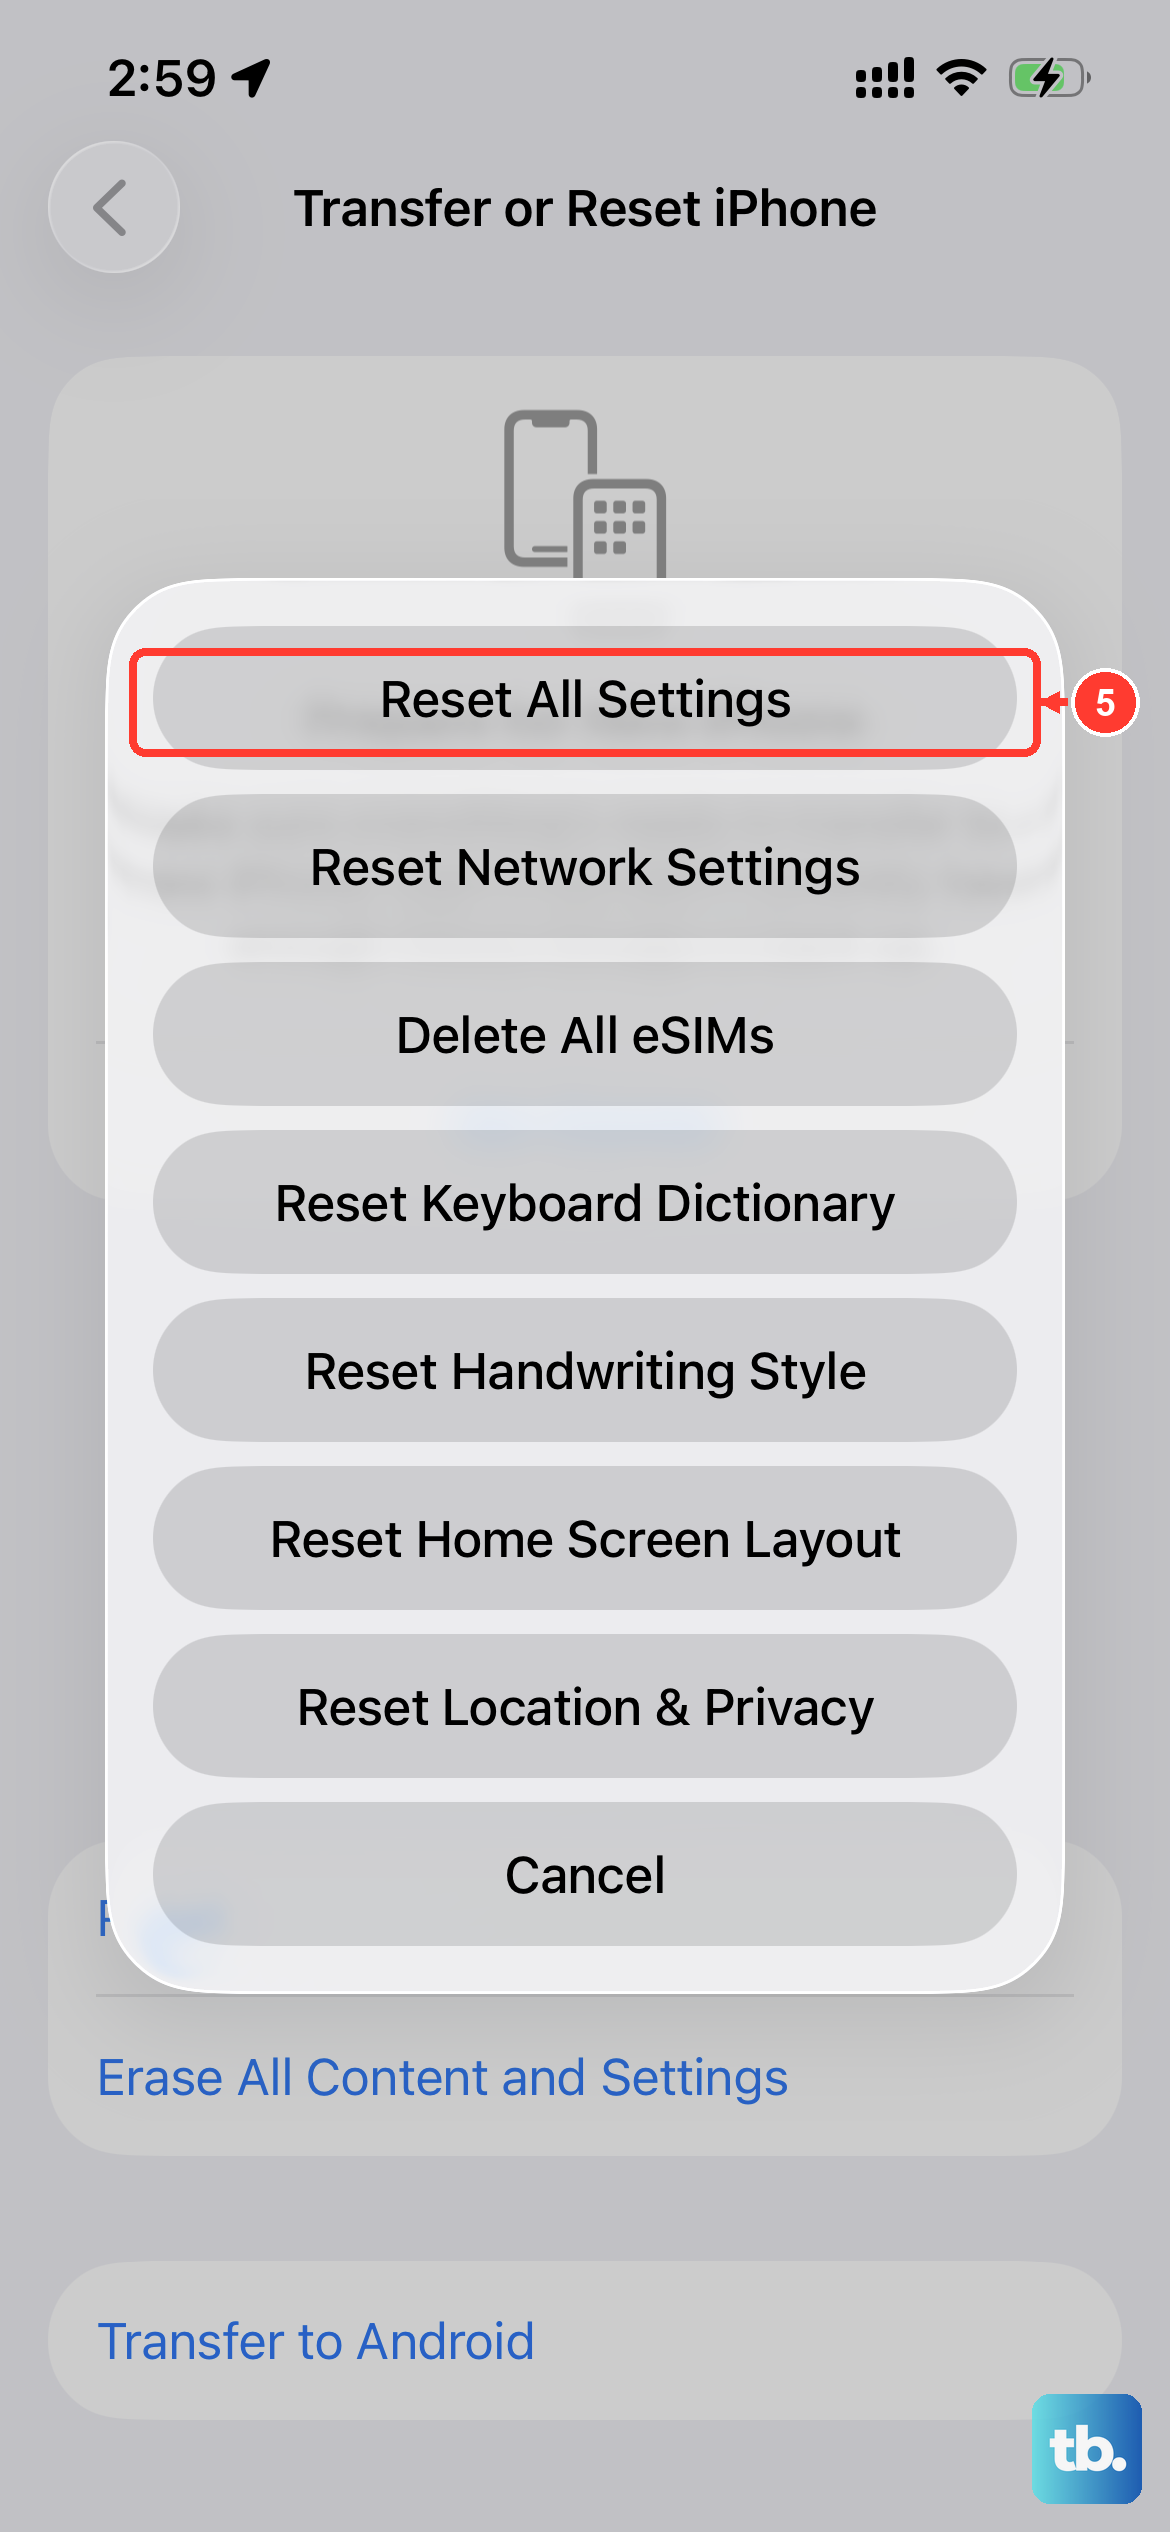
If nothing else has worked, this final step resets every system setting on your iPhone 13, including wallpaper, privacy permissions, and keyboard dictionaries, back to factory defaults, without touching your photos, messages, or apps. The path is Settings > General > Transfer or Reset iPhone > Reset > Reset All Settings.
It's a bit of a hassle because you'll have to reconfigure things like Face ID and display brightness, but it eliminates any corrupted setting that could be causing the mail problem. Your email accounts will remain, but you may need to re-enter their passwords.


