Saturday brings a fresh set of NYT Pips puzzles. Today's lineup delivers a consistent challenge across all three difficulty levels with heavy reliance on equal-condition zones and exact-number requirements that reward methodical placement. We've got hints, step-by-step walkthroughs, and full solutions for Easy, Medium, and Hard difficulty levels.
How to Play Pips
Pips is a domino placement puzzle where you fill a grid of color-coded zones. Each zone has a condition you must satisfy using the pip values on your dominoes. The twist: you must use every domino and meet every condition to win.
Zone Conditions:
- = All pips in this zone must equal the same number
- Not Equal All pips must be different numbers
- > Pips must be greater than the listed number
- < Pips must be less than the listed number
- Exact Number Pips must total that exact value
- No Color Free space, any domino value works
Click or tap dominoes to rotate them. Each puzzle has one or more valid solutions.
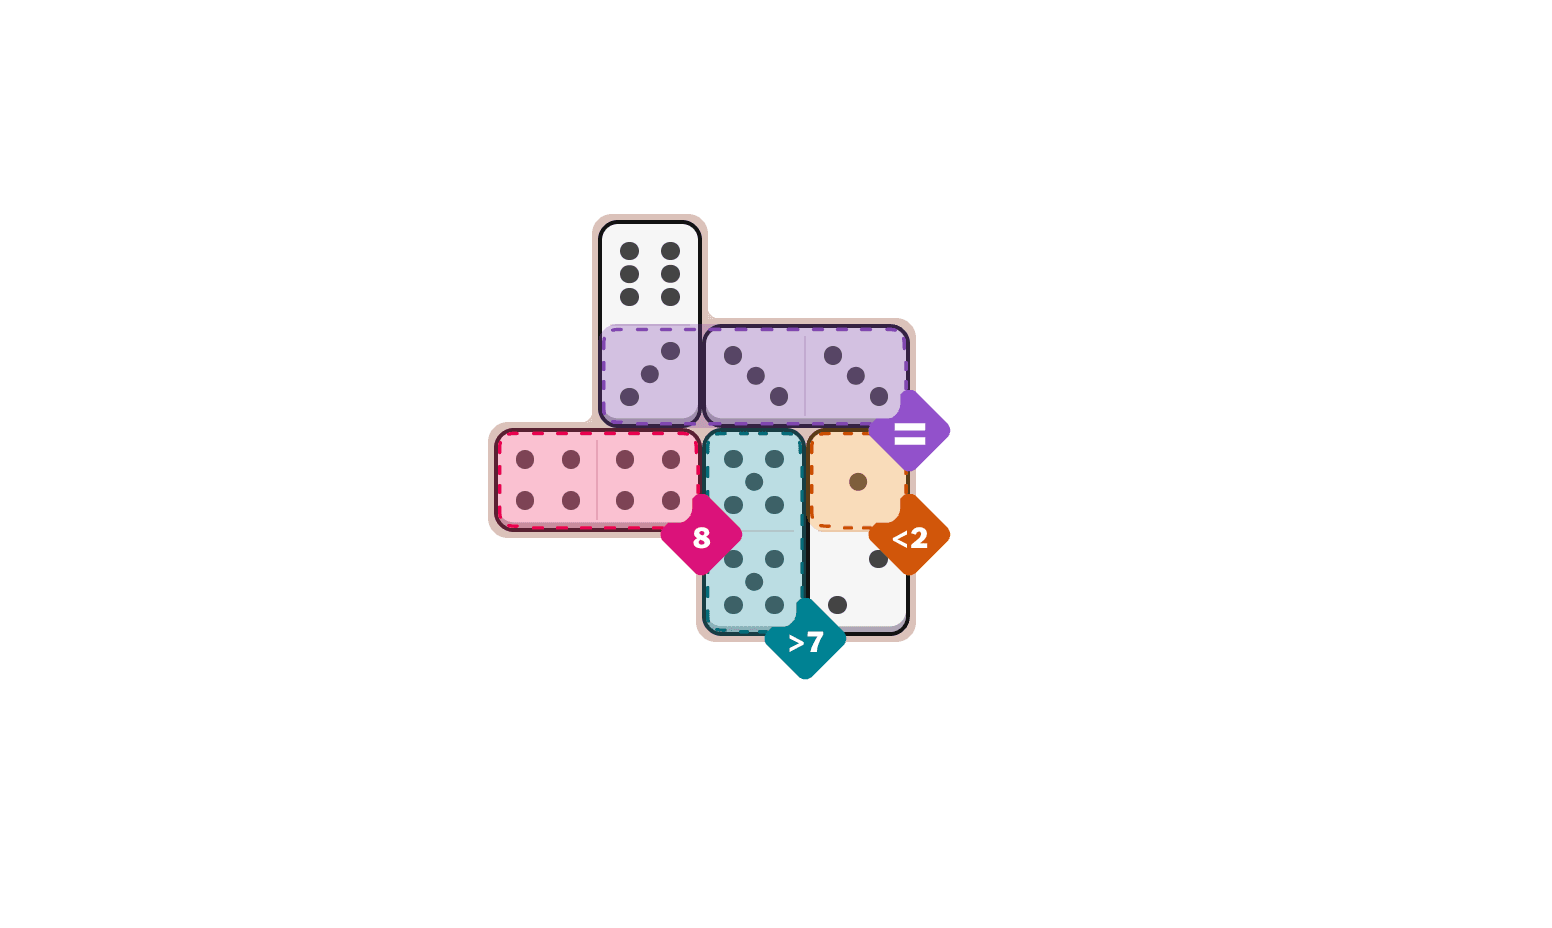
Today's Easy Pips
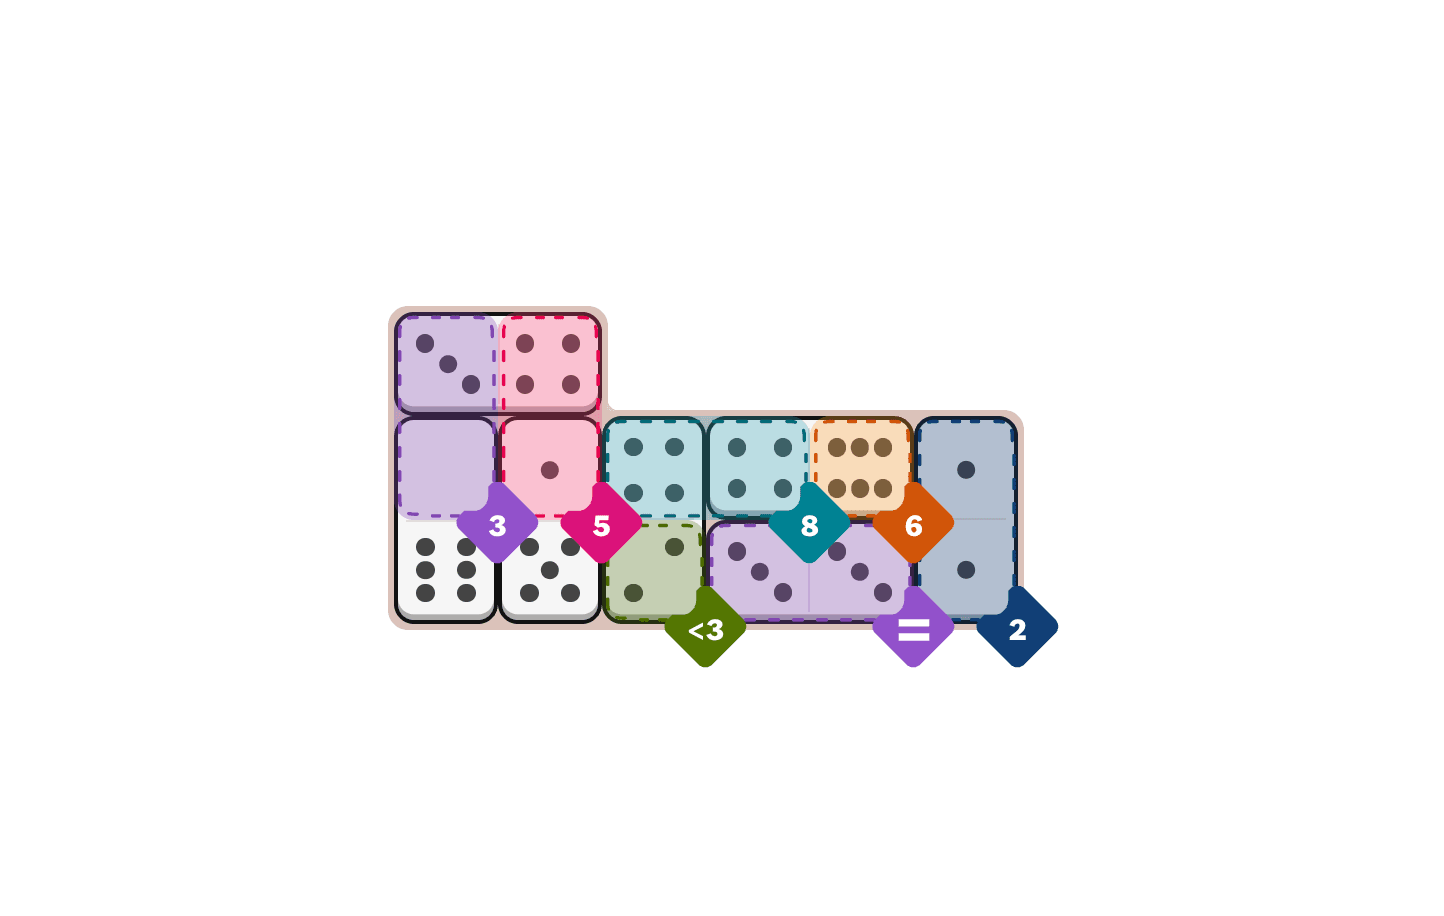
Today's Medium Pips
Today's Hard Pips
Quick Hints (No Spoilers)
Starting Point: The purple (=) zone is the densest equal-condition zone on the board. Locking it down early constrains the rest of the grid significantly.
Key Insight: The orange (=) zone and the purple (7) zone share a border. Solve them as a unit rather than independently -- the domino that crosses between them determines values for both.
Watch Out For: The teal (=) zone and navy (=) zone both require all pips to match, but they receive dominoes from multiple directions. A wrong placement in the bridging zones (green 6, purple 2) can cascade errors into both equal zones simultaneously.
Step-by-Step Walkthrough
- 1.Start with the purple (=) zone. Place the 4/4 horizontally to establish the equal value at 4. This is the most constrained zone and sets the tone for the entire puzzle.
- 2.Place the 4/1 vertically so the 4 end stays in the purple (=) zone and the 1 drops into the pink (=) zone. This creates the first bridge between the two largest equal-condition zones.
- 3.Place the 1/6 vertically from pink (=) into navy (=). The 1 matches the pink zone's value, and the 6 begins populating the navy zone. Three equal zones are now linked.
- 4.Place the 6/2 vertically from navy (=) into the purple (2) zone. The 6 keeps navy consistent. The 2 satisfies the purple (2) exact-number requirement, this is a critical placement because the purple (2) zone has no room for error.
- 5.Place the 1/0 vertically from pink (=) into green (0). The 1 maintains pink's consistency, and the 0 meets the green zone's exact requirement.
- 6.Fill the remaining pink (=) zone with the 1/1 horizontally. All pink zone pips now equal either 1, satisfying the equal condition.
- 7.Tackle the purple (7) zone. Place the 2/4 horizontally so the 2 sits in the purple (7) zone and the 4 crosses into the orange (=) zone.
- 8.Place the 5/6 vertically in the purple (7) zone and pink (=) zone. The 5 adds to the 2 already in purple (7) for a subtotal of 7, this zone is now satisfied. The 6 fits pink's equal condition.
- 9.Place the 6/6 horizontally in pink (=) zone and 4/6 vertically in the orange (=) zone and pink (=) zone.
- 10.Work the teal (7) zone. Place the 4/3 horizontally, bridging into the orange (=) zone. The 4 matches orange's equal condition. Then place the 4/0 horizontally, bridging into the orange (0) zone.
- 11.Complete the navy (=) zone with the 5/5 horizontal. Place the 6/3 vertically between the green (6) zone and the teal (=) zone. Place the 5/3 vertically between the navy (=) zone and the teal (=) zone.
- 12.Finish with the 3/3 horizontally in the teal (=) zone. All zones are now satisfied with every domino placed.
Hard Pips Solution
Last chance to solve independently
---
---
---
---
---
- 1.Place the 4/4 domino horizontally in the purple (=) zone
- 2.Place the 4/1 domino vertically in the purple (=) zone and pink (=) zone
- 3.Place the 1/6 domino vertically in the pink (=) zone and navy (=) zone
- 4.Place the 6/2 domino vertically in the navy (=) zone and purple (2) zone
- 5.Place the 1/0 domino vertically in the pink (=) zone and green (0) zone
- 6.Place the 1/1 domino horizontally in the pink (=) zone
- 7.Place the 2/4 domino horizontally in the purple (7) zone and orange (=) zone
- 8.Place the 5/6 domino vertically in the purple (7) zone and pink (=) zone
- 9.Place the 6/6 domino horizontally in the pink (=) zone
- 10.Place the 4/6 domino vertically in the orange (=) zone and pink (=) zone
- 11.Place the 4/3 domino horizontally in the orange (=) zone and teal (7) zone
- 12.Place the 4/0 domino horizontally in the teal (7) zone and orange (0) zone
- 13.Place the 5/5 domino horizontally in the navy (=) zone
- 14.Place the 6/3 domino vertically in the green (6) zone and teal (=) zone
- 15.Place the 5/3 domino vertically in the navy (=) zone and teal (=) zone
- 16.Place the 3/3 domino horizontally in the teal (=) zone
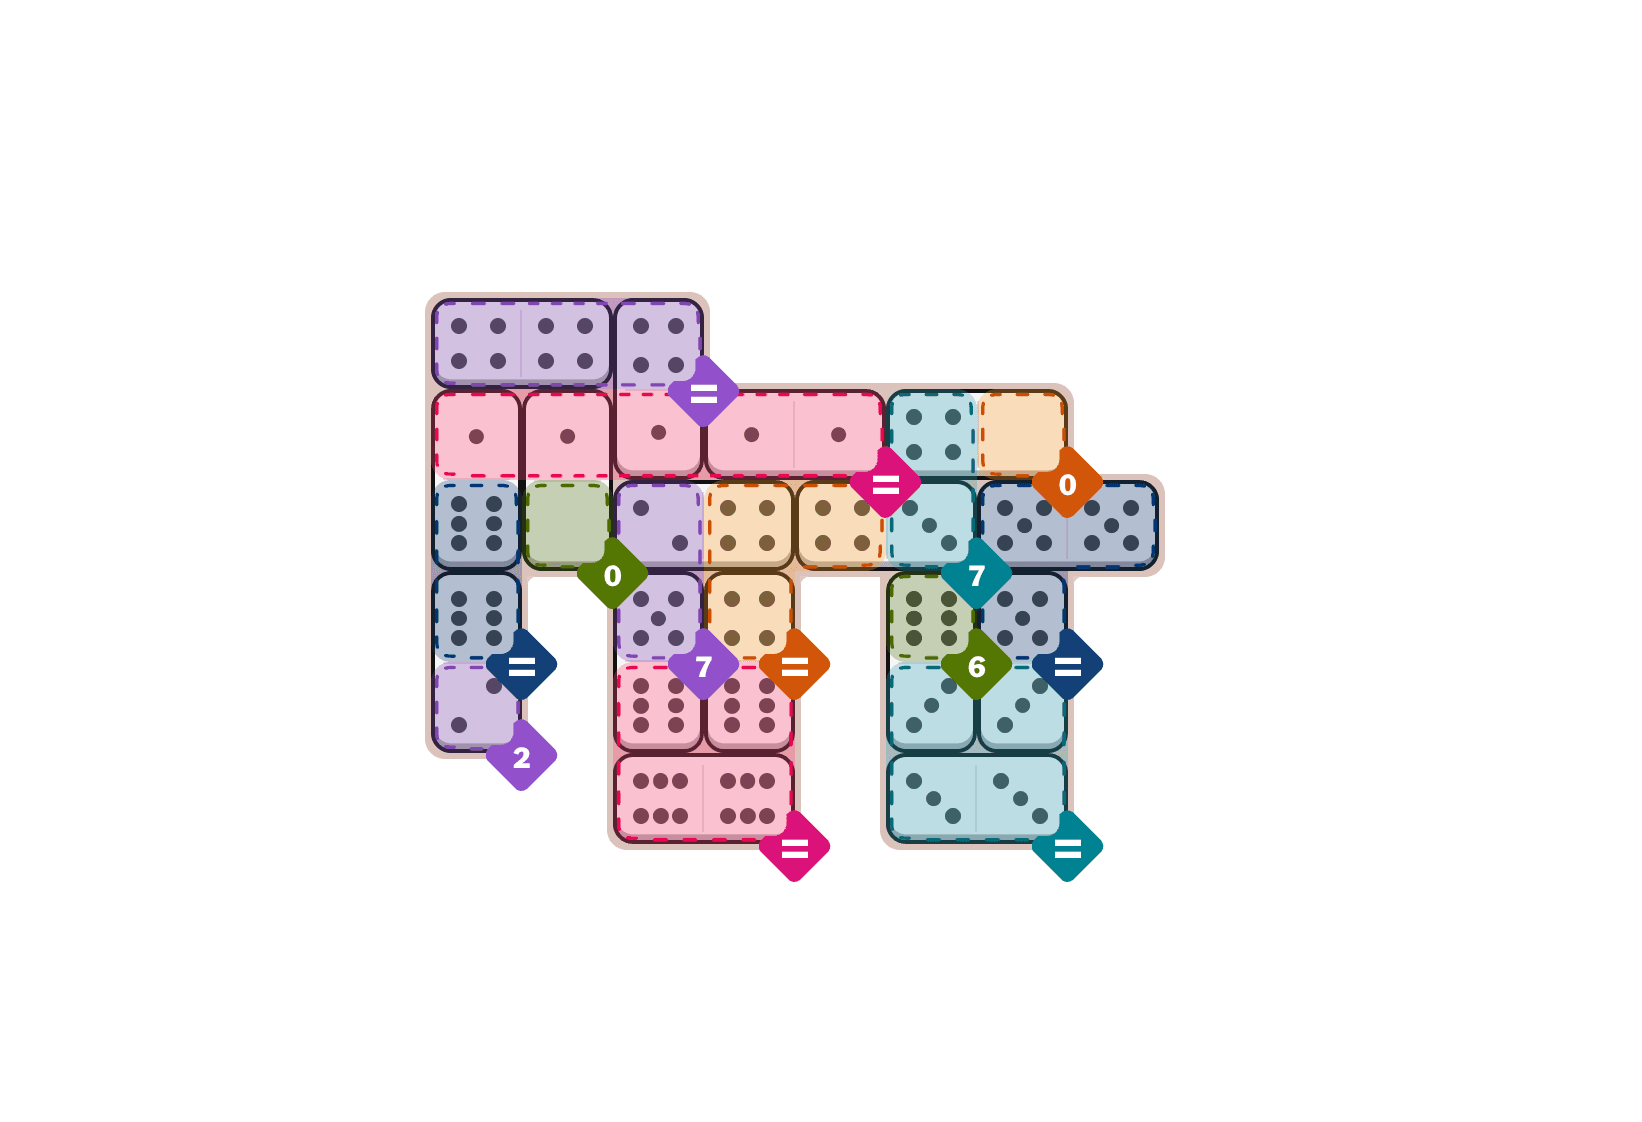
Puzzle Debrief
Overall Difficulty: Moderate challenge -- the zone layout is identical across all three levels, but the strategic approach shifts based on how you prioritize the equal-condition chains.
Trickiest Puzzle: Hard -- the density of equal-condition zones (purple, pink, navy, teal) combined with exact-number requirements (purple 2, purple 7, green 0, orange 0, teal 7) means a single misplacement can cascade errors across multiple zones. The purple (2) zone in particular leaves no margin for error.
Our Take: Today's puzzles share the same underlying grid configuration, so mastering the Easy walkthrough gives you a template for the harder variants. The real challenge in Medium and Hard is the mental overhead of tracking more constraints simultaneously. The purple (=) zone is the keystone -- lock it in first, and everything else falls into place.
Tomorrow's Pips drops at midnight. See you then.