When your iPad (11th generation) isn't ringing for incoming calls, it can be confusing, especially if you rely on it for communication. This issue is often tied to how your iPad is set up to handle calls from your paired iPhone, a feature Apple calls Wi-Fi Calling. The good news is that a few settings checks usually get things working again.
I'd start with the simplest fix first. Open the FaceTime app on your iPad and tap your profile picture or initials in the top right corner. Make sure your Apple ID is signed in and that the "Calls from iPhone" switch is turned on. This is the master setting that allows calls to come through.
Check Your iPhone's Wi-Fi Calling Settings
For your iPad to receive calls, your iPhone needs to be configured correctly. On your iPhone, go to Settings > Phone > Wi-Fi Calling. Ensure "Wi-Fi Calling on This iPhone" is enabled. Then, scroll down and tap on "Calls on Other Devices."
Turn on the "Allow Calls on Other Devices" toggle. Your iPad (11th generation) should appear in the list of devices below. Make sure the switch next to it is turned on. Both devices need to be signed into the same Apple ID and connected to the same Wi-Fi network, or have cellular connectivity, for this to work.
Verify Do Not Disturb and Focus Modes
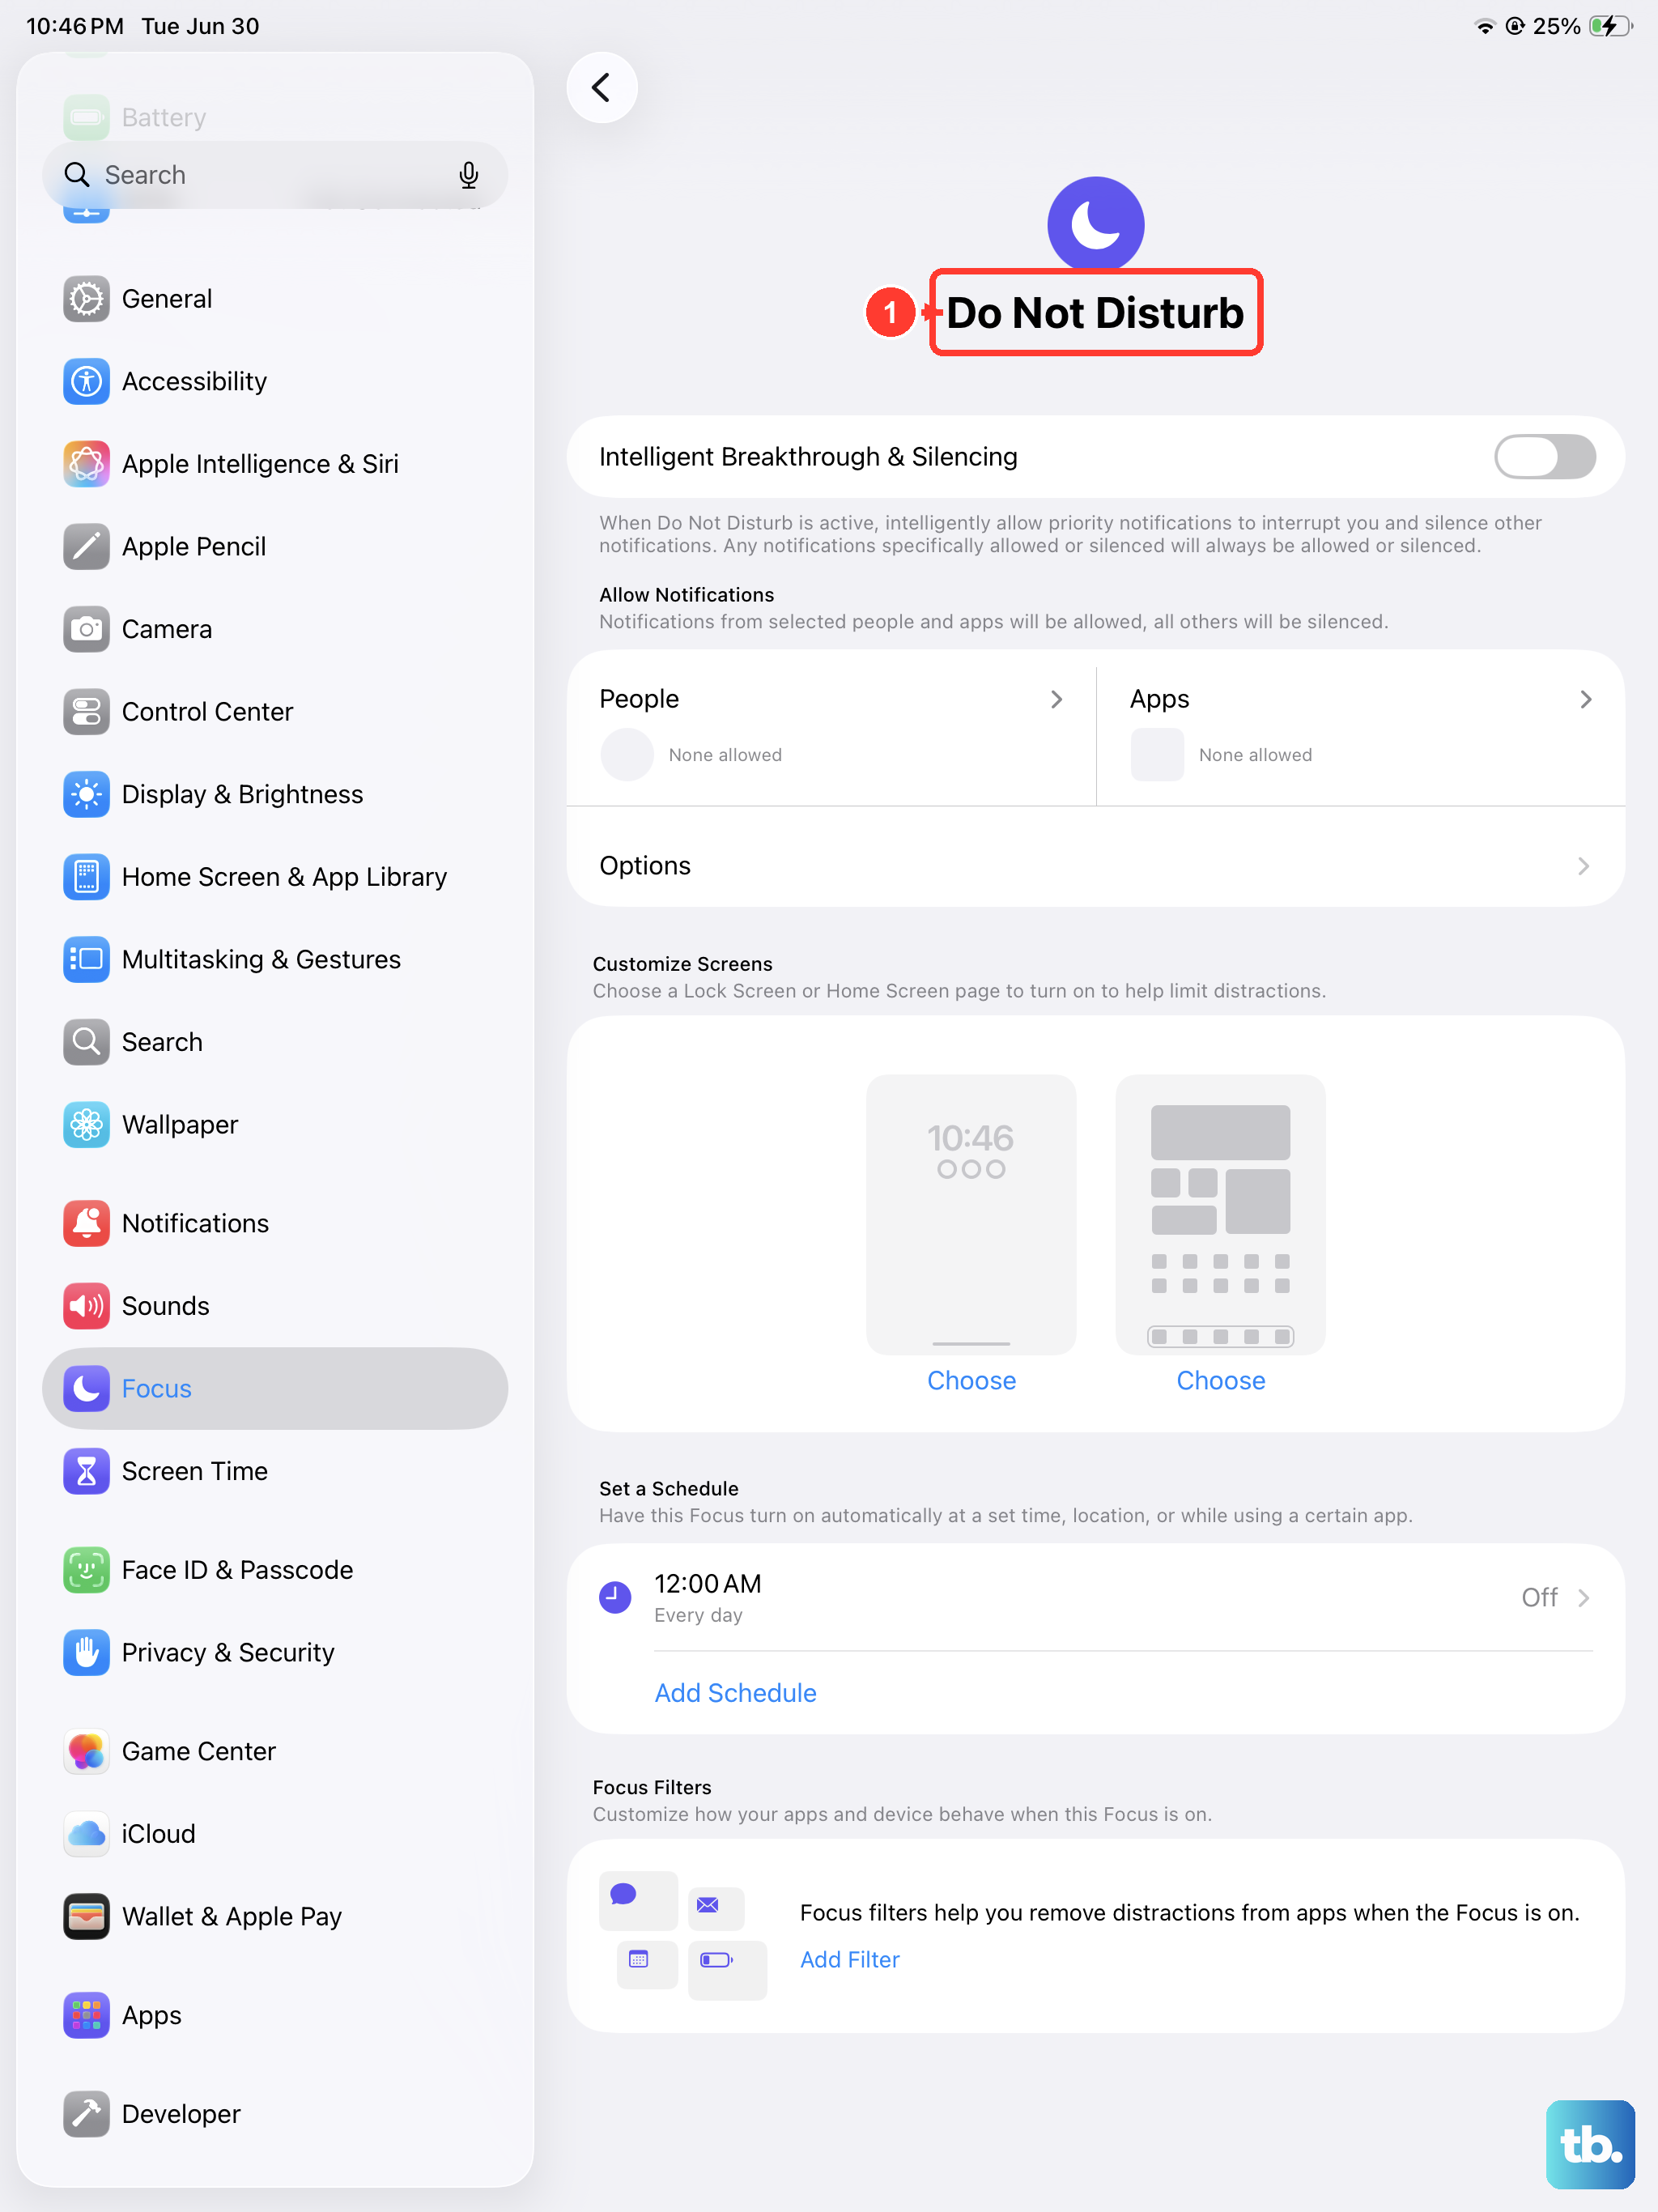
Do Not Disturb or a custom Focus mode on either your iPhone or iPad can silence incoming calls. Swipe down from the top-right corner of your iPad's screen to open Control Center. Look for the crescent moon icon. If it's highlighted, tap it to turn off Do Not Disturb.
You should also check your scheduled Focus modes. Go to Settings > Focus on your iPad. Review any active Focuses, like Work or Sleep, and ensure they aren't set to silence calls from everyone or your favorites. You can adjust which people and apps can notify you within each Focus.
Restart Both Your iPad and iPhone
A simple restart can clear out temporary software glitches that might be breaking the connection between your devices. To restart your iPad (11th generation), press and quickly release the Volume Up button, press and quickly release the Volume Down button, then press and hold the Top button until you see the Apple logo.
Do the same for your iPhone (the button combination will differ based on your model). Once both devices are back on, test the call forwarding again by having someone call your iPhone number.
Sign Out and Back Into Your Apple ID
Sometimes, the link between your devices gets out of sync. You can refresh this by signing out of your Apple ID on the iPad and then signing back in. Go to Settings and tap your name at the top. Scroll all the way down and choose "Sign Out." You'll be asked if you want to keep a copy of your data on the iPad; you can say yes.
After signing out, restart your iPad using the method above. Then, go back to Settings and sign in with your Apple ID again. Remember to re-enable "Calls from iPhone" in the FaceTime settings after you're signed back in.
Update iPadOS and iOS
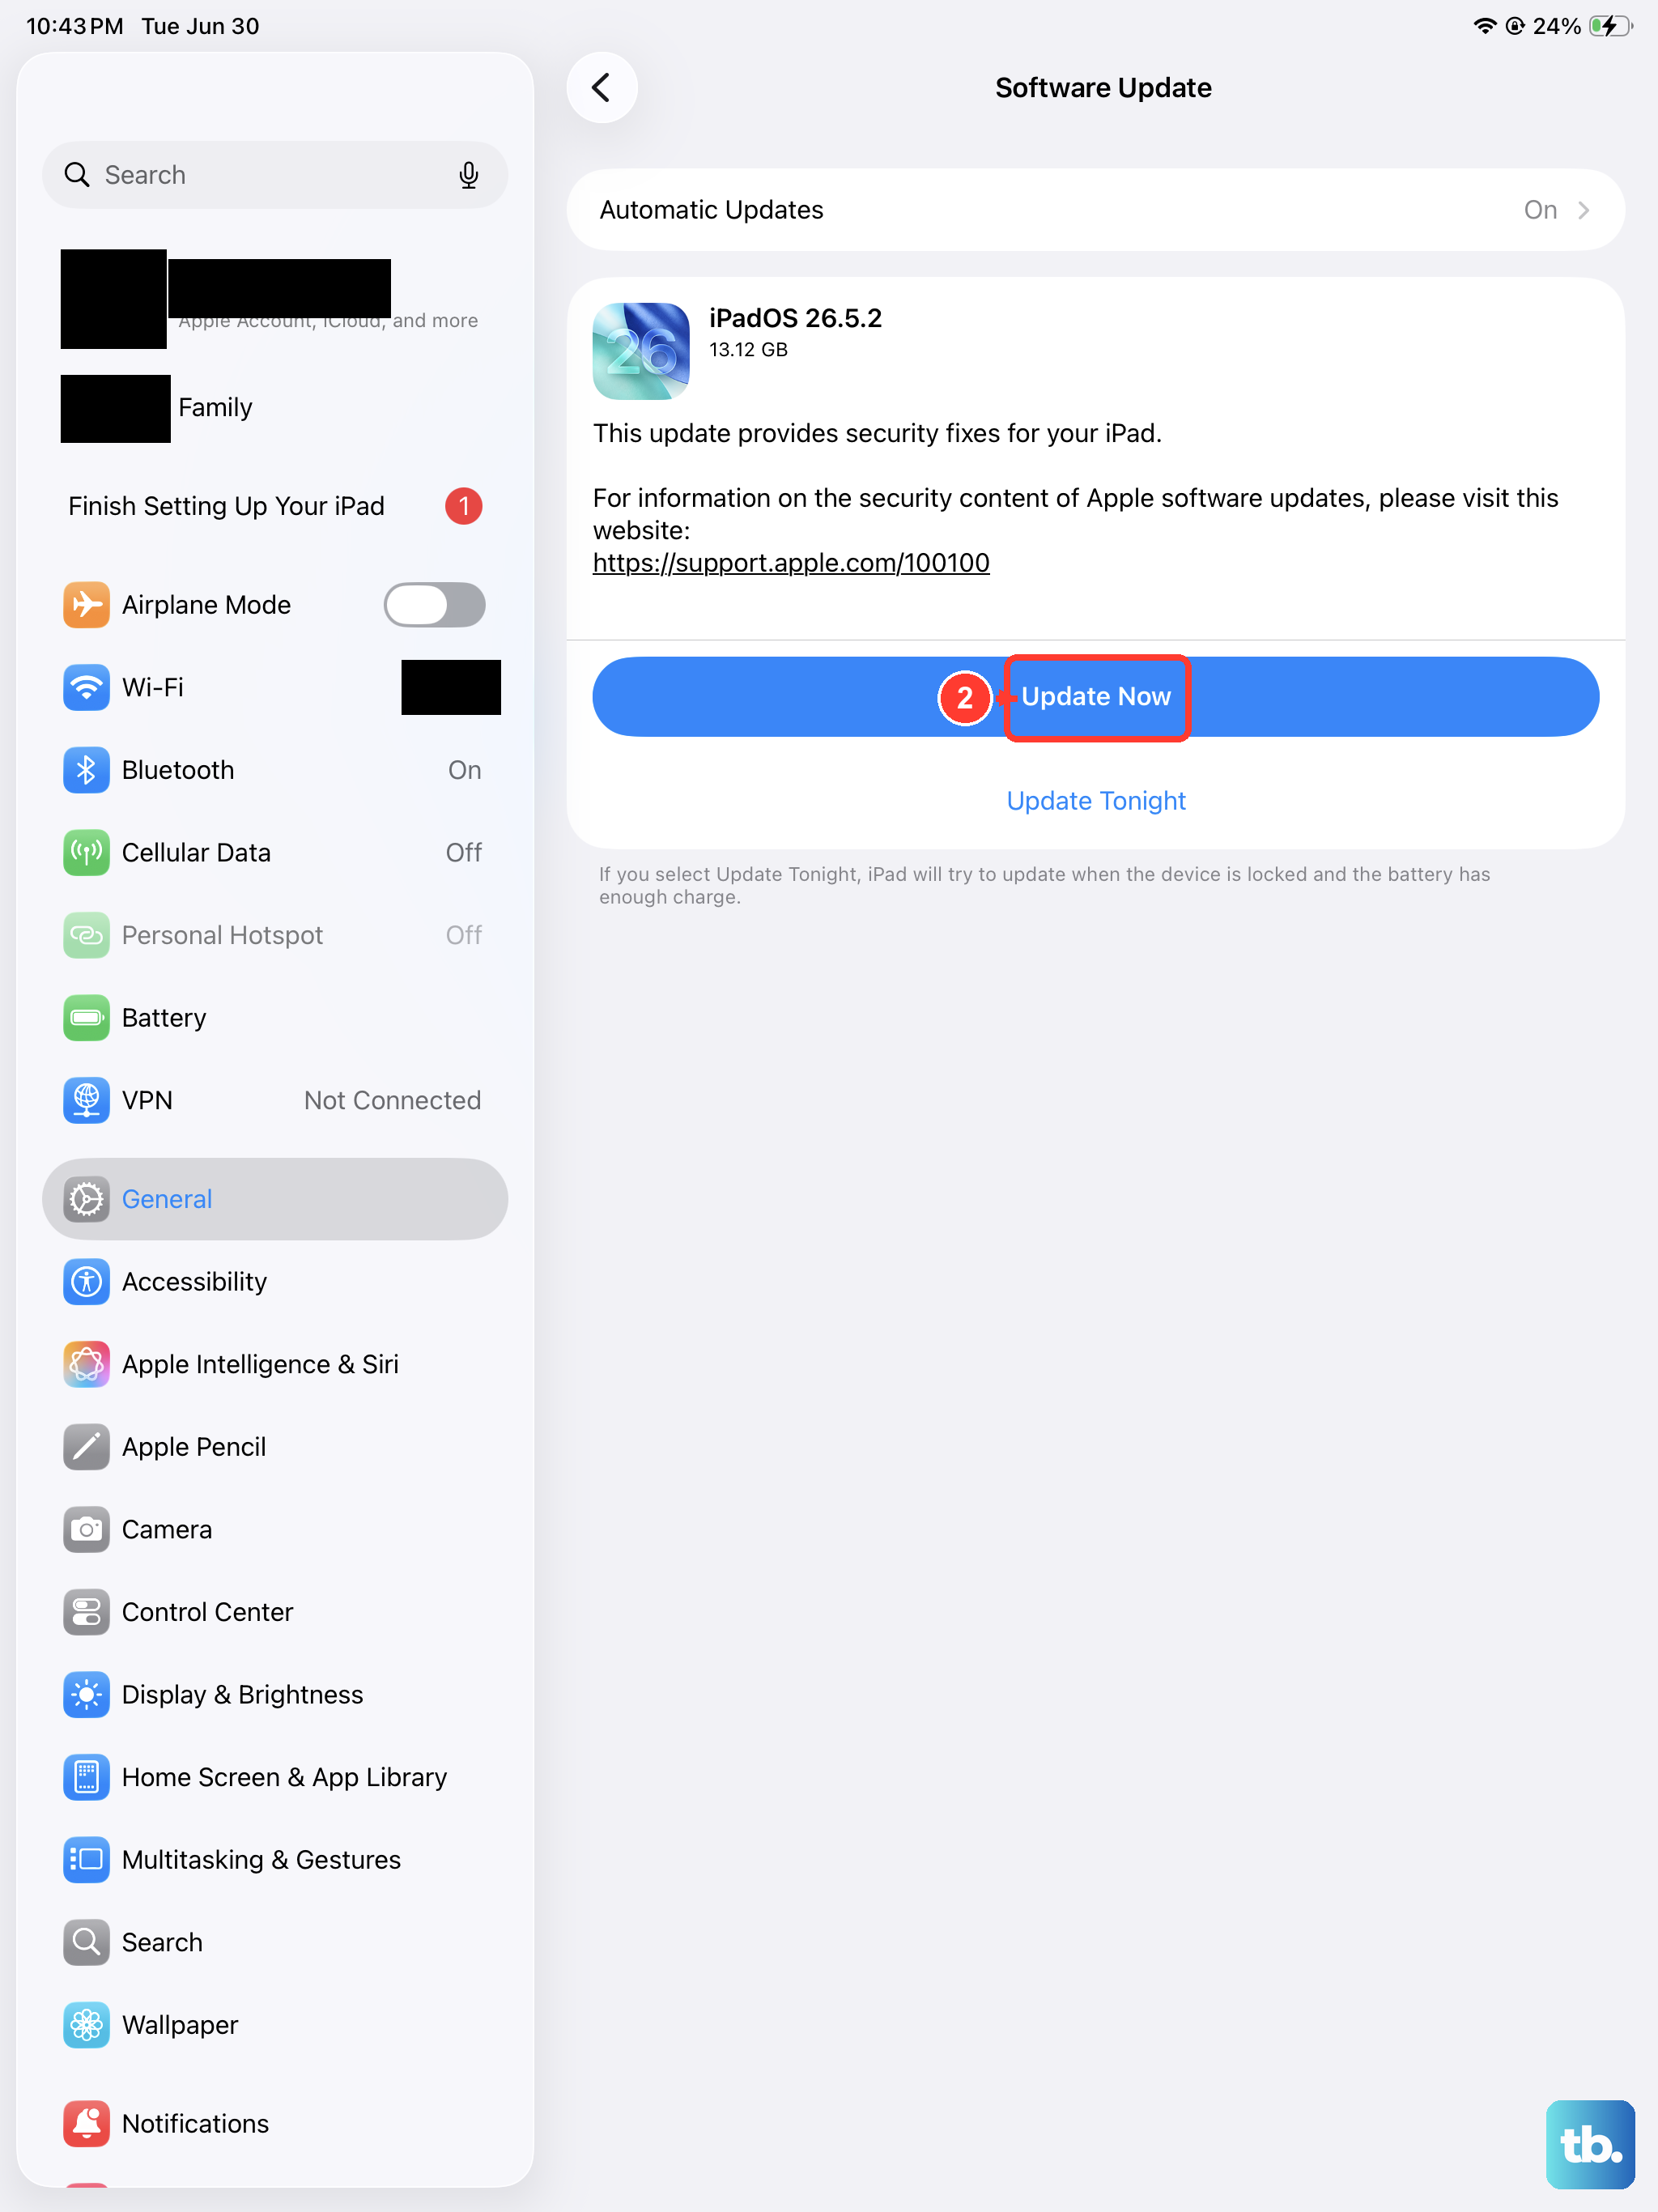
Running outdated software can cause compatibility issues with call continuity features. On your iPad, go to Settings > General > Software Update. Install any available update for iPadOS. It's a good practice to keep your iPadOS updated for performance and security anyway.
You need to do the same on your paired iPhone. On the iPhone, go to Settings > General > Software Update and install any pending iOS updates. Make sure both devices are on compatible, recent versions of their operating systems.
Reset Network Settings on Your iPad
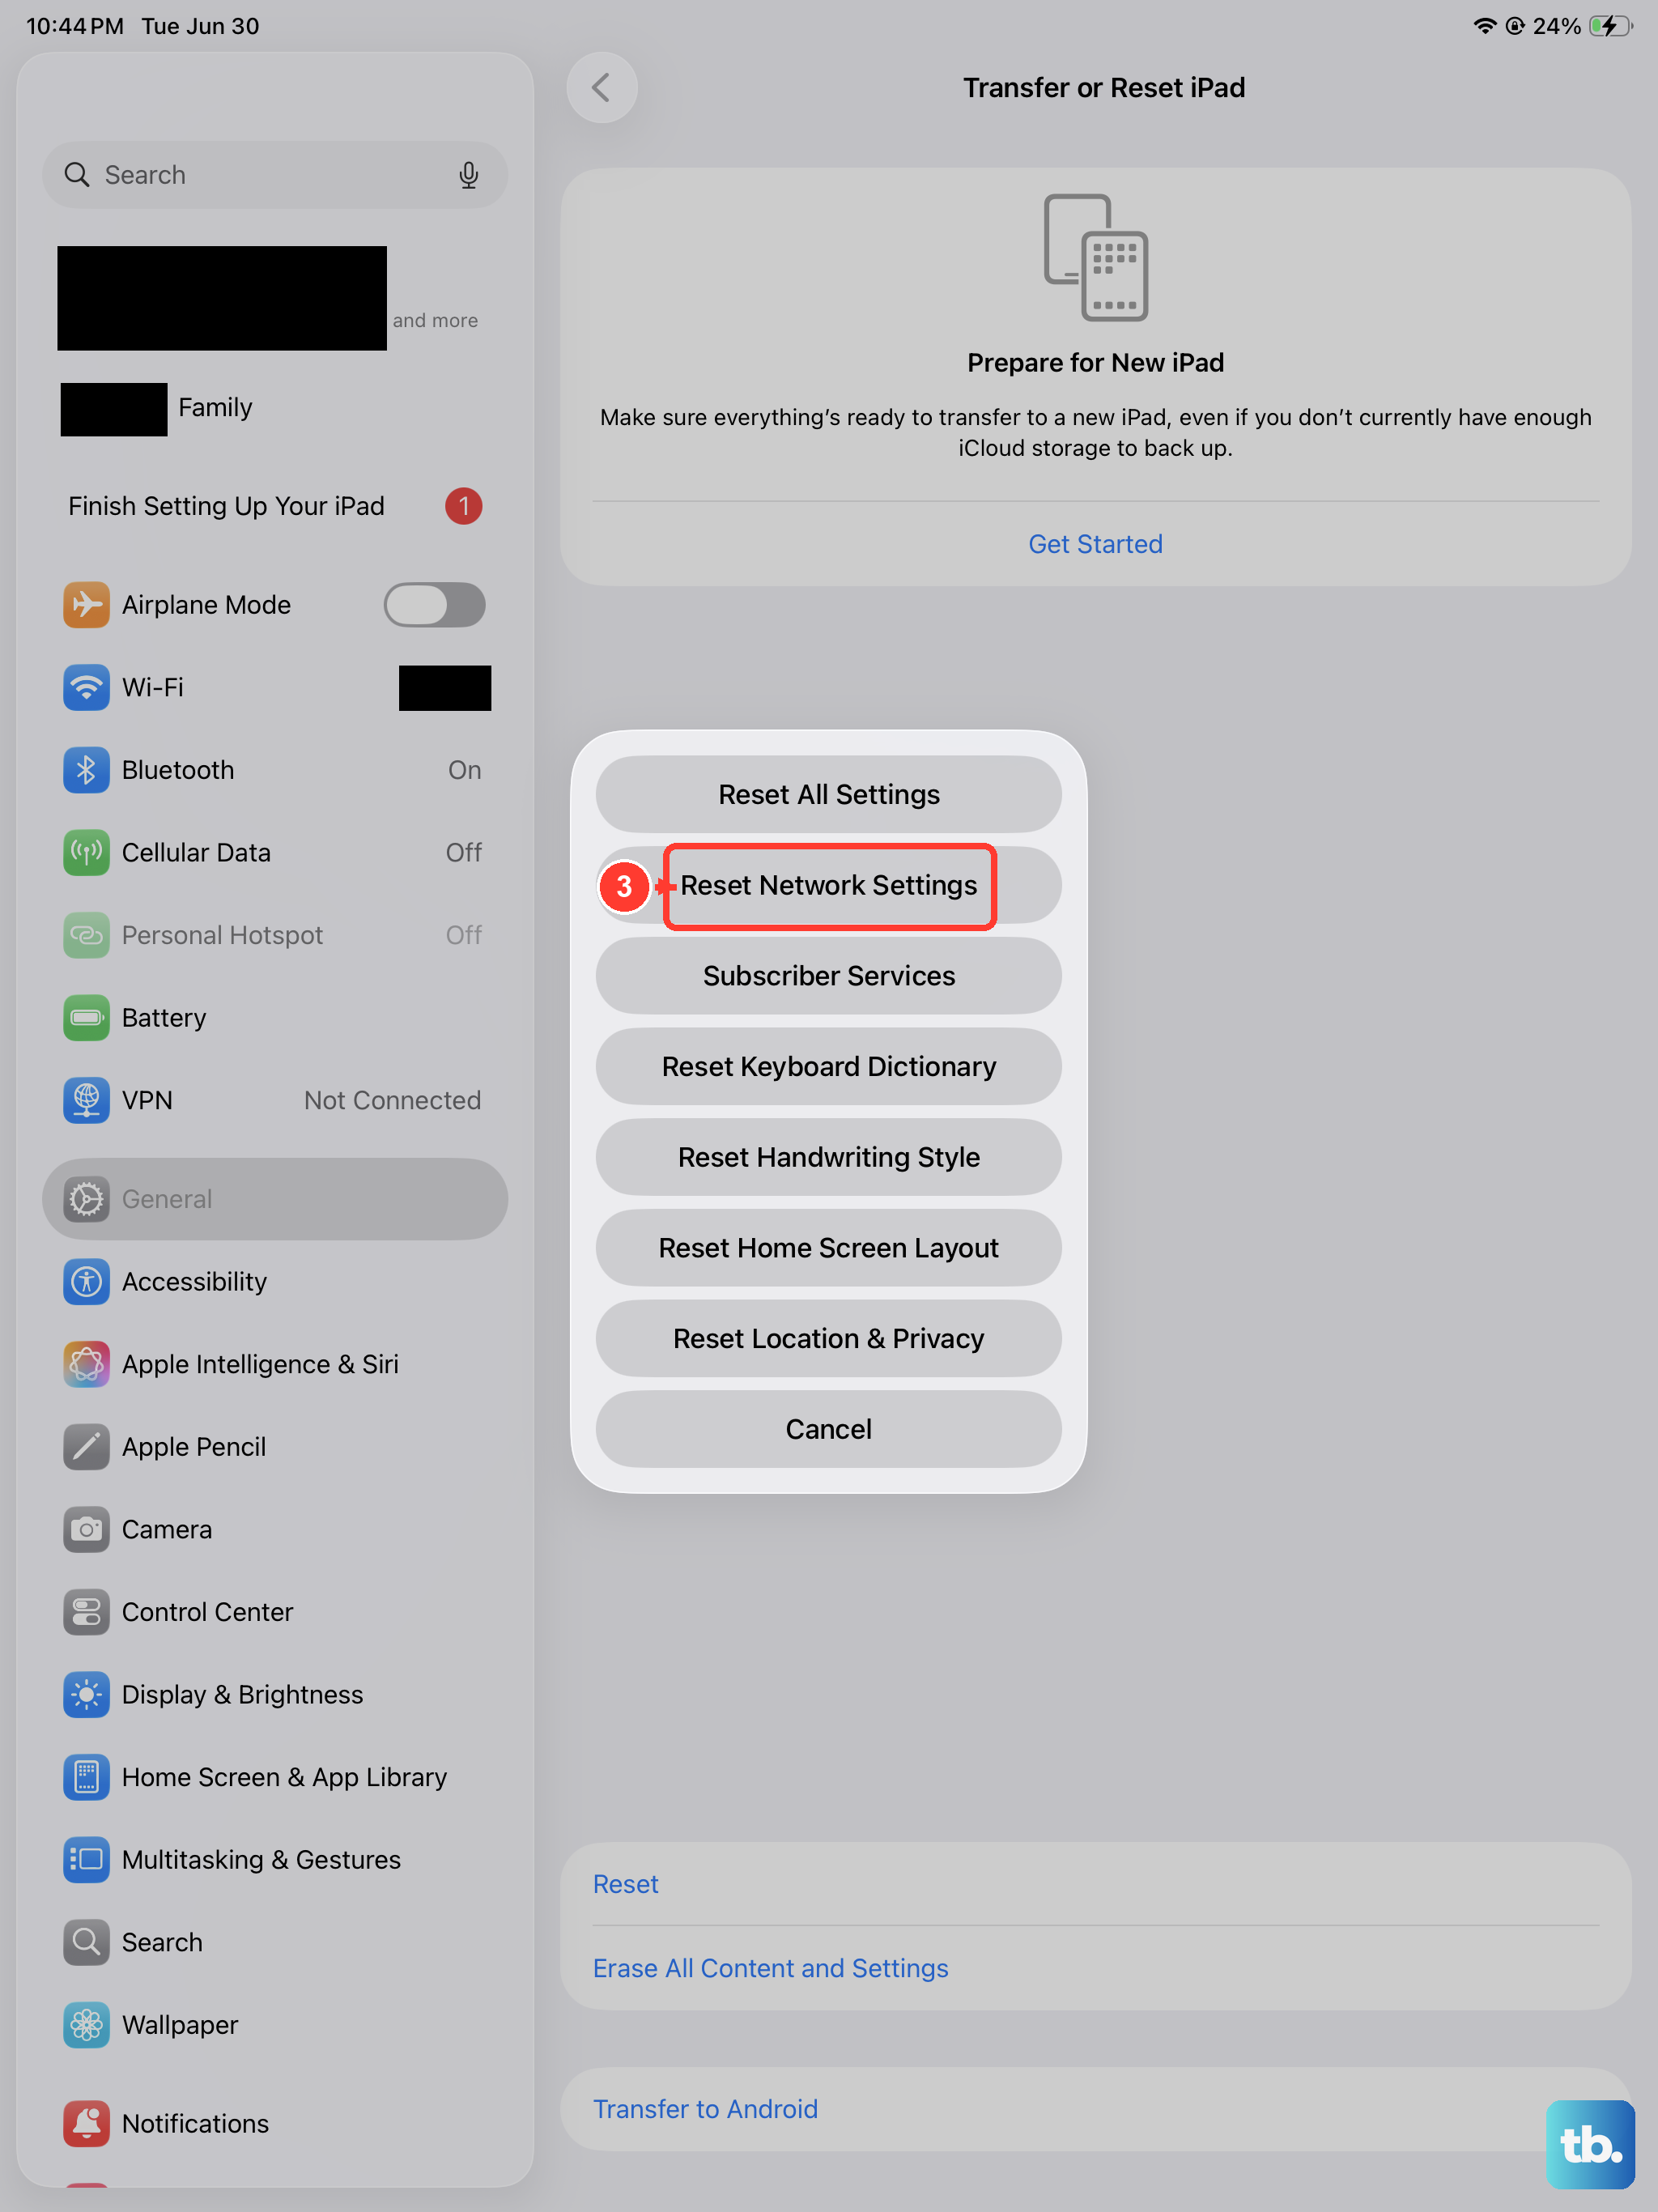
If the connection seems to be the issue, resetting network settings can help. This will erase all Wi-Fi passwords, VPN settings, and cellular settings on the iPad, so you'll need to rejoin your Wi-Fi networks afterward.
Go to Settings > General > Transfer or Reset iPad > Reset. Then, tap "Reset Network Settings." Enter your passcode if prompted and confirm. After the iPad restarts, reconnect to your Wi-Fi and check the FaceTime call settings again.


