Seeing "No SIM" or "Invalid SIM" on your iPad (11th generation) can stop you from getting online when you're away from Wi-Fi. This usually happens because of a simple software hiccup or a physical issue with the SIM card tray, and you can often fix it in a few minutes.
I'd start with a force restart. It's the quickest way to clear out any temporary software bugs that might be confusing the cellular modem. Press and quickly release the Volume Up button, then quickly press and release the Volume Down button. Finally, press and hold the Top button until you see the Apple logo appear on the screen.
While you're doing that, check if your cellular plan is actually active. Sometimes a billing issue or plan change on your carrier's end can cause the iPad to show a "No SIM" error, even though the physical card is fine. A quick call to your carrier's support can confirm this.
Check and Reinsert the SIM Card
Turn your iPad off completely before you touch the SIM tray. Find the SIM ejector tool that came in the box (a paperclip works in a pinch) and gently push it into the small hole on the right edge of the iPad.
Carefully pull out the tray and take a look at the SIM card. Make sure it's the correct size for your iPad (it should be a nano-SIM) and that it's seated correctly in the tray, not crooked or loose. Any dust or lint in the tray can block the contacts.
Use a dry, soft cloth to gently wipe the gold contacts on the SIM card. Blow any debris out of the SIM tray slot on the iPad itself. Then, carefully reinsert the tray, making sure it goes in smoothly and clicks into place.
Toggle Airplane Mode and Cellular Data

Sometimes the cellular radio just needs a quick reset. Swipe down from the top-right corner of the screen to open Control Center and tap the airplane icon to turn on Airplane Mode. Wait about ten seconds, then tap it again to turn it off.
Next, go to Settings > Cellular Data and make sure the Cellular Data switch is turned on. If you see an option for "Enable LTE" or "Data Mode," try switching it to a different setting, like "Data Only" or "Voice & Data," to see if it triggers recognition.
Update Your iPadOS Software
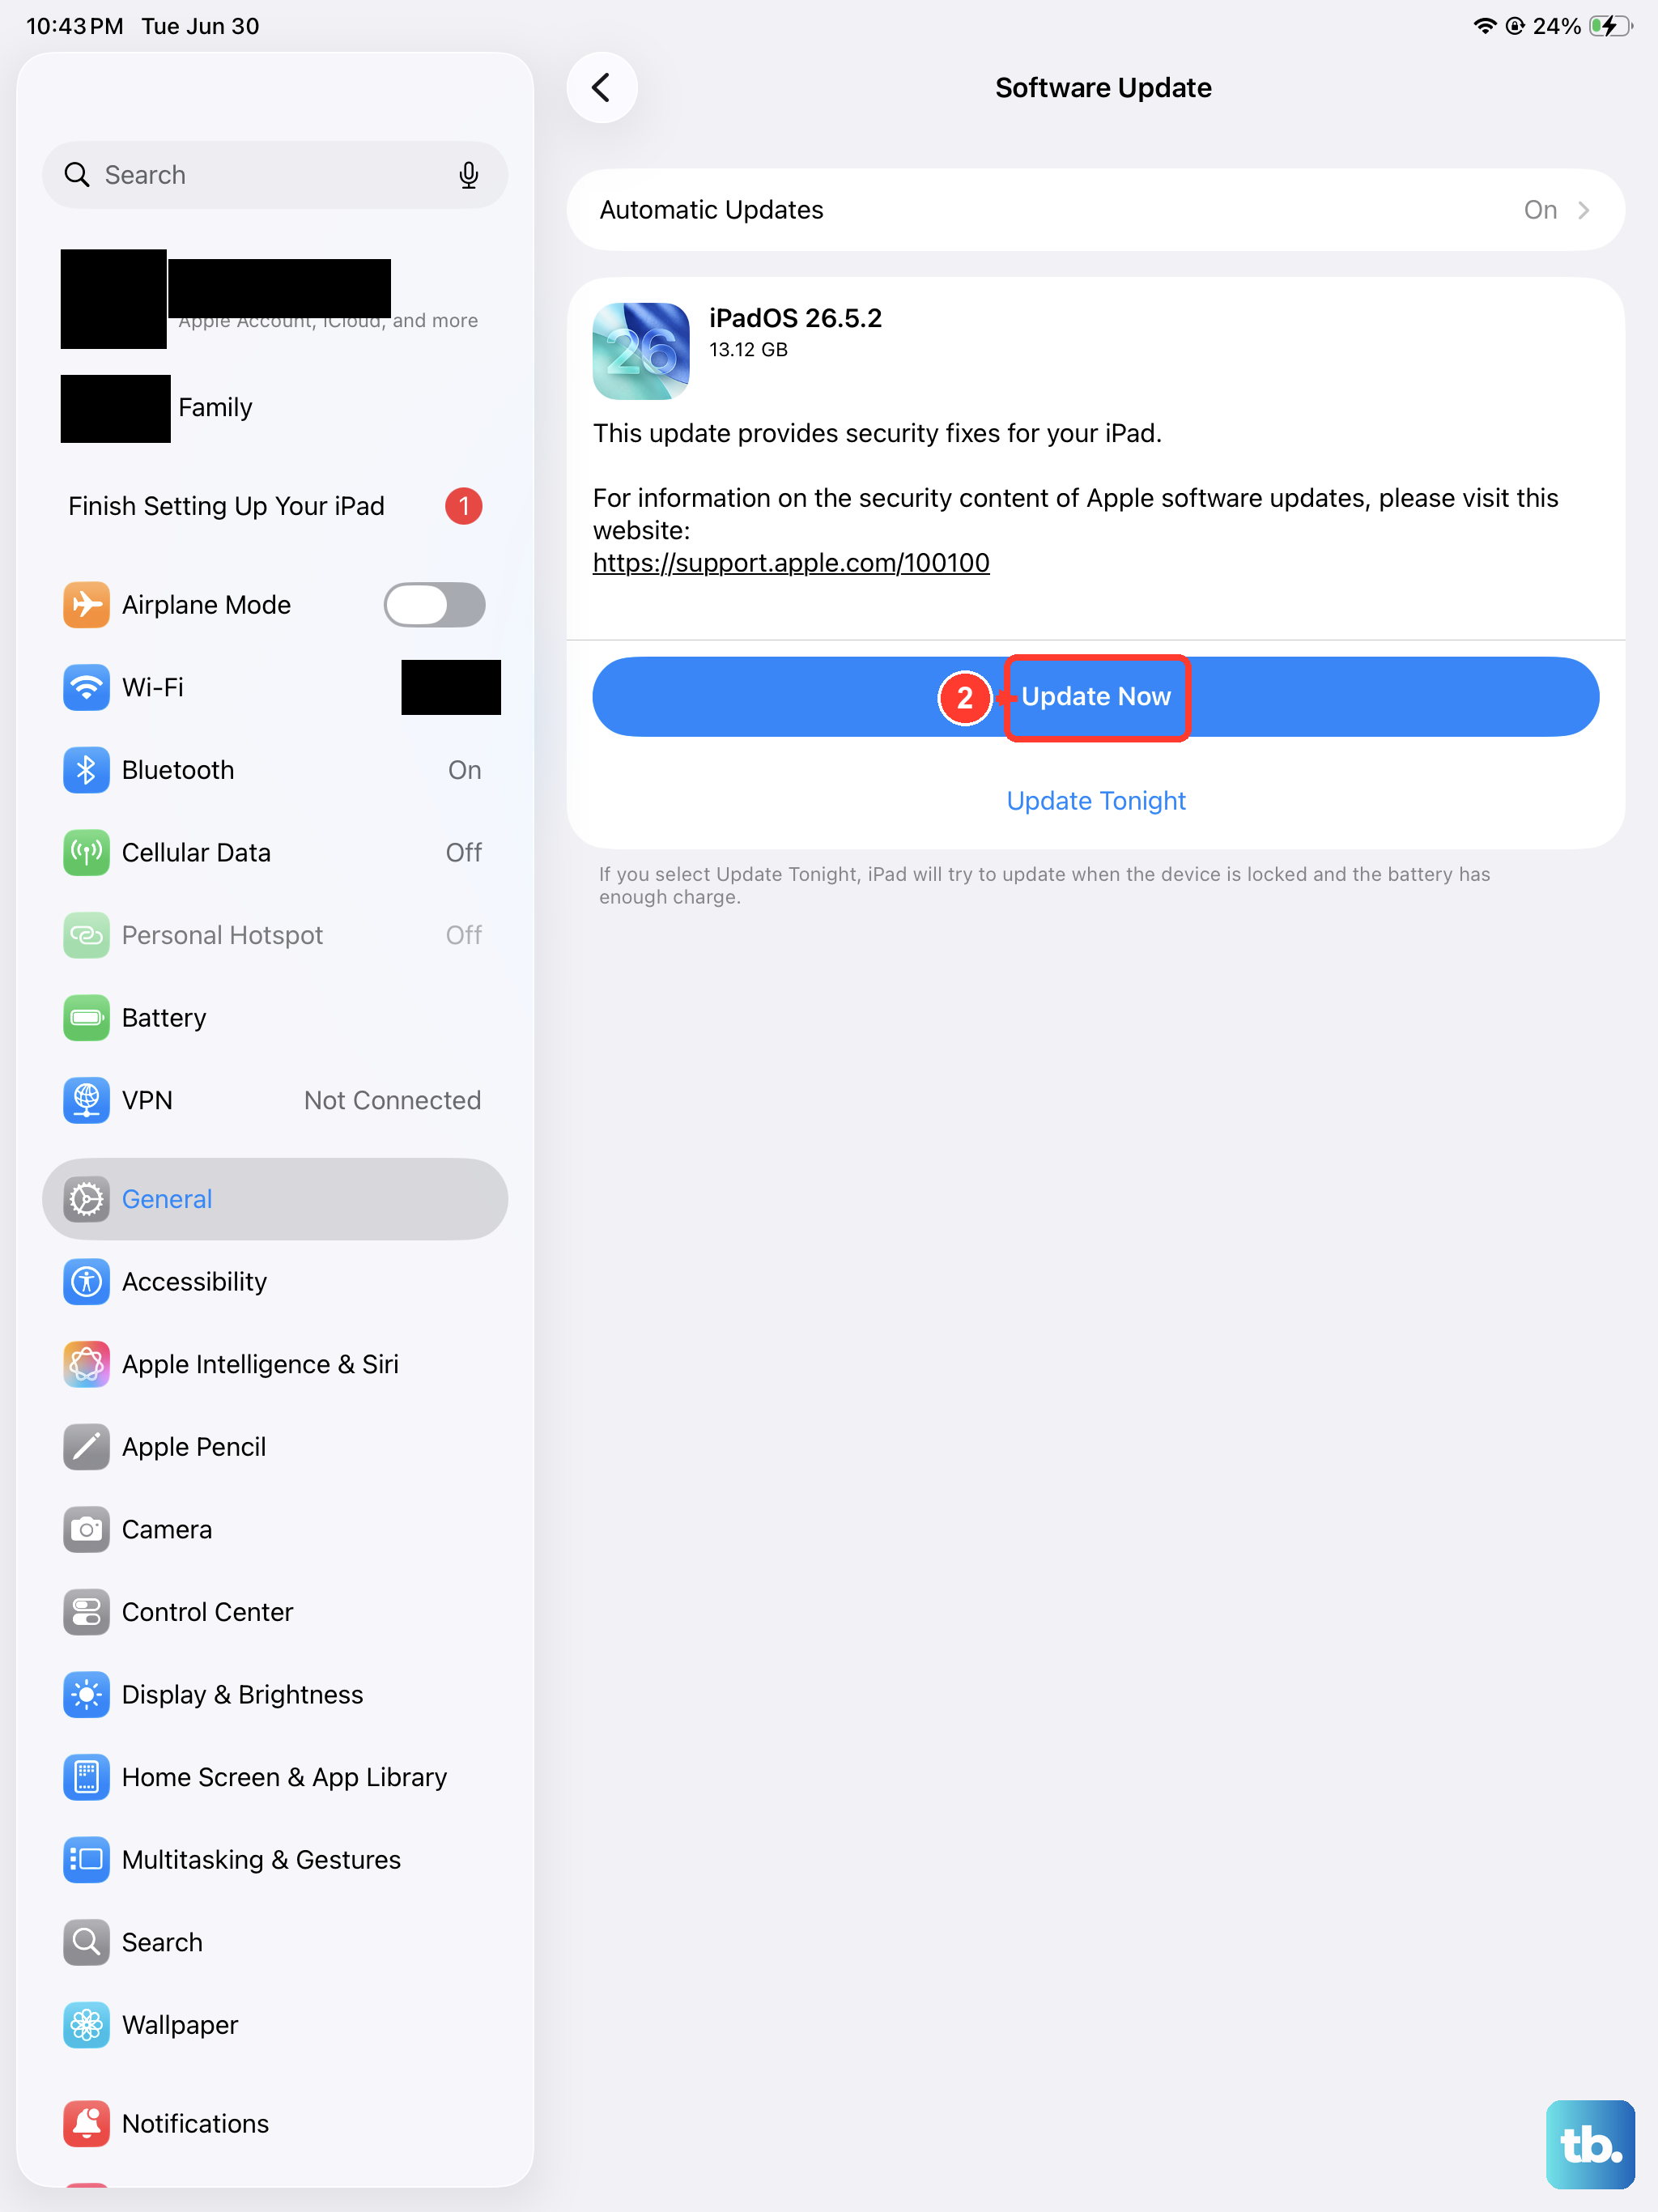
An outdated version of iPadOS can have bugs that affect cellular connectivity. Apple regularly releases updates that include fixes for modem firmware and network-related issues.
Connect to a Wi-Fi network, then go to Settings > General > Software Update. If an update is available, tap "Download and Install." It's a good practice to keep your iPad updated not just for fixes, but for security and performance too.
Reset Your Network Settings
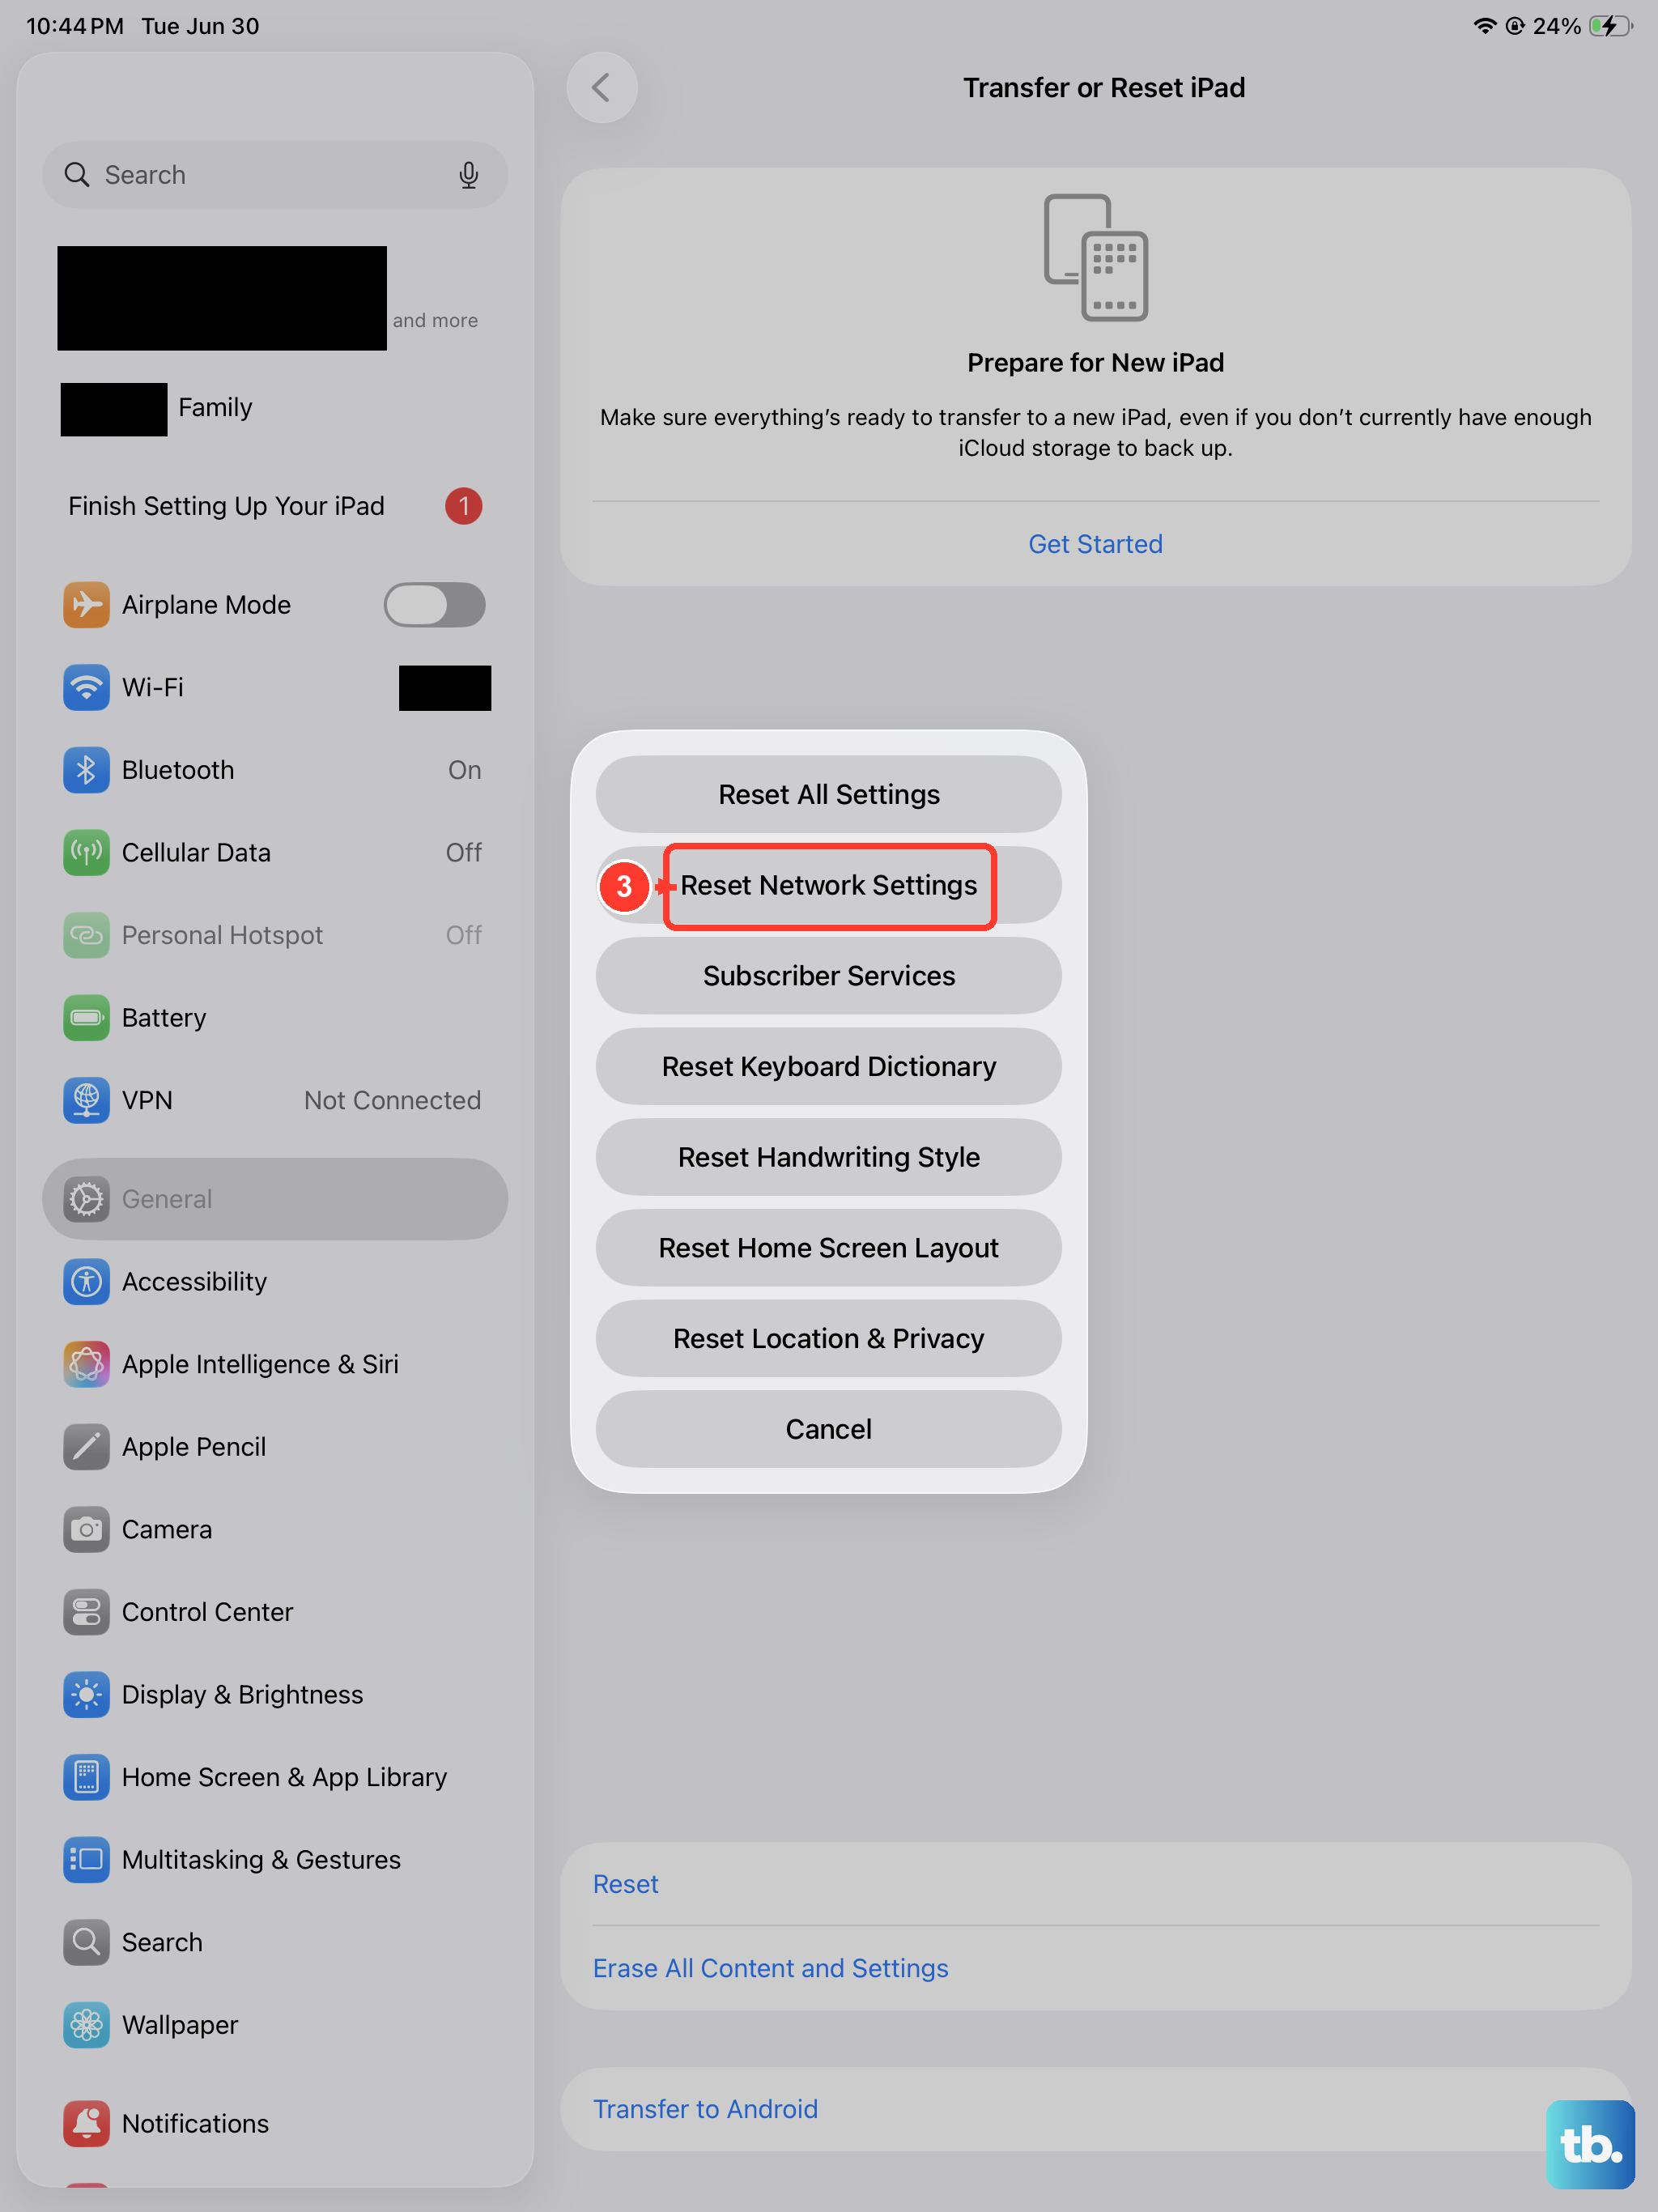
This is a stronger step that clears all your network configurations. It will erase saved Wi-Fi passwords, Bluetooth pairings, and cellular settings, but it won't touch your personal data or apps.
To do this, open Settings, tap General, scroll down and tap Transfer or Reset iPad. Then, tap Reset and choose Reset Network Settings. You'll need to enter your passcode and confirm. After the iPad restarts, you'll need to rejoin Wi-Fi networks.
Check for a Carrier Settings Update
Carrier settings are small files that help your iPad work properly with your specific mobile network. Updates to these can happen automatically, but sometimes you need to manually check.
Make sure you're connected to Wi-Fi and have a SIM card inserted. Go to Settings > General > About. If a carrier settings update is available, a pop-up notification will appear on this screen. Just follow the prompts to install it.
Try Your SIM Card in Another Device
This is the best way to figure out if the problem is with the SIM card itself or with your iPad. If you have another unlocked iPad or cellular-enabled device, power it off, insert your SIM, and turn it back on.
If the other device also says "No SIM" or fails to connect to the cellular network, the issue is almost certainly with the SIM card. You'll need to contact your wireless carrier for a replacement SIM, which they can usually provide same-day at a store.
Review Your Cellular Plan with Your Carrier
Give your carrier a call or use their online chat support. Ask them to verify that your line is active, that the SIM is properly provisioned in their system, and that your plan includes data for tablets.
They can often refresh the connection from their end, which can solve the problem instantly. This is also the time to ask if your account is in good standing, as sometimes an unpaid bill can suspend service.
Consider an eSIM Activation
The iPad (11th generation) supports eSIM, which is a digital SIM embedded in the device. If your physical SIM card is old or damaged, or if you're having persistent tray issues, switching to an eSIM might be a permanent solution.
Contact your carrier and ask if they support eSIM activation for iPads. Many major carriers do, and they can guide you through scanning a QR code or using their app to download the digital profile directly to your iPad, bypassing the physical tray altogether.
Restore Your iPad via a Computer
If you've tried everything else and the problem seems software-related, a restore is the final step. This will install a completely fresh copy of iPadOS. Make sure you have a recent backup in iCloud or on your computer first.
Connect your iPad to a Mac or PC using a USB-C cable. On a Mac with macOS Catalina or later, open Finder. On a PC or older Mac, open iTunes. Select your iPad, choose "Restore iPad," and follow the prompts. This process takes longer but can resolve deep-seated software corruption.


