
Getting that "SIM Not Provisioned" message on your new iPhone 17 Pro Max is a real roadblock. It means your phone can't properly register with your carrier's network, so calls, texts, and mobile data won't work. The good news is it's almost always something you can fix yourself.
I'd start with the simplest solution first. A quick force restart can clear out any temporary software glitch that's interfering with the cellular connection. On the iPhone 17 Pro Max, you do this by pressing and quickly releasing the Volume Up button, then quickly pressing and releasing the Volume Down button. Finally, press and hold the Side button until you see the Apple logo appear on the screen.
Check Your SIM Card Activation Status
If you just got a new SIM card or switched carriers, this is the most likely culprit. The SIM card needs to be fully activated on your carrier's end. The easiest way to check is to give your carrier's customer service a quick call or use their online chat.
They can look up your account and see if the activation process is complete. Sometimes there's just a small delay in their system, or they might need you to verify some information to finalize it.
Reinsert Your SIM Card
It sounds too simple, but a SIM card that isn't seated perfectly in the tray can cause this error. Grab the SIM ejector tool that came in the box with your iPhone. Turn the phone off completely first, then gently push the tool into the small hole on the left side of the frame to pop out the tray.
Take a close look at the gold contacts on the SIM card itself. If you see any dust or lint, give it a gentle wipe with a soft, dry cloth. Carefully place the SIM back into the tray, making sure it's flush and oriented correctly, then slide the tray back in until it clicks. Power your phone back on.
Toggle Airplane Mode to Refresh the Connection
This trick forces your phone to completely disconnect from and then reconnect to all wireless networks, which can often kickstart a stalled cellular connection. Swipe down from the top-right corner of your screen to open Control Center.
Tap the airplane icon to turn Airplane Mode on. Wait about 15 to 20 seconds, then tap the icon again to turn it off. You should see the cellular signal bars in the status bar search and reconnect.
Update Your Carrier Settings
Apple and carriers periodically release small updates to carrier settings that help your iPhone 17 Pro Max communicate better with their network. To check for one, open the Settings app and go to General > About.
If a carrier settings update is available, a pop-up notification will appear on this screen. Just follow the prompts to install it. This process only takes a moment and doesn't require a restart.
Manually Select Your Network Operator
Sometimes the automatic network selection gets stuck. You can manually tell your phone which carrier to use. Go to Settings > Cellular. Tap Network Selection at the bottom of the menu.
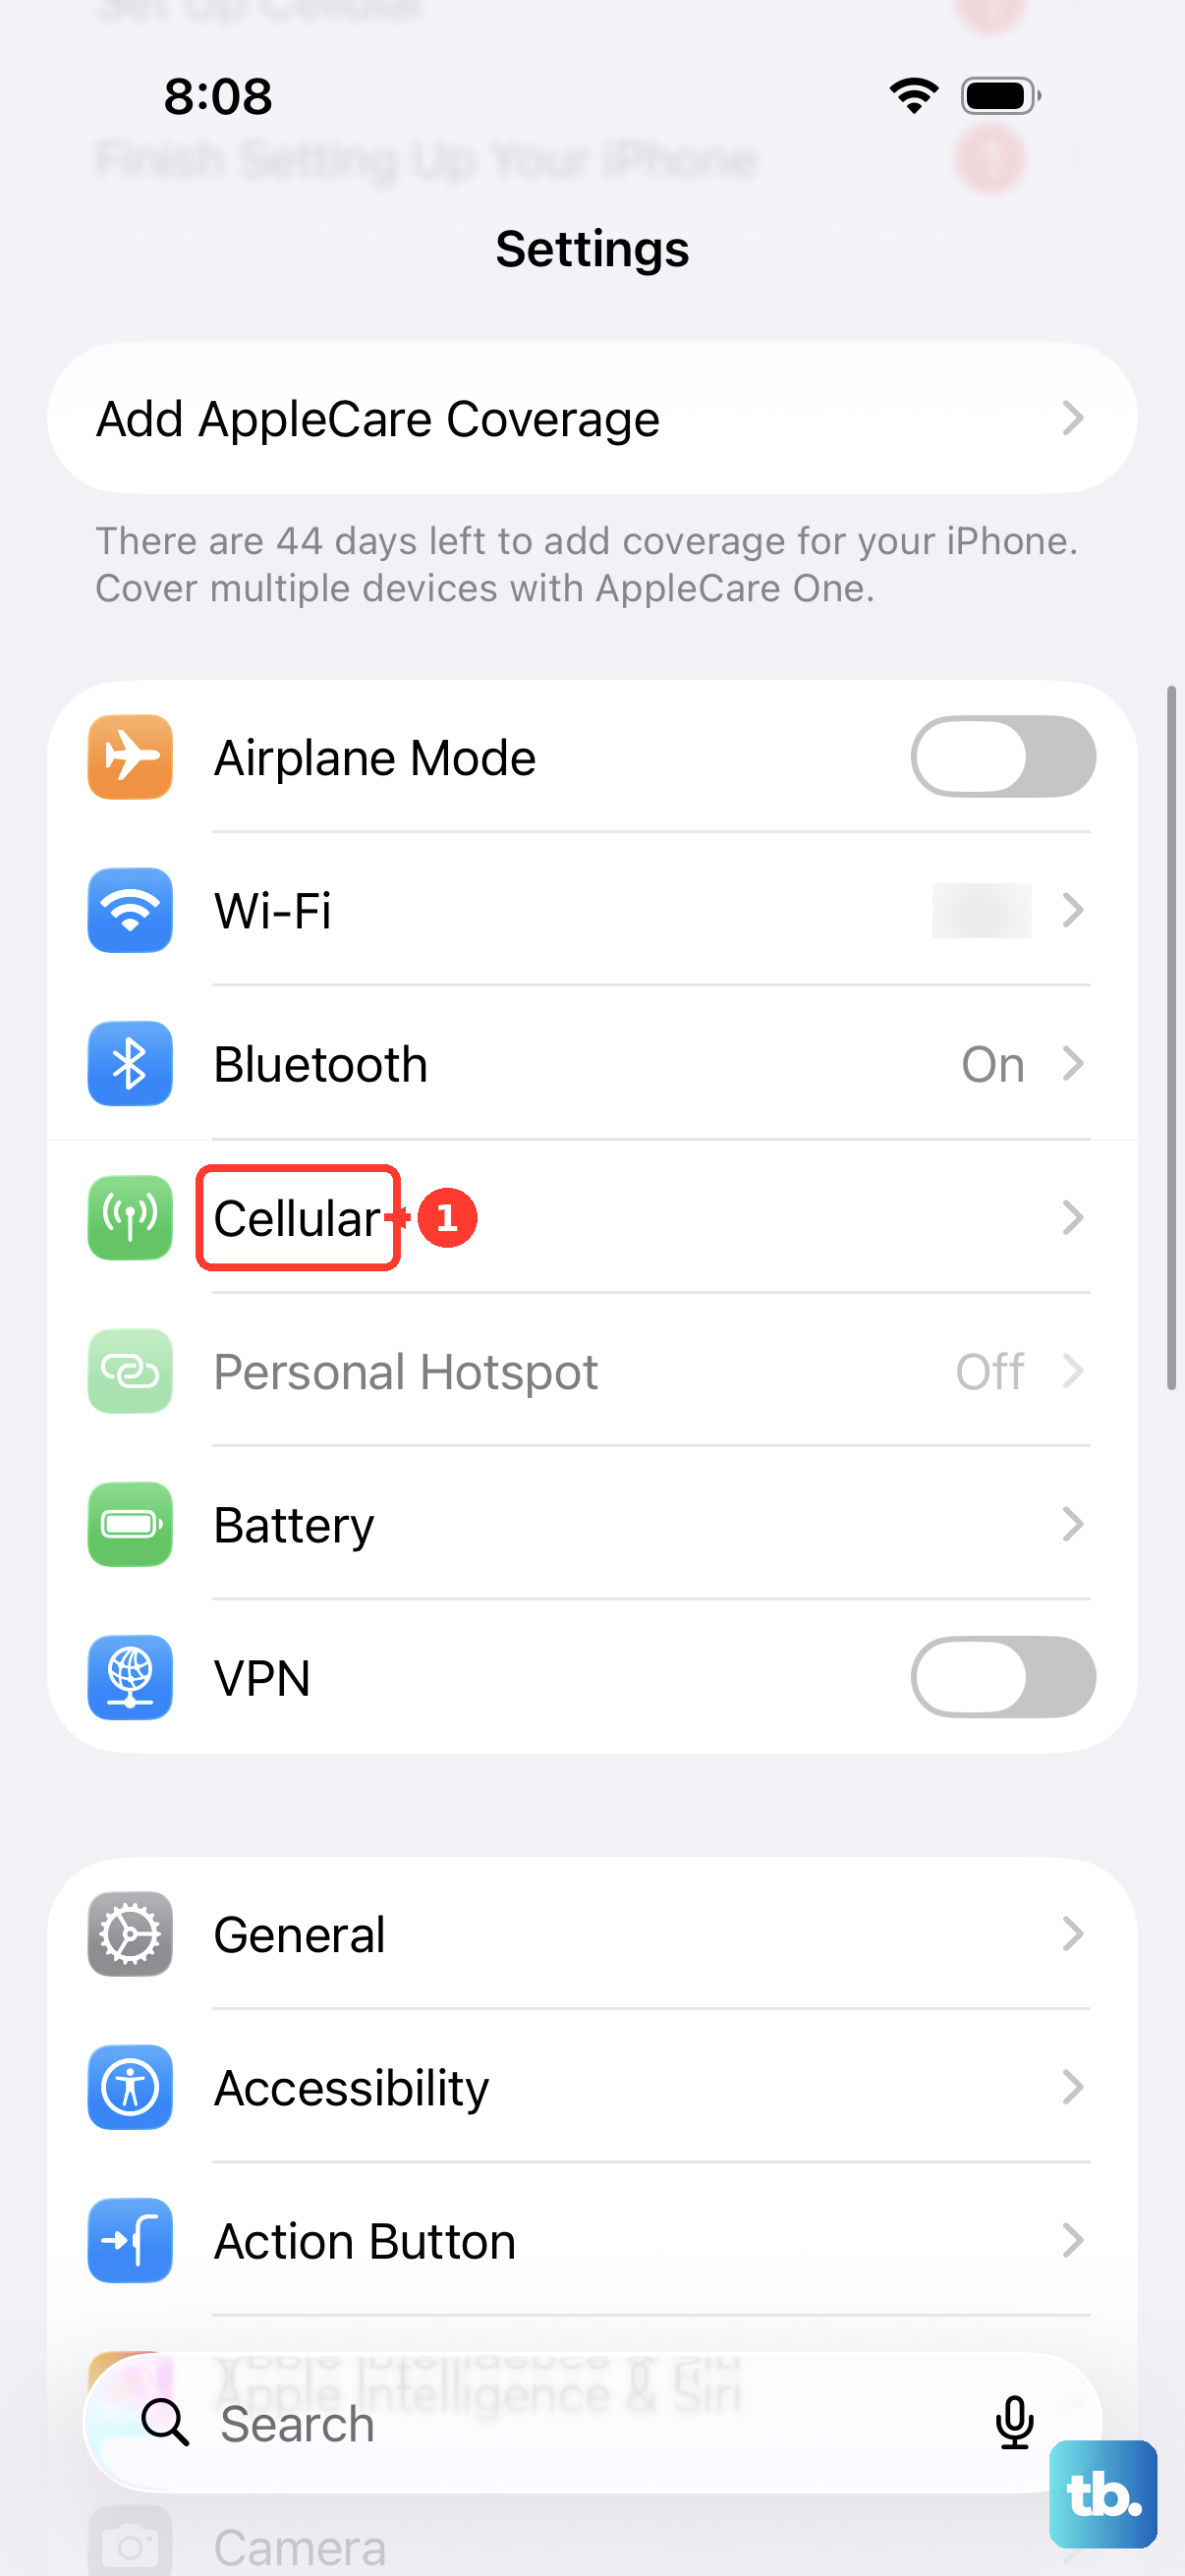
Turn off the "Automatic" toggle. Your phone will search for available networks. After a moment, a list will appear. Select your carrier's name from the list. Once it connects, you can turn "Automatic" back on for convenience.
Reset Your Network Settings
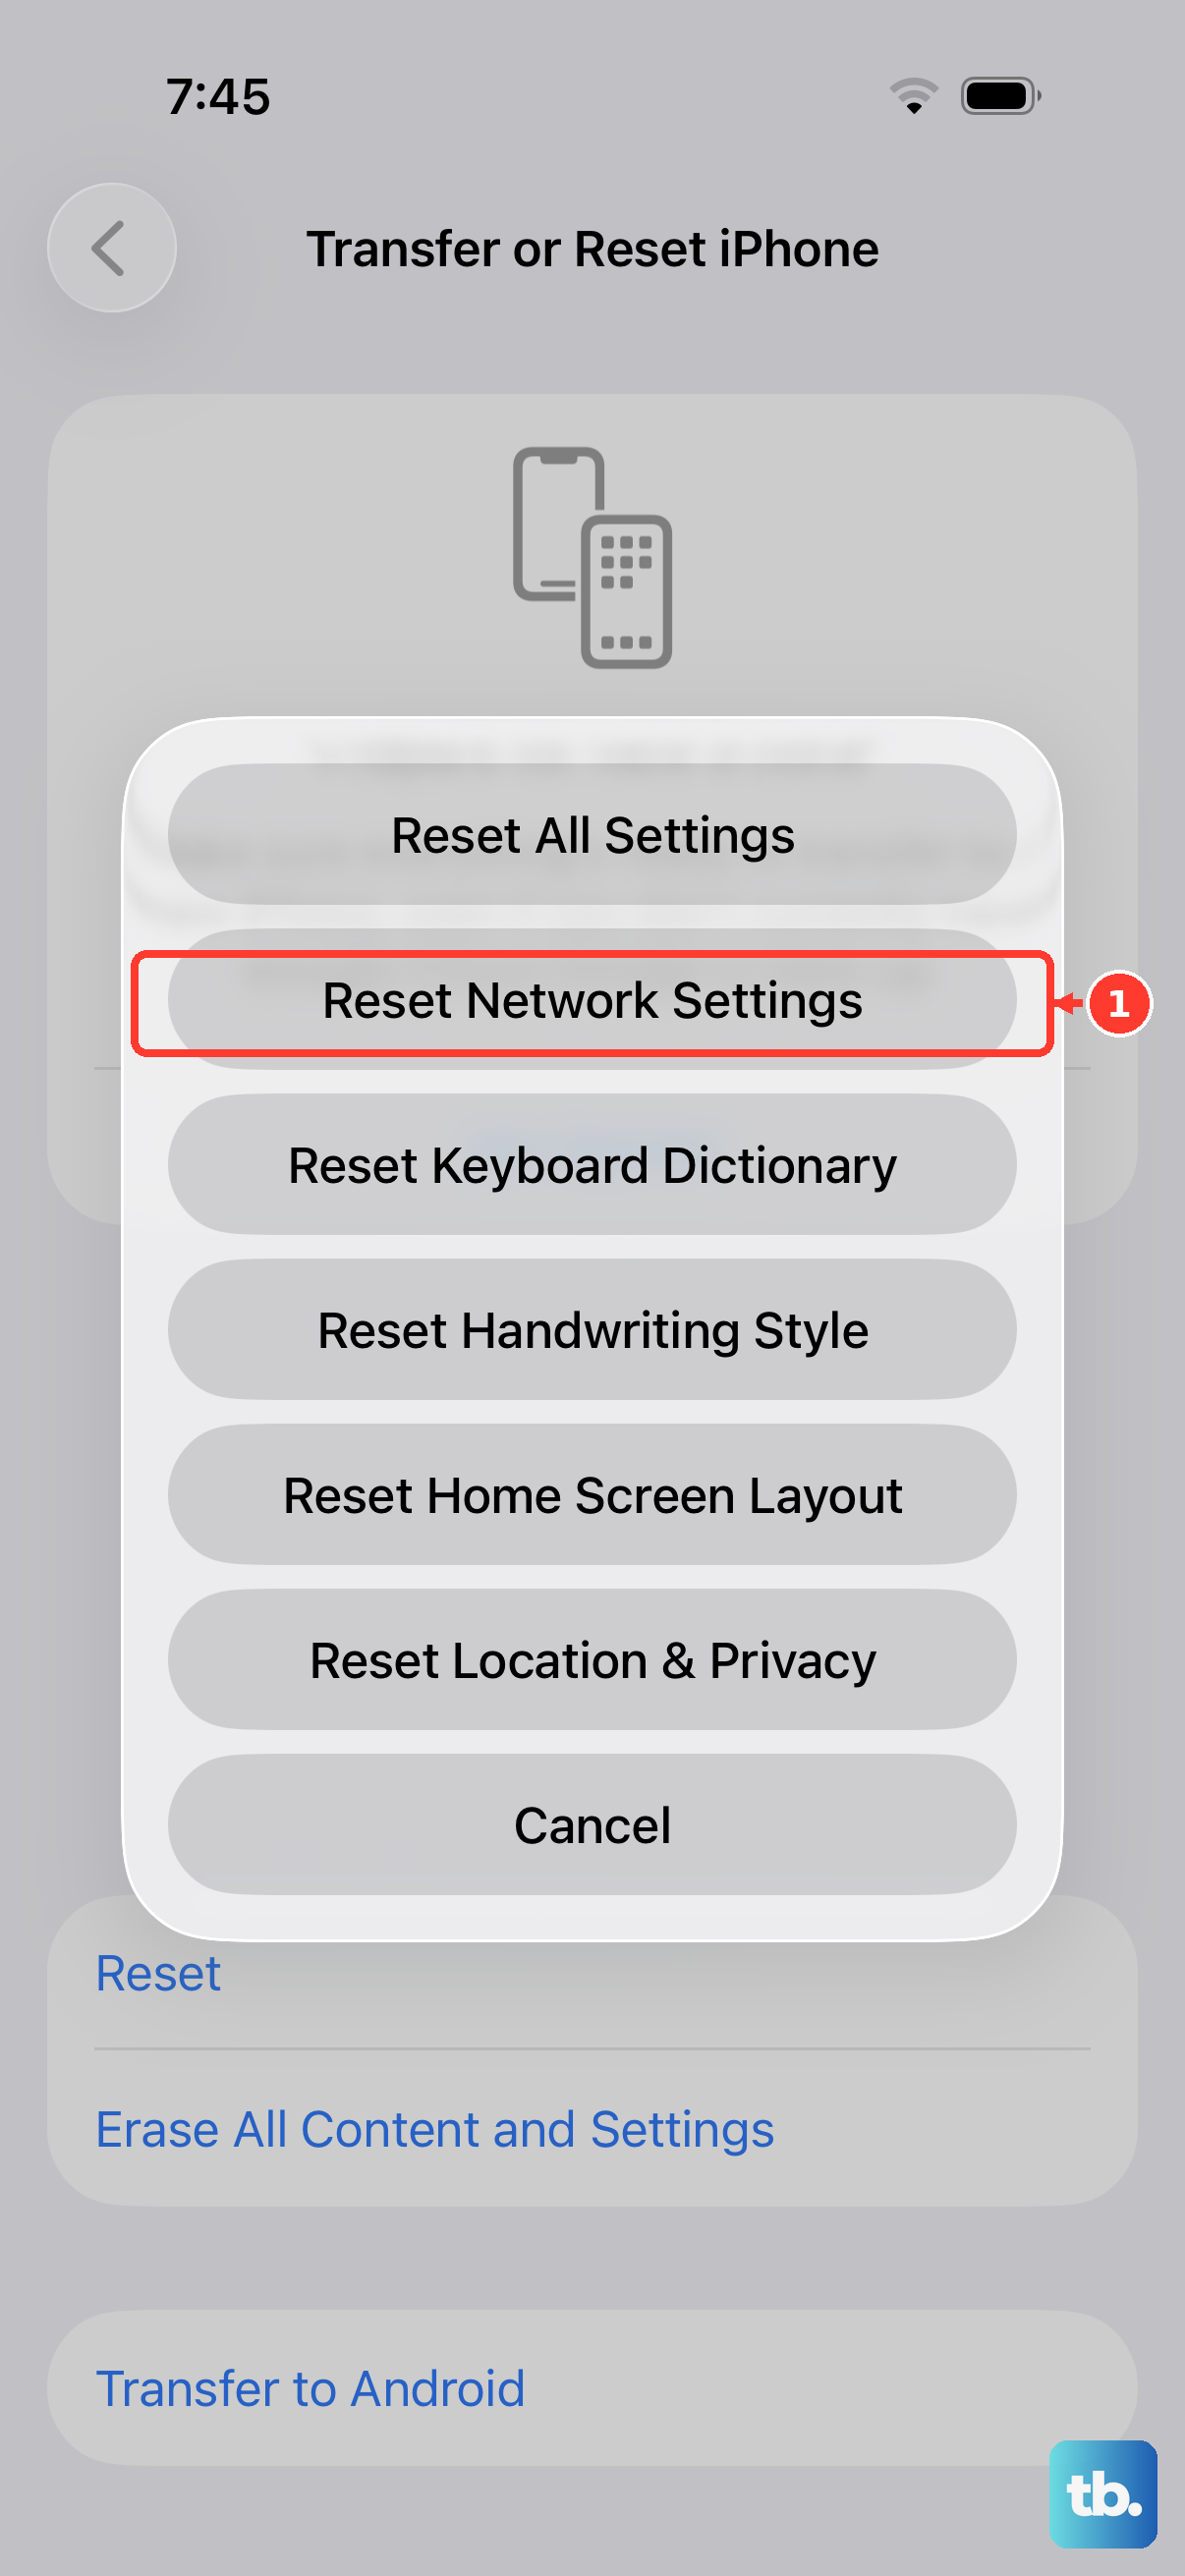
This is a more thorough step that clears all your saved network preferences, including Wi-Fi passwords, Bluetooth pairings, and cellular settings. It won't delete your personal data like photos or messages. Go to Settings > General > Transfer or Reset iPhone.
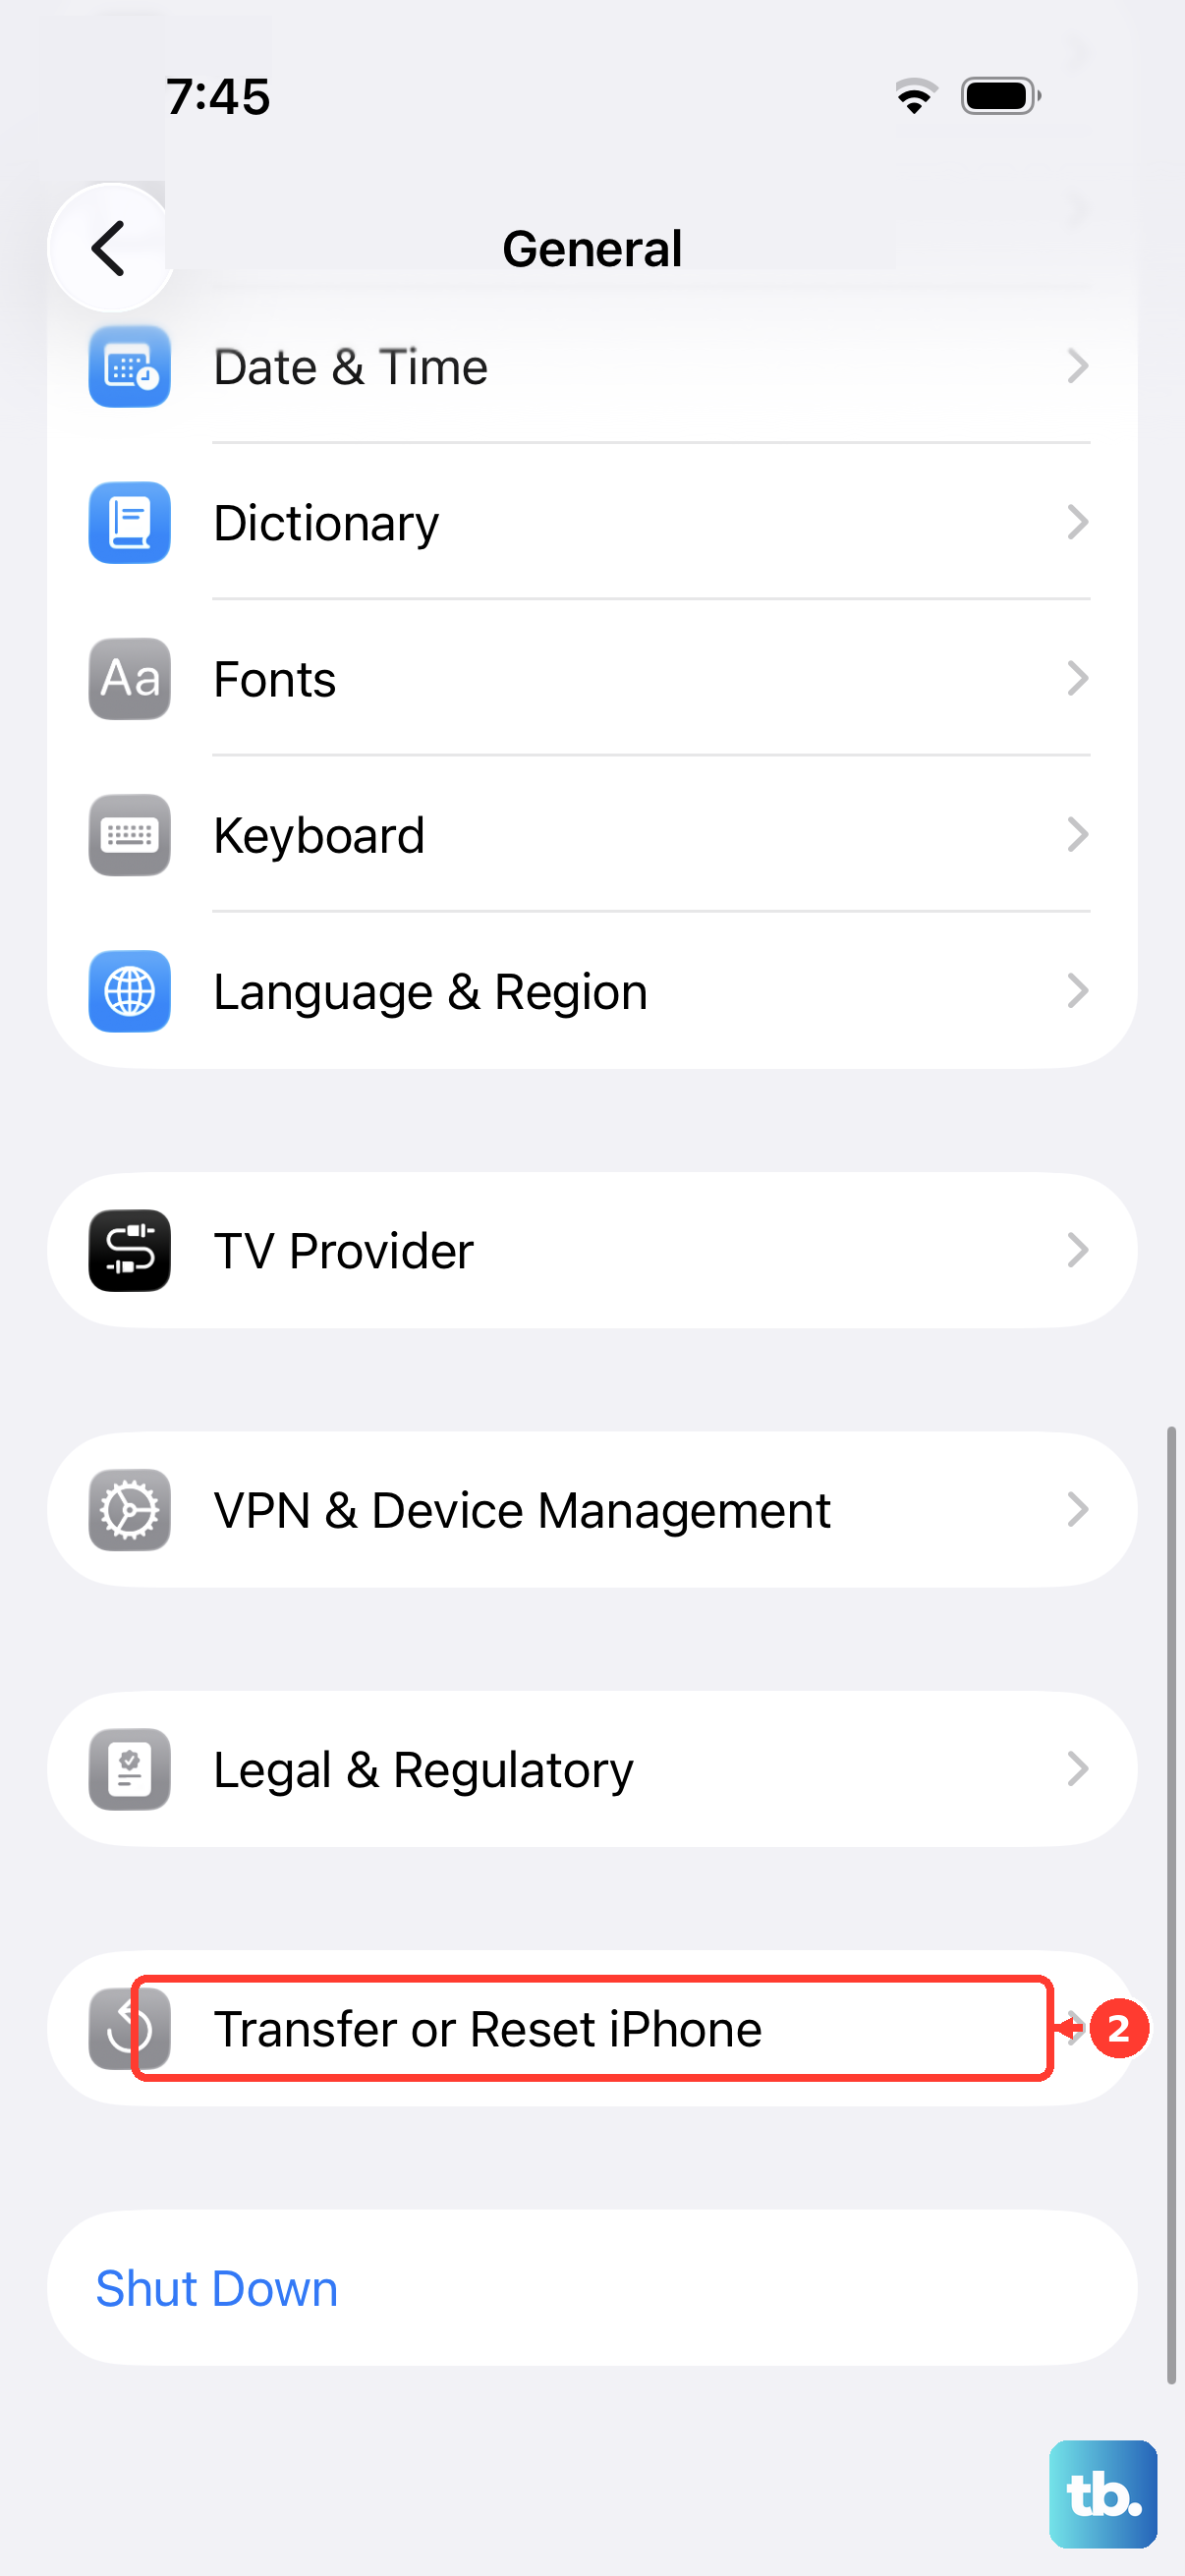
Tap Reset at the bottom, then choose Reset Network Settings. You'll need to enter your passcode to confirm. Your iPhone will restart, and you'll have to rejoin Wi-Fi networks and re-pair Bluetooth devices afterward.
Verify Your Account is in Good Standing
If you're on a prepaid plan, a lack of funds can cause service to be suspended, which might show as a provisioning error. For postpaid accounts, a missed payment could have the same effect.
Log into your carrier's account via their app or website to check your balance and payment status. If everything looks good there, it rules out this common cause.
Contact Your Mobile Carrier for Support
If you've tried everything above and the error persists, it's time to call in the experts. There might be a network outage in your area, a problem with your specific account profile, or an issue that requires them to reprovision your line from their end.
They can also run diagnostics and, if necessary, arrange for a replacement SIM card to be sent to you. A damaged SIM card is a less common cause, but it does happen.
Test the SIM Card in Another Device
This is the definitive test to figure out where the problem lies. If you have access to another unlocked phone, power it off and insert your iPhone's SIM card. Turn that phone on.
If the other phone connects to the network without the "Not Provisioned" error, then the issue is likely with your iPhone 17 Pro Max itself. If the error follows the SIM card to the other phone, then the problem is definitely with the SIM or your carrier account.