You sit down to install a pending update, and Windows throws back 0x80073712 or 0x80070002 before the progress bar even moves. These two codes feel intimidating, but they point at fairly specific conditions: 0x80073712 is ERROR_SXS_COMPONENT_STORE_CORRUPT, meaning a file in the Windows component store is damaged or missing, and 0x80070002 is ERROR_FILE_NOT_FOUND, Microsoft's shorthand for missing or corrupt files or an incomplete update. The good news is that both respond to the same ladder of fixes, and the first few do not require a single command. Work through the steps below in order, starting with the safest, and stop as soon as updates install cleanly.
Everything here applies to both Windows 11 and Windows 10, with the menu paths called out separately where they differ.
Start With the Built-In Update Troubleshooter
Microsoft lists its automated troubleshooter first for a reason: it analyzes your update state and resets any Windows Update components that need it, with no risk to your files. This single tool clears a surprising number of 0x80070002 and 0x80073712 failures on its own.
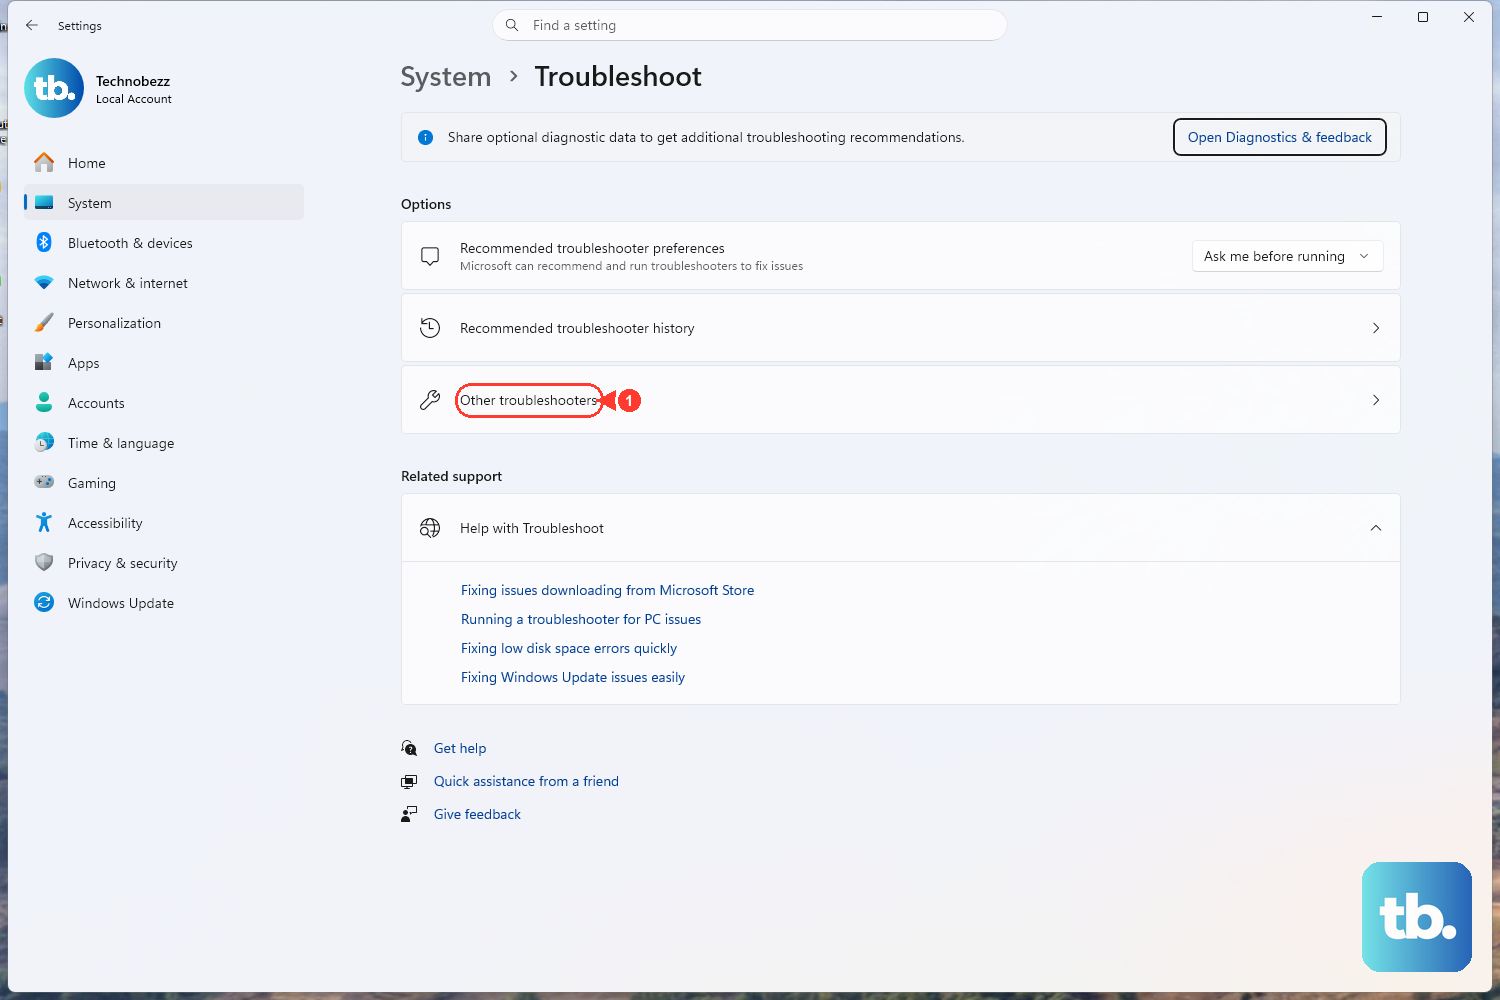
On Windows 11, open Start > Settings > System > Troubleshoot > Other troubleshooters. Find Windows Update in the list and select Run next to it. On Windows 10, the path is Start > Settings > Update & Security > Troubleshoot > Additional troubleshooters; select Windows Update, then Run the troubleshooter.
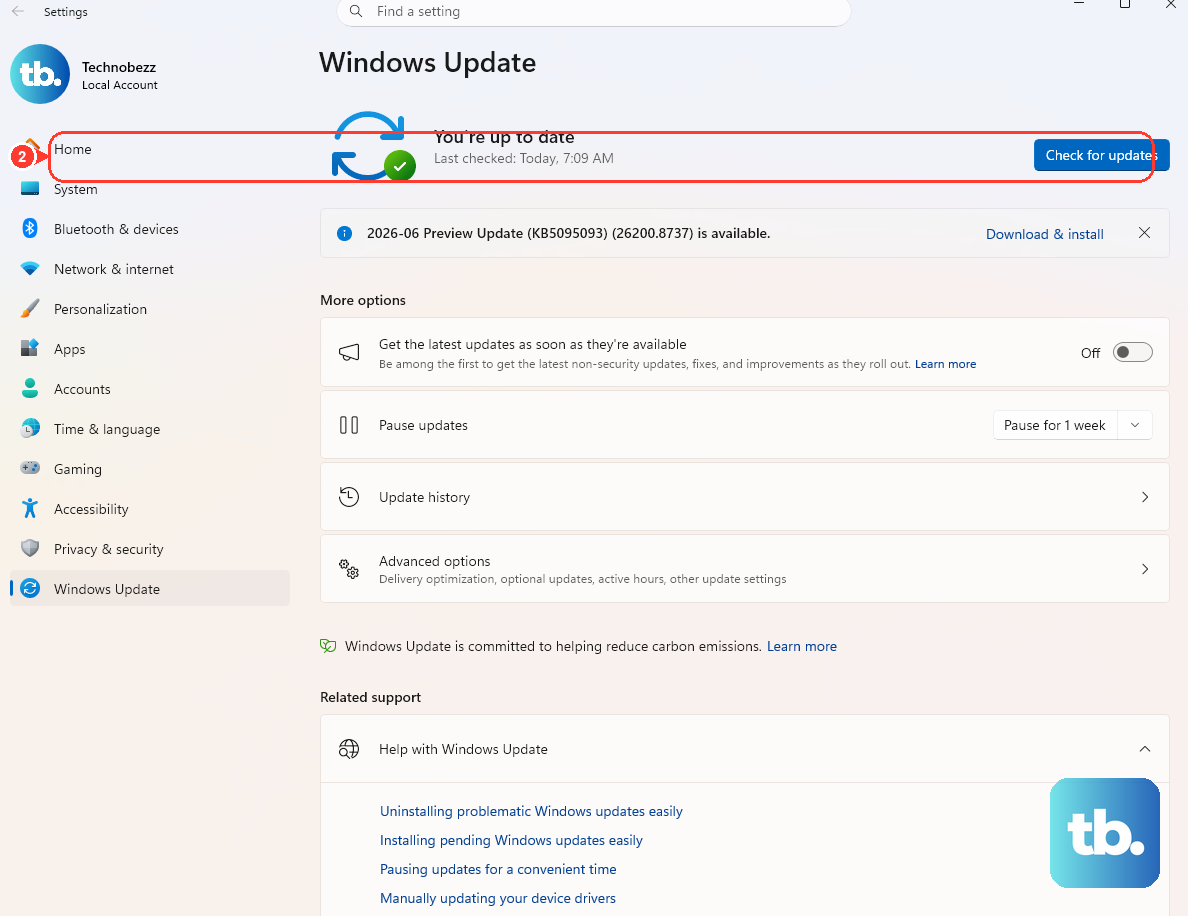
Let the tool finish its analysis and apply any fixes it suggests. When it is done, restart the device and try Windows Update again before moving on.
Clear the Easy Blockers Before Touching the Command Line
Many update failures come down to environment problems rather than corruption, so it is worth ruling those out next. Make sure the PC is plugged in and connected to the internet, and that you are signed in as an administrator. Then confirm the date and time are set to update automatically, since a wrong clock can break the secure handshake an update relies on.
Disk space matters more than people expect. Microsoft cites a minimum of 16 GB of free space for 32-bit Windows and 20 GB for 64-bit Windows, so free up room if you are anywhere near full. It also helps to disconnect unnecessary external and USB hardware, which occasionally trips up the installer.
After those checks, restart the PC and check for updates one more time. These low-risk adjustments resolve many transient 0x80070002 and 0x80073712 errors without any deeper repair.
Repair the System Image and Files With DISM, Then SFC
If the codes persist, the next layer targets the actual corruption behind them using two built-in repair tools. Both ship with Windows, and Microsoft is explicit that you should run them as a pair, not just one.
First, open an elevated Command Prompt. Type command prompt in the taskbar search box, choose Run as administrator, then select Yes at the prompt.
- 1.Run the component-store repair exactly as written:
DISM.exe /Online /Cleanup-image /Restorehealthand press Enter. It can take several minutes, and a healthy result reports either "The restore operation completed successfully" or "The operation completed successfully." - 2.Run the System File Checker next:
sfc /scannowand let it run all the way to 100%. This scans and repairs protected system files.
When both finish, restart the PC and try Windows Update again. This sequence directly addresses the component-store corruption behind 0x80073712 and the missing-or-corrupt-file condition behind 0x80070002. If you want to inspect what SFC found, the log lives at C:\Windows\Logs\CBS\CBS.log.
Reset the Windows Update Components by Hand
When the troubleshooter and the DISM/SFC pass still leave you stuck, Microsoft's documented manual reset clears the update queue and the folders that cache update data. Run every command from an elevated Command Prompt, in this order.
Start by stopping the three relevant services, one command at a time:
- 1.
net stop bitsstops the Background Intelligent Transfer Service. - 2.
net stop wuauservstops the Windows Update service. - 3.
net stop cryptsvcstops Cryptographic Services.
Next, delete the BITS queue files so a stale download queue cannot keep breaking the update:
- 1.
Del "%ALLUSERSPROFILE%\Application Data\Microsoft\Network\Downloader\qmgr*.dat"
The folder-rename step is reserved for a repeat attempt, not the first pass; Microsoft is specific about this, so only run these three if the reset alone did not work the first time:
- 1.
Ren %Systemroot%\SoftwareDistribution\DataStore DataStore.bak - 2.
Ren %Systemroot%\SoftwareDistribution\Download Download.bak - 3.
Ren %Systemroot%\System32\catroot2 catroot2.bak
Finally, restart the three services and try the update again:
- 1.
net start bits - 2.
net start wuauserv - 3.
net start cryptsvc
Renaming the folders is intentionally non-destructive, since Windows simply rebuilds fresh copies of %systemroot%\SoftwareDistribution and %systemroot%\System32\catroot2 on the next update. Microsoft's full procedure also includes optional re-registering of update DLLs and a Winsock reset, but you can leave those alone unless the basic reset fails. One caution: Microsoft also documents commands that reset the BITS and Windows Update services to their default security descriptors, and warns that they overwrite existing service permissions, so skip those unless every other step has failed.
A Faster Way to Clear the SoftwareDistribution Folder
Microsoft also documents a shorter "reset the Windows Update Agent" sequence that clears the entire SoftwareDistribution folder in one move. From an elevated Command Prompt, run these in order:
- 1.
net stop wuauserv - 2.
rd /s /q %systemroot%\SoftwareDistribution - 3.
net start wuauserv
This is a quicker alternative when you would rather clear the whole update cache at once instead of renaming individual subfolders. Windows recreates the SoftwareDistribution folder automatically, then you can check for updates again.
When the Code Is Actually 0x80070643 on a Recovery Update
It is worth pausing here, because a related code is easy to misdiagnose. Microsoft documents 0x80070643 as a known issue tied specifically to the Windows Recovery Environment (WinRE) update KB5034441 for Windows 10 versions 21H2 and 22H2, with parallel updates for other releases.
The cause is not generic update corruption at all; it is insufficient free space in the WinRE recovery partition. That update needs at least 250 MB of free space in the recovery partition to install, and the failure simply means there is not enough room there.
Microsoft's recommended fix is to follow its instructions to manually resize the recovery partition, or to use Microsoft's sample script to increase the WinRE partition size, then check for updates again. Do not run the SoftwareDistribution reset for this one and expect results; treat 0x80070643 against a WinRE or Safe OS update as a partition-space problem, not a corruption problem.
The Last-Resort In-Place Repair Upgrade
Some servicing-stack and component-store errors, including 0x80073712, reflect corruption that DISM and SFC cannot fully repair. For those stubborn cases, Microsoft's documented resolution is an in-place upgrade that reinstalls the operating system while preserving your data, apps, and settings using the current Windows installation media.
On a PC, that means downloading a Windows ISO of the same version you are running, launching setup.exe from it, and choosing the "Keep personal files and apps" option when prompted. Because this reinstalls Windows over itself, back up your important files first as a precaution, even though the process is designed to keep them.
This step lives at the bottom of the ladder for a reason. If the troubleshooter, the disk and date checks, the DISM/SFC pair, or the component reset already fixed your update, you never need to reach for it.
Frequently Asked Questions
What does error 0x80073712 actually mean?
It is the code ERROR_SXS_COMPONENT_STORE_CORRUPT, which means a file in the Windows component store is corrupt or missing. That is why the fix centers on repairing the component store with DISM.exe /Online /Cleanup-image /Restorehealth followed by sfc /scannow, and, in severe cases, an in-place repair upgrade.
What does 0x80070002 mean and how is it different?
The code 0x80070002 is ERROR_FILE_NOT_FOUND, which Microsoft describes as missing or corrupt files or an incomplete update. It responds to the same fixes as 0x80073712: the built-in troubleshooter first, then DISM and SFC, then the manual reset of the Windows Update components.
Do I have to run both DISM and SFC, or just one?
Microsoft says to run both, not just one. Run DISM.exe /Online /Cleanup-image /Restorehealth first so the component store is healthy, then run sfc /scannow so the file checker can repair protected system files using that restored store. Run them in that order, then restart.
Is renaming SoftwareDistribution and catroot2 safe?
Yes. Renaming %systemroot%\SoftwareDistribution and %systemroot%\System32\catroot2 to .bak versions simply forces Windows to rebuild fresh copies on the next update. Microsoft notes the rename step should be used only on a repeat attempt, after the basic service-stop and queue-clear reset did not resolve the error on the first pass.
I am getting 0x80070643 instead. Is this the same problem?
No. Microsoft ties 0x80070643 to the Windows Recovery Environment update KB5034441 (for Windows 10 21H2 and 22H2, with parallel updates elsewhere), and the cause is insufficient free space in the recovery partition, which needs at least 250 MB. The fix is to resize the recovery partition using Microsoft's instructions or its sample script, then check for updates again.


