Your fan is roaring, the keyboard feels frozen, and when you finally pry open Task Manager the Disk column is glued to 100%. A drive pinned at full activity makes even a fast PC crawl, because every app is waiting in line for the same overworked disk. The good news is that this is almost always fixable, and most of the fixes are simple settings changes built into Windows. Work through these in order, starting with the safest, and test after each one so you know exactly what solved it.
Start With a Restart Before Anything Else
It sounds too easy, but a restart clears stuck processes and background tasks that may be hammering your drive after a long uptime. Close any apps you are not actively using, then select Start > Power > Restart. Microsoft lists restarting as a documented step to recover performance when a PC is slow or stuck at high resource use.
A full restart is better here than sleep or shutdown, because it ends every running process cleanly and reloads Windows fresh. If the disk drops back to normal afterward, you may not need any of the deeper fixes below. If it climbs back to 100% within minutes, move on to find the culprit.
Find Out What Is Actually Pinning Your Disk
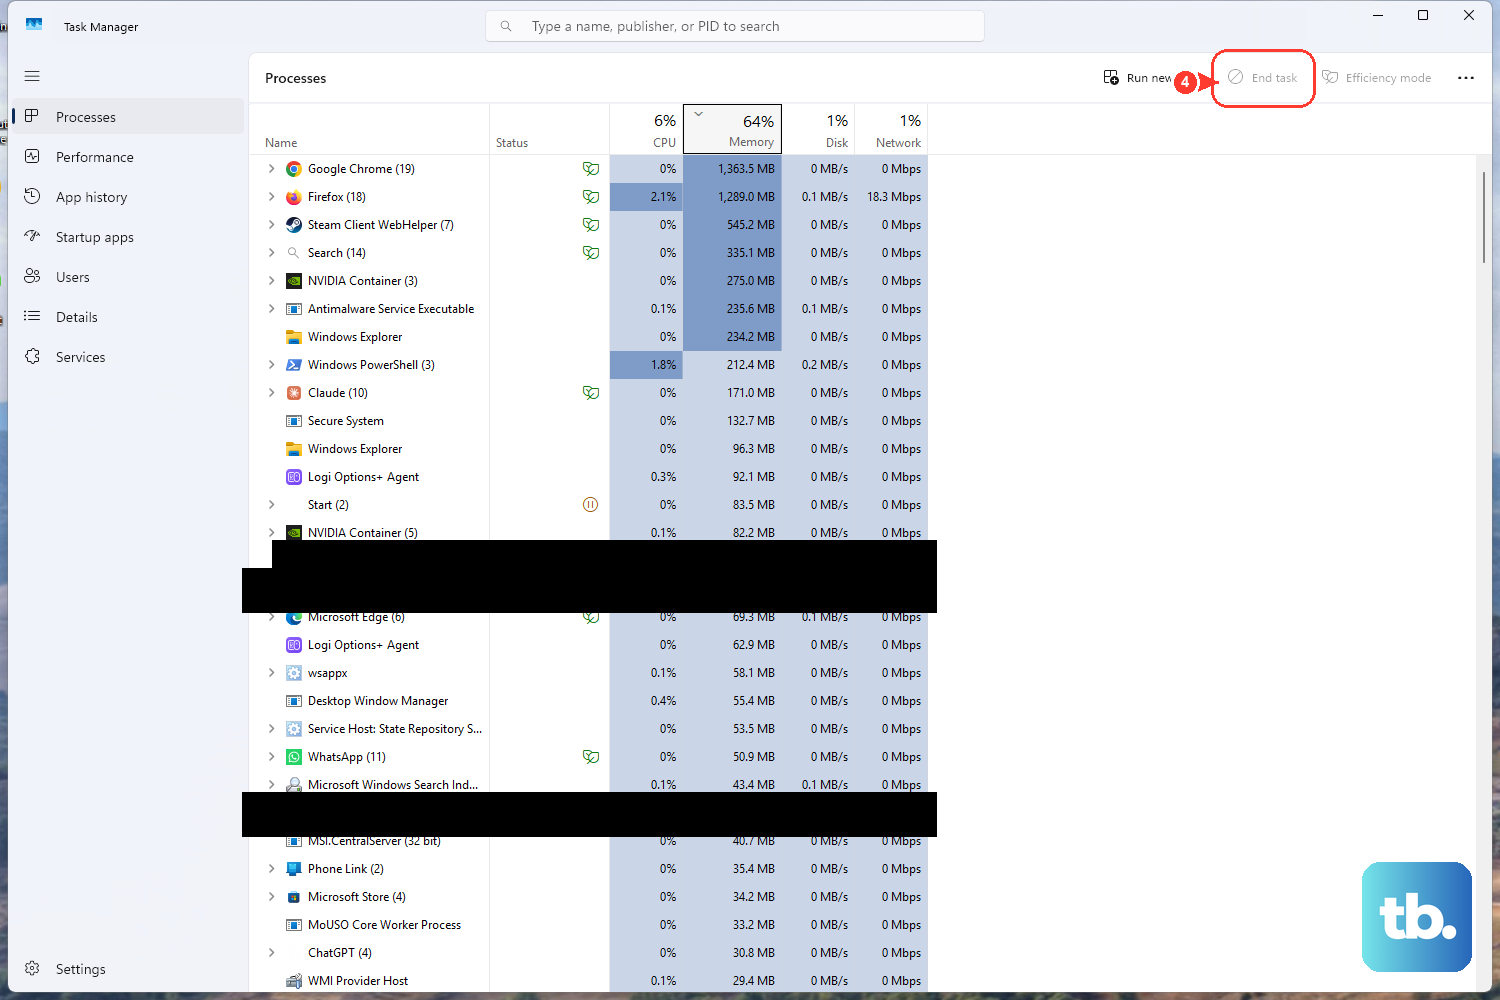
Before changing settings, identify which process is doing the work. Press Ctrl+Shift+Esc to open Task Manager (or select Start, type task, and choose Task Manager). It opens on the Processes tab, which shows CPU, Memory, Disk, and Network columns.
Select the Disk column header to sort from highest to lowest, with the arrow pointing down, and the process at the top is the one pinning your drive. Do the same with the CPU and Memory columns to get the full picture. Microsoft notes that if a process can be stopped or its related service disabled, you can stop it to see whether that resolves the issue.
Dig Deeper With Resource Monitor
When Task Manager is not detailed enough, Resource Monitor breaks activity down per process. Select Start, type resmon, and open Resource Monitor, then select the Disk tab (or the CPU tab if CPU is also spiking). Sort by the relevant column to surface the heaviest process, and maximize the window if you cannot see all the data.
Install Windows and Driver Updates
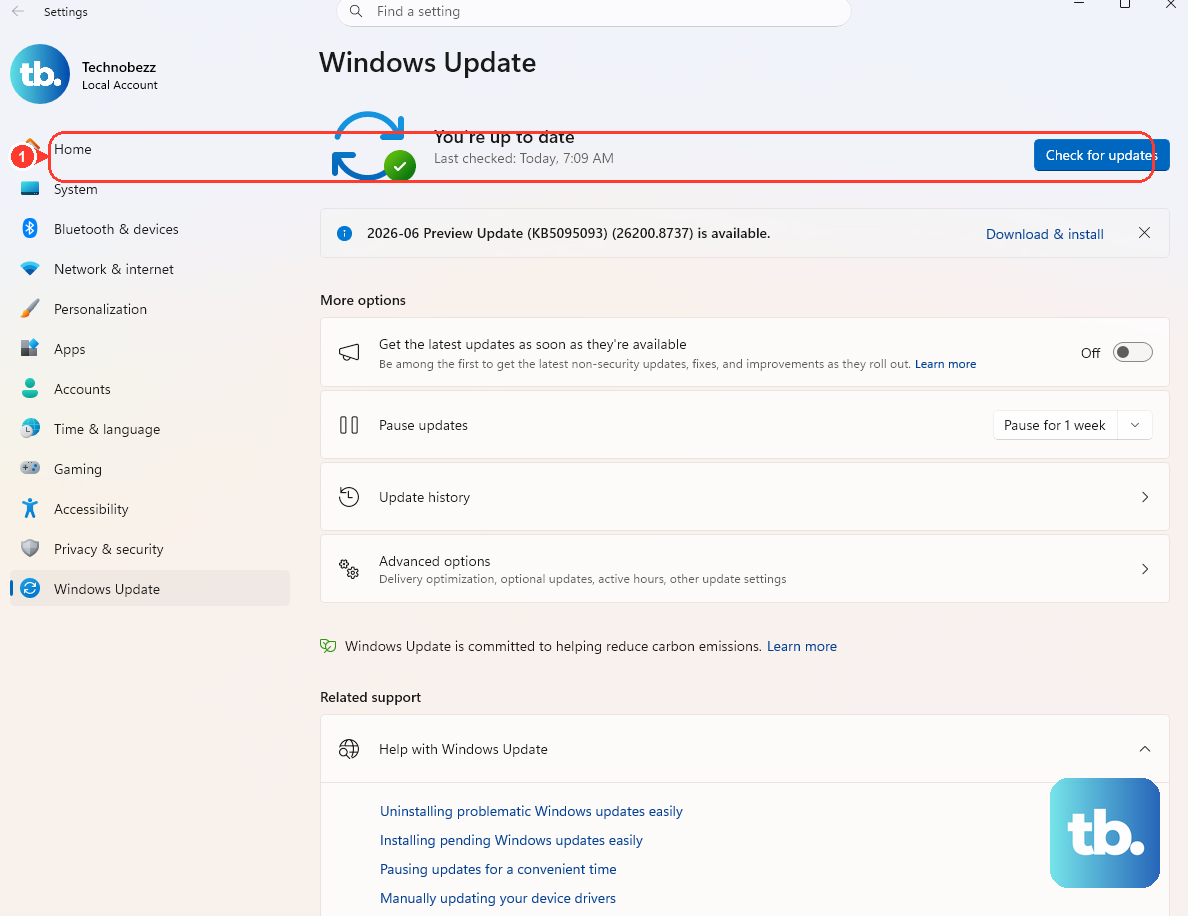
Many high-disk problems are bugs that Microsoft has already patched. On Windows 11, go to Start > Settings > Windows Update > Check for Windows updates, then choose Download & install. On Windows 10, go to Start > Settings > Update & Security > Windows Update > Check for Windows updates, then Download & install.
Restart if you are prompted, since some updates only finish applying after a reboot. Microsoft lists installing updates as a key step to improve performance, because updates include fixes and performance improvements. Note that Windows 10 support ended on October 14, 2025, so an up-to-date Windows 11 system will keep receiving these fixes.
Rule Out Malware With a Windows Security Scan
Malicious software can drive sustained high disk and CPU activity in the background. Select Start > Settings > Privacy & security > Windows Security > Virus & threat protection, then run a scan. If a quick scan comes back clean but the disk activity continues, try a more thorough scan from the same screen.
For a stubborn case, the Microsoft Defender Offline scan is worth running. It restarts the PC and scans before Windows fully loads, so persistent malware has a harder time hiding from it. Let the scan finish completely before judging whether the disk activity has dropped.
Free Up Space on a Crowded Drive
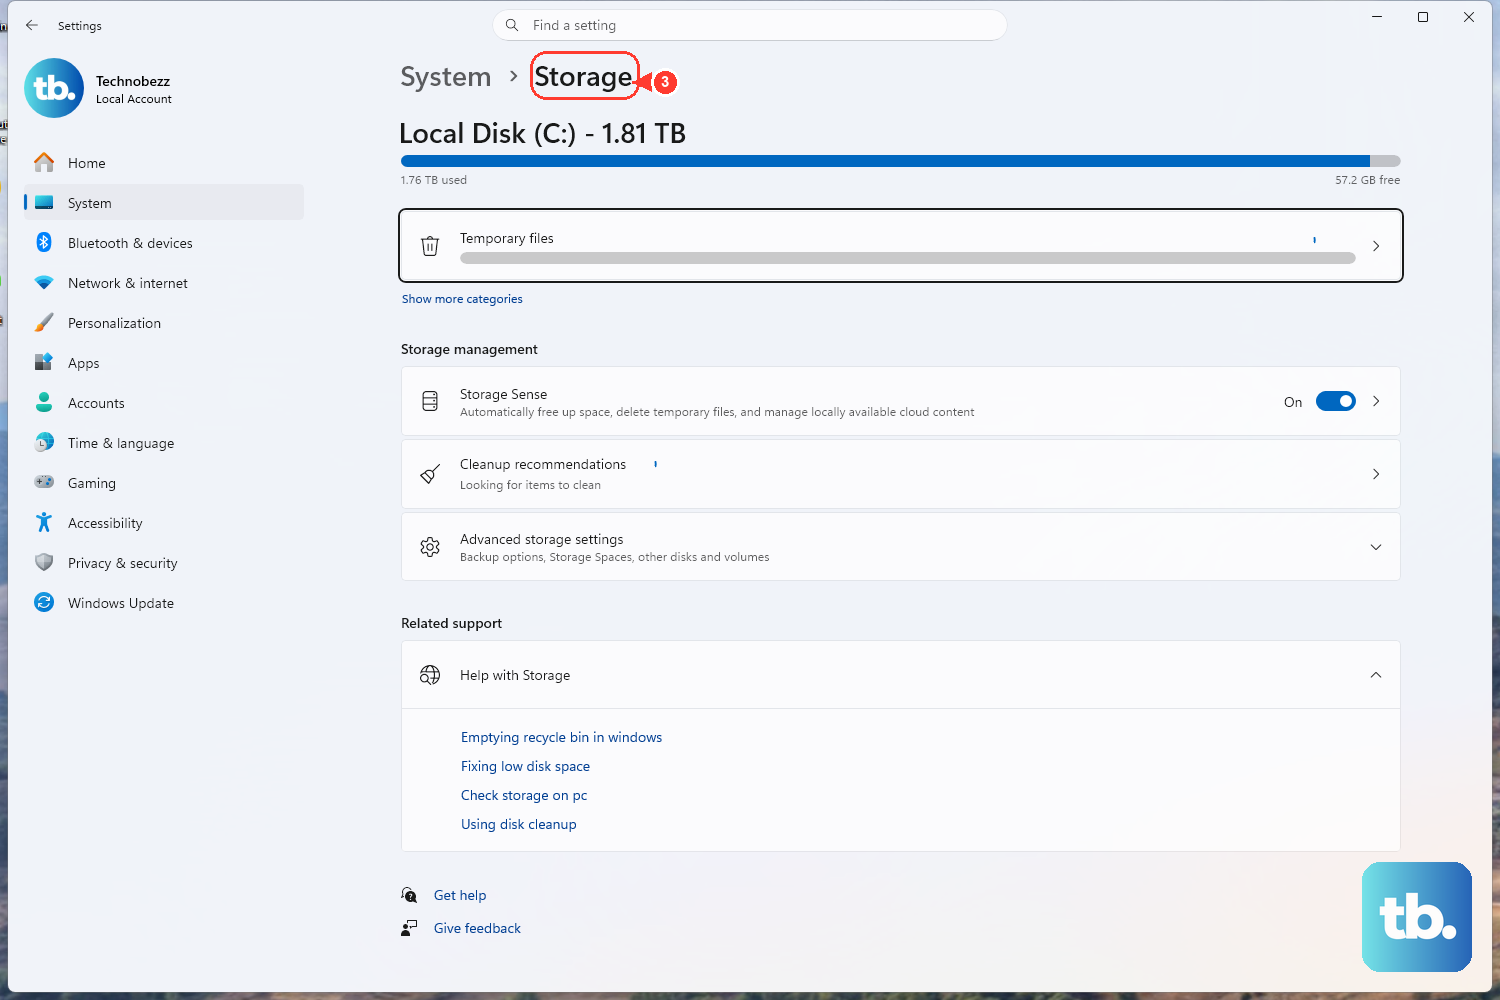
A nearly full drive degrades performance and slows disk indexing. Select Start > Settings > System > Storage to see what is using your space and clear some out. Microsoft's Windows Search guidance separately notes that indexing stops when there is insufficient disk space, and recommends keeping more than 1 GB free.
Removing old downloads, temporary files, and apps you no longer use gives Windows room to breathe. Once the drive has comfortable free space, background tasks like indexing and update staging stop fighting for the last few megabytes.
Cut Down the Apps Launching at Startup
Too many programs starting at boot keep the disk busy long after you sign in. Press Ctrl+Shift+Esc to open Task Manager, select Startup apps from the left-hand menu, and disable the apps you do not need to launch automatically.
Focus on heavy background tools, updaters, and helpers from apps you only open occasionally; leave security software enabled. Disabling a startup app does not uninstall it, so you can still open it manually whenever you want.
Tame Windows Search if SearchIndexer Is the Culprit
If Task Manager points at the Windows Search indexer (searchindexer.exe) eating your disk, Microsoft documents reducing the index size rather than disabling search outright. To exclude folders, on Windows 11 go to Settings > Privacy & security > Searching Windows > Add an excluded folder (on Windows 10, Settings > Search > Searching Windows > Add an excluded folder).
If the index itself is corrupted, rebuild it. On Windows 11 go to Settings > Privacy & security > Searching Windows > Advanced indexing options > Advanced > Rebuild (on Windows 10, Settings > Search > Searching Windows > Advanced Search Indexer Settings > Advanced > Rebuild), and allow up to 24 hours for it to finish. The Windows Search service is named Windows Search (service wsearch) and can be restarted from the Services tab of Task Manager or from services.msc.
Defragment the Search Database (Advanced)
Microsoft documents a sequence to defragment, not permanently disable, the Windows Search index database. Run these commands in order in an admin Command Prompt: Sc config wsearch start=disabled, then Net stop wsearch, then EsentUtl.exe /d %AllUsersProfile%\Microsoft\Search\Data\Applications\Windows\Windows.edb, then Sc config wsearch start=delayed-auto, then Net start wsearch. This temporarily stops search, compacts the database, and restarts the service; it does not turn search off for good.
Check the Drive for Errors With Check Disk
If the drive itself has file-system corruption or is starting to fail, it can spike to 100%. Check Disk inspects a volume for logical and physical errors. Open an elevated Command Prompt (right-click Command Prompt and choose Run as administrator), then run chkdsk d: /f to fix file-system errors on drive D, or add /r to also locate bad sectors and recover readable data (note that /r includes /f).
The drive must be lockable, so for your system drive Windows will offer to run the check at the next restart instead of immediately; accept and reboot. Administrator rights are required, and the full /r scan can take a long time on a large or failing disk, so run it when you can leave the PC alone.
Repair Corrupted System Files With DISM and SFC
Damaged Windows system files can cause runaway resource use that no setting will fix. Open Command Prompt as administrator (type cmd in Search, right-click Command Prompt, choose Run as administrator). First repair the component store by running DISM.exe /Online /Cleanup-image /Restorehealth, then run sfc /scannow.
Run them in that order, because DISM repairs the source that SFC draws its clean copies from. Do not close the window until verification reaches 100%; SFC replaces corrupted protected files with a cached copy as it goes.
Set Laptops to Best Performance
On a laptop, a power-saving mode can throttle the hardware and make disk activity drag. Select Start > Settings > System > Power & battery and set the Power mode to Best performance. Be aware that Microsoft notes this increases power consumption and drains a laptop battery faster, so you may prefer to use it while plugged in.
Optimize Your Drive
Optimizing a drive reorganizes how data is stored so Windows can reach it more efficiently. Select Start, type Defragment and Optimize Drives, open the tool, select your drive, and choose Optimize. Microsoft lists optimizing the drive as a documented way to improve performance.
Let Windows Manage Virtual Memory
The page file (pagefile.sys) extends your RAM, and when it is mismanaged the system can freeze or crash under load. Microsoft documents that system-managed page files grow automatically when the commit charge reaches 90% of the commit limit, expanding up to three times physical memory or 4 GB (whichever is larger) but no more than one-eighth of the volume size.
Hitting the commit limit can cause freezing and crashing, so for most users the safe default is to leave the page file system-managed and let Windows size it. You can watch your committed and limit memory on the Performance tab in Task Manager to see how close you are running to that limit.
Frequently Asked Questions
Why is my disk at 100% when I am barely using my PC?
Background tasks are usually responsible, including Windows Update downloads, malware scans, search indexing, or a misbehaving app launching at startup. Open Task Manager with Ctrl+Shift+Esc and sort by the Disk column to see exactly which process is doing the work, then apply the matching fix above.
Should I disable the Windows Search service to fix high disk usage?
Microsoft does not recommend permanently disabling Windows Search to fix disk usage. Instead, it documents excluding folders, rebuilding the index, or temporarily managing the wsearch service to defragment its database, so a permanent shutoff is unnecessary and you keep search working normally.
Is it safe to run chkdsk on my main drive?
Yes. Because the system drive cannot be locked while Windows is running, Check Disk on the active drive simply schedules itself to run at your next restart; accept the prompt and reboot. Adding /r also scans for bad sectors and recovers readable data, which takes longer, so plan to leave the PC running until it completes.
Will optimizing or defragmenting my SSD help?
You can run the built-in Optimize Drives tool on any drive Windows lists; it applies the appropriate maintenance for the drive type automatically. Microsoft lists optimizing the drive as a documented way to improve performance, so it is safe to let the tool handle the work for you.
How do I know which fix actually worked?
Apply the fixes one at a time and watch the Disk column in Task Manager after each change. When the number drops from 100% and stays down during normal use, the last step you took is the one that solved it, and you can stop there.


