You click into a video call and your screen stays dark, or the Camera app greets you with a blank box and an error code instead of your face. A webcam that suddenly stops working on Windows is almost always fixable, and the cause is usually something simple like a permission toggle, another app holding the camera, or a driver that broke after an update. The fixes below are ordered from the quickest and safest to the more involved ones, so start at the top and stop as soon as your camera comes back to life. Everything here applies to both Windows 10 and Windows 11.
Start with a free webcam test to rule out a hardware fault. If a live preview appears there but not in your app, the camera is fine and the app is the problem.
Start With a True Restart and a Quick Camera Test
Before changing any setting, give your PC a clean reboot. A full restart clears the temporary glitches that often freeze a camera, and it costs you nothing. Microsoft is specific that waking your device from sleep is not the same thing as a restart.
- 1.Open Start > Power > Restart and let the PC fully reboot.
- 2.Open the Camera app from Start, then choose Camera.
- 3.If you are prompted to allow access, select Yes and check whether the preview appears.
If the camera works now, you are done. If it is still dark, move on to the next fix.
Make Sure No Other App Is Holding the Camera
Only one app can use the camera at a time on Windows. If a video-call app, a photo app, or even a minimized program already has the camera open, the app you are trying to use will be locked out. Close any other application that might be using the camera, then try again.
When another program is holding the camera, you may see error 0xA00F4243 or an access-denied message. Shutting down the conflicting app usually releases the camera immediately, so check your taskbar and system tray for anything still running in the background.
Turn On the Camera Privacy Permissions
Windows keeps a master set of privacy switches for the camera, and if the top-level one is off, no app on the system can use it. This is one of the most common reasons a webcam appears broken when the hardware is perfectly fine.
On Windows 11, go to Start > Settings > Privacy & security > Camera and make sure Camera access, Let apps access your camera, and Let desktop apps access your camera are all turned On. Also confirm the toggle for the specific app you are using is enabled.
On Windows 10, go to Start > Settings > Privacy > Camera and turn on Camera access for this device, Allow apps to access your camera, and Allow desktop apps to access your camera. The device-level access toggle gates everything; if it is off, every app is blocked regardless of its own setting.
For a USB Webcam, Reseat the Cable and Switch Ports
External webcams depend on a solid physical connection and enough power. Make sure the camera is securely connected to the USB port and check for any loose cords or cables. A half-seated plug or a flaky port produces the same symptoms as a software fault.
- 1.Unplug the USB cable and wait a short time so Windows unloads the driver.
- 2.Plug the cable back in, ideally into a different USB port on your PC.
- 3.Connect the webcam directly to the computer rather than through an unpowered USB hub, which may not supply enough power.
Trying a second port rules out a single dead connector, and going direct rules out a hub that is starving the camera of power.
Let the Windows Camera Troubleshooter Do the Work
Microsoft ships an automated camera troubleshooter that runs a series of checks and resolves most common camera problems on its own. It is worth running before you start editing drivers by hand.
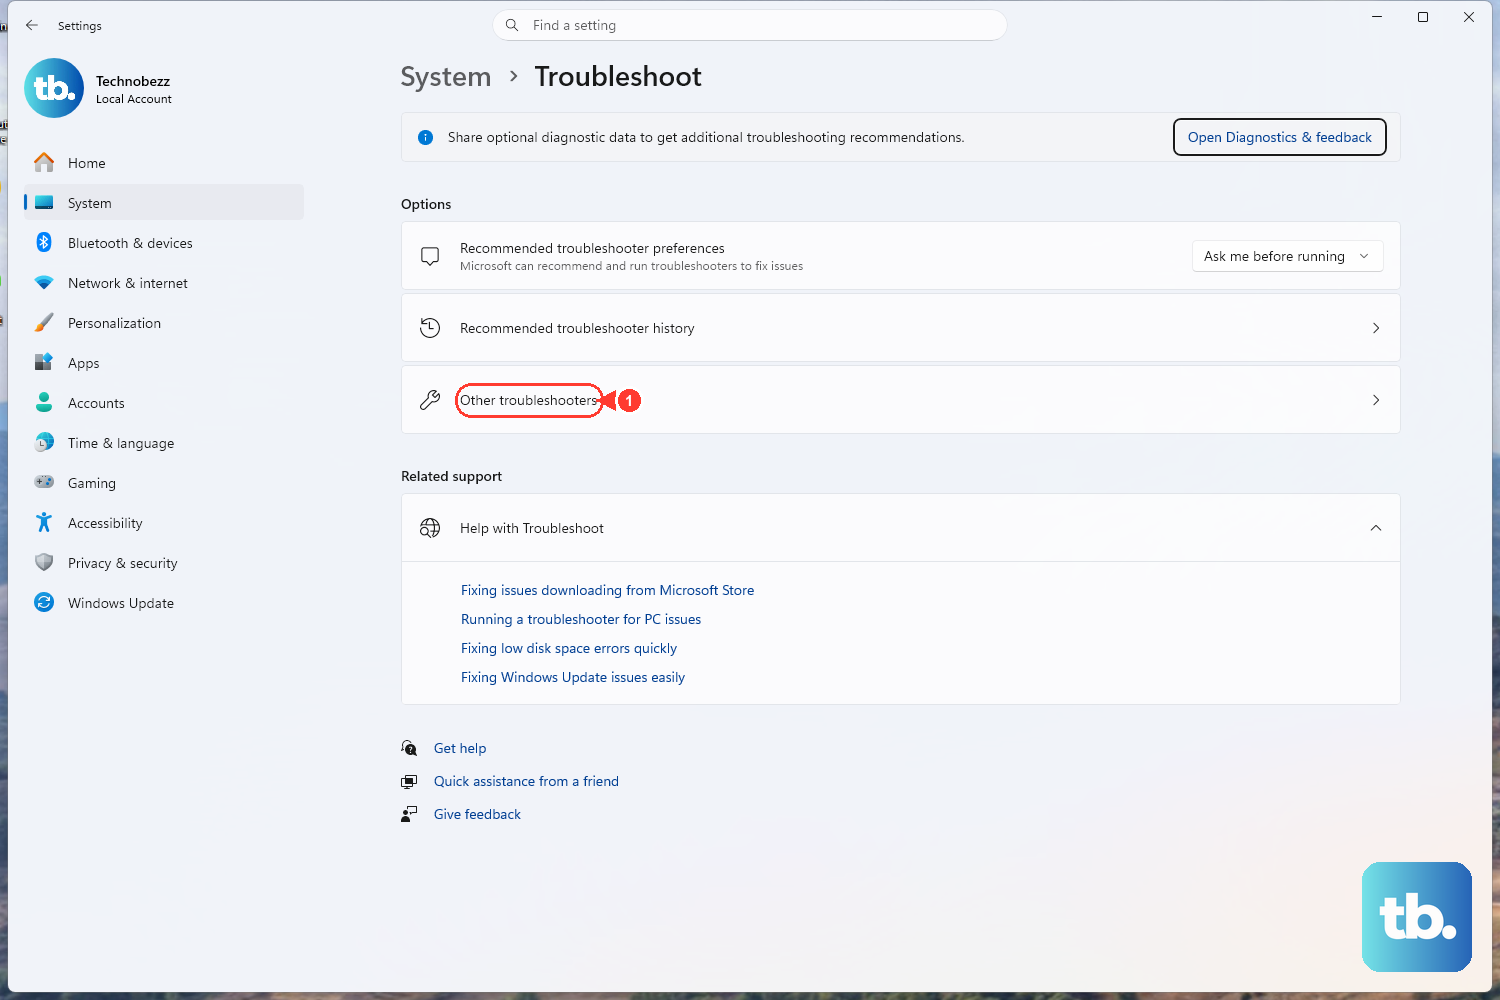
On Windows 11, open the troubleshooter from the Get Help app; Microsoft links to it directly from its camera support page. On Windows 10, go to Start > Settings > Update & Security > Troubleshoot > Find and fix other problems > Camera > Run the troubleshooter. Follow any prompts it offers and re-test the Camera app when it finishes.
Install Windows Updates and Optional Driver Updates
A missing or outdated driver, often left behind after a Windows update, is a frequent cause of a dead camera. Checking for updates can pull down the right driver automatically.
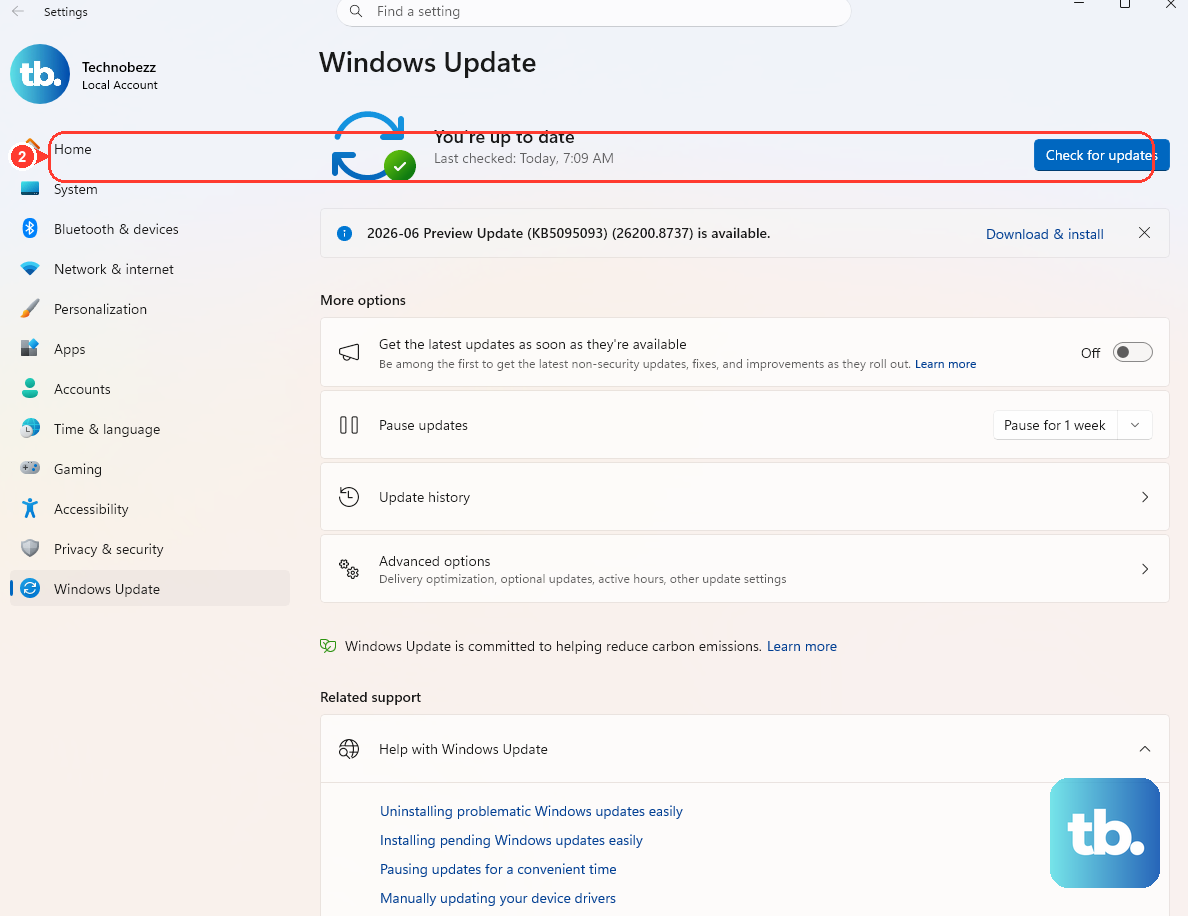
- 1.Go to Start > Settings > Windows Update > Check for updates and install anything offered.
- 2.If no camera update appears, select Advanced options > Optional updates and look for a camera driver update there.
- 3.Install anything found, then restart and test the camera again.
Check Whether Security Software Is Blocking the Camera
Antivirus and security software can block camera access as a privacy feature, sometimes without an obvious notification. If the error 0xA00F4246 appears, it means the camera is locked by security software.
Open your security software and look under its Settings, Tools, or a Protection tab. Temporarily disable its protection to test, choosing a short duration. Be sure to re-enable your protection afterward so your PC is not left exposed. If the camera works while protection is off, adjust that software's camera or webcam permissions rather than leaving it disabled.
Update the Camera Driver in Device Manager
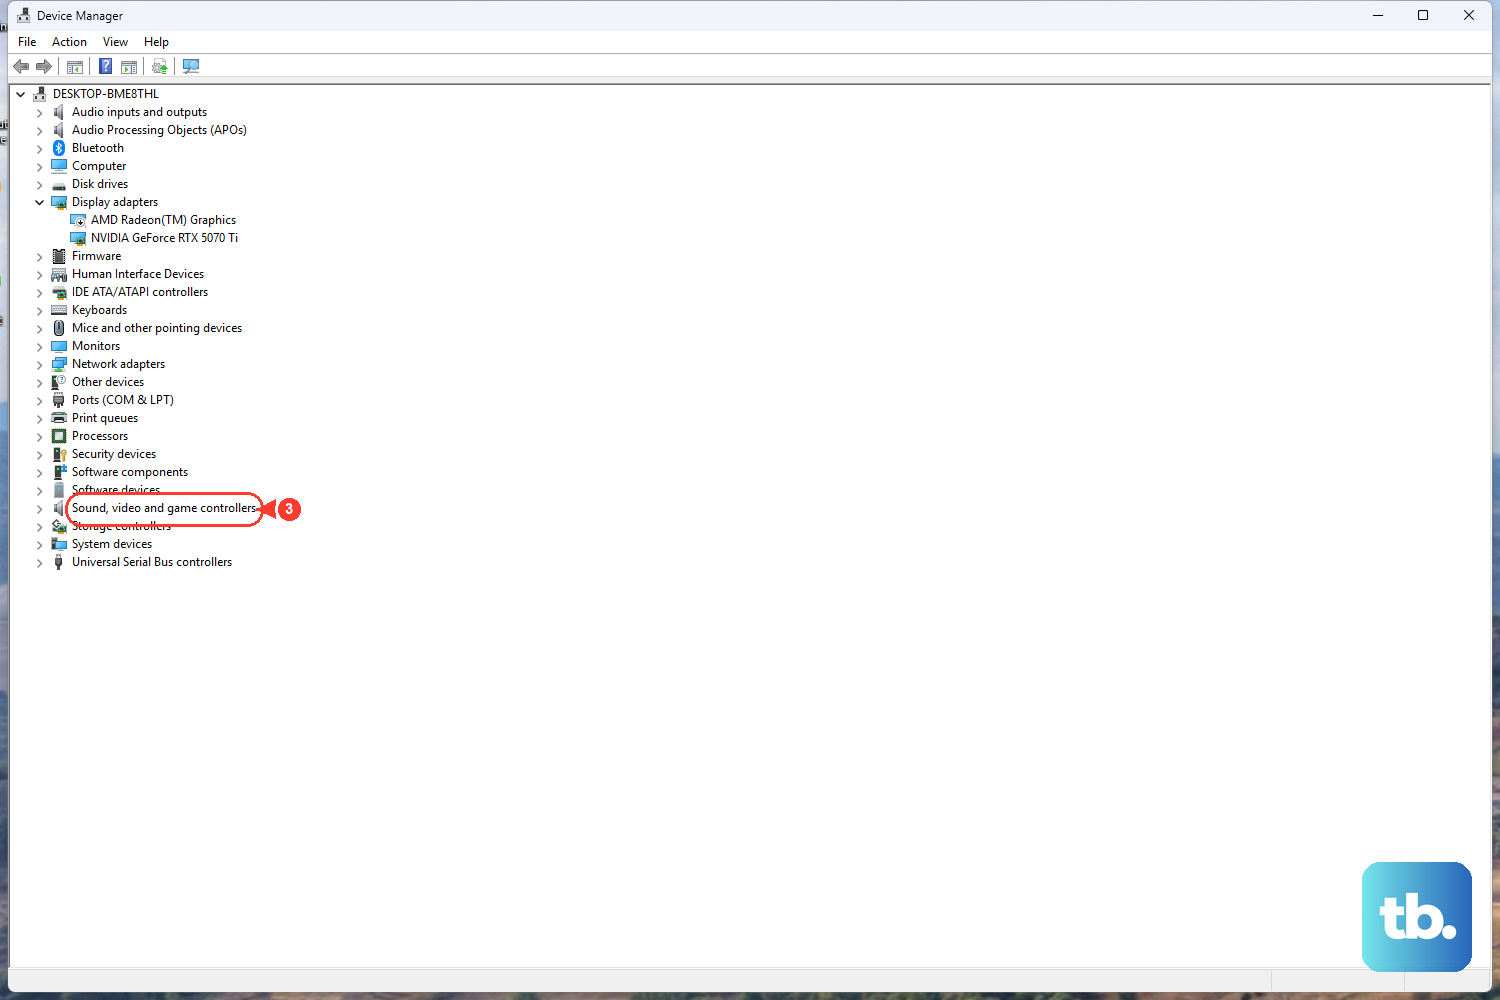
If automatic updates did not help, you can ask Device Manager to search for a newer driver directly. Open Start, type device manager, and select it. Your camera will appear under Cameras, Imaging devices, or Sound, video and game controllers.
Right-click the camera, choose Update driver > Search automatically for drivers, and let Windows look. If Windows reports that nothing newer is available, you can download an updated driver from the camera or PC manufacturer's website and install that instead.
Roll Back the Driver If the Camera Broke After an Update
If your camera worked fine until a recent driver or system update, the new driver may be the culprit. Rolling back restores the previous version that was working.
In Device Manager, right-click the camera and choose Properties > Driver tab > Roll Back Driver > Yes, then restart and test. Note that some drivers do not provide this option; Roll Back Driver only appears if a previous driver version is stored on the system.
Uninstall and Reinstall the Camera Driver
When the driver is corrupted rather than simply outdated, removing it and letting Windows reinstall a fresh copy often clears the fault. This is more aggressive than the steps above, so do it once the gentler fixes have failed.
- 1.In Device Manager, right-click the camera and choose Properties > Driver tab > Uninstall Device.
- 2.Check Attempt to remove the driver for this device, then select OK.
- 3.Select Action > Scan for hardware changes so Windows reinstalls the camera.
- 4.Restart and test the Camera app.
When Windows Says No Camera Is Attached, Use the Generic USB Video Driver
If Windows cannot detect the camera at all and you see error 0xA00F4244 with a message that no cameras are attached, switching to the built-in generic driver often brings a USB webcam back.
- 1.In Device Manager, right-click the camera and choose Properties > Driver tab > Update driver.
- 2.Select Browse my computer for drivers > Let me pick from a list of available drivers.
- 3.Choose USB Video Device and let Windows install it.
This generic class driver frequently restores a webcam that Windows otherwise reports as having no camera attached.
Stop a USB Webcam From Dropping Out
If your USB webcam keeps disconnecting on its own, two things help: reinstalling the USB controllers and stopping Windows from powering the port down to save energy.
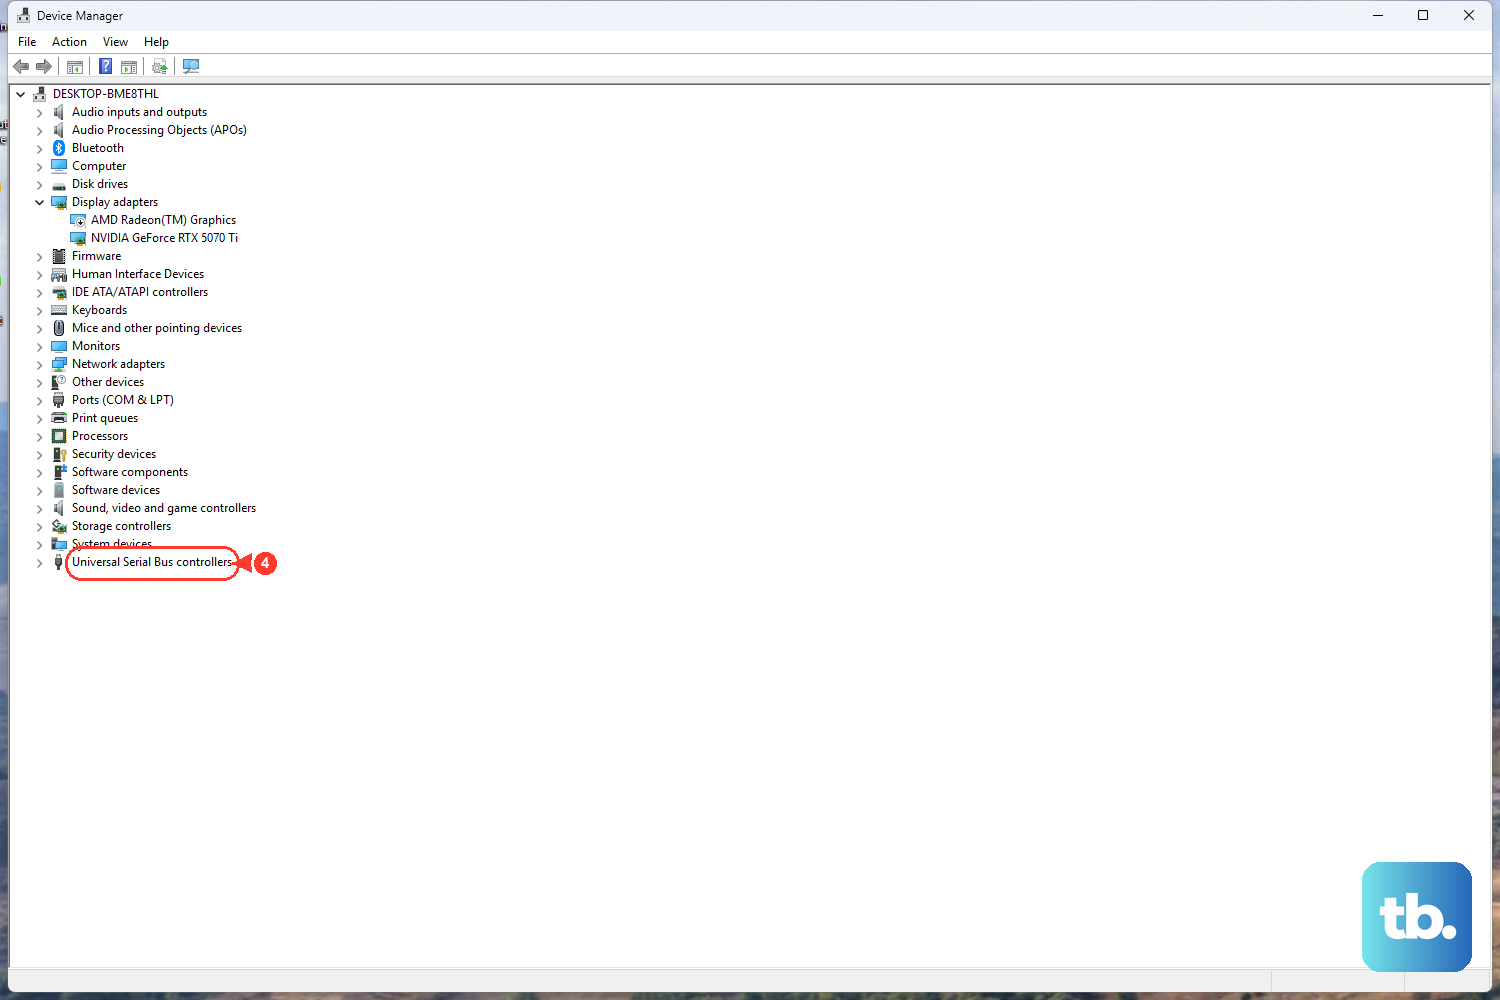
First, in Device Manager expand Universal Serial Bus controllers, right-click each one and select Uninstall, then restart so Windows reinstalls them. Next, prevent the port from sleeping: go to Start, type power plan, then Choose a power plan > Change Plan Settings > Change advanced power settings > USB Settings > USB selective suspend settings, and set Plugged in (and Battery on laptops) to Disabled, then Apply > OK.
One caveat: this power-setting path is documented on an archived Microsoft page scoped to Windows 10 version 1709 and Windows 7 SP1. The path still exists in current Windows, but it is not separately documented for Windows 11, so treat it as a known fix rather than an officially supported Windows 11 step.
Frequently Asked Questions
Why does my camera show an error instead of an image?
The error code points to the cause. 0xA00F4243 means another app is already using the camera; 0xA00F4246 means security software has locked it; and 0xA00F4244 means Windows cannot detect a camera at all. Match the code to the matching fix above.
Why can one app use my webcam but another cannot?
Only one app can use the camera at a time, so a program running in the background may be holding it. Beyond that, both the device-level Camera access toggle and the per-app toggle in your privacy settings must be on for a given app to see the camera.
My webcam was working until a Windows update. What should I do?
That usually means a driver changed. Try Roll Back Driver in Device Manager to return to the previous version, and also check Windows Update > Advanced options > Optional updates for a newer camera driver.
How do I fix a USB webcam that keeps disconnecting?
Reinstall the USB controllers in Device Manager, then disable USB selective suspend settings in your power plan's advanced settings so Windows stops powering the port down. Plugging the camera directly into the PC instead of a hub also helps.
Is it safe to disable my antivirus to test the camera?
It is fine for a short test, which is why you should choose a brief duration if your software offers one. Always re-enable your protection right afterward, and if the camera worked while it was off, adjust that software's camera permissions rather than leaving protection disabled.


