Seeing "No Service" on your iPhone means it cannot reach your carrier's cellular network, so calls, texts, and mobile data all stop working. The cause is usually a small software hiccup, an outdated carrier setting, or a SIM that has lost its connection, and most of the time you can fix it yourself in a few minutes.
This guide walks through 15 fixes in order, from the fastest taps to the more involved steps. Work down the list and test your signal after each one. The steps cover physical SIM and eSIM iPhones, including the eSIM-only models sold in the US, and reflect the current Settings layout in iOS 18 and iOS 26.
Quick Checks Before You Start
Glance at the status bar first. If you see "No Service" or "Searching" everywhere you go, the problem is likely your iPhone or carrier connection. If you only lose signal in one building or area, it is probably weak coverage rather than a fault.
Also confirm your bill is paid and your account is active. A past-due balance or a suspended line will show "No Service" no matter how many times you reset things. When you are ready, start with fix one.

1 Toggle Airplane Mode
This is the fastest fix and it works surprisingly often. Open Control Center or go to Settings > Airplane Mode and turn it on. Wait at least 15 seconds so the radios fully power down.
Turn Airplane Mode back off and watch the status bar. Your iPhone will search for the network and reconnect, which clears many temporary signal drops.
2 Restart Your iPhone
A restart clears the small software glitches that block cellular reconnection. Press and hold the side button and either volume button until the power-off slider appears, then drag it to turn the iPhone off.
Wait about 30 seconds, then hold the side button again until the Apple logo appears. Let it finish booting and give it a moment to find the network before you judge the result.
3 Check for a Carrier Outage
Sometimes the problem is your carrier, not your iPhone. Connect to Wi-Fi and check your carrier's app or status page, or ask someone nearby on the same carrier whether they have signal too.
If there is a known outage in your area, no amount of troubleshooting will help. Wait it out and your service will return on its own once the network is restored.
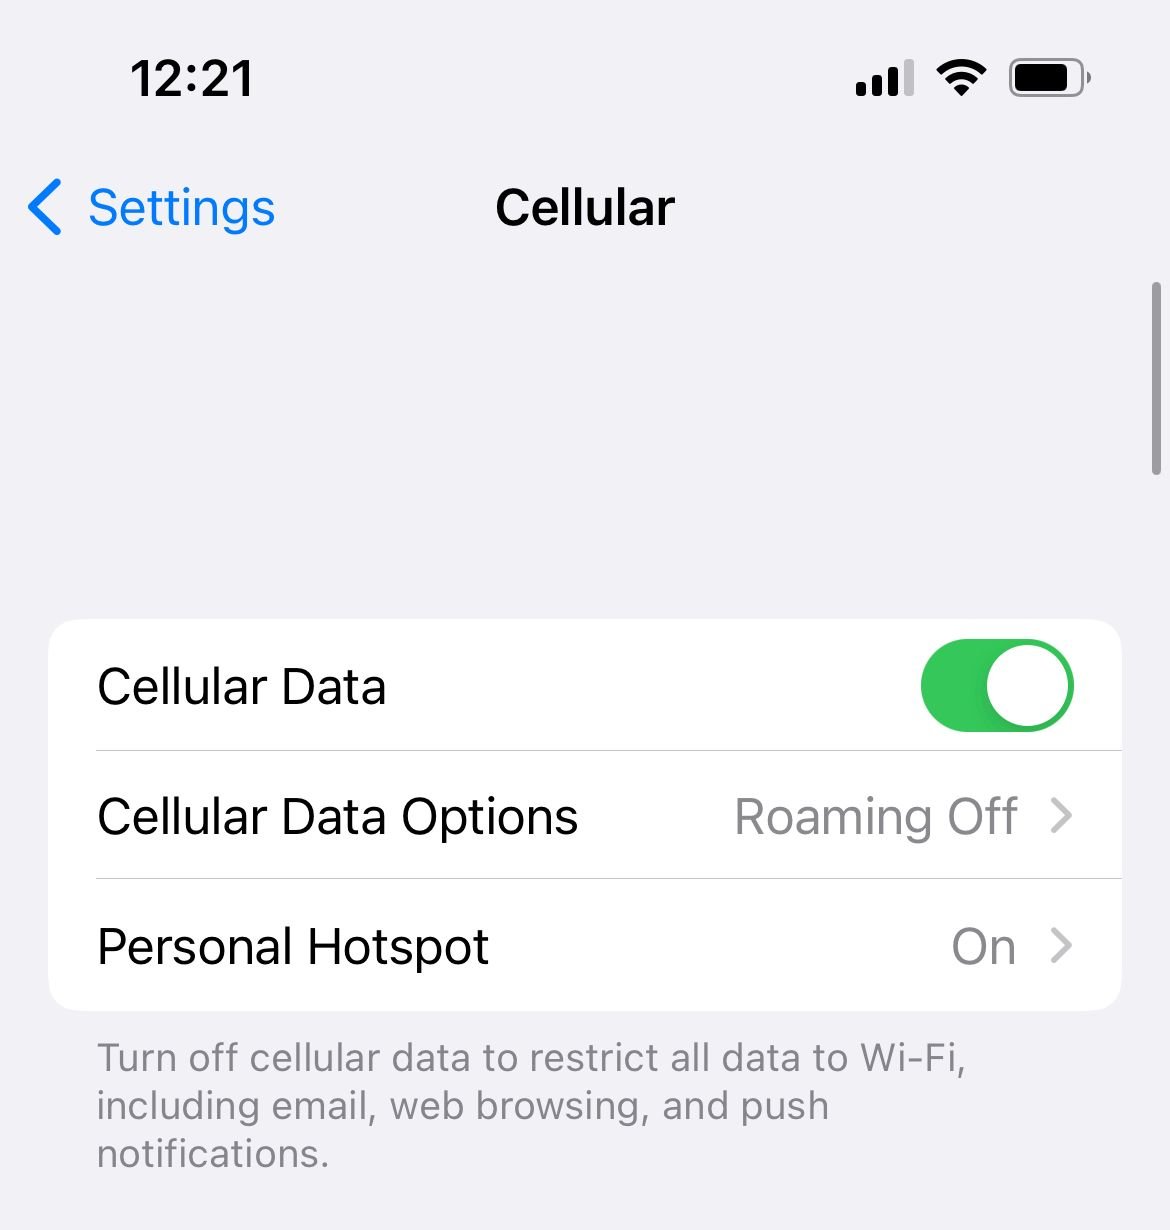
4 Make Sure Cellular Data Is On
If the line itself is switched off, your iPhone will show "No Service" by design. Go to Settings > Cellular and confirm Cellular Data is enabled.
If you use Dual SIM, tap the cellular line you rely on and check that it is turned on. If the line is off, tap Turn On This Line and test your signal again.
5 Update Carrier Settings
Carrier settings are small files that tell your iPhone how to talk to your network, and an outdated version can break service. Connect to Wi-Fi, then go to Settings > General > About and wait a few seconds on that screen.
If an update is available, a prompt will appear asking you to update your carrier settings. Tap it and let the install finish, then check whether your bars come back.
6 Update to the Latest iOS
Apple regularly ships connectivity bug fixes inside iOS updates, including patches for cellular and eSIM problems that appear after a major release. Go to Settings > General > Software Update and install anything available.
Keep the iPhone on Wi-Fi and charged while it updates. If your "No Service" issue started right after an iOS update, a follow-up point release very often resolves it.
7 Enable LTE
If your iPhone fails to register on a particular network type, switching the data mode can help it reconnect. Go to Settings > Cellular > Cellular Data Options, then open the Voice & Data screen.
Make sure 5G or LTE is selected, and on older devices turn on Enable LTE. Toggling between modes nudges the iPhone to re-register with the tower.
8 Reseat Your Physical SIM Card
If your iPhone uses a physical nano-SIM, a loose or dusty card can drop service. Use a SIM eject tool or a straightened paper clip to open the tray, then remove the SIM.
Inspect the card and tray for dust, debris, or visible damage, wipe them gently with a soft dry cloth, then seat the SIM firmly and close the tray fully. Reseating forces the iPhone to reread the card and re-authenticate with the carrier.
Read more - How to Fix iPhone SIM Failure No SIM or Invalid SIM Messages
9 Fix an eSIM That Lost Service
US iPhones from the iPhone 14 onward, including the iPhone 17 lineup, are eSIM-only and have no SIM tray, so the SIM lives entirely in software. If your eSIM shows "No Service," go to Settings > Cellular, tap the affected line, and confirm it is turned on.
Restart the iPhone and install any carrier settings update first. Avoid erasing an eSIM as a troubleshooting step unless your carrier tells you to, because once it is removed you have to contact the carrier for a new one before you can set it up again.
If your carrier confirms the eSIM is active but service still fails, ask them to reissue or resend the eSIM profile, then add it back and test. This often clears a stale profile that was blocking the connection.
10 Set Network Selection to Automatic
If your iPhone is trying to connect to the wrong network, forcing it back to automatic can restore service. Go to Settings > Cellular > Network Selection.
Turn on Automatic if it is off. If it is already on, switch it off, choose your carrier manually from the list, then switch Automatic back on so the iPhone picks the strongest available network.
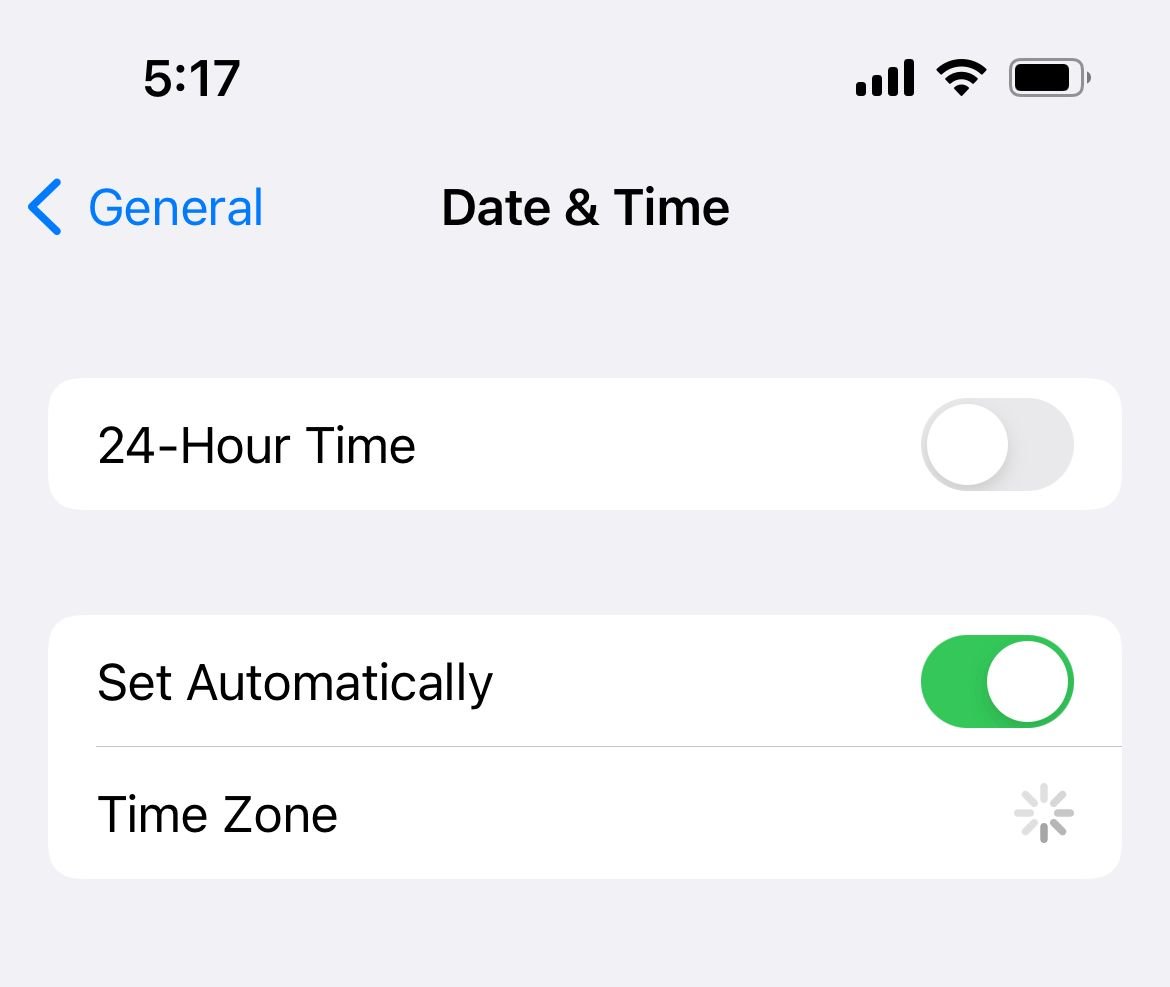
11 Check Date and Time Settings
An incorrect clock can break the secure handshake your iPhone uses to register on the network. Go to Settings > General > Date & Time and turn on Set Automatically.
This lets the iPhone pull the correct time from the network. If it was wrong, fixing it can clear stubborn registration errors that show up as "No Service."
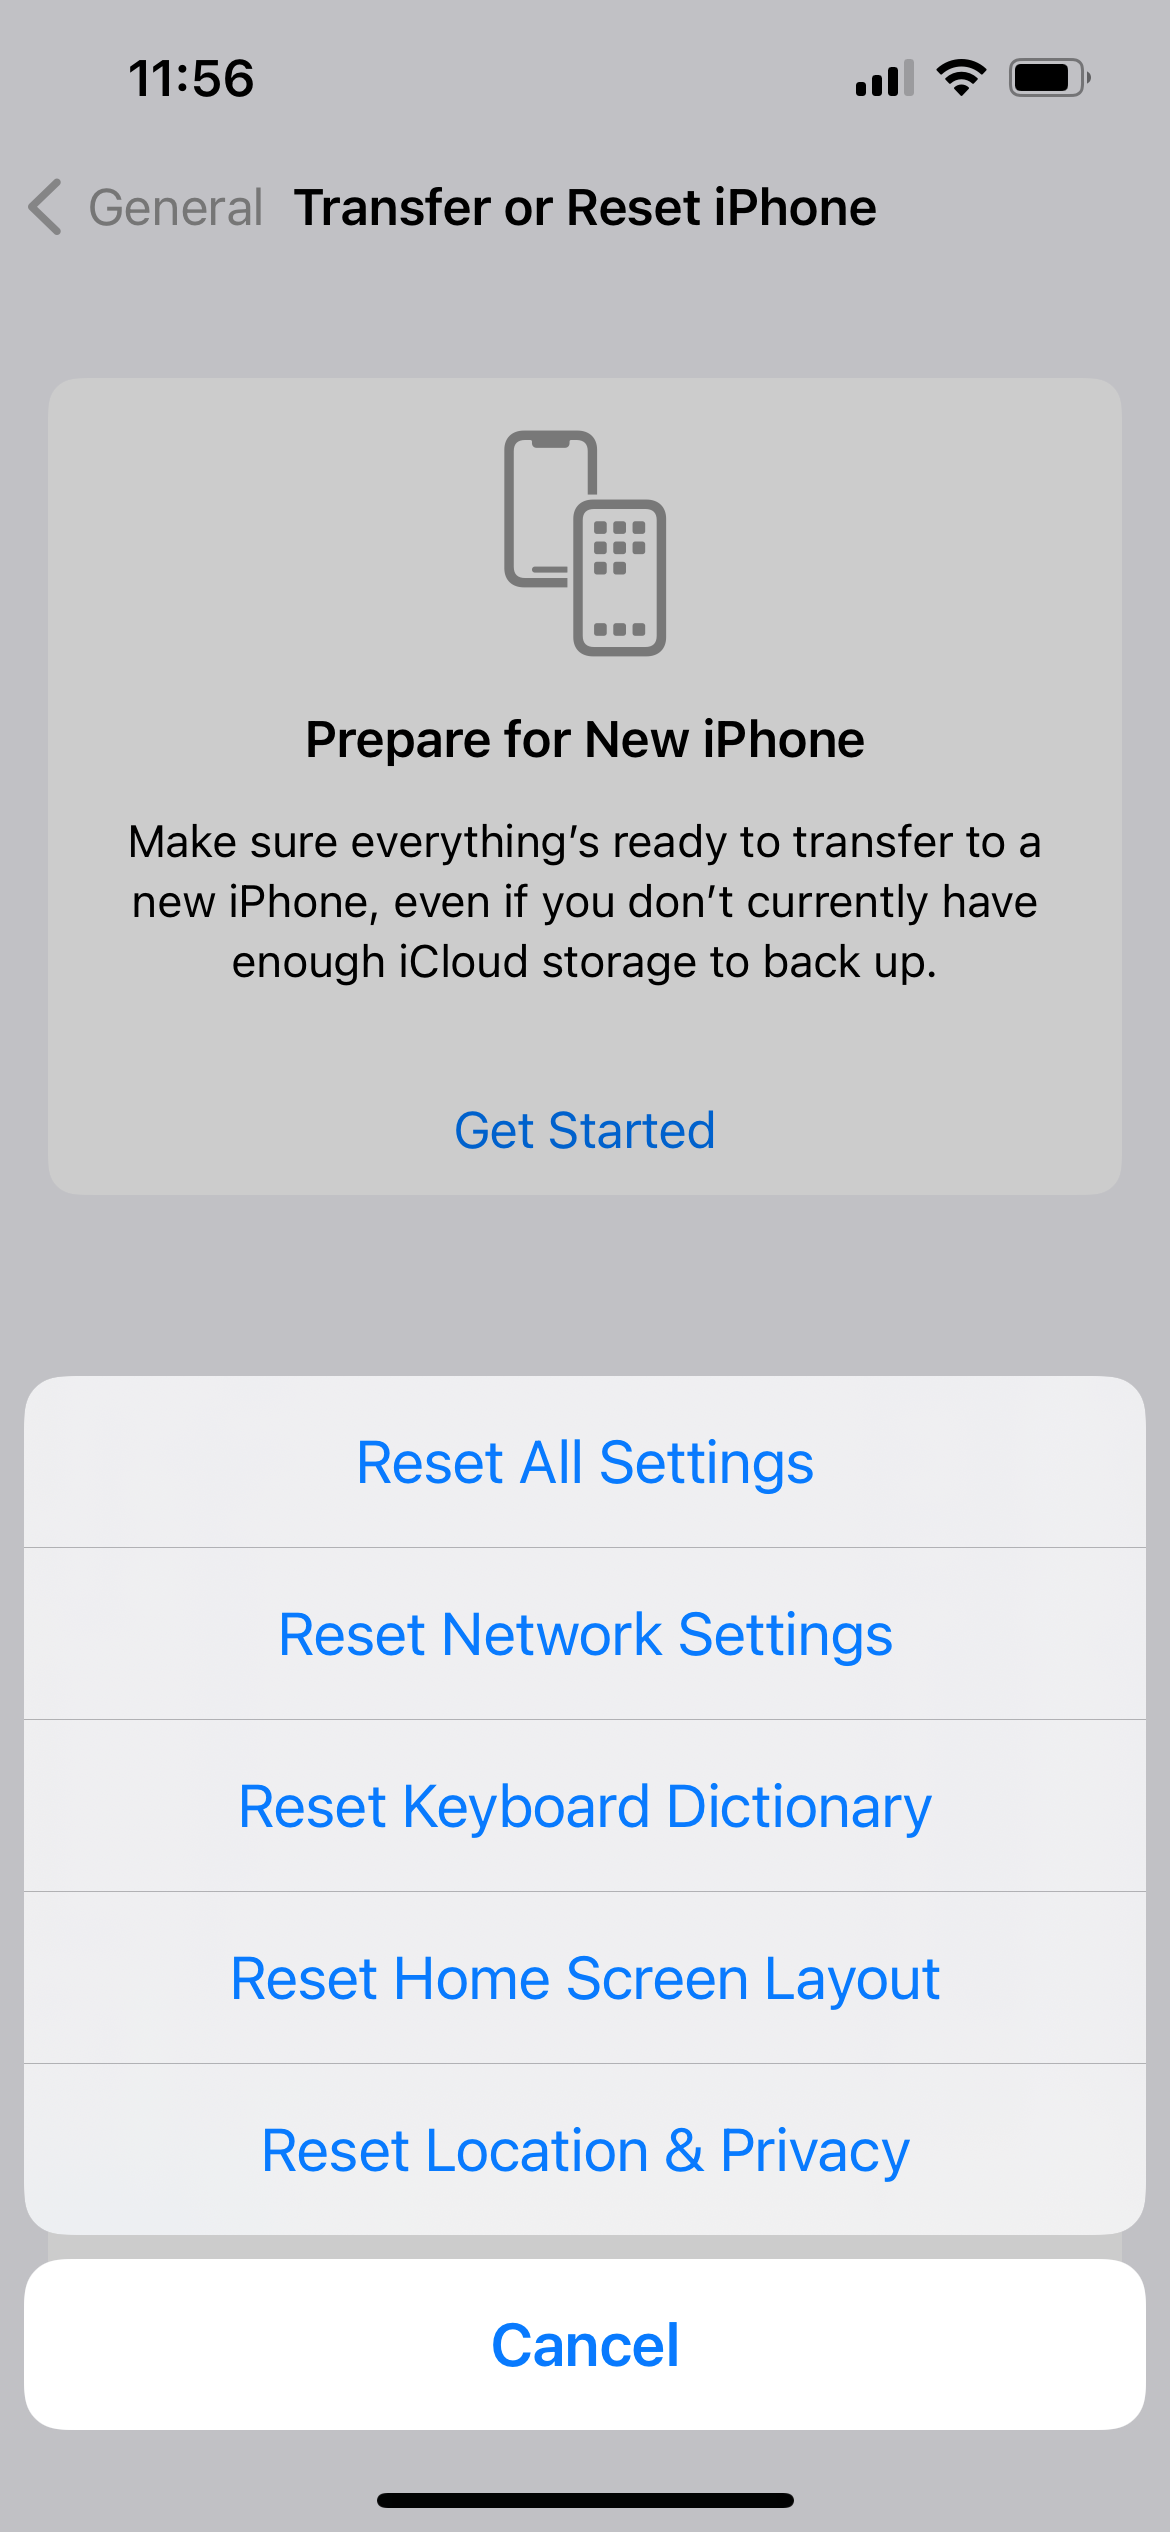
12 Reset Network Settings
This wipes your network configurations and rebuilds them, without touching your photos, apps, or messages. Go to Settings > General > Transfer or Reset iPhone > Reset, then tap Reset Network Settings and enter your passcode.
Your iPhone will restart, and you will need to reconnect to Wi-Fi networks afterward because saved Wi-Fi passwords are cleared. This is one of the most reliable software fixes for persistent "No Service."
13 Reset All Settings
If a network reset alone did not work, resetting all settings clears every system preference back to default while keeping your personal data. Go to Settings > General > Transfer or Reset iPhone > Reset and tap Reset All Settings.
Enter your passcode to confirm. You will need to redo preferences like wallpaper and notification settings, but this can remove a bad configuration that a network reset missed.
14 Contact Your Carrier
If software fixes have not worked, your carrier can check things only they control. Call or message support and ask them to confirm your account is active, your line is provisioned, and your device is not blocked.
They can also verify your IMEI is not blacklisted, reissue a physical SIM or eSIM, and confirm coverage at your location. Many "No Service" cases that survive every on-device step turn out to be an account or provisioning issue on the carrier side.
15 Check for Hardware or Water Damage
In rarer cases, "No Service" points to a physical fault rather than software. A drop can damage the cellular antenna or modem, and liquid exposure can corrode the internal components that handle signal.
If your signal failed right after the iPhone was dropped or got wet, and no software step helps, stop resetting and back up your data. Contact Apple Support or visit an authorized service provider for a hardware diagnosis.
No Service on iPhone Causes at a Glance
Use this quick map to jump to the most likely fix for your situation.
| What you see | Likely cause | Where to start |
|---|---|---|
| No Service everywhere, full bill paid | Software glitch or stale carrier settings | Fixes 1, 5, 12 |
| No Service after an iOS update | Update bug or eSIM hiccup | Fixes 6, 9, 12 |
| No Service after dropping or wetting the phone | Antenna, modem, or liquid damage | Fix 15 |
| No SIM or Invalid SIM on a physical-SIM iPhone | Loose, dirty, or damaged SIM | Fix 8 |
| One Dual SIM line shows No Service during a call | Normal behavior on the inactive line | No fix needed |
| No Service only in one area | Weak coverage or local outage | Fixes 3, 10 |
Frequently Asked Questions
Why does my iPhone say No Service but still show bars sometimes?
Flickering between bars and "No Service" usually means a weak or unstable connection to the tower, often from poor coverage or a network registration error. Toggle Airplane Mode, set Network Selection to Automatic, and update your carrier settings to help it lock onto a stable signal.
Does No Service mean my SIM is dead?
Not necessarily. "No Service" most often comes from software or carrier issues rather than a failed SIM. On a physical-SIM iPhone, reseat the card and test it, and on an eSIM device, confirm the line is on and ask your carrier whether the profile is still active before assuming the SIM is the problem.
How do I fix No Service on an eSIM iPhone?
Confirm the line is turned on under Settings > Cellular, restart the iPhone, and install any carrier settings update. If service still fails, ask your carrier to reissue the eSIM rather than erasing it yourself, since removing an eSIM means you need a new one from the carrier to set it up again.
Why did my iPhone lose service after an iOS update?
Major iOS releases can occasionally introduce cellular or eSIM bugs that show up as "No Service." Reset network settings, then check Settings > General > Software Update for a follow-up point release, which Apple often ships specifically to fix update-related connection problems.
Why does one line show No Service on my Dual SIM iPhone?
When one line is active on a call, the other line normally shows "No Service" until the call ends. This is expected behavior, not a fault, so no fix is needed unless both lines lose service.
What does it mean if I see SOS instead of No Service?
"SOS" or "SOS only" means your iPhone has lost your carrier's network but can still place emergency calls through another available network. The same fixes apply, so work through Airplane Mode, carrier settings, and a network reset to restore your normal service.
First published October 14, 2025. Last updated June 4, 2026.