Seeing a "No SIM Card" error on your brand new iPhone 17 Air is enough to kill your whole day. You can't make calls, send texts, or hop on cellular data. It's worth remembering that this is almost always a fixable software or settings hiccup, not a dead phone.
Start with a Force Restart
The first thing to try is a force restart. On the iPhone 17 Air, quickly press and release the Volume Up button, then quickly press and release the Volume Down button, then press and hold the Side button until you see the Apple logo. This clears out temporary system glitches without erasing anything.
I usually give this a solid ten seconds before letting go. If the Apple logo pops up, you're good. Let it boot up completely and see if the SIM error disappears.
Toggle Airplane Mode
Swipe into Control Center and tap the Airplane Mode icon. Leave it on for about ten seconds, then tap it again to turn it off. This forces your phone to re-scan for available networks and can snap it out of a "No SIM" state.
It's such a simple trick that people skip it, but I've seen it work more times than you'd expect. The whole process takes maybe twenty seconds.
Inspect the SIM Card Slot
If you're using a physical SIM card, power down the phone completely first. Use the SIM eject tool (or a small paperclip) to pop out the tray.
Take a close look at the gold contacts on the SIM card. A quick wipe with a dry microfiber cloth can fix things if there's any dirt or smudging. Also check that the SIM tray itself isn't bent or damaged before sliding it back in.
Check Your Cellular Settings
Open Settings > Cellular. If you have a physical SIM, it should show up at the top of the screen. If you're on an eSIM, confirm that your plan is turned on and selected. It's surprisingly easy to accidentally toggle a line off without noticing.
You can also try tapping Add eSIM and then Transfer from Nearby iPhone if you recently switched phones. Sometimes the carrier profile needs a nudge to fully activate.
Update Your Carrier Settings
Carriers push out tiny configuration updates that fix connectivity issues. Make sure your phone is connected to Wi-Fi, then go to Settings > General > About. If an update is available, a pop-up will appear asking you to install it. Just tap Update.
This one is totally silent. You won't know an update is waiting until you visit that screen, so it's a good habit to check whenever you see network oddities.
Keep iOS 26 Updated
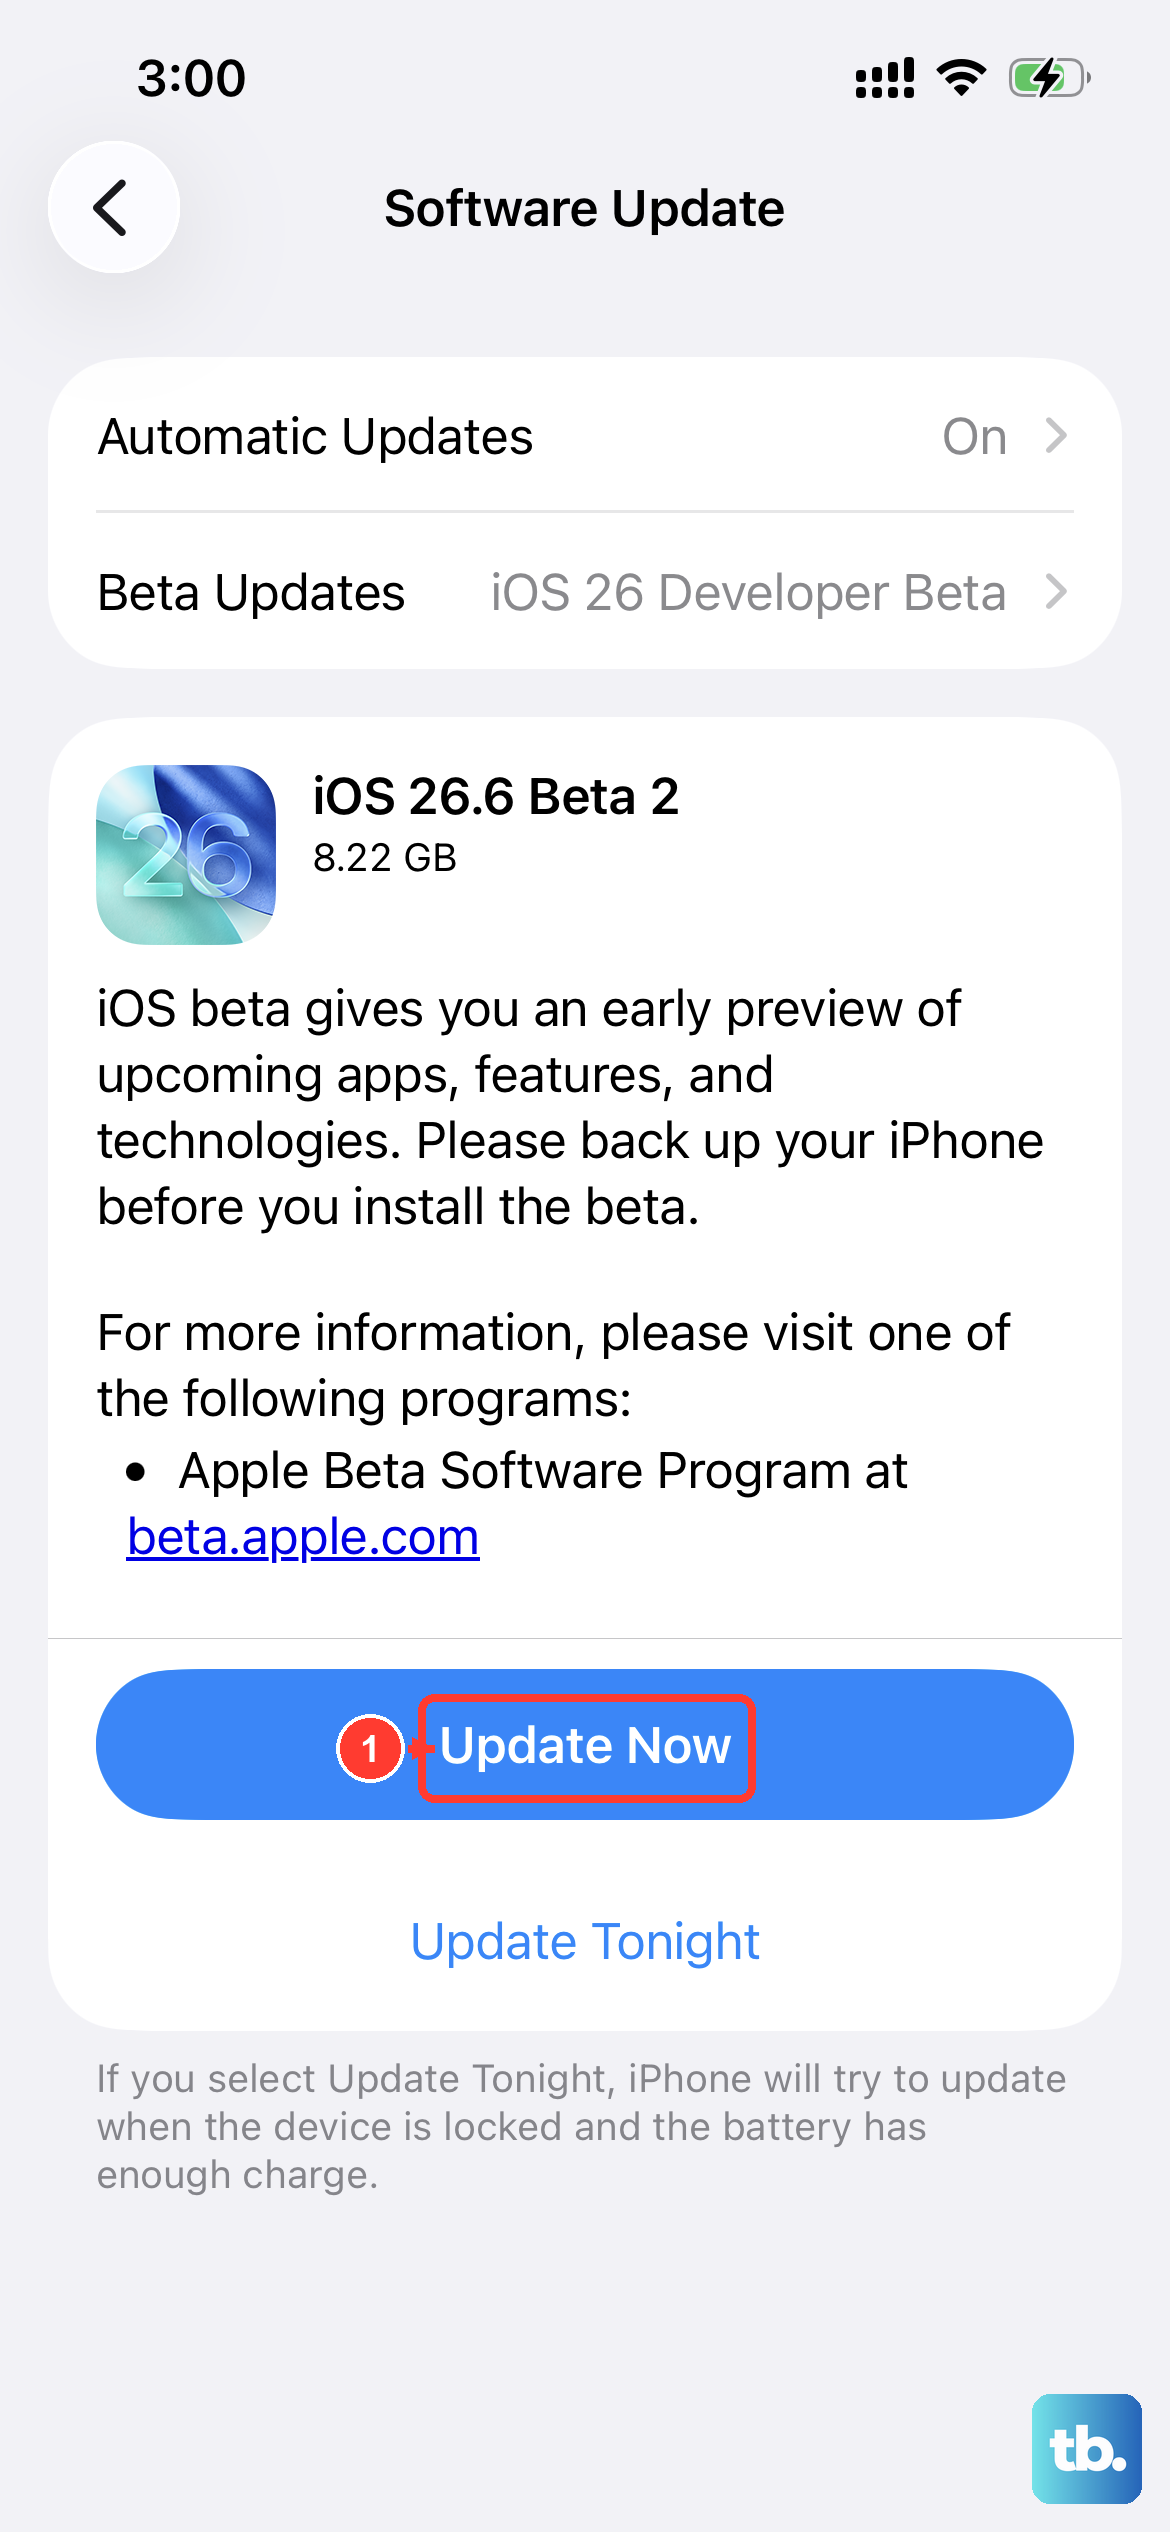
Software glitches can definitely cause SIM detection problems. Head to Settings > General > Software Update and install anything that's available.
Apple frequently pushes bug fixes that address cellular connectivity and SIM card detection. I'd make sure you're running at least iOS 26.4.2, as earlier versions had a reported firmware issue that could cause intermittent problems.
Manually Select a Network
Sometimes automatic network selection gets confused. Go to Settings > Cellular > Network Selection and toggle off Automatic. Wait for your iPhone to search for available networks, then tap your carrier's name from the list.
If it connects successfully, you can leave it on manual or switch Automatic back on. Both options work fine, but manual selection forces a fresh handshake with the tower.
Reset Your Network Settings

This is a deeper clean that wipes saved Wi-Fi passwords and Bluetooth connections. It doesn't touch your photos, apps, or any personal data. Go to Settings > General > Transfer or Reset iPhone > Reset > Reset Network Settings.
You'll have to rejoin Wi-Fi networks afterward, but it often clears stubborn SIM issues. I'd put this somewhere in the middle of your troubleshooting list, not right at the start.
Consider Switching to eSIM
If your physical SIM card is old or damaged, converting to an eSIM is a solid long-term fix. The iPhone 17 Air supports dual eSIMs, so you won't lose any functionality. You can usually do this right on the phone by going to Settings > Cellular > Add eSIM and following the prompts.
Your carrier can also provide a QR code or activation code. Many users have resolved persistent "No SIM" errors this way, especially if the physical card was on its last legs.
Reset All Settings
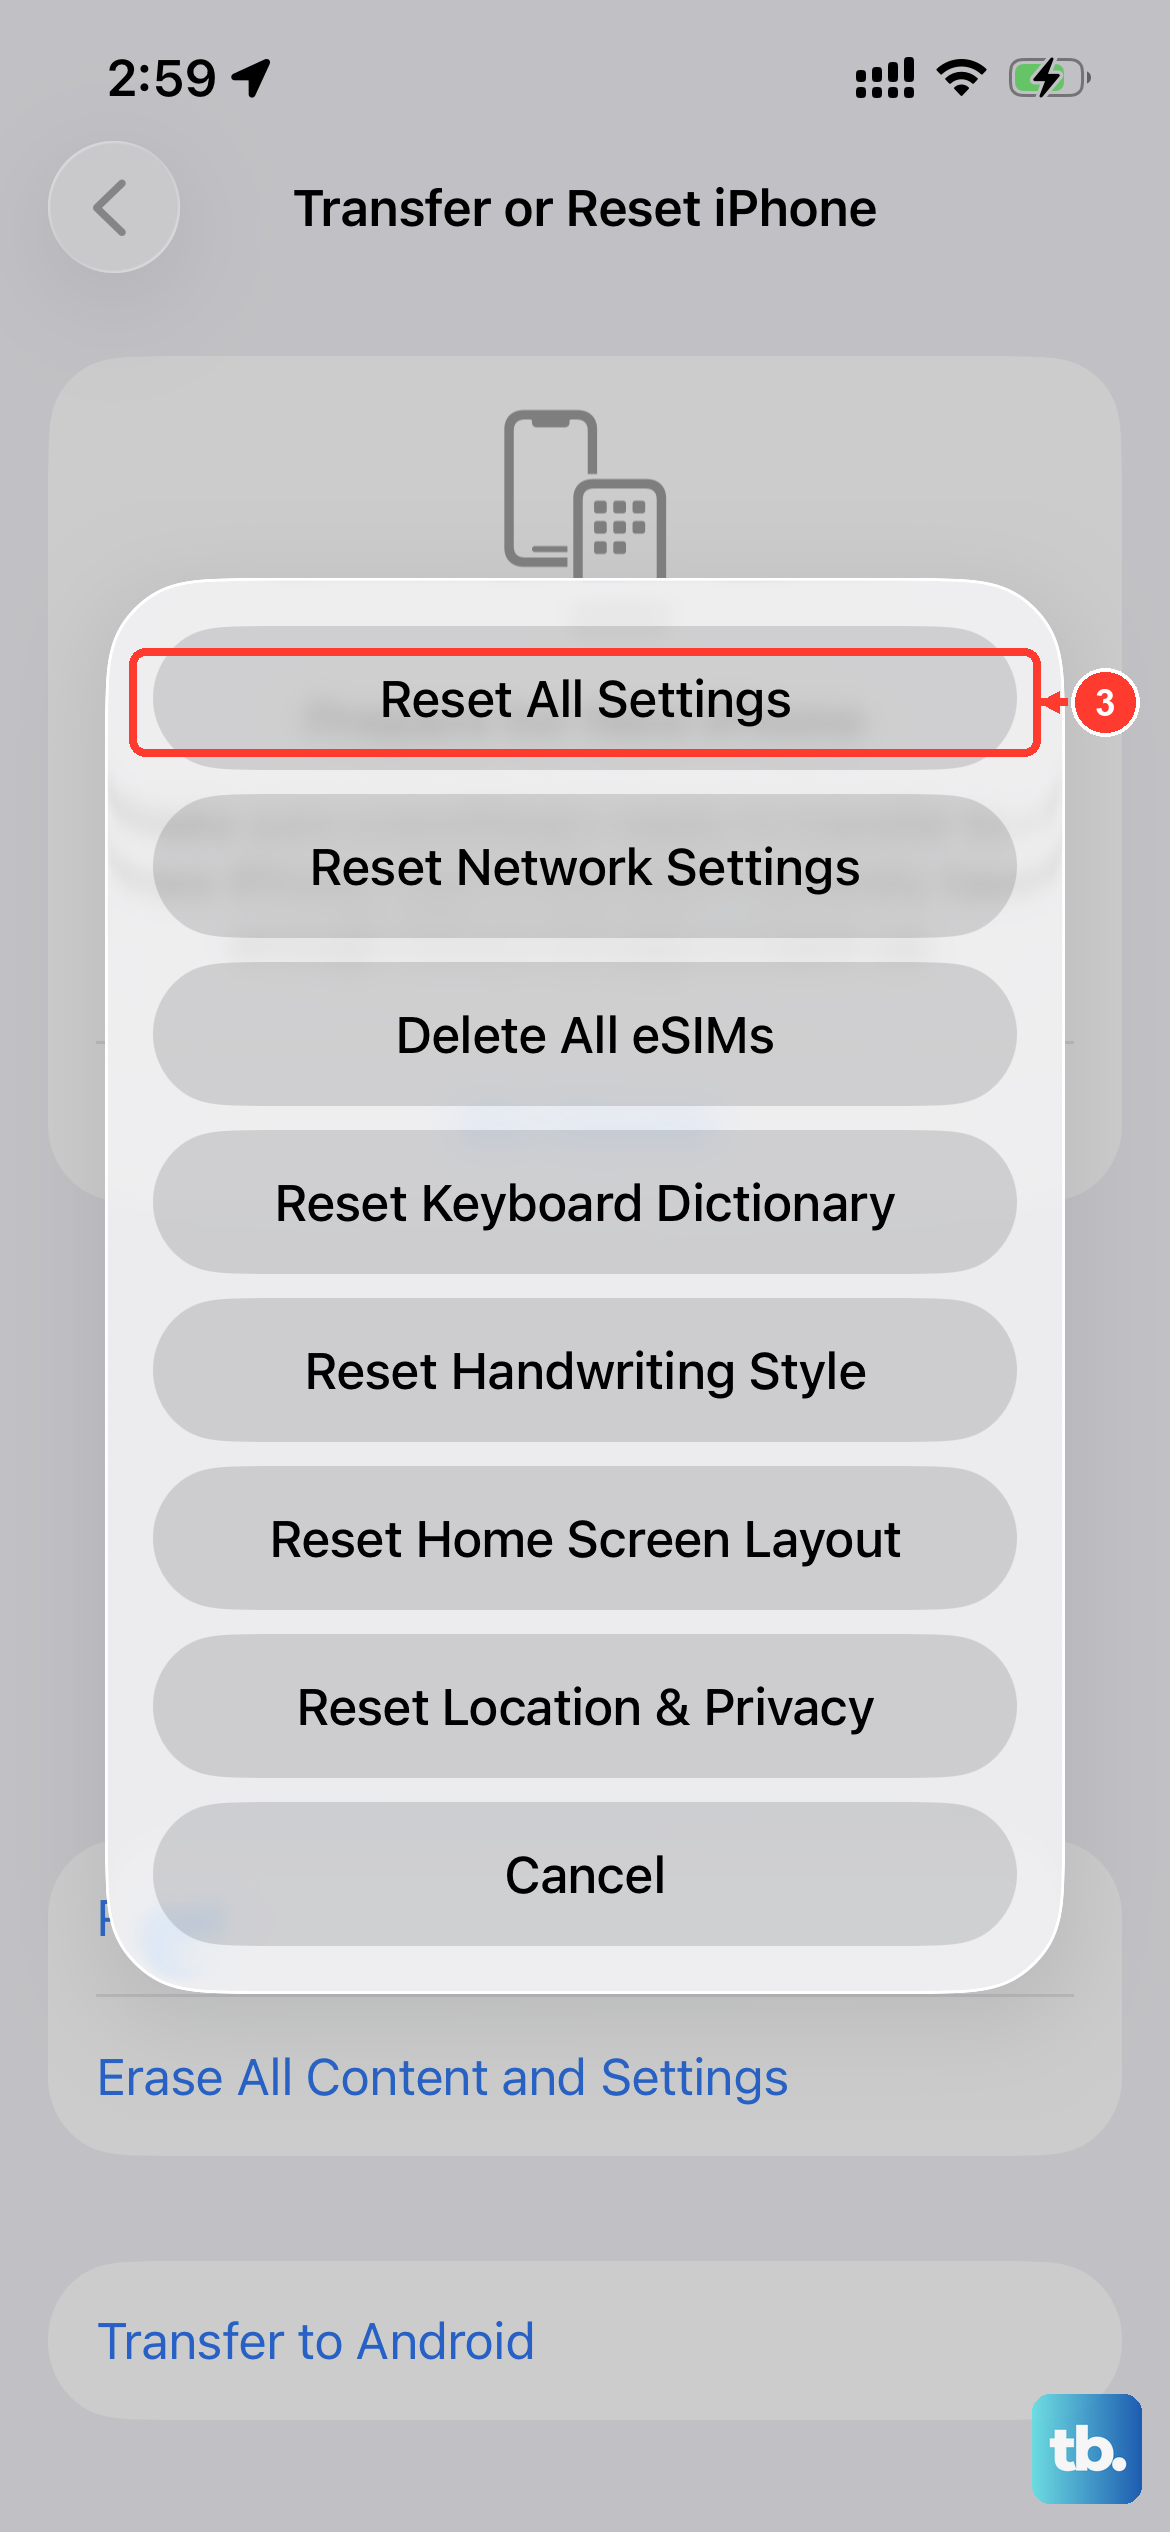
If you're still seeing the error, this is the last thing to try before a full erasure. It resets all your settings back to defaults but keeps your data intact. Go to Settings > General > Transfer or Reset iPhone > Reset > Reset All Settings.
You will have to set up your wallpaper, notifications, and privacy preferences again. But if a configuration file got corrupted somewhere, this usually flushes it out without losing a single photo or contact.


