Seeing "SIM Not Provisioned" on your iPhone 13 is a real roadblock. It means your phone can't connect to your carrier's network, so you're stuck without calls, texts, or mobile data. The good news is this is almost always a simple account or connection hiccup you can fix yourself.
I'd start by checking your account status with your carrier. If you just got a new SIM or eSIM, it might not be fully activated yet. For prepaid plans, a low balance can also trigger this message. A quick call or check of your carrier's app can clear that up in minutes.
Restart Your iPhone 13
A simple restart can clear out temporary software glitches that mess with the cellular modem. Just power it down completely and turn it back on. If the phone is unresponsive, you can force restart it.
To force restart your iPhone 13, quickly press and release the Volume Up button, then quickly press and release the Volume Down button. Finally, press and hold the Side button until you see the Apple logo appear on the screen.
Toggle Airplane Mode
This is a quick trick to force your phone to drop and reacquire the cellular network signal. Swipe down from the top-right corner to open Control Center and tap the airplane icon to turn it on.
Wait about 15 seconds, then tap the icon again to turn Airplane Mode off. You should see the signal bars in the top corner disappear and then hopefully reappear with your carrier's name.
Reinsert the Physical SIM Card
If you're using a physical nano-SIM, it might not be seated perfectly in the tray. You'll need the SIM ejector tool that came with your iPhone 13, or a small paperclip.
Turn off your phone first. Insert the tool into the small hole on the left side of the frame to pop out the tray. Gently remove the SIM card, check for any dust or debris, and place it back in firmly. Slide the tray back in and power your iPhone on.
Check for a Carrier Settings Update
Apple and carriers periodically release small updates that help your iPhone 13 communicate with their network. These are different from iOS updates.
Go to Settings > General > About. If an update is available, a prompt will appear on this screen. Just follow the on-screen instructions to install it. This process only takes a moment and doesn't require a restart.
Reset Your Network Settings
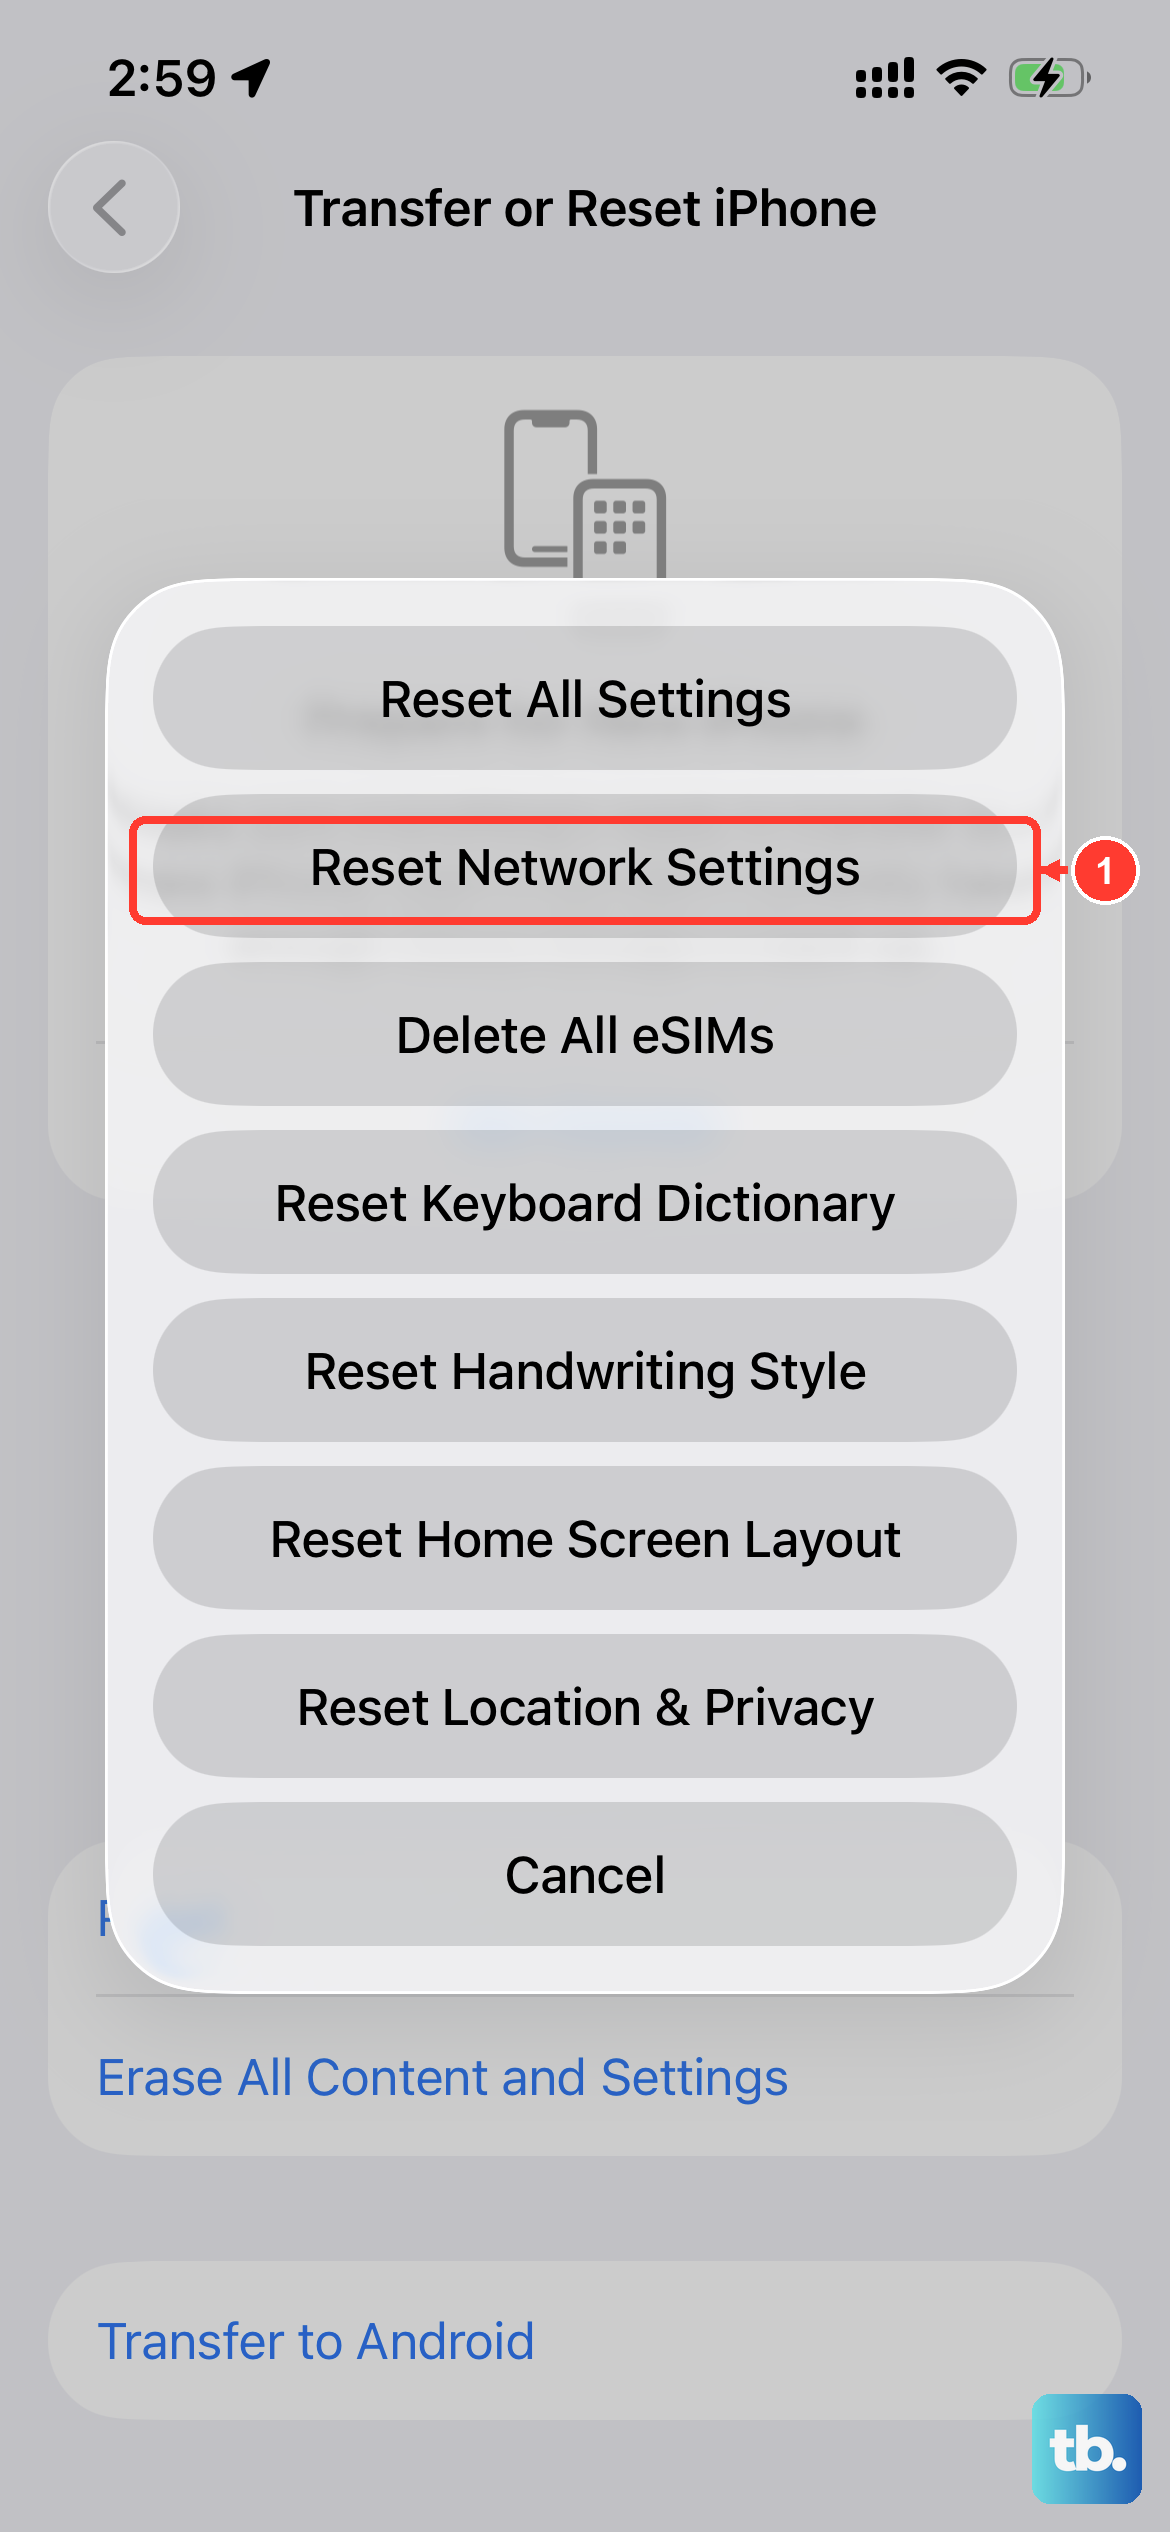
This will erase all saved Wi-Fi passwords, Bluetooth pairings, and cellular network preferences, forcing your iPhone 13 to start fresh. It's a very effective fix for persistent connection problems.
Before you proceed, make sure you know your Wi-Fi passwords. Go to Settings > General > Transfer or Reset iPhone. Tap Reset and then choose Reset Network Settings. Enter your passcode if asked and confirm.
Manually Select Your Network
Sometimes your phone gets stuck trying to connect to a weak or incorrect tower. You can tell it exactly which carrier to use. Go to Settings > Cellular.
Tap Network Selection and turn off the "Automatic" switch. Your iPhone 13 will search for available networks. After a moment, a list will appear. Select your carrier's name from the list.
Update iOS to the Latest Version
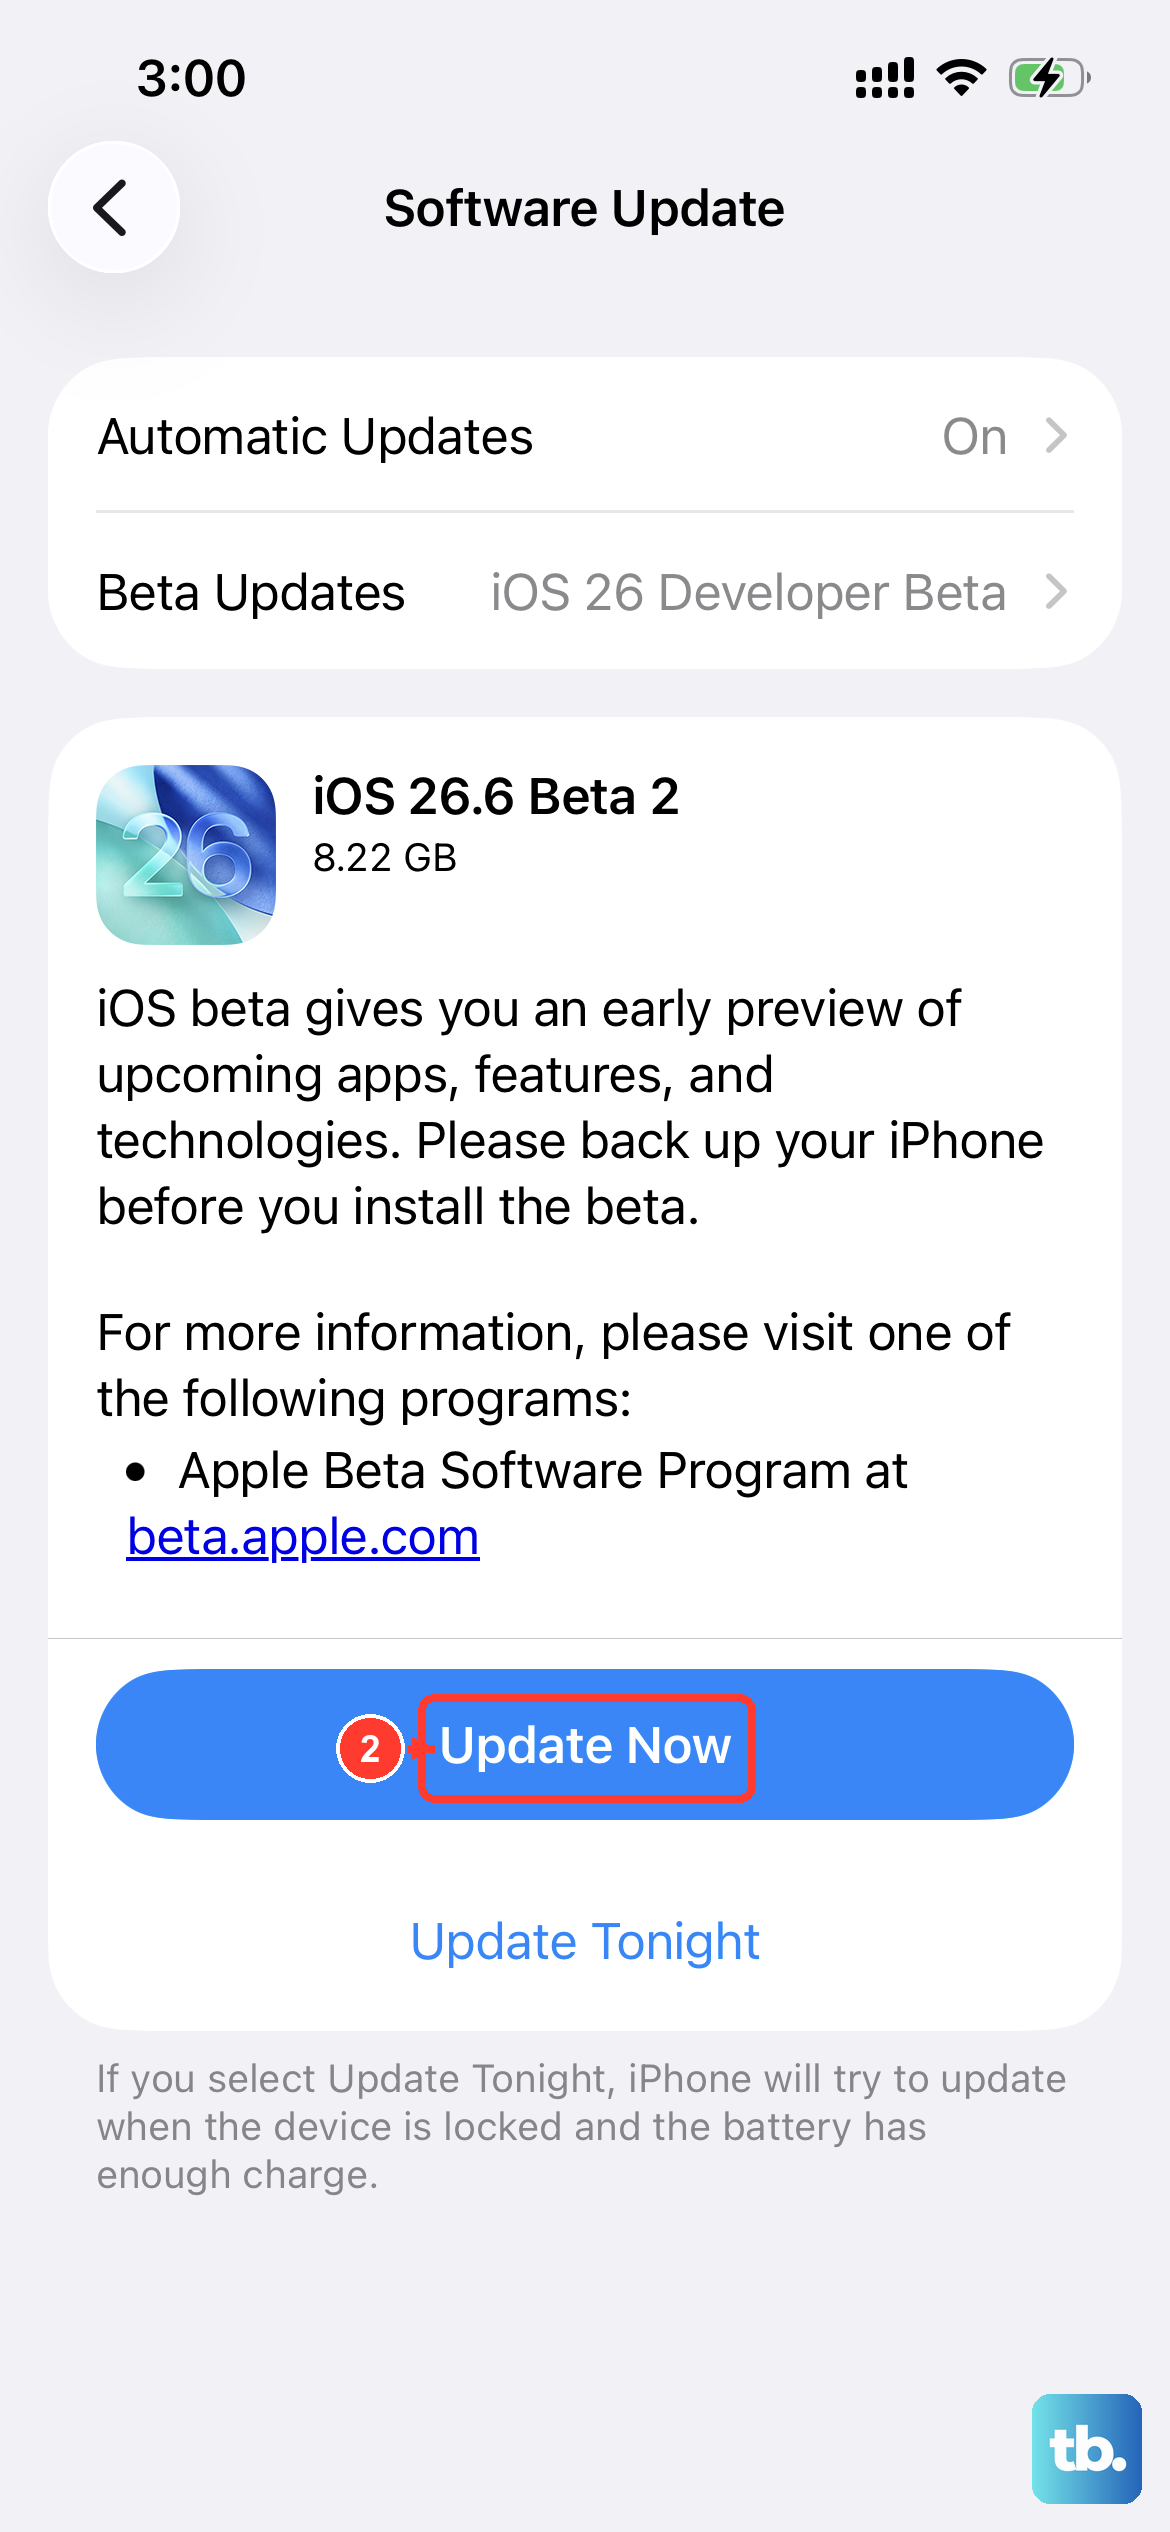
Software bugs in iOS can sometimes cause cellular issues. Making sure you're on the latest available version of iOS ensures you have all the current fixes. Connect to Wi-Fi first, as this update can be large.
Go to Settings > General > Software Update. If an update is available, tap "Download and Install." It's a good idea to plug your phone into power using a reliable 20W charger and original Lightning cable during this process.
Contact Your Mobile Carrier
If you've tried everything here, the issue is almost certainly on your carrier's end. They need to check that your line is active, provisioned correctly, and that there are no outages in your area.
They can also verify if your SIM card has failed and arrange to send you a new one, or help you transfer your service to an eSIM on your iPhone 13, which can be more reliable than a physical card.


