That "No SIM Card Installed" or "Invalid SIM" alert on your iPhone 13 is a real roadblock. It usually means a simple connection hiccup between the card and the phone's internal reader. The good news is you can almost always fix it yourself in a few minutes.
Start With a Force Restart
This is the single most effective first step for any weird iPhone 13 glitch, including SIM problems. It clears the phone's temporary memory without touching your data. Quickly press and release the Volume Up button, then the Volume Down button. Finally, press and hold the Side button until you see the Apple logo appear, then let go.
Check and Reinsert Your SIM Card
Power your iPhone 13 off completely. Find the SIM ejector tool that came in the box (a paperclip works in a pinch) and push it into the small hole on the left side of the phone. The tray should pop out.
Take out the SIM card and give it a close look. Check the gold contacts for any scratches, dirt, or corrosion. Gently wipe them with a clean, dry microfiber cloth. Blow any dust out of the SIM tray slot on the phone itself.
Make sure the SIM card is seated correctly in the tray, the angled corner should match the tray's shape. Carefully slide the tray back in until it clicks. Turn your phone back on and see if it recognizes the network.
Toggle Airplane Mode
This quickly resets all the phone's radio connections. Swipe down from the top-right corner to open Control Center and tap the airplane icon. Wait about ten seconds, then tap it again to turn Airplane Mode off. You can also do this in Settings > Airplane Mode.
Update Your iPhone's Software

A bug in iOS can sometimes interfere with the SIM card reader. Making sure you're on the latest version of iOS 18 is important. Go to Settings > General > Software Update. If an update is available, download and install it. I'd plug your phone into power using a reliable Lightning cable first, as this process can take a while.
Reset Your Network Settings
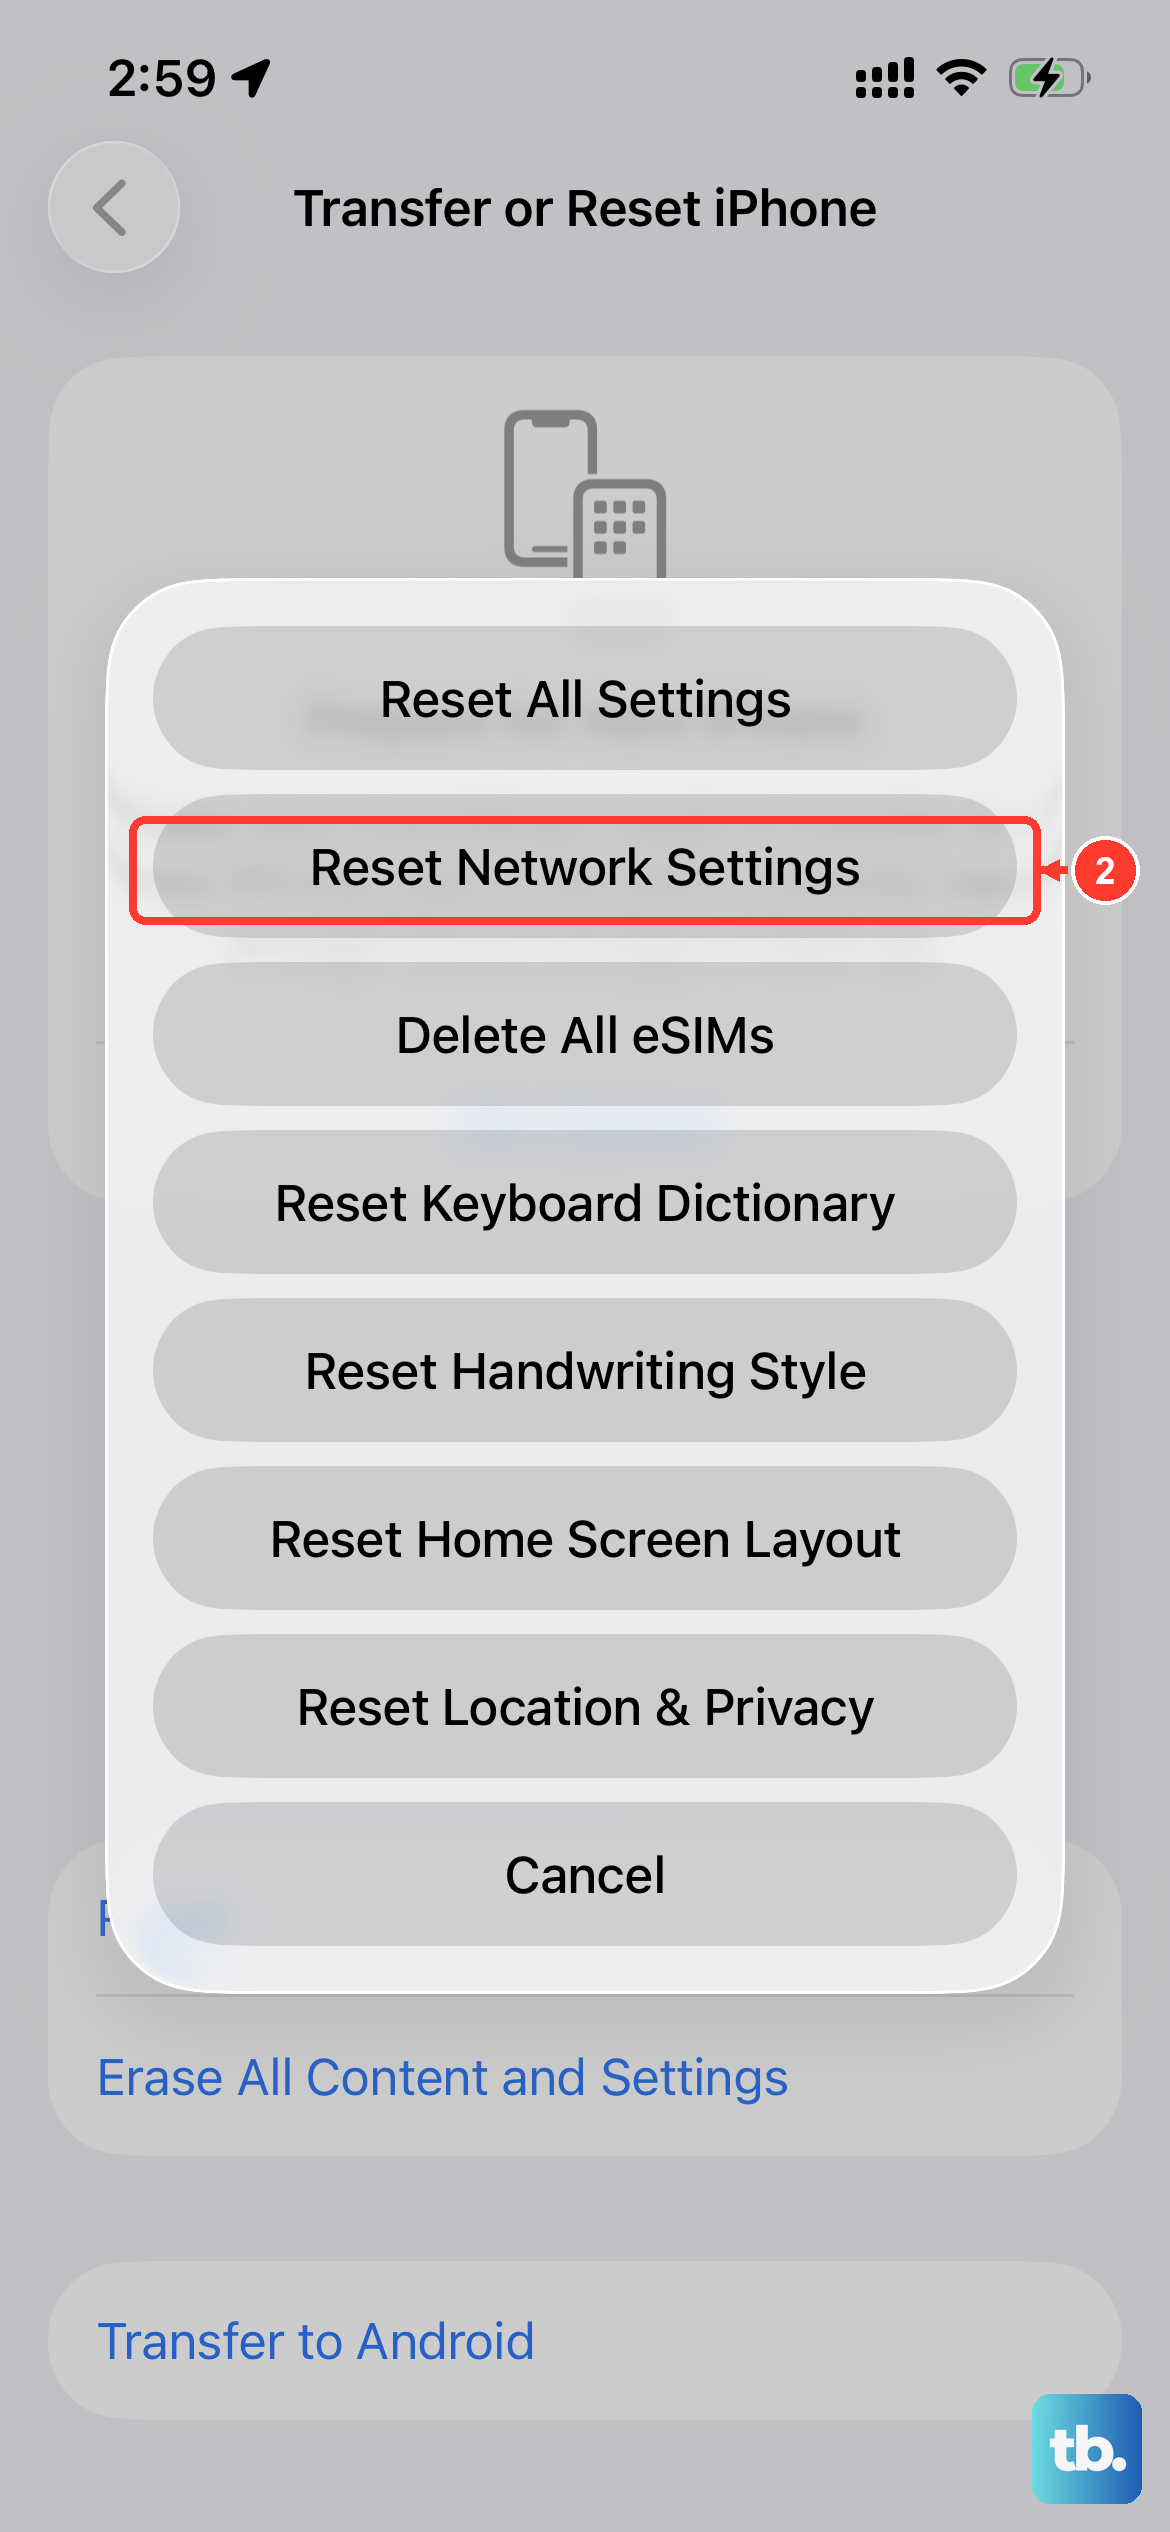
This clears out all saved Wi-Fi passwords, Bluetooth pairings, and cellular network configurations, which can resolve deeper connection issues. It won't delete your photos, messages, or apps. Go to Settings > General > Transfer or Reset iPhone. Tap Reset and then choose Reset Network Settings. You'll need to enter your passcode to confirm.
Check for a Carrier Settings Update
Your carrier occasionally sends small updates that help your iPhone 13 work better on their network. To check, make sure you have a Wi-Fi or cellular data connection, then go to Settings > General > About. If an update is available, a prompt will appear right on this screen.
Try Your SIM Card in Another Phone
This is the best way to figure out if the problem is with your SIM card or the iPhone itself. If you have access to another unlocked phone, power it off, insert your iPhone 13's SIM, and turn it on. If that phone also shows "No SIM," the card itself is likely faulty or deactivated.
In that case, you'll need to contact your wireless carrier. They can check the card's status on their end and send you a replacement if needed, which usually arrives quickly.
Consider Switching to eSIM
The iPhone 13 fully supports eSIM, a digital SIM that's built into the phone. If your physical SIM tray is damaged or you keep having issues, moving to an eSIM is a great permanent solution. Contact your carrier's support; they can often help you convert your physical line to an eSIM over the phone or via their app, eliminating the physical card altogether.
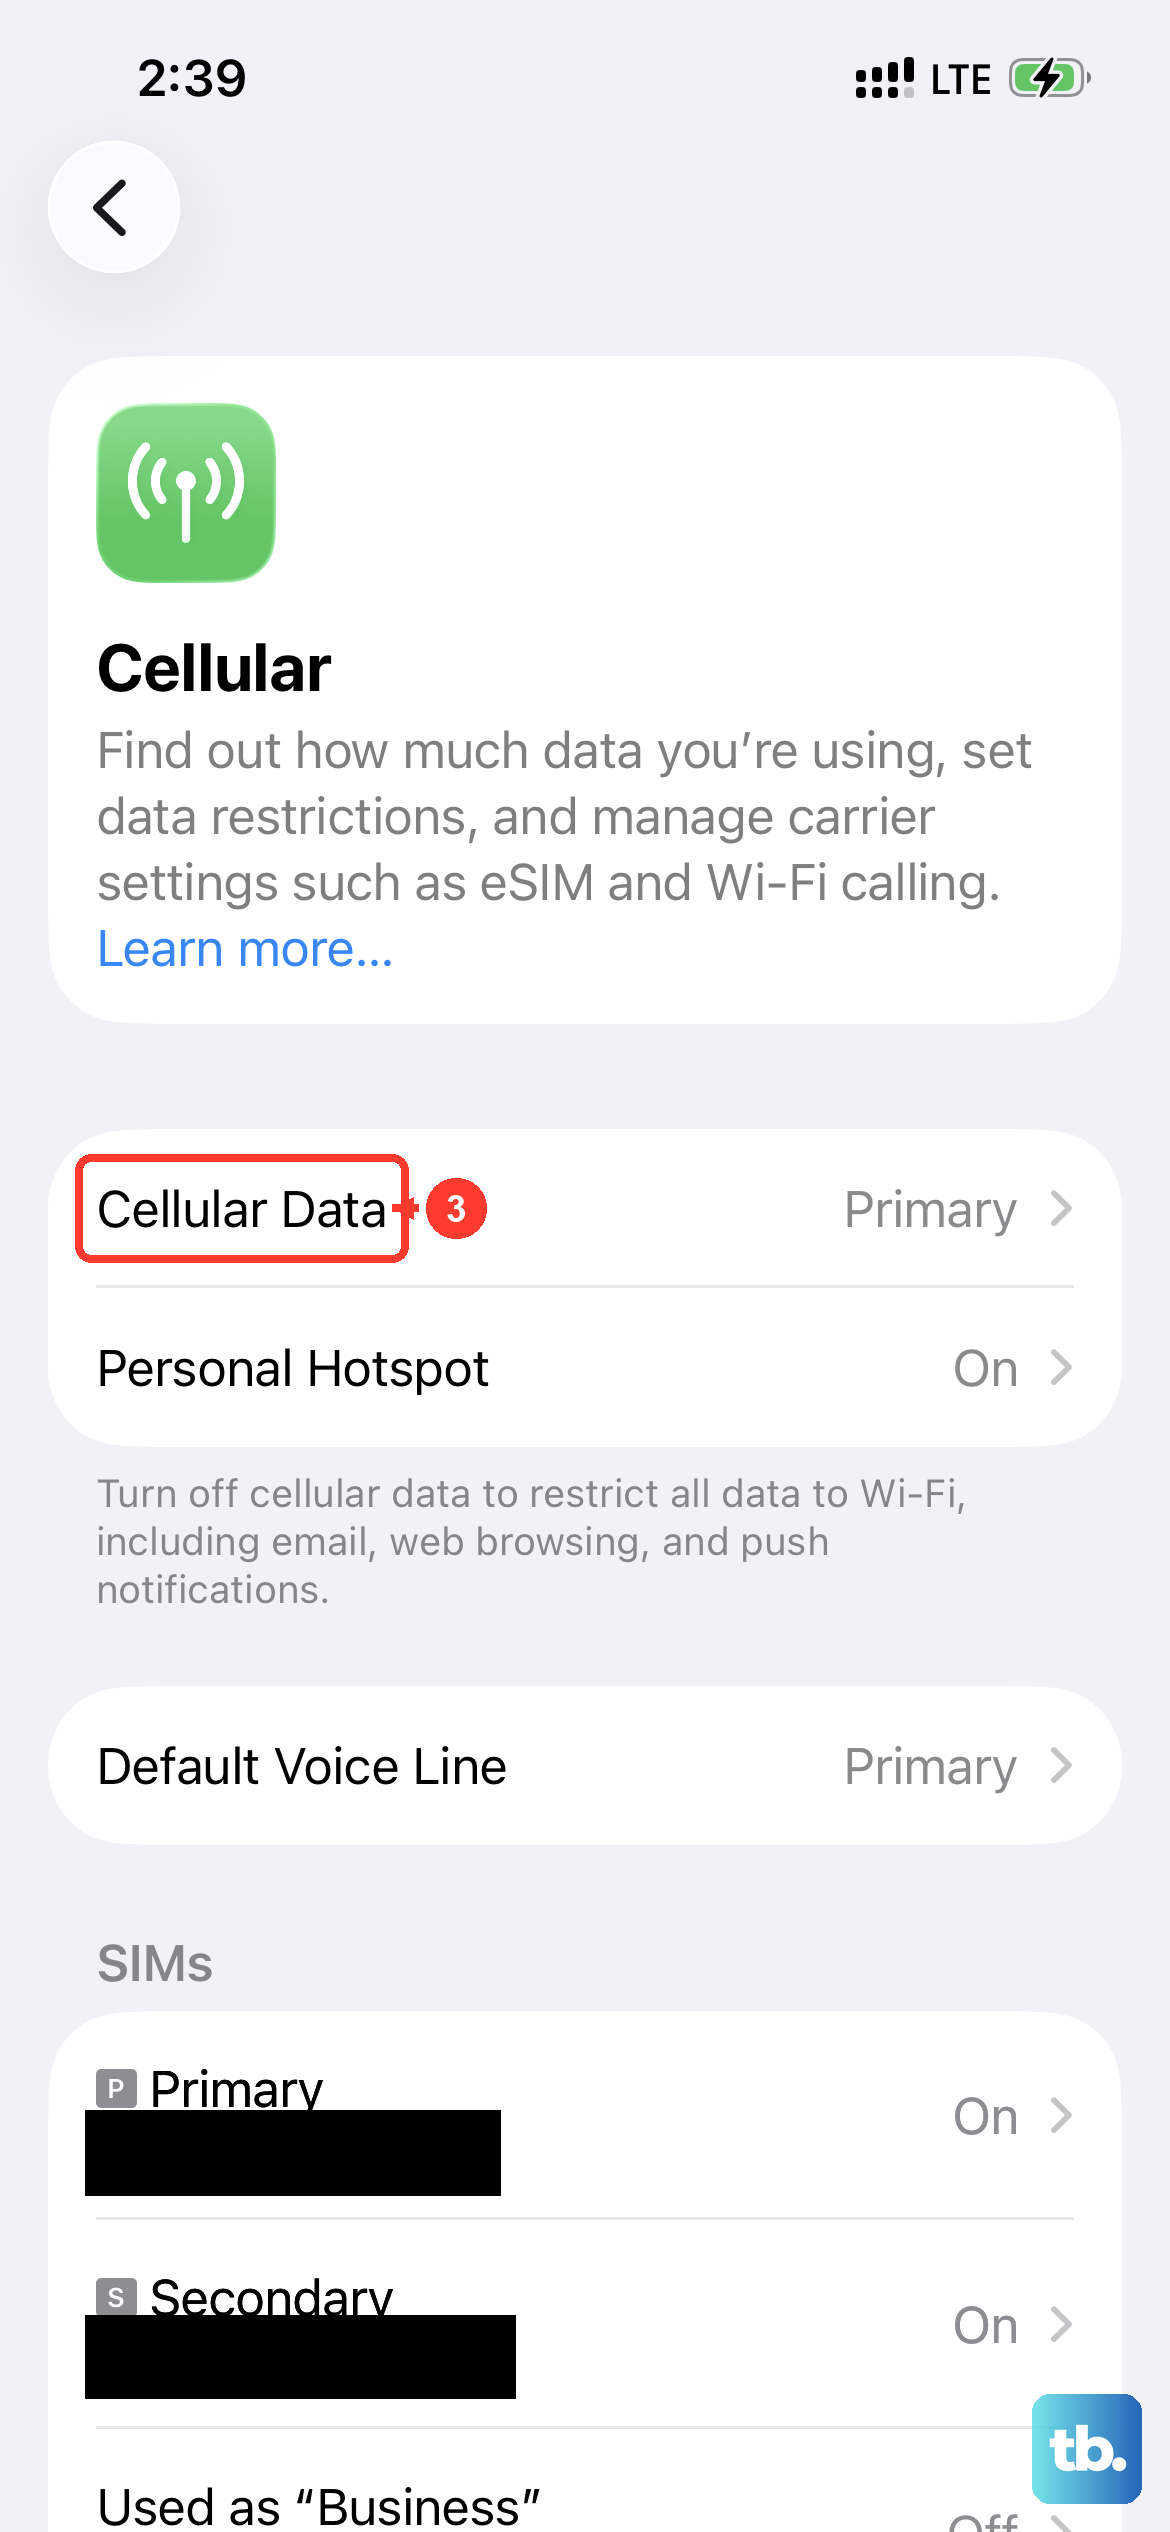
Manually Select Your Network
Sometimes the automatic network selection gets stuck. You can try choosing your carrier manually. Go to Settings > Cellular > Network Selection. Turn off "Automatic." After a moment, a list of available networks will appear. Select your carrier's name from the list.
Restore Your iPhone
If you've tried everything else and the SIM works in another phone, a software corruption might be the culprit. First, make a full backup of your iPhone 13 to iCloud or your computer. Then, you can restore it. The most thorough method is to put the phone into Recovery Mode and restore it via a computer with Finder (Mac) or iTunes (PC).
To enter Recovery Mode, connect your iPhone to the computer. Quickly press and release the Volume Up button, then the Volume Down button, then press and hold the Side button. Keep holding it even after you see the Apple logo until you see the recovery mode screen on your computer.


