The iPad Pro M5 packs a studio-quality microphone array, so when audio goes quiet or your recordings sound muffled, it's immediately noticeable. Let's sort this out step by step.
It is worth running a microphone test before working through the steps below. The live waveform makes it obvious whether the microphone is picking up sound at all.
Test the Microphones First
Before you start changing settings, confirm which microphones are actually having trouble. The iPad Pro M5 has multiple mics, and sometimes only one is affected.
Open the Voice Memos app and tap the red record button. Speak at a normal volume for about 10 seconds, then play it back. If your voice sounds clear, the primary microphone is fine.
Next, switch to the Camera app and record a short video while talking. Play it back to check if the audio is coherent or distorted. If the video sounds fine but Voice Memos doesn't, the issue might be app-specific.
Try Siri too. Press and hold the Top button and ask something simple, like "What time is it?" If Siri doesn't respond or mishears you regularly, there's a good chance at least one microphone is blocked or glitching.
Remove the Case and Check for Blockages
The iPad Pro M5 has microphones near the top edge, the rear camera module, and along the USB-C port area. A case that's slightly misaligned can cover one of these openings without you noticing.
Pop the iPad out of its case entirely and test again. If the audio comes back, the case was the culprit. You might need to trim the case or switch to one with better cutouts.
While the case is off, inspect each microphone grille under good light. A tiny speck of dust or pocket lint can block sound. Use a soft, dry toothbrush or a gentle puff of compressed air to clear the openings. Don't poke anything sharp into the grilles, use a gentle touch.
Force Close and Reopen the App
If the microphone issue only happens inside one app, like FaceTime, Zoom, or a specific recording app, the app itself might be stuck. Swipe up from the bottom of the screen and pause, then swipe the problematic app off the top of the screen to force close it. Wait a couple of seconds, then reopen the app and test the microphone again.
This clears out any temporary audio routing glitches that can happen when an app grabs the mic and then doesn't let go properly.
Disconnect Bluetooth Accessories
Your iPad Pro M5 might be sending audio to a connected Bluetooth device instead of using its own microphones. Open Control Center and tap the Bluetooth icon to turn it off completely, or go to Settings > Bluetooth and tap the "i" icon next to any connected devices, then select Disconnect.
Once Bluetooth is off, test the microphone. If it works now, the problem was that your AirPods, headphones, or speaker were hogging the audio input. You can reconnect them later, just be aware that some accessories switch the audio source automatically.
Check Microphone Permissions in Settings
iPadOS 18 is strict about app permissions. If an app doesn't have microphone access, it will record silent video or produce no audio in calls. Go to Settings > Privacy & Security > Microphone. You'll see a list of every app that has requested mic access.
Make sure the toggles are green for the apps you're using. If you recently denied permission to an app by accident, this is the place to turn it back on. The change takes effect immediately, no restart needed.
Restart or Force Restart the iPad
A simple restart fixes a surprising number of mic issues. Press and hold the Top button and either Volume button until the power-off slider appears. Drag the slider, wait 30 seconds, then press the Top button to turn it back on.
If the iPad is completely unresponsive or the mic issue persists after a normal restart, perform a force restart. Press and quickly release the Volume Up button, then press and quickly release the Volume Down button, then press and hold the Top button until the Apple logo appears. This doesn't erase any data, it just reboots the system fresh.
Update iPadOS 18
Apple frequently ships audio-related fixes in software updates. Go to Settings > General > Software Update. If a newer version of iPadOS 18 is available, download and install it. This takes a few minutes and your iPad will restart once.
While you're in Settings, check Settings > General > About to see if there's an iOS carrier settings update available. These small updates can also affect Voice over LTE or FaceTime audio routing.
Reset All Settings
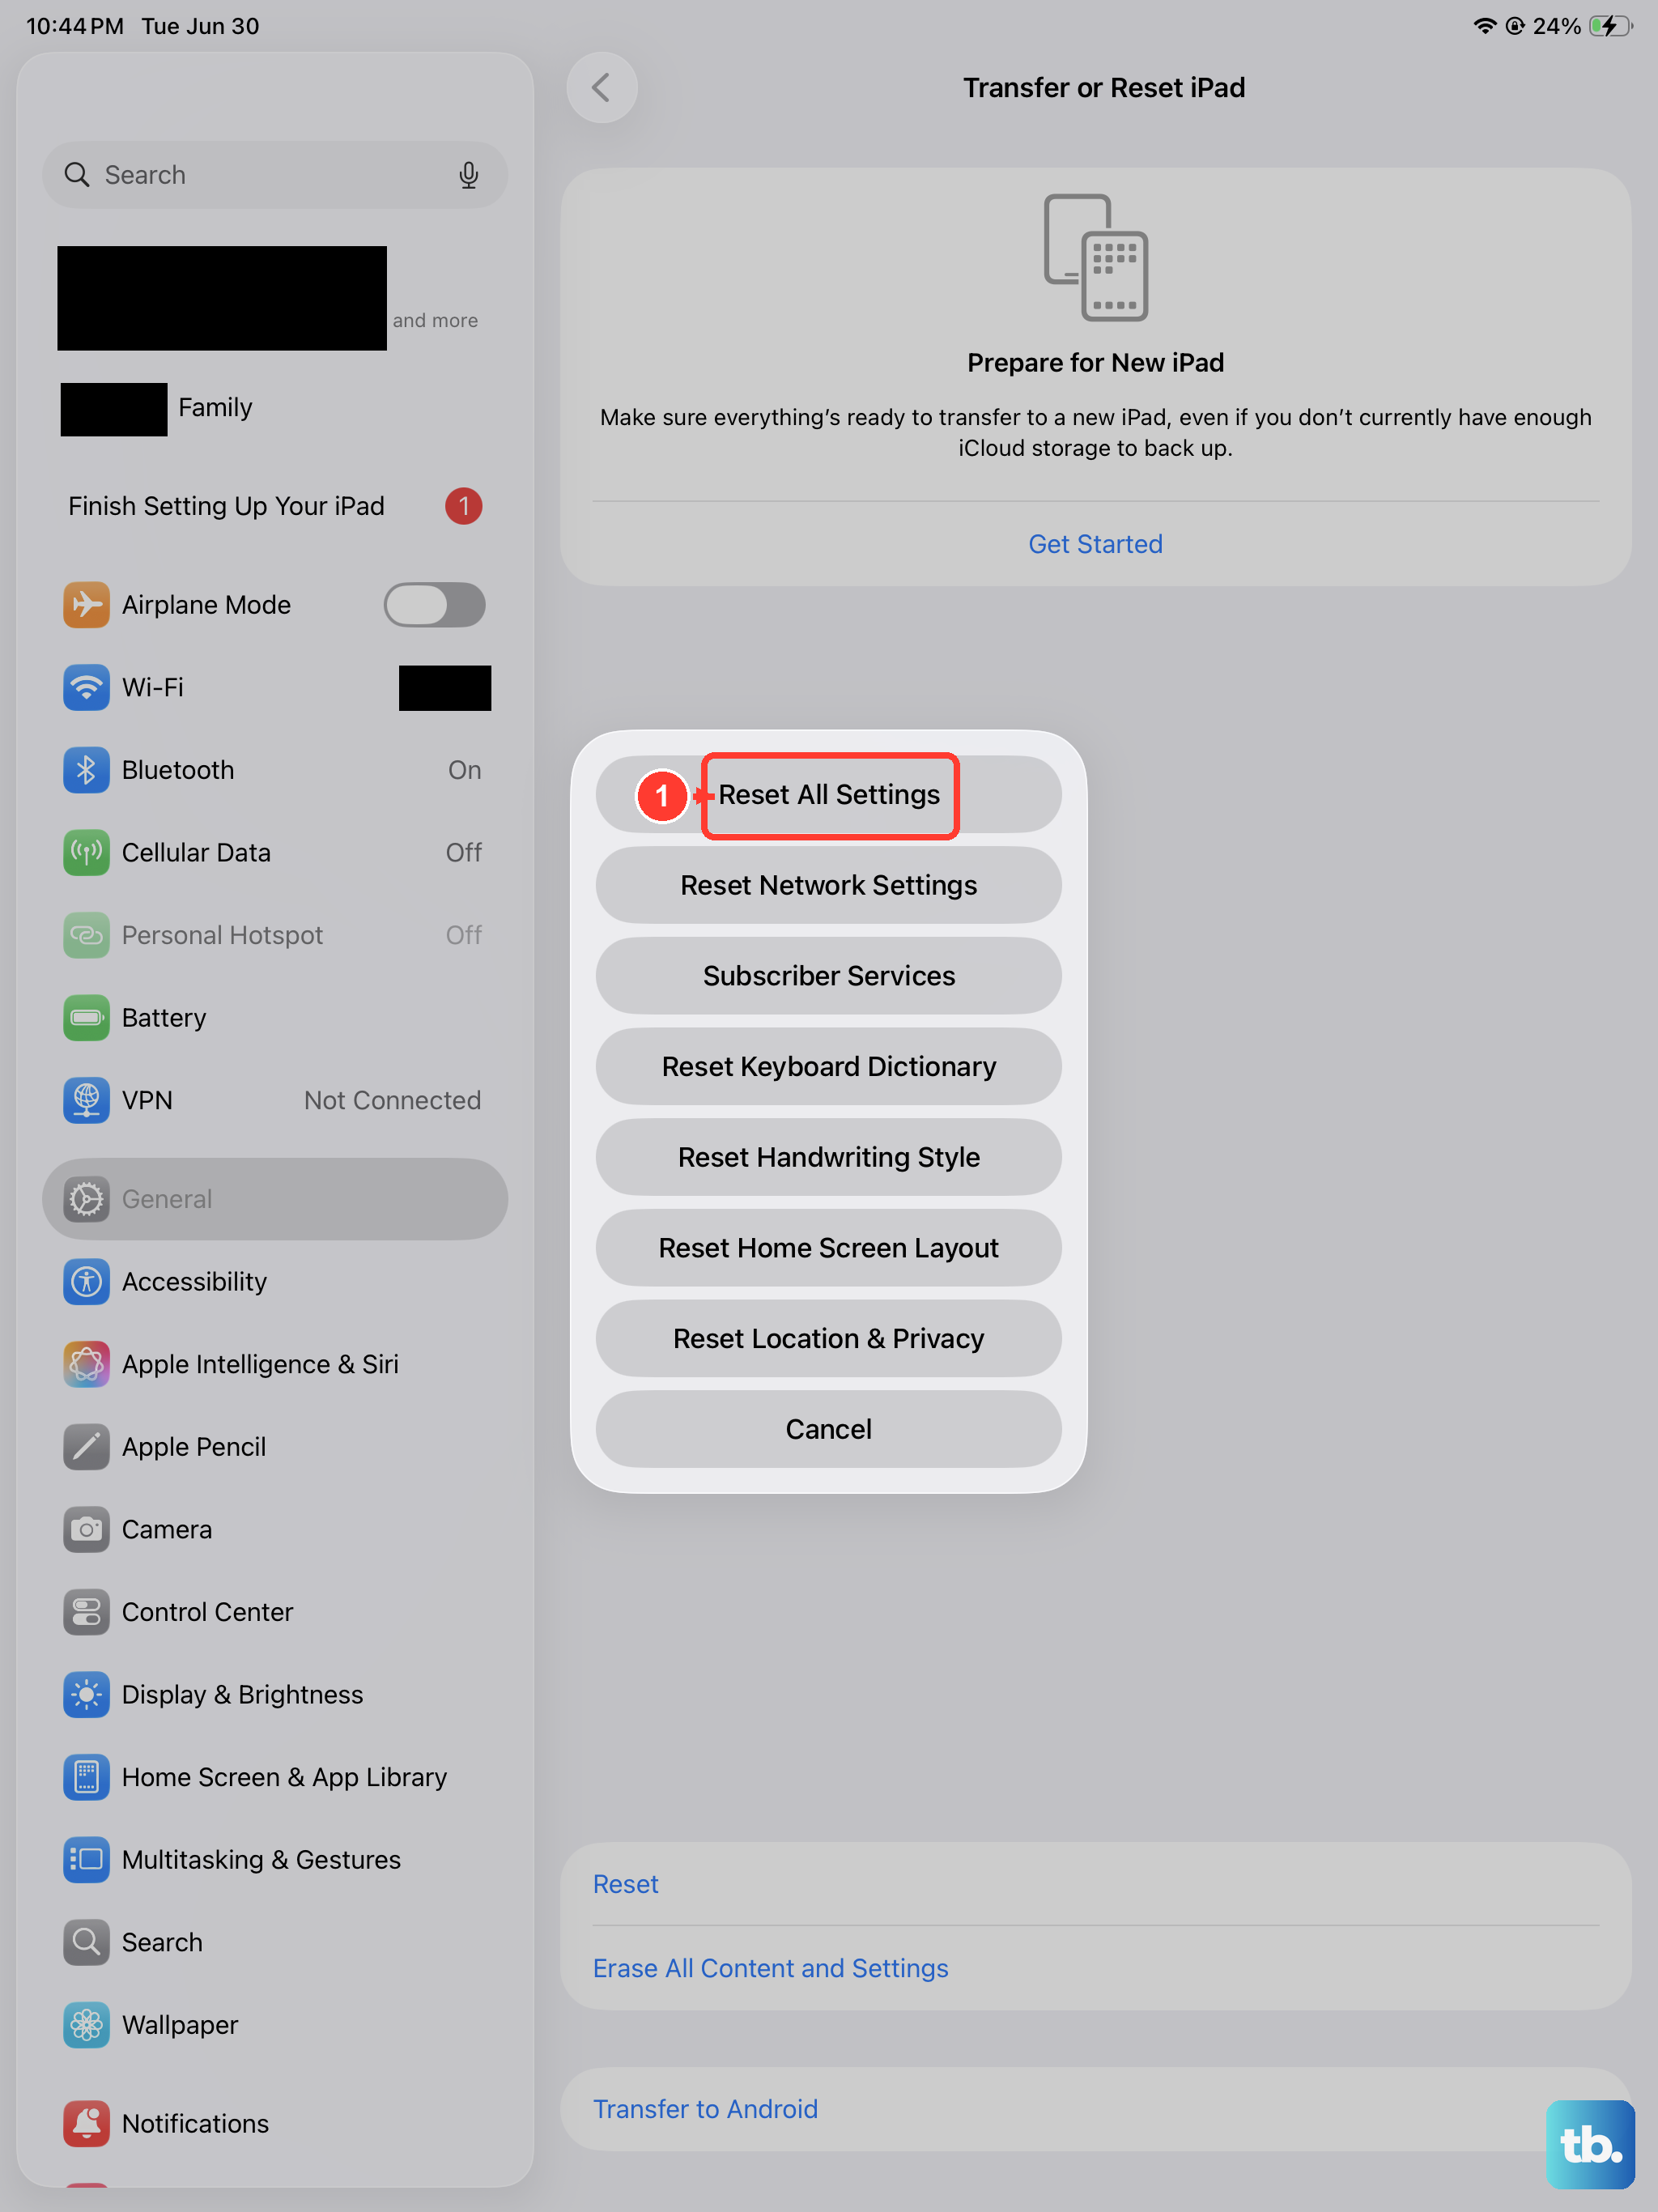
If software glitches are persisting, Reset All Settings is a good middle ground. It wipes your custom settings (Wi-Fi passwords, wallpapers, accessibility tweaks) back to factory defaults without touching your photos, apps, or data.
Go to Settings > General > Transfer or Reset iPad > Reset > Reset All Settings. Your iPad will restart and you'll need to set up a few things again, but your files are safe.
Erase and Restore from a Backup
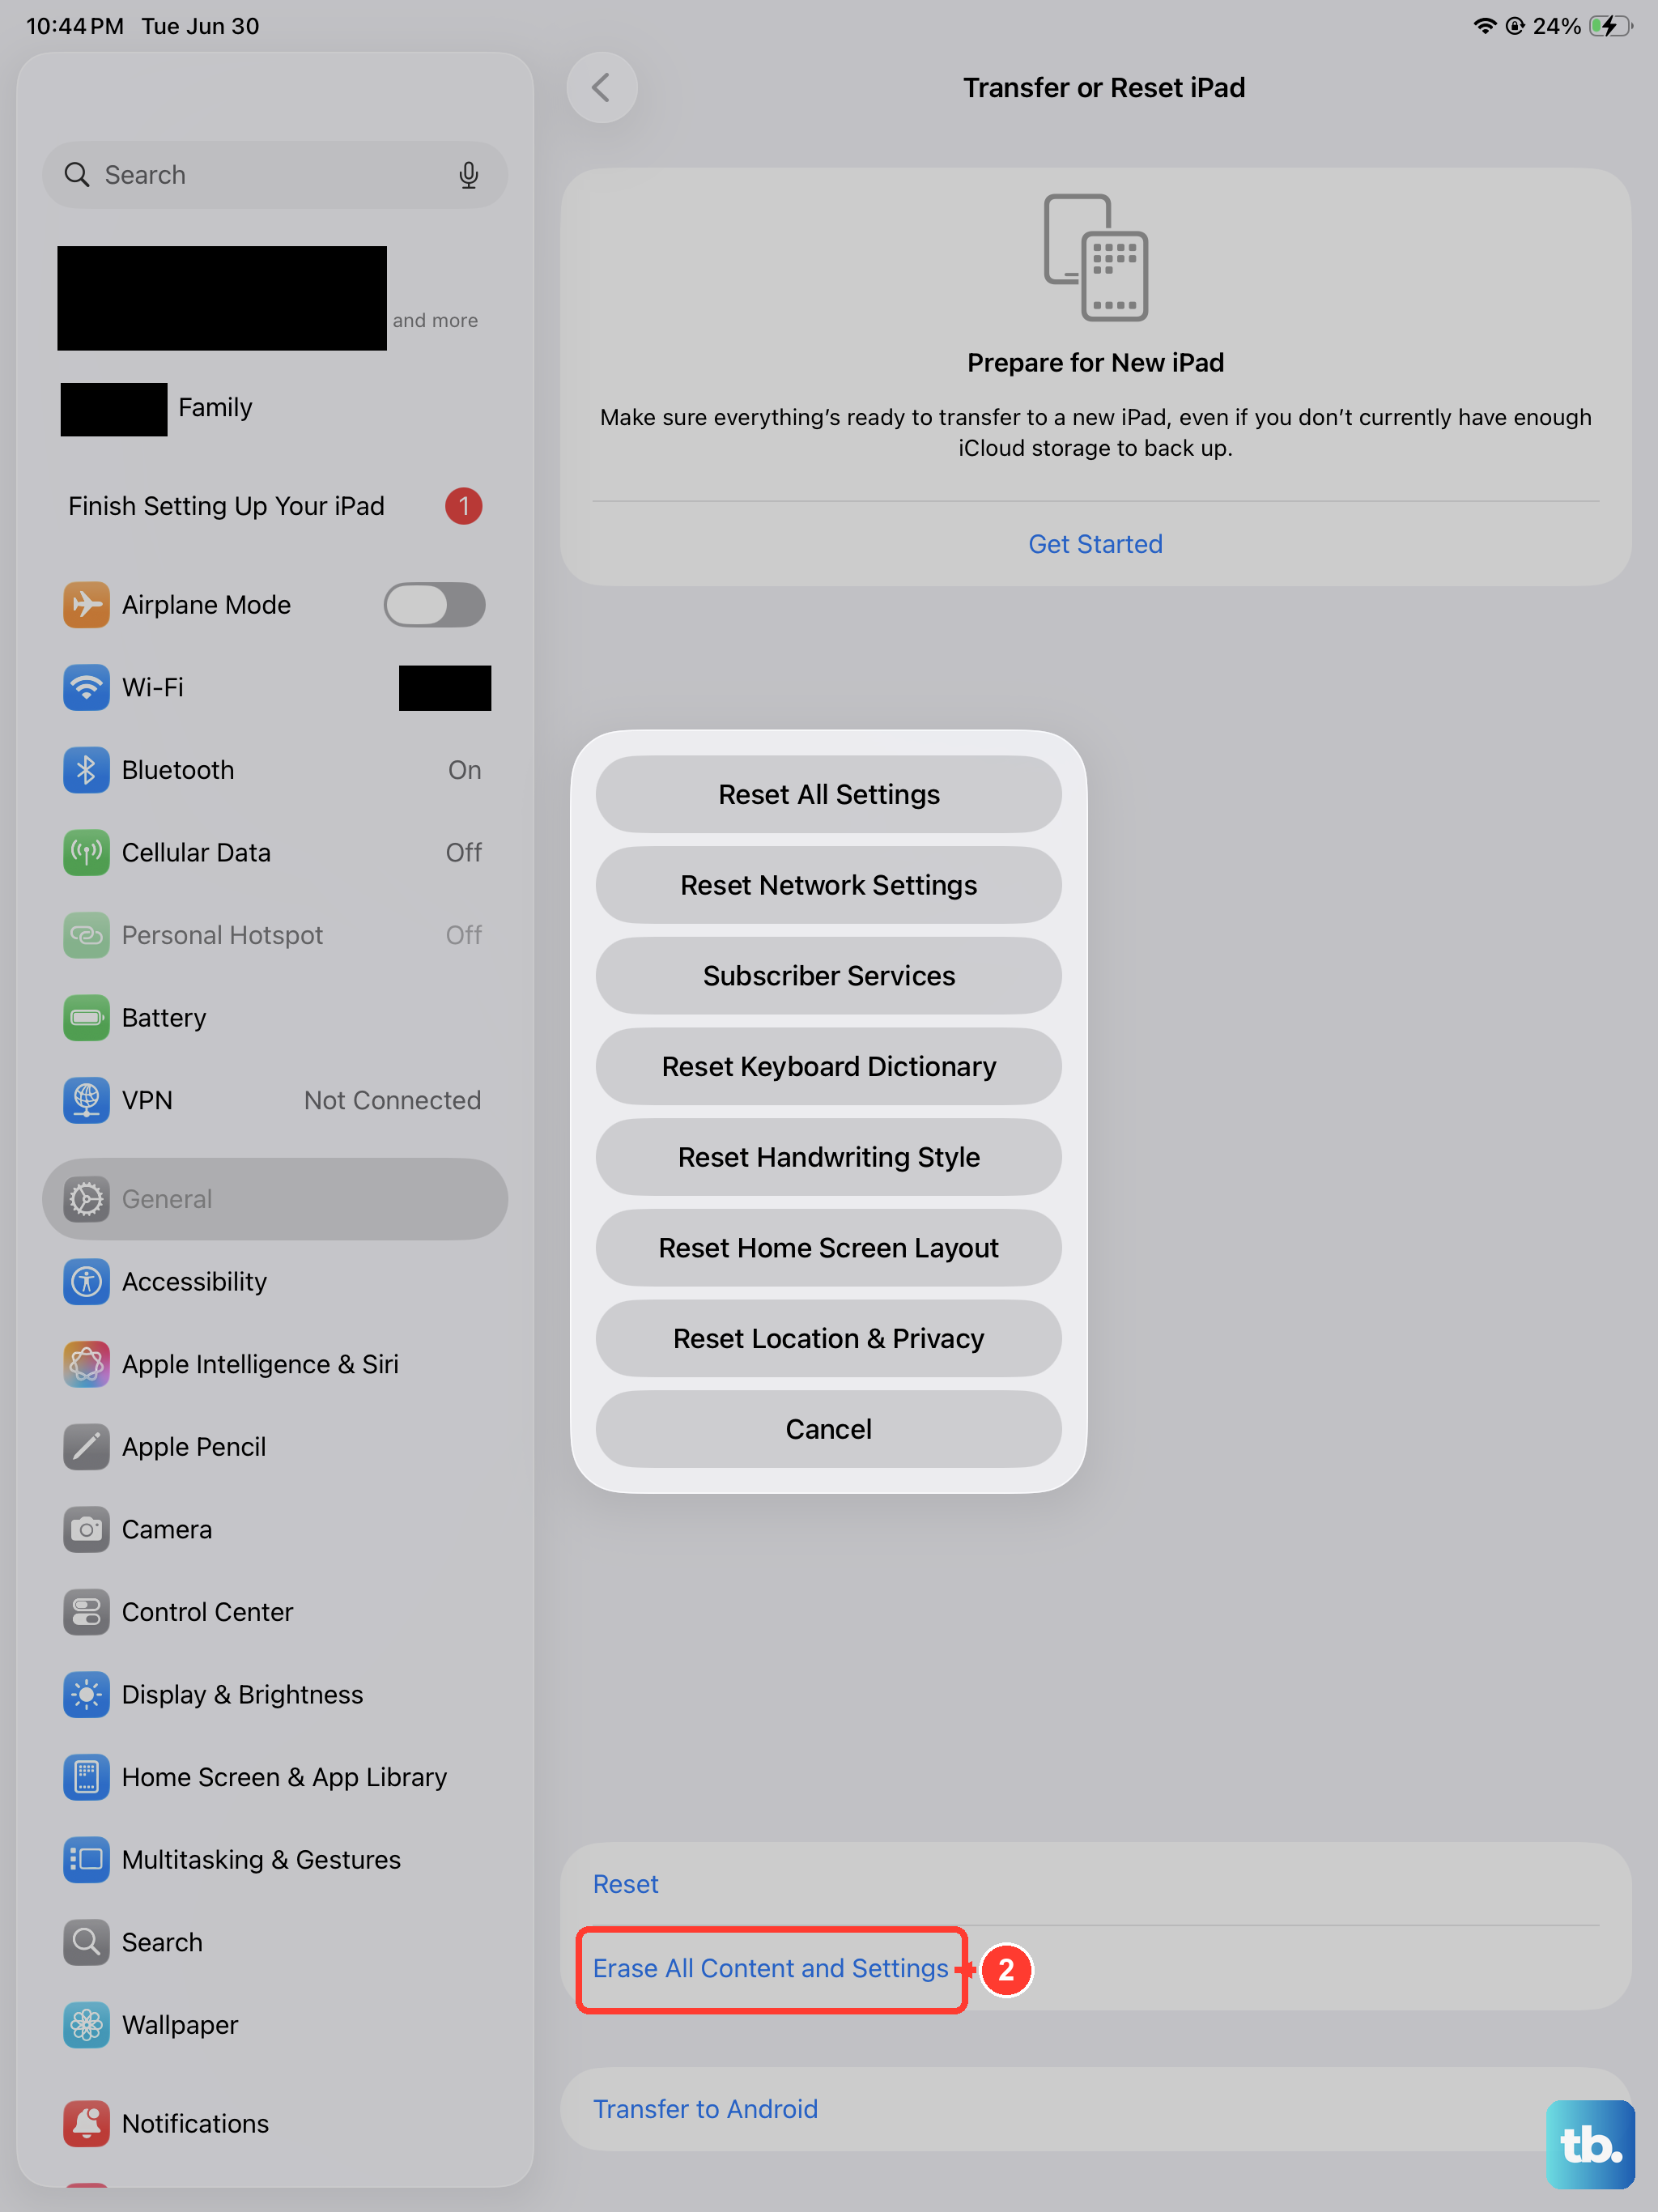
This is the nuclear option, but it's worth considering if your mic still isn't working after everything else. Back up your iPad to iCloud or a computer first. Then go to Settings > General > Transfer or Reset iPad > Erase All Content and Settings.
After the wipe, set up the iPad as new or restore from your backup. If the microphone works during the initial setup process but then fails after restoring your data, the issue is likely corrupted settings or data in your backup.


