When your iPad microphone stops picking up your voice, it can throw a wrench into everything from FaceTime calls and Zoom meetings to recording voice memos or using Siri. The first thing to do is figure out exactly which microphone is affected, as your iPad has several.
Test Your iPad Microphone
Open the Voice Memos app and record a quick message. Speak clearly and play it back. If the audio is muffled or missing, you've confirmed the issue.
You can also test with Siri. Press and hold the Top button (or say "Hey Siri") and ask a question. If Siri doesn't respond correctly, it's another sign the main microphone isn't working.
For a more thorough check, open the Camera app and record a short video in both front and back camera modes. Play them back to see if audio is present. This helps pinpoint if the issue is with a specific mic.
Remove Any Cases or Covers
This is a surprisingly common fix. A folio case, keyboard cover, or even a thick screen protector can partially block the microphone openings.
Take your iPad out of its case completely and run the Voice Memos test again. I've seen keyboard cases, especially third-party ones, cause this exact problem by covering the side-mounted microphones.
Check for Connected Audio Devices
If you have AirPods, Bluetooth headphones, or even a USB-C audio adapter connected, your iPad will route all audio through them by default. This includes the microphone input.
Swipe down from the top-right corner to open Control Center and tap the Bluetooth icon to turn it off temporarily. Then, test your iPad's built-in mic again without any accessories attached.
Inspect the Microphone Openings
Your iPad has multiple tiny microphone ports. On recent models without a Home button, you'll find them along the top edge and on the upper back near the camera.
Grab a can of compressed air and give these openings a few short, gentle bursts to dislodge any pocket lint or dust. Avoid using anything sharp like a paperclip, as you can easily damage the internal mic.
Force Restart Your iPad
A simple restart clears out temporary software glitches that can affect hardware. The method depends on your iPad model.
For iPads without a Home button, quickly press and release the Volume Up button, then the Volume Down button. Finally, press and hold the Top button until you see the Apple logo appear.
If your iPad has a Home button, just press and hold both the Home button and the Top button together until the Apple logo shows up.
Check App Permissions in Settings
Apps like Zoom, Teams, or recording software need explicit permission to use your microphone. If you accidentally denied this, the app will be silent.
Go to Settings > Privacy & Security > Microphone. You'll see a list of all apps that have requested access. Make sure the toggle is switched on (green) for the apps where you need the mic to work.
Update iPadOS
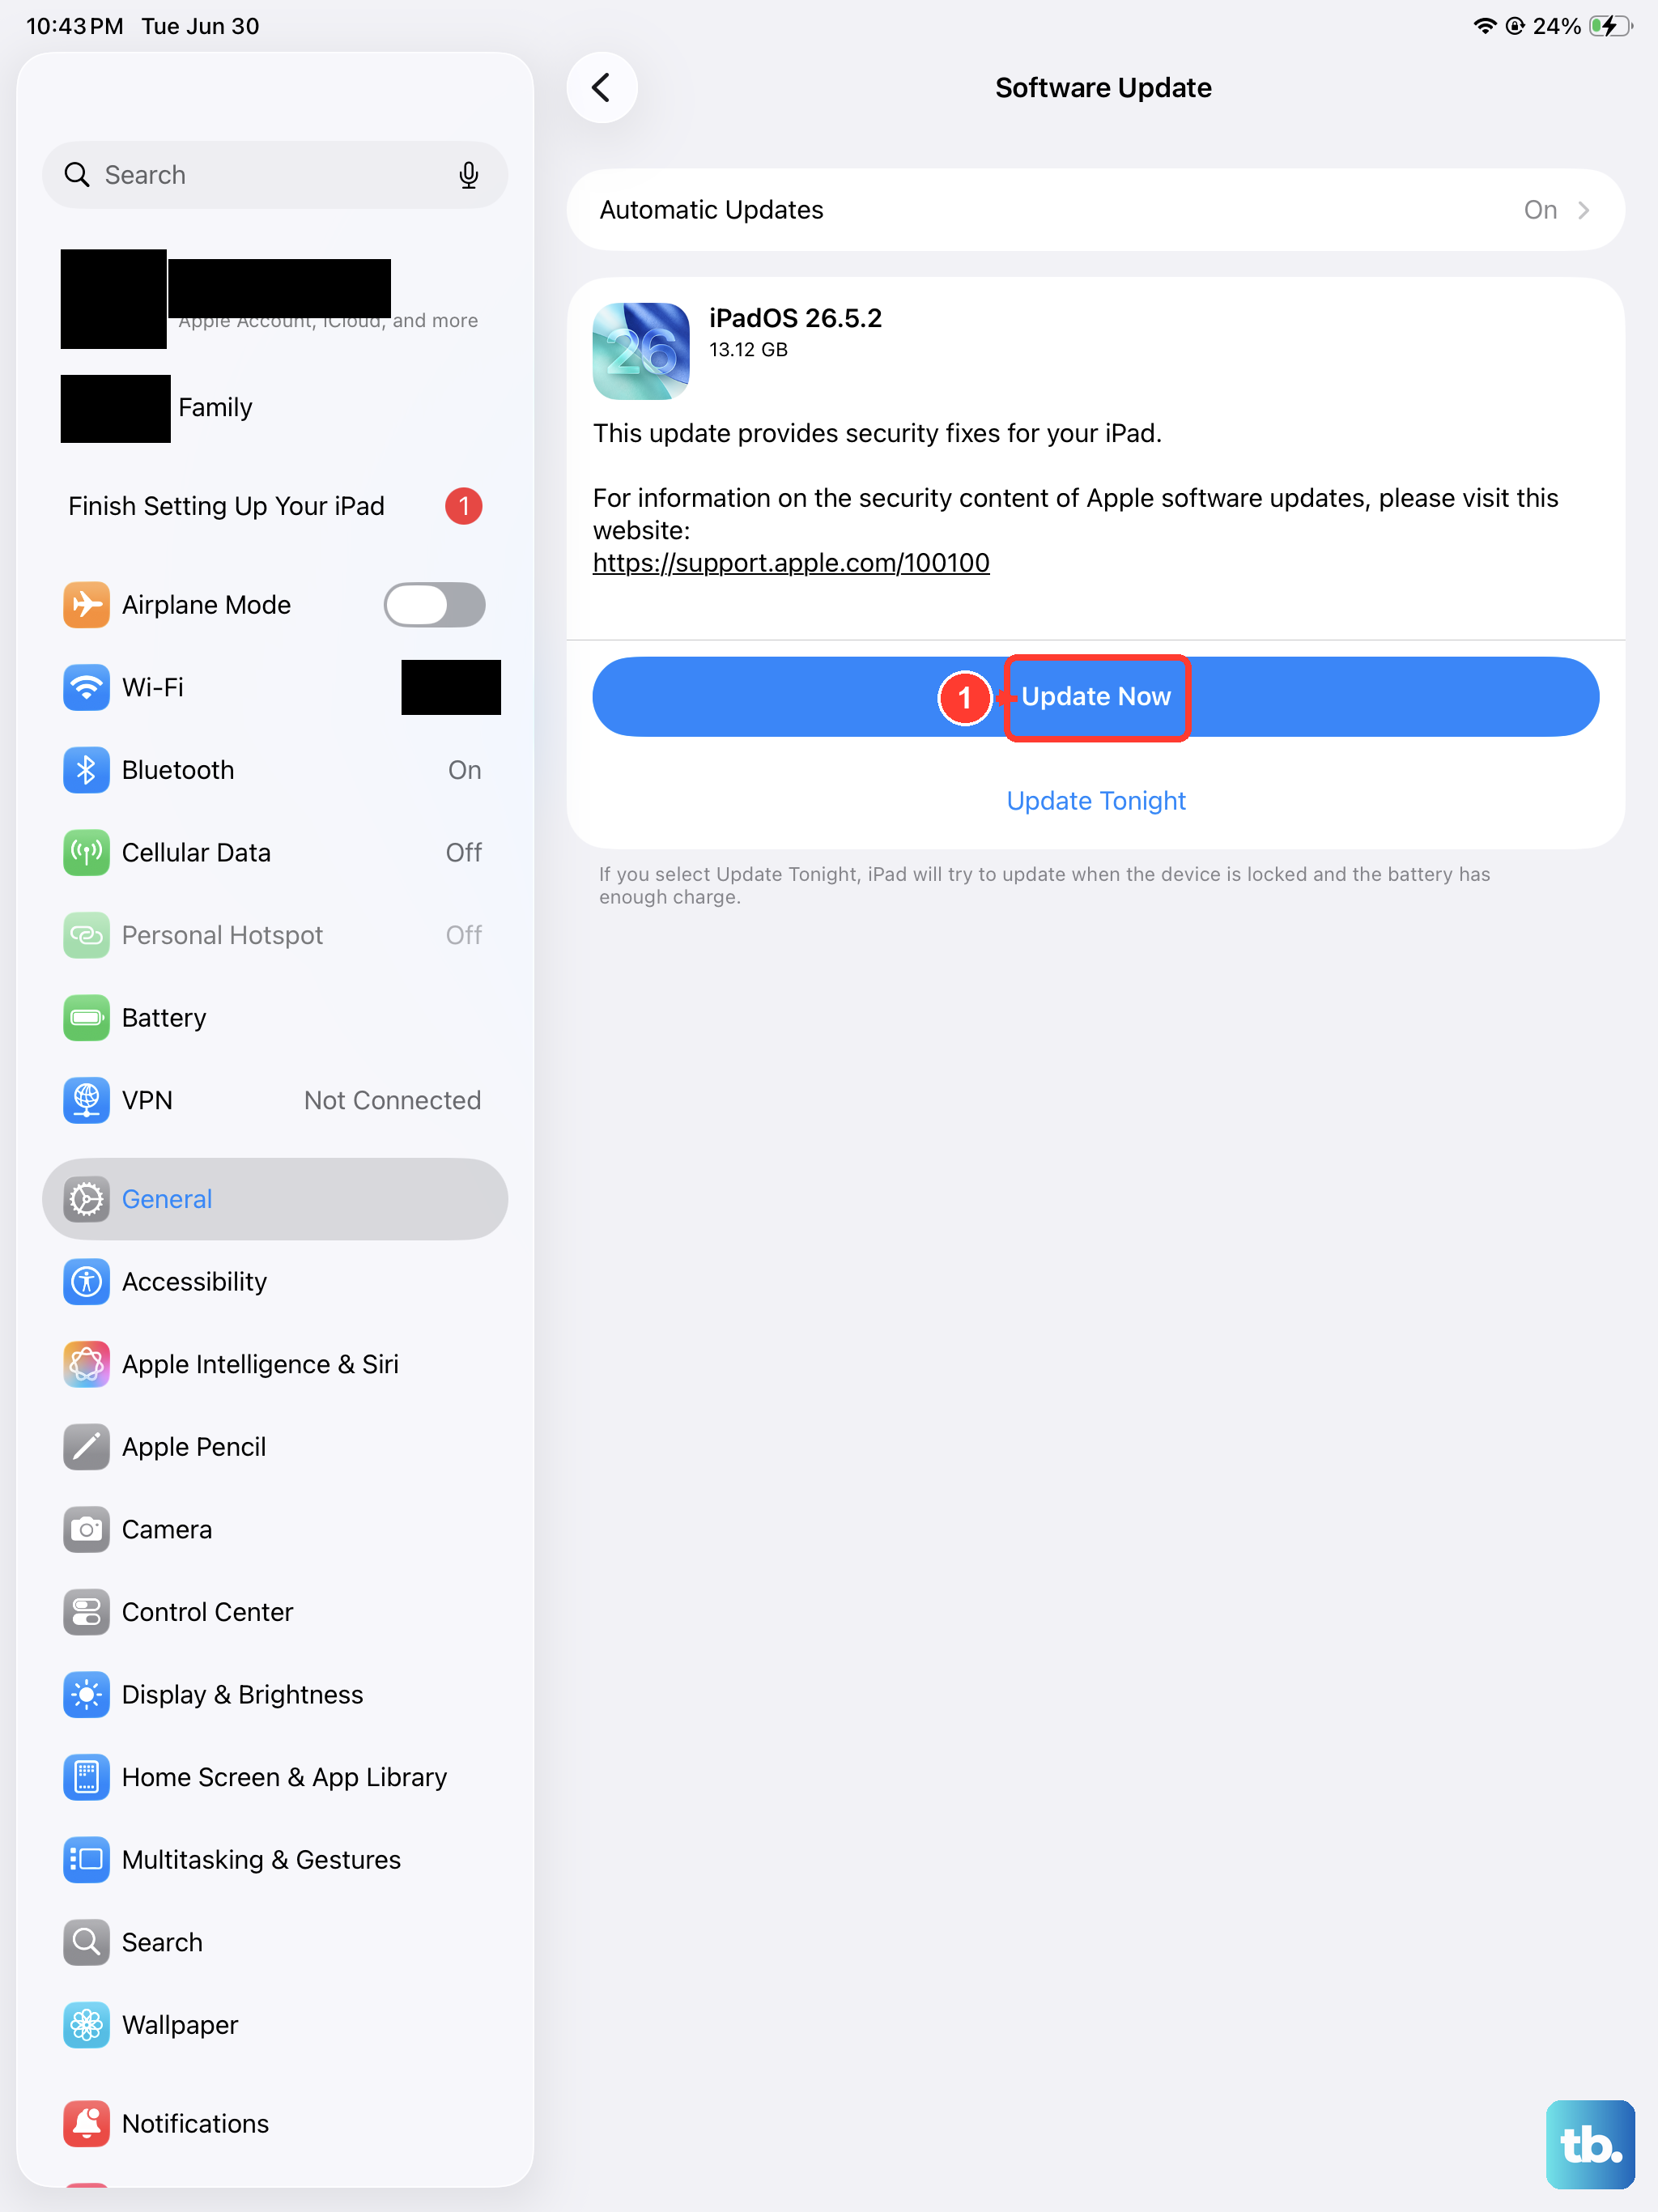
Software bugs in iPadOS can sometimes cause microphone hardware to malfunction. Apple frequently patches these issues in updates.
Head to Settings > General > Software Update. If an update is available, install it. It's a good idea to plug your iPad into power during this process, especially if you're on an older charger.
Reset All Settings
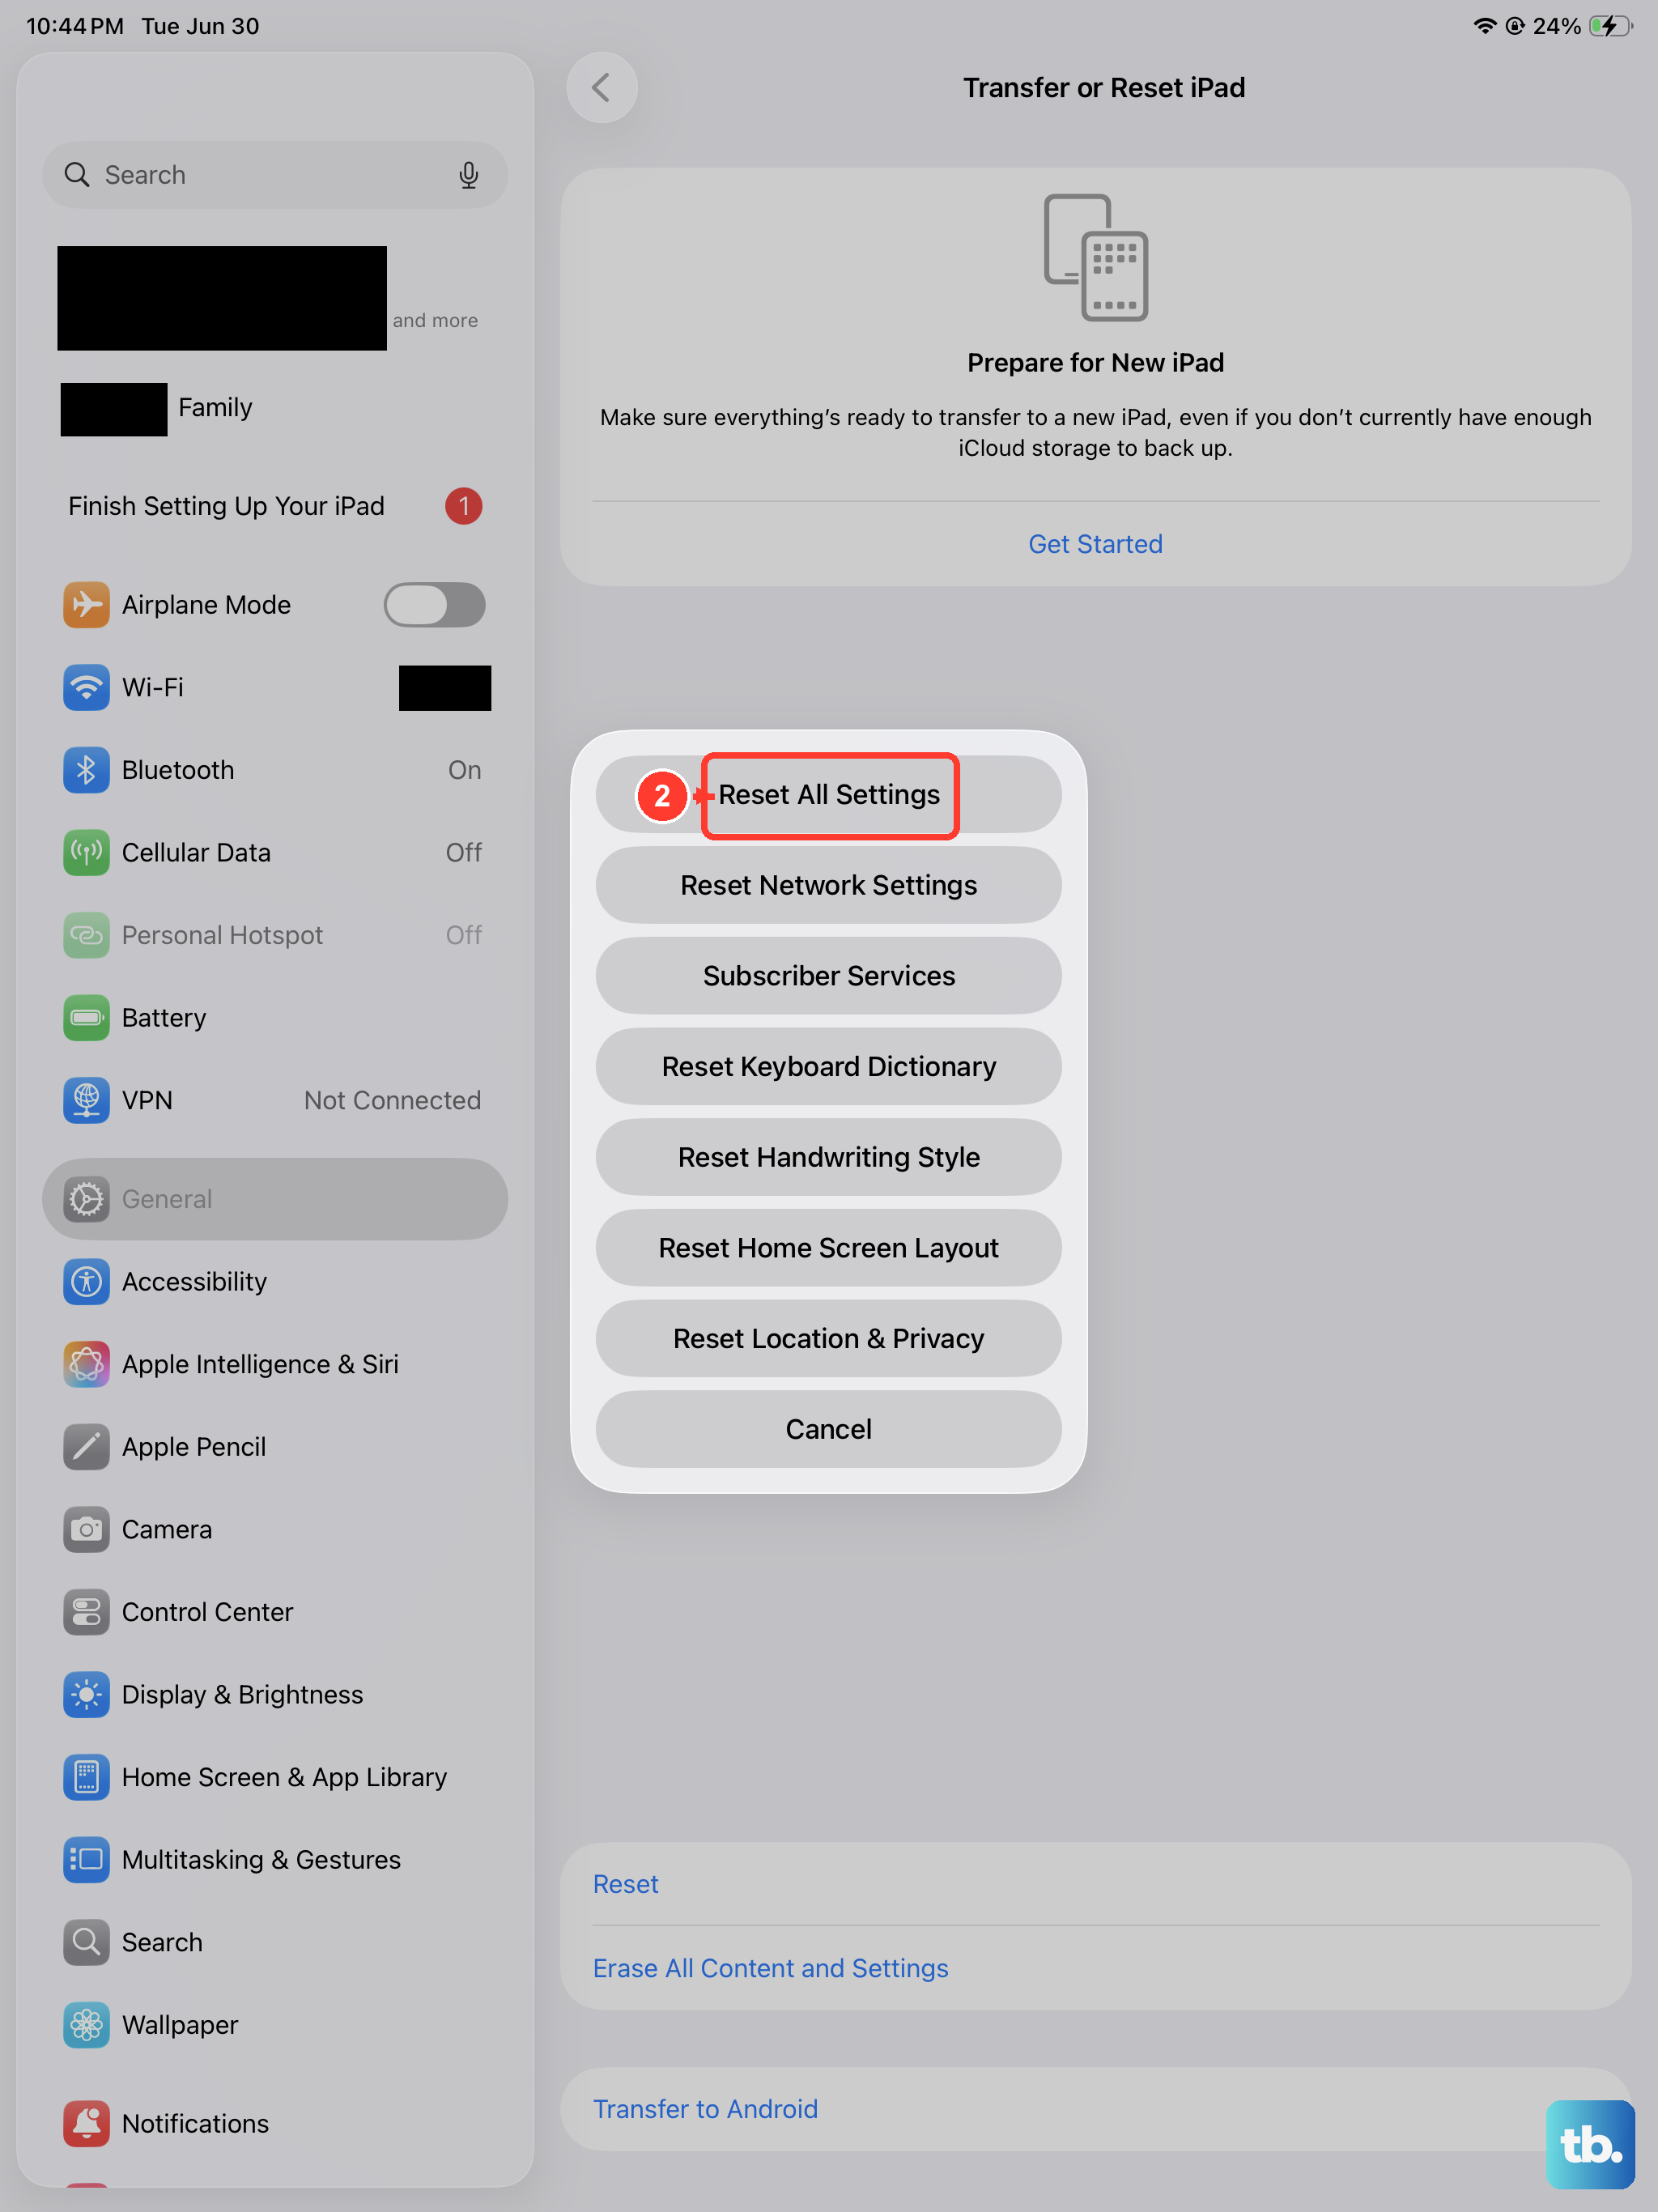
This is a more thorough step that resets every system setting on your iPad back to factory defaults. Your personal data and apps remain untouched, but you'll need to reconfigure things like Wi-Fi passwords and wallpaper.
To do this, navigate to Settings > General > Transfer or Reset iPad. Tap Reset and then choose Reset All Settings. After your iPad reboots, test the microphone immediately.
Consider a Software Restore
If you're still having issues, the problem might be deeper within the iPadOS installation. The next step is to restore your iPad using a computer.
Connect your iPad to a Mac or PC with a USB-C cable. On a Mac with macOS Catalina or later, open Finder. On a PC or older Mac, open iTunes. Select your iPad, choose "Restore," and follow the prompts. This will install a completely fresh copy of iPadOS.
Remember to back up your iPad to iCloud or your computer before starting a restore, as this process will erase everything.


