
When your iPad Air (2026) won't send pictures, it's usually a quick fix. The most common culprit is a simple network hiccup. I'd start by checking your internet connection and giving your iPad a quick restart.
Check Your Internet Connection
First, look at the status bar in the top-right corner. If you're trying to use Wi-Fi, you should see the Wi-Fi symbol. If you don't, swipe down from the top-right to open Control Center and tap the Wi-Fi icon to turn it on.
For cellular models, make sure you have a signal. You can also try toggling Airplane Mode on for ten seconds and then off again. This resets all the radios at once and often clears up a temporary glitch.
Restart Your iPad
A force restart is a great next step. It clears out any minor software bugs without affecting your data. On the iPad Air (2026), you press and quickly release the Volume Up button, then quickly press and release the Volume Down button.
Finally, press and hold the Top button. Keep holding it until you see the Apple logo appear on the screen, then let go. Wait for your iPad to boot back up and try sending the picture again.
Verify iMessage is Active
If you're sending to another Apple device, blue iMessage bubbles mean it's working. Green bubbles mean it's falling back to SMS/MMS, which can fail with large photos. Go to Settings > Apps > Messages and make sure iMessage is toggled on.
If it's already on, try turning it off, waiting a moment, and turning it back on. This refreshes the connection to Apple's servers. Also, tap Send & Receive in the same menu to confirm your phone number or email is selected.
Check Your Cellular Data Settings
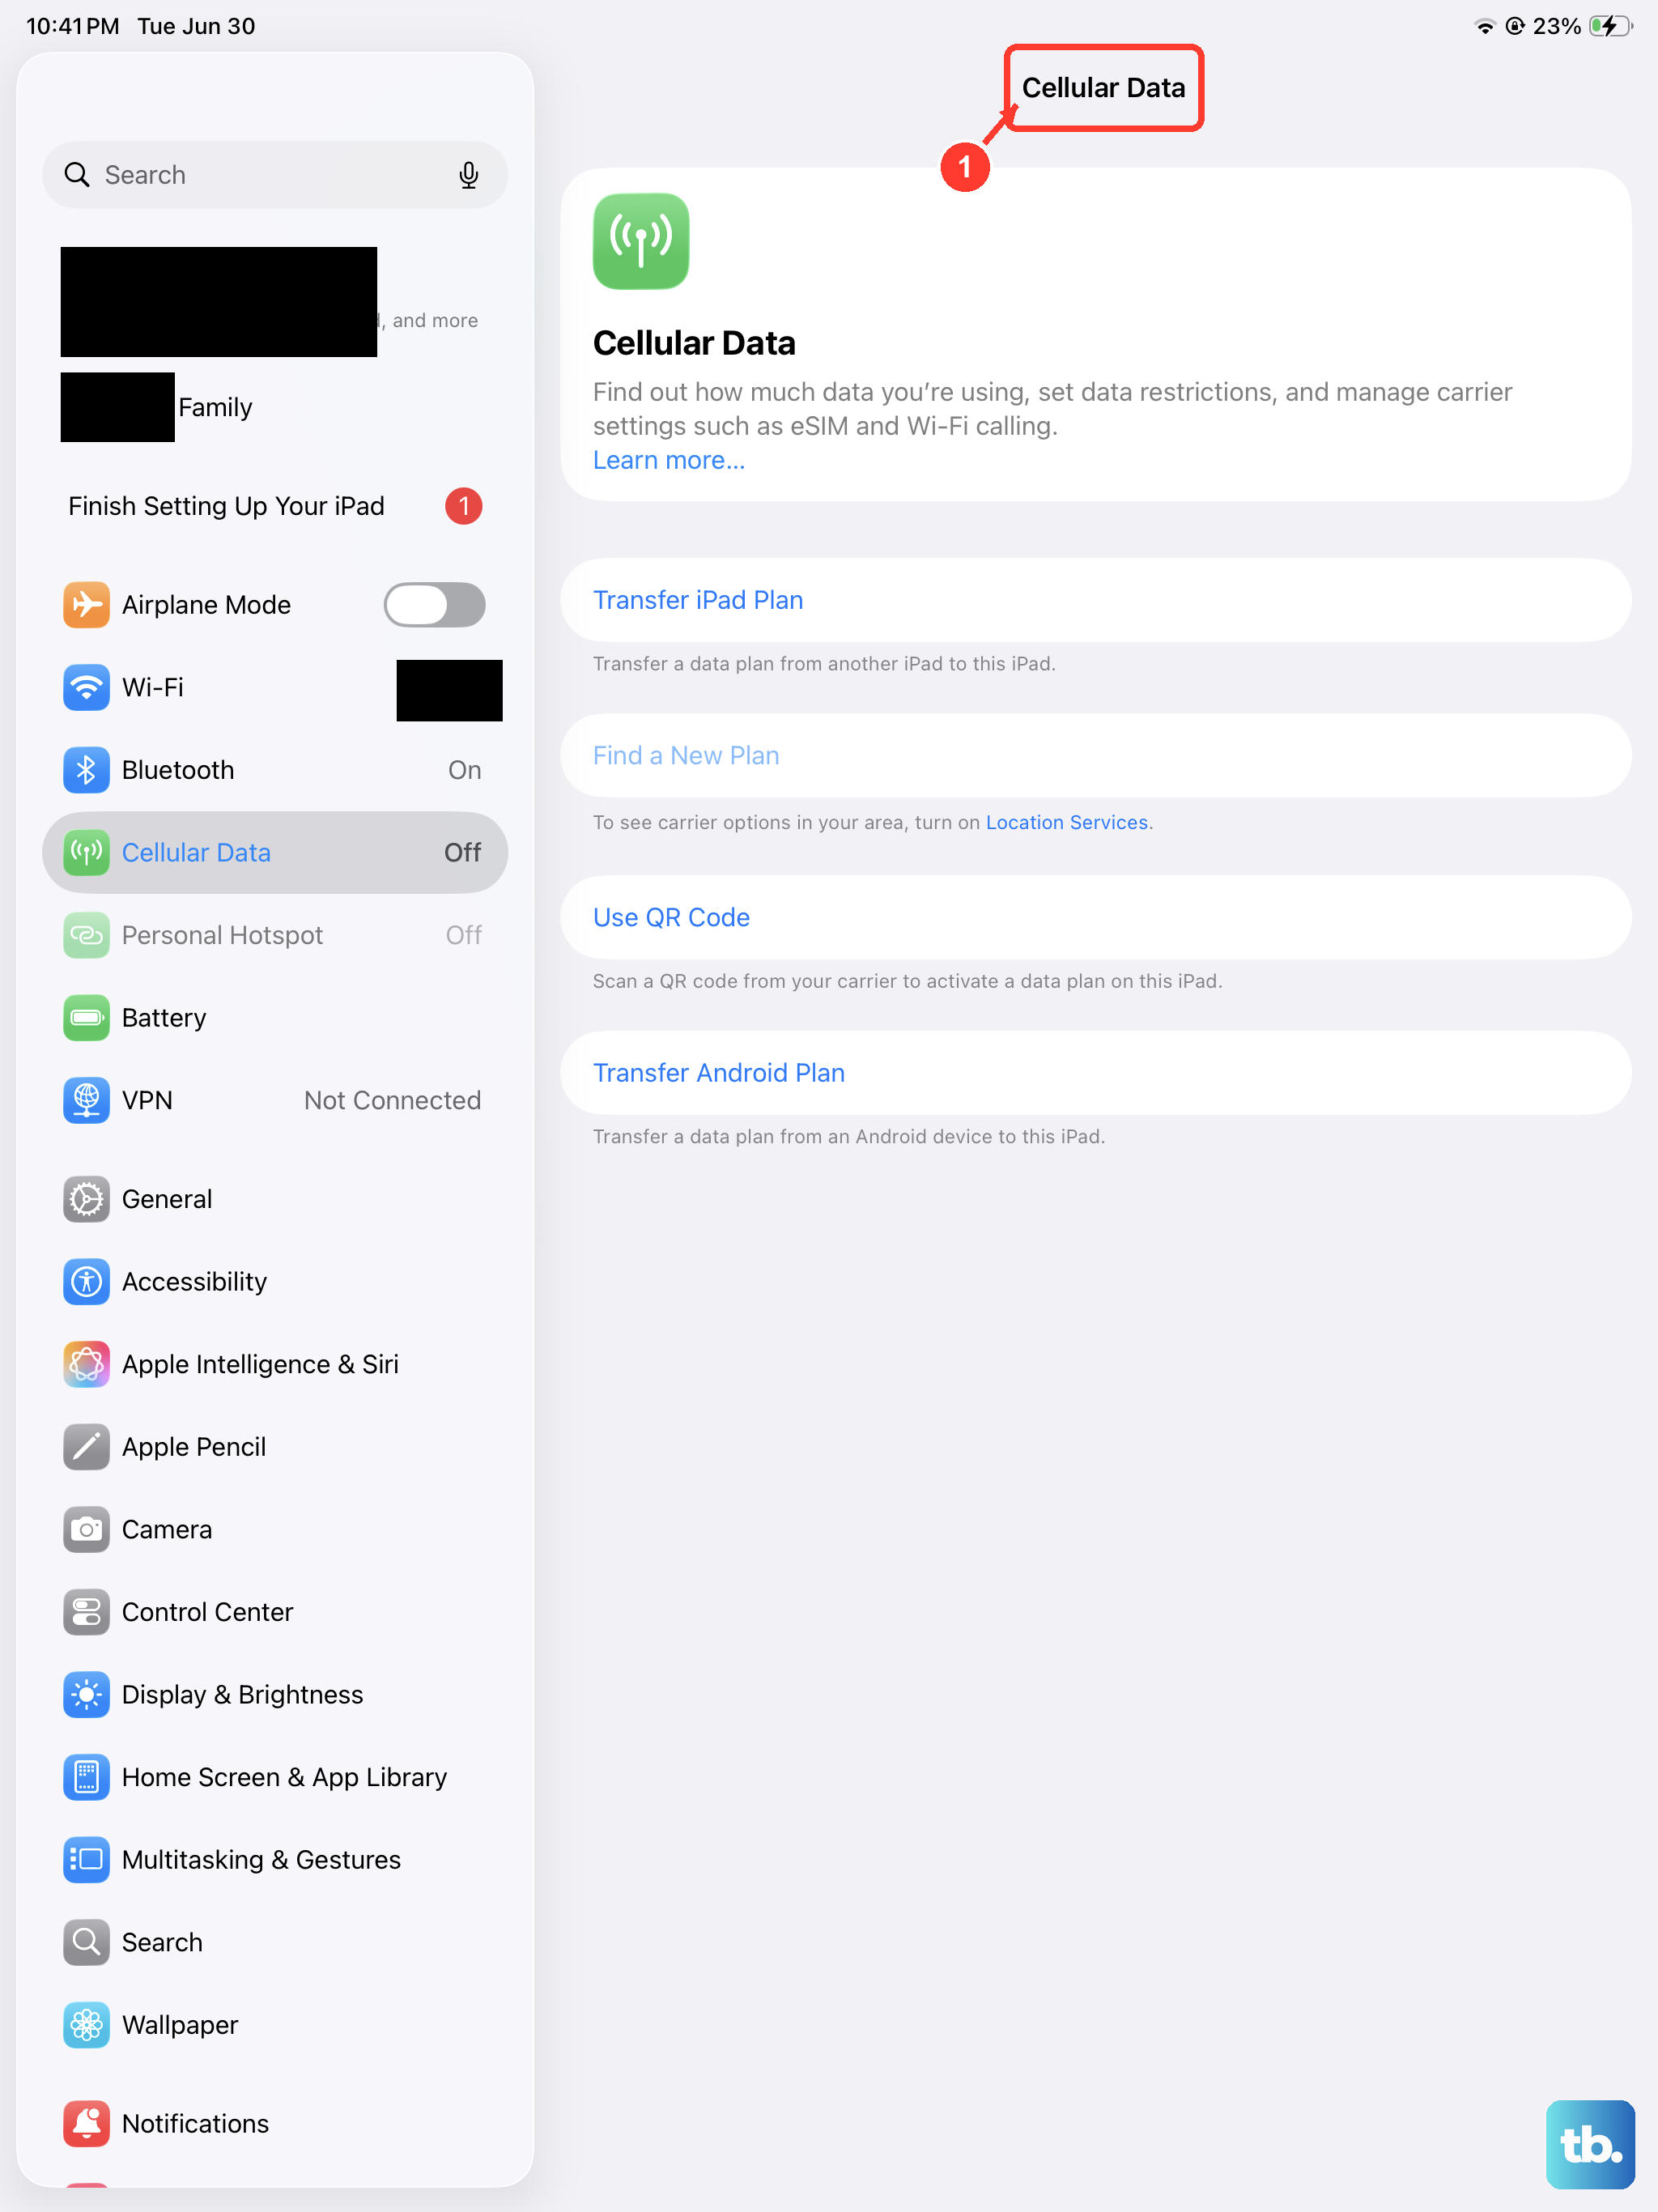
If you're using a cellular model and not on Wi-Fi, a few settings can block pictures. Go to Settings > Cellular Data and ensure the main Cellular Data switch is on. Scroll down to find the Messages app in the list and make sure it's also allowed to use cellular data.
Also, check for Low Data Mode. Go to Settings > Cellular Data > Cellular Data Options and make sure Low Data Mode is turned off. This mode restricts background data and can prevent photos from sending.
Enable MMS Messaging
When sending to non-Apple devices, your iPad uses MMS. This needs to be enabled. Head to Settings > Apps > Messages. Scroll down and ensure MMS Messaging is turned on.
While you're there, also check that Send as SMS is enabled. This allows your message to switch from iMessage to a regular text if iMessage fails, giving it a better chance to go through.
Update iPadOS
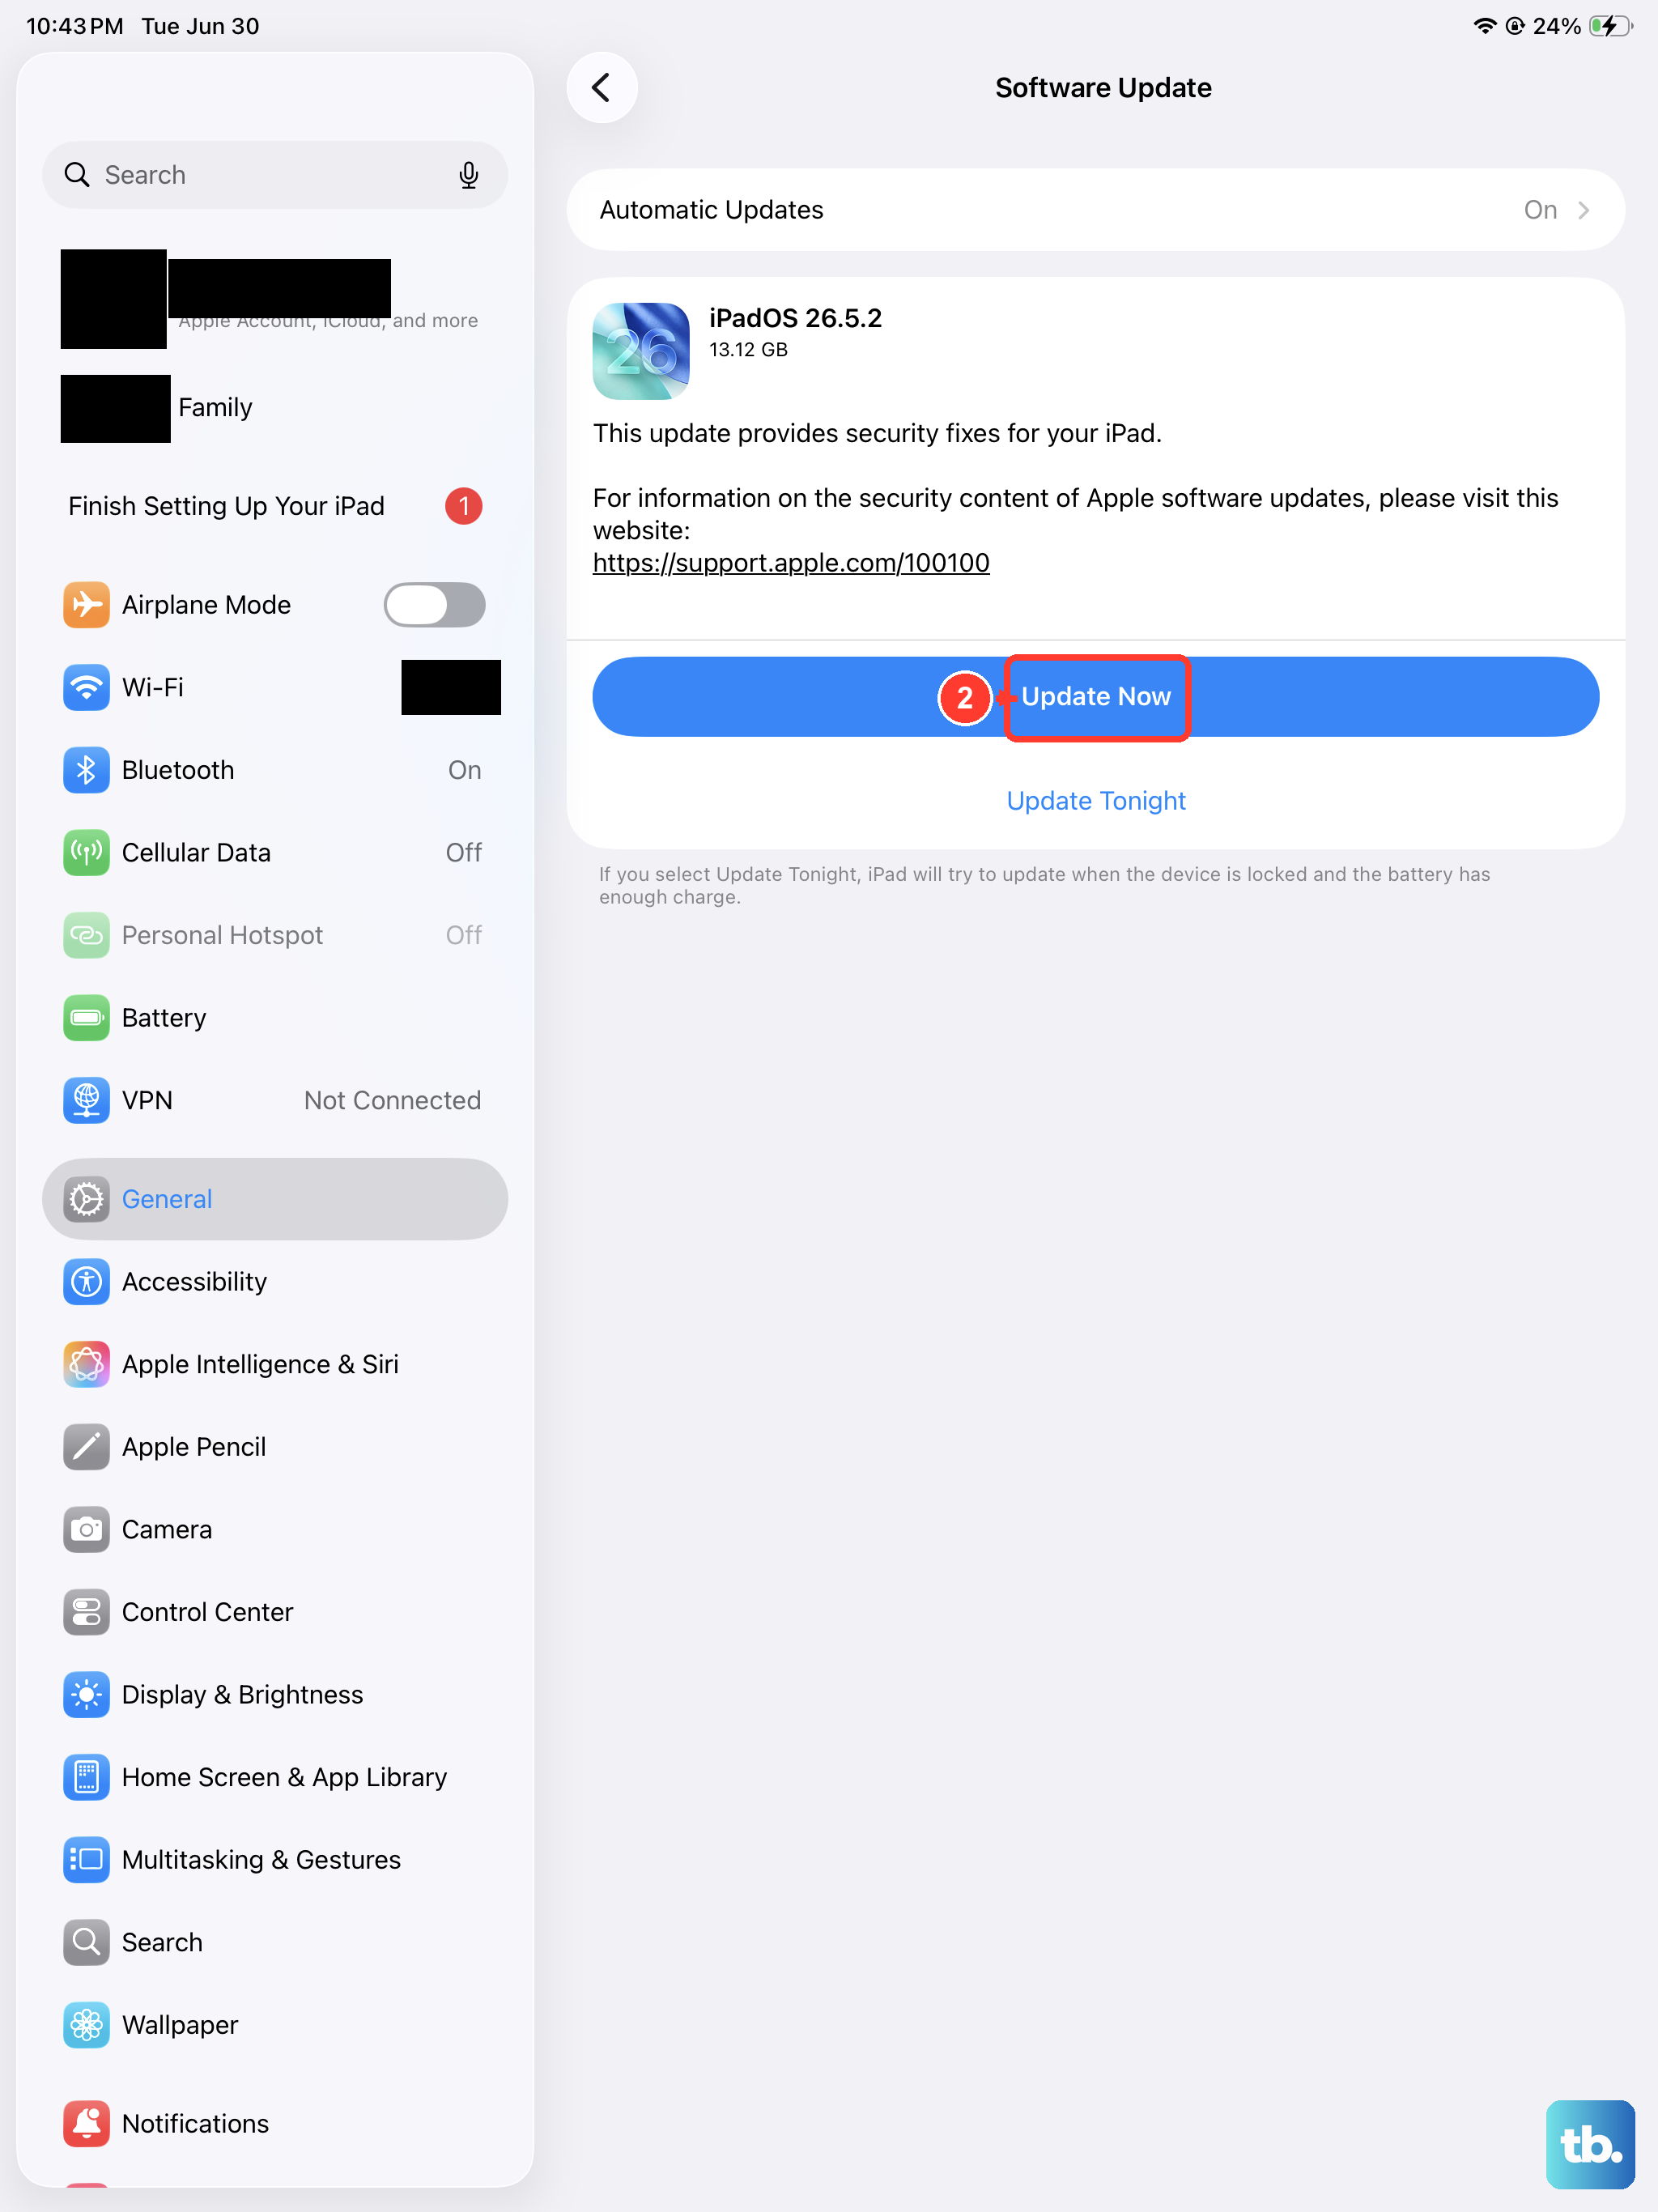
Running an outdated version of iPadOS can lead to bugs that affect messaging. Apple regularly releases updates with fixes. Connect to Wi-Fi and plug in your iPad with its USB-C charger.
Then, go to Settings > General > Software Update. If an update is available, tap to download and install it. I've seen many messaging issues resolved simply by updating to the latest software.
Check Date & Time Settings
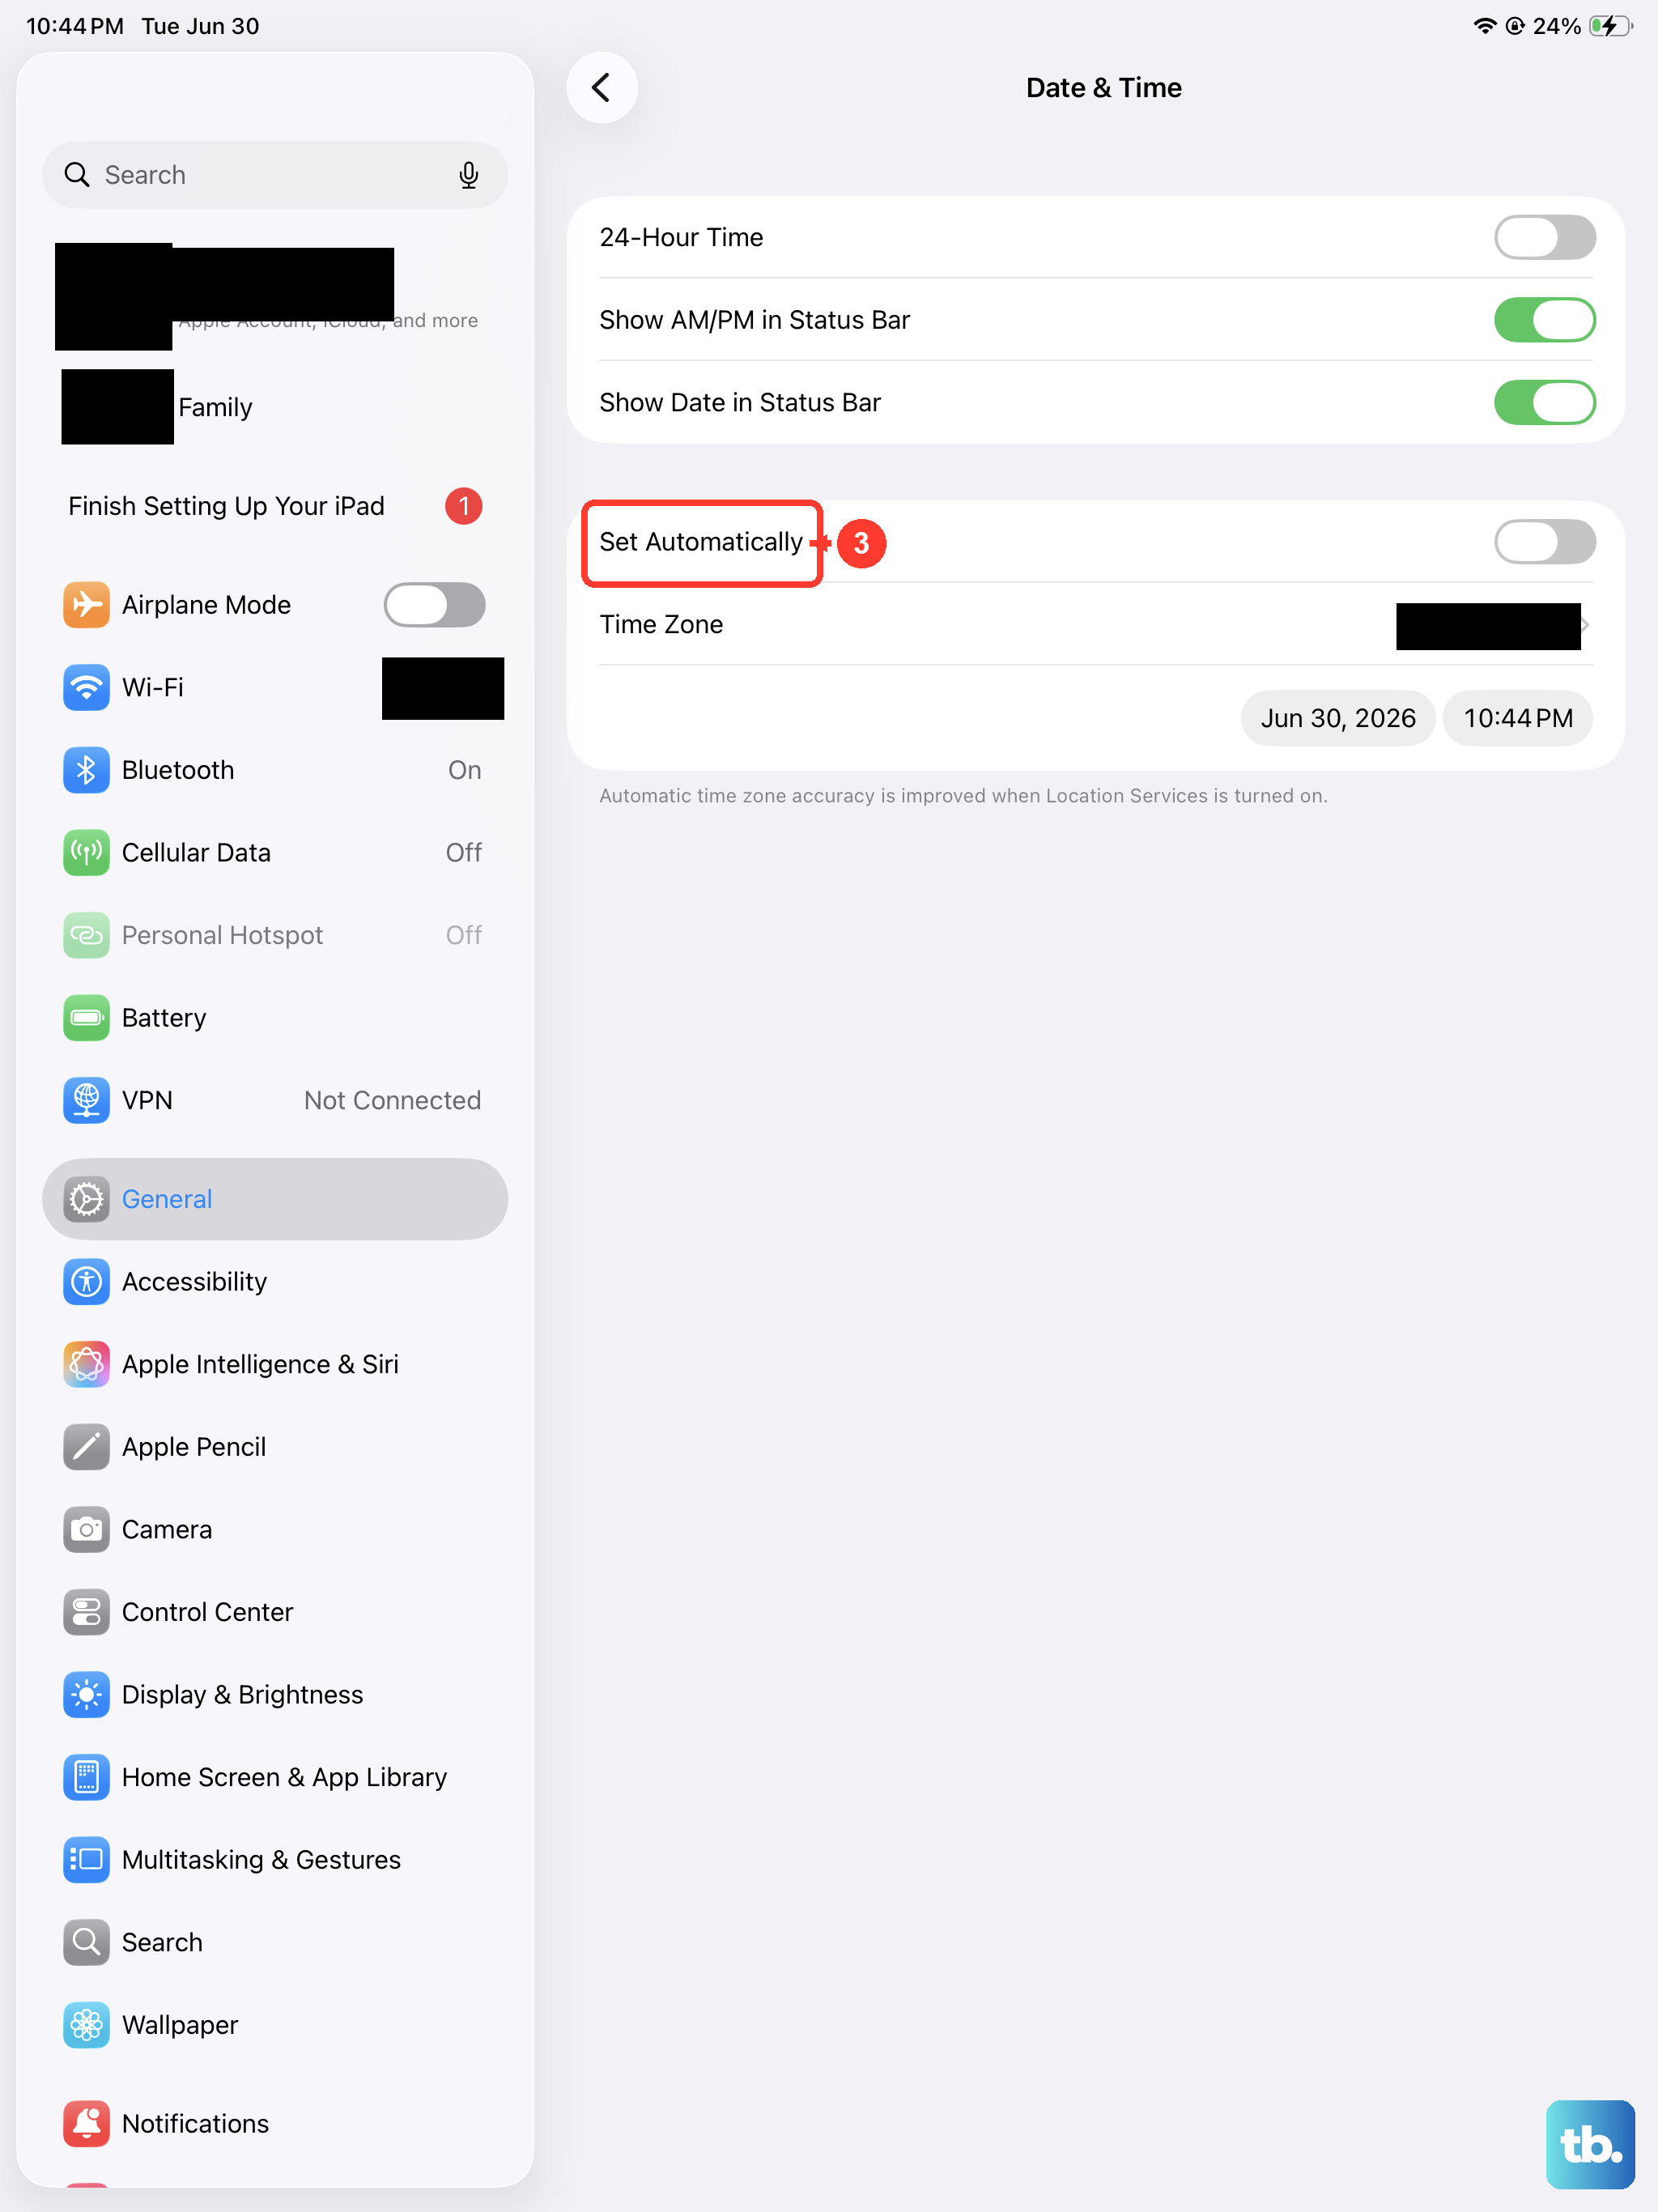
Incorrect date and time settings can surprisingly mess with iMessage. Your iPad needs to sync properly with Apple's servers. Go to Settings > General > Date & Time.
Make sure the option for Set Automatically is turned on. This ensures your iPad's clock is always accurate, which is crucial for secure message delivery.
Sign Out and Back Into Your Apple ID
This refreshes your account's connection to iMessage. Go to Settings and tap your name at the top. Scroll all the way down and tap Sign Out. You'll need your Apple ID password.
After signing out, force restart your iPad using the method described earlier. Once it's back on, go back to Settings and sign in with your Apple ID again. Try sending a picture to test it.
Reset Network Settings
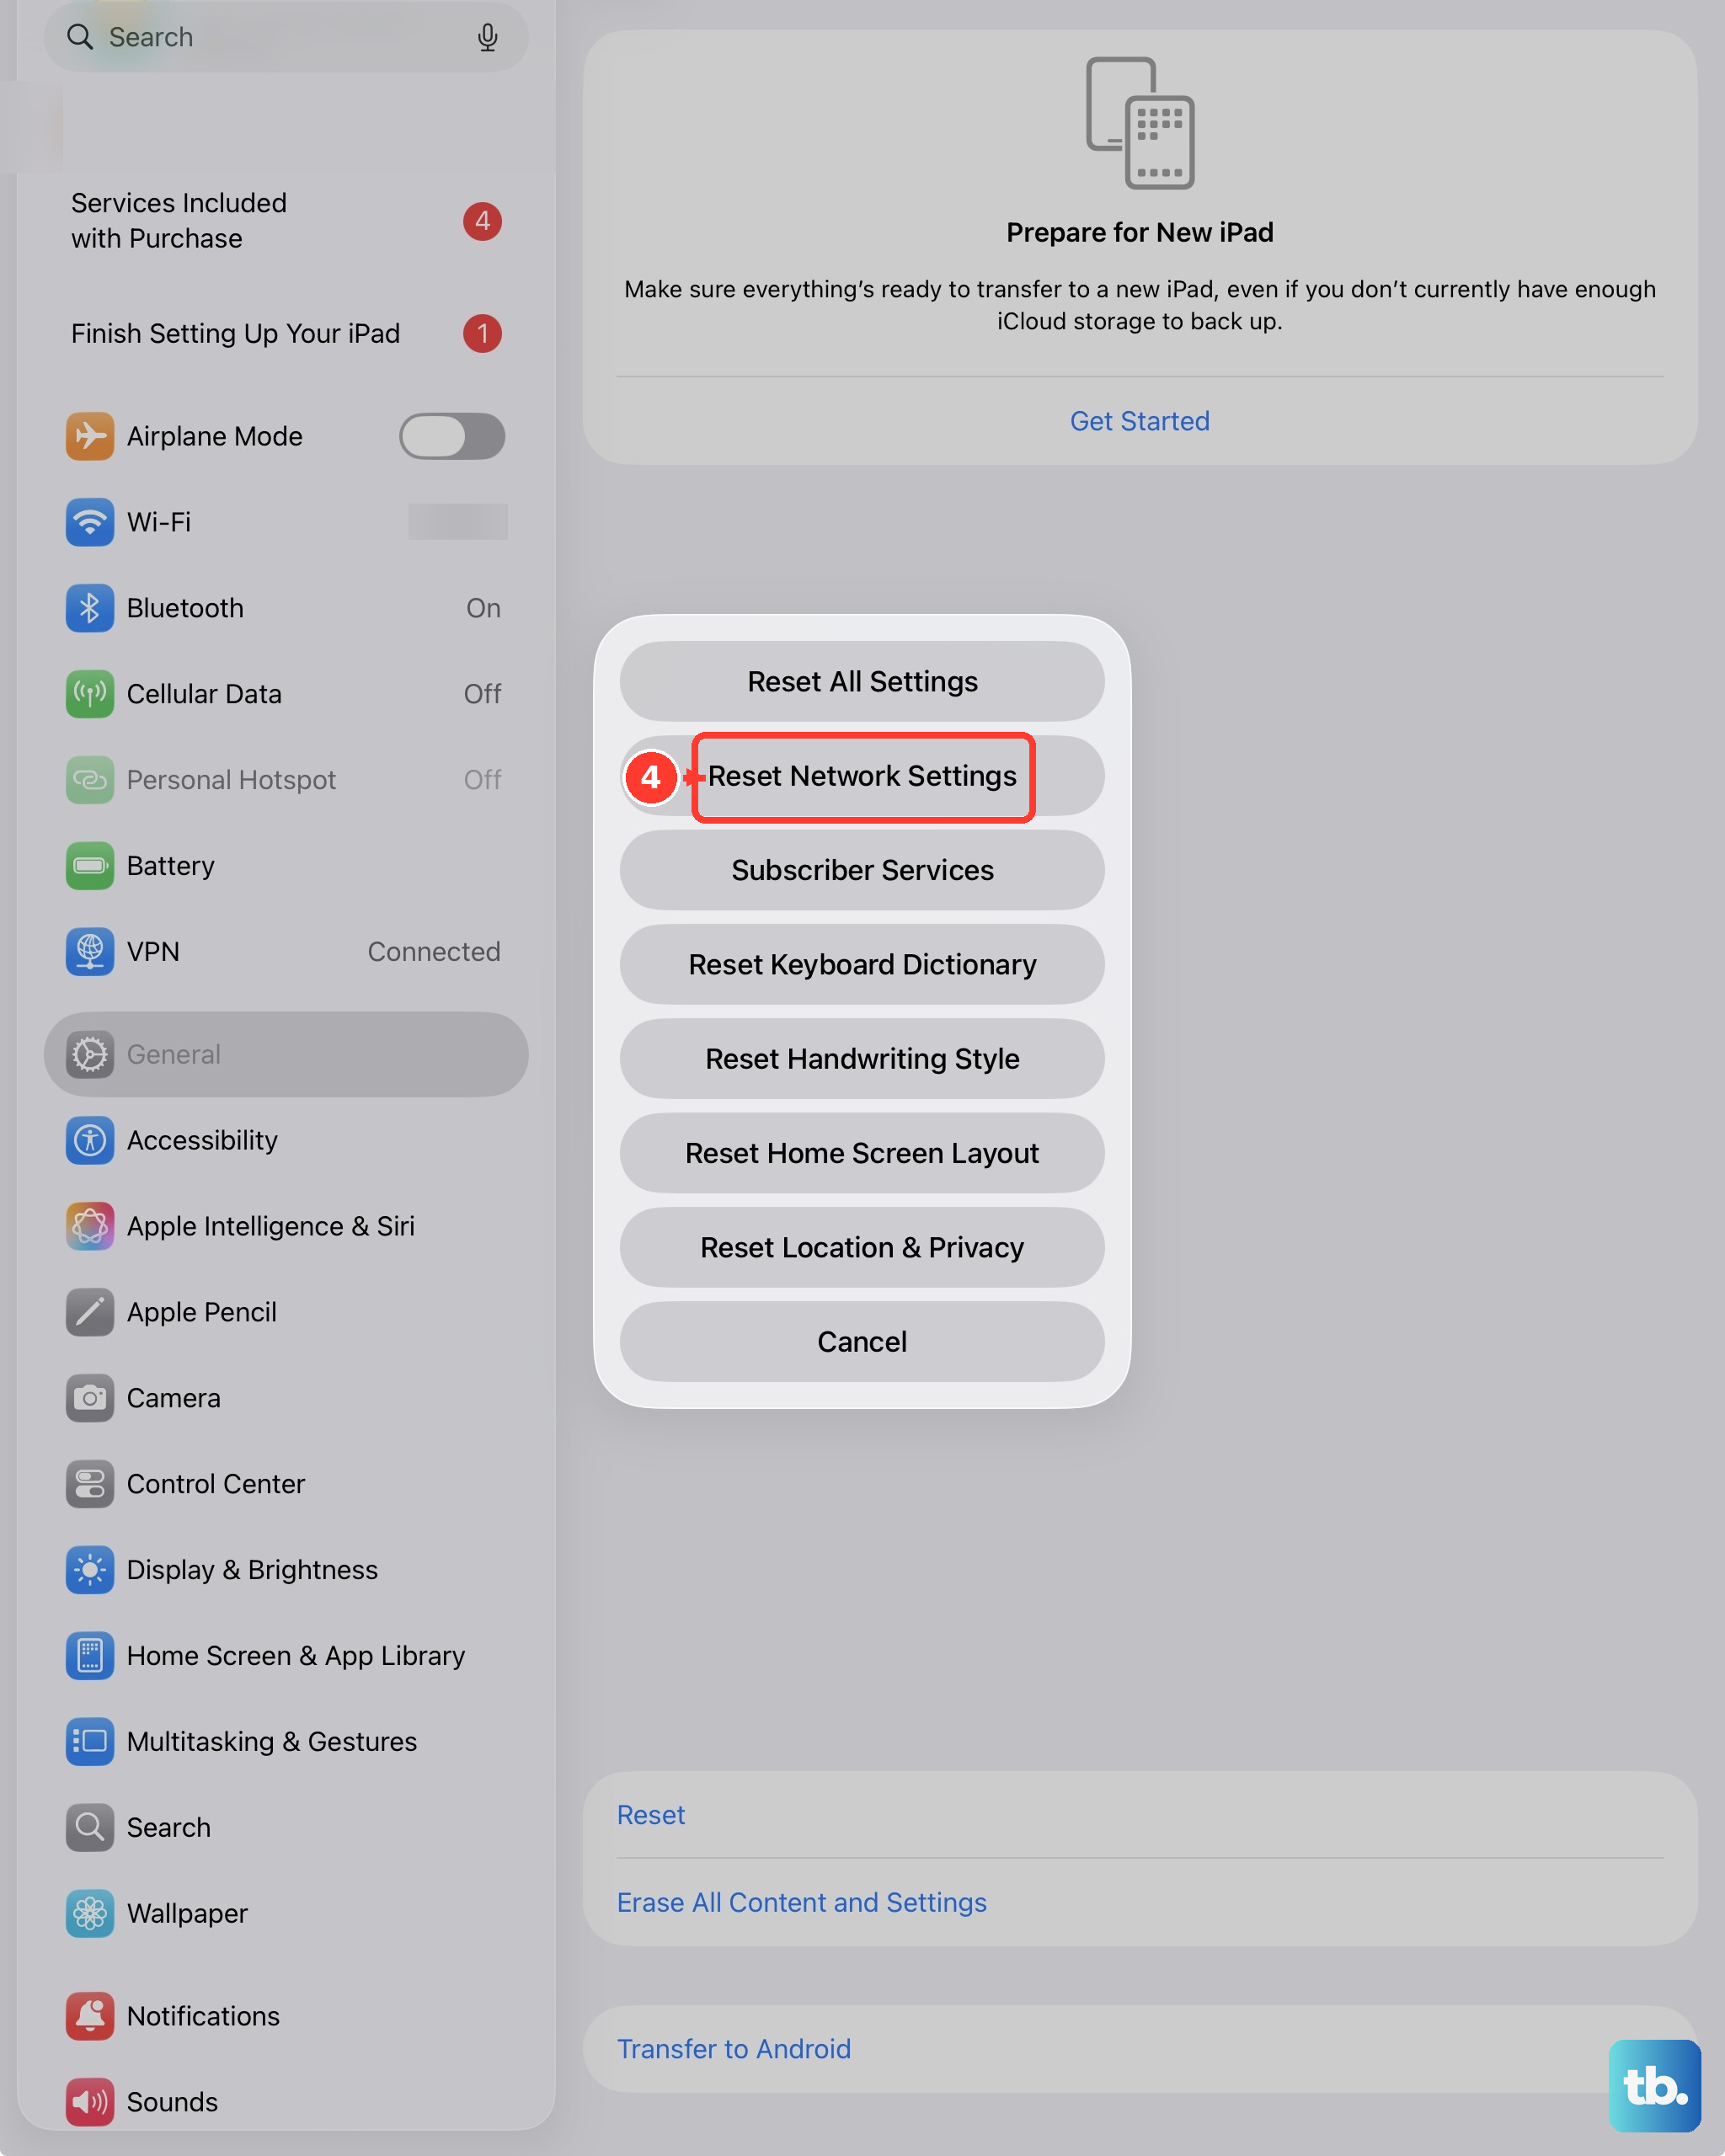
This step clears all your saved Wi-Fi passwords, VPN settings, and cellular preferences, so it's a bit more involved. It's very effective for persistent network-related sending problems.
Go to Settings > General > Transfer or Reset iPad. Tap Reset and then choose Reset Network Settings. Enter your passcode when prompted and confirm. Your iPad will restart and you'll need to rejoin your Wi-Fi networks.
Force Quit and Reopen the Messages App
Sometimes the app itself just gets stuck. To close it fully, swipe up from the bottom of the screen and pause in the middle to enter the app switcher. Find the Messages app card and swipe it up and off the top of the screen to close it.
Wait a few seconds, then tap the Messages icon on your Home Screen to reopen it. This gives the app a fresh start and can clear up any temporary glitches that were preventing the photo upload.