Windows 10 comes with autocorrect enabled by default to help fix spelling errors as you type. While this feature can be helpful for some users, others find it distracting or unnecessary. If you prefer to type without automatic corrections, you can easily disable this setting.
Here's how to turn off autocorrect in Windows 10:
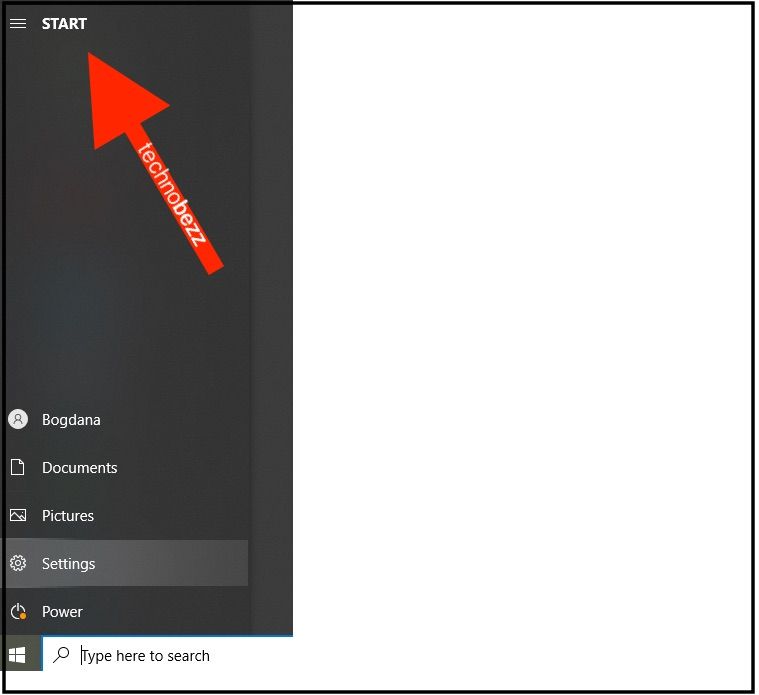
- 1.Click the Start button in the bottom-left corner of your screen
- 2.Select the gear icon to open Settings
- 3.Click on "Devices" from the Settings menu
- 4.Choose "Typing" from the left sidebar
- 5.Under the Spelling section, you'll see "Autocorrect misspelled words" - this is turned on by default
- 6.Click the toggle switch to turn off autocorrect
Click to expand

Click to expand
You can also disable "Highlight misspelled words" if you don't want Windows to underline potential spelling errors. Both settings are located in the same Typing menu.
If you ever want to re-enable autocorrect, simply return to Settings > Devices > Typing and toggle the switch back on. The changes take effect immediately across all Windows applications.