Your external monitor should light up the moment the cable, input, and Windows display mode agree with each other. When Windows 11 shows a black screen, mirrors the wrong display, or refuses to detect the monitor, start with the hardware and then move into Display settings.
To narrow down whether the screen or the signal is at fault, open a online monitor test and step through its patterns. A clean result shifts suspicion to the cable or source device.
Run through these fixes in order, from the fastest checks to driver repair and wireless display setup.
1. Check the cable and choose the right input
Begin with the physical connection: Windows cannot detect a screen that is powered off, plugged into the wrong port, or set to the wrong source.
Turn on the monitor, TV, or projector.
Connect the display to the PC with HDMI, DisplayPort, USB-C, Thunderbolt, DVI, or VGA.
Use the display's built-in buttons or menu to select the matching Input or Source.
Next, reseat the video cable at both ends.
Then try a different cable or connector type.
If you are using a dock, hub, or dongle, connect the monitor directly to the laptop with HDMI-to-HDMI or DisplayPort-to-DisplayPort. A direct test tells you whether the adapter path is causing the blank screen.
2. Switch the Windows projection mode
Press Windows logo key + P.
Choose Duplicate to show the same image on both screens.
Choose Extend to spread the desktop across both displays.
Choose Second screen only to use only the external monitor.
Choose PC screen only to return to the built-in display.
A monitor can be connected correctly and still stay dark when Windows is sending the image to the wrong screen. For a desk setup, Extend is the most useful mode. For a TV or projector, Duplicate keeps everything simple.
3. Detect and arrange your monitors
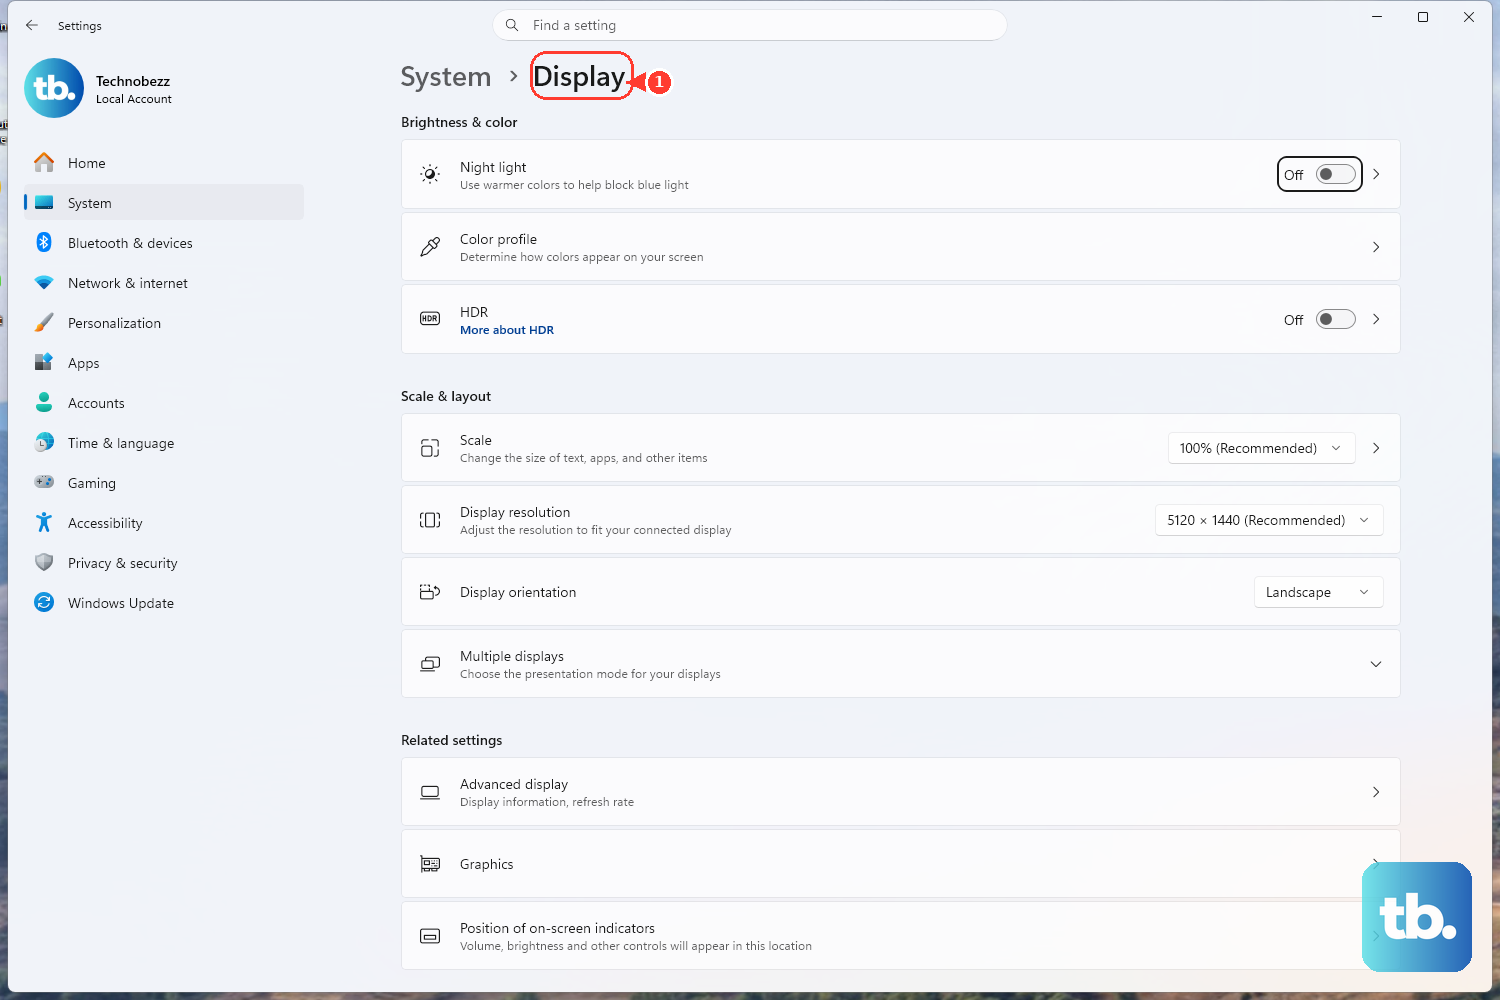
Once the display appears, use Start > Settings > System > Display, then Multiple displays, to make Windows match the layout on your desk. Select Detect if the external monitor is connected but missing, select Identify to show numbers on each display, drag each display box into the same position as the real monitors, and select Apply.
This fixes the classic problem where the mouse exits from the wrong side of the screen. Still on the Display page, expand Multiple displays and turn on Remember window locations based on monitor connection. Use Minimize windows when a monitor is disconnected if you want Windows to clear disconnected-monitor windows from the desktop.
4. Set resolution scale and refresh rate
Open Start > Settings > System > Display.
Select the external monitor.
Under Scale & layout, choose a comfortable Scale.
Open Display resolution and choose the option marked Recommended.
Use Display orientation only when the monitor is mounted vertically or upside down.
Blurry text, giant windows, tiny menus, and choppy motion usually come from the display layout settings. For smoother motion, open Start > Settings > System > Display > Advanced display. Select the monitor under Choose Display, then open Choose a refresh rate and pick the rate you want. The rates shown come from the monitor, cable, adapter, GPU, and resolution.
On supported Windows 11 hardware with DRR, VRR, and at least 120 Hz, use the Dynamic refresh rate toggle in Advanced display.
5. Reset the display when Windows sees nothing
If the external monitor is still missing, run the quick recovery checks before changing drivers.
- 1.Turn off the external display, disconnect it from power, reconnect power, and turn it on again.
- 2.Confirm the display is plugged in and set to the correct Input or Source.
- 3.Reconnect the video cable at the PC and monitor.
- 4.Open Start > Settings > System > Display > Multiple displays and select Detect.
- 5.Press Windows + Ctrl + Shift + B to reset the graphics driver. A beep or screen flicker confirms the reset.
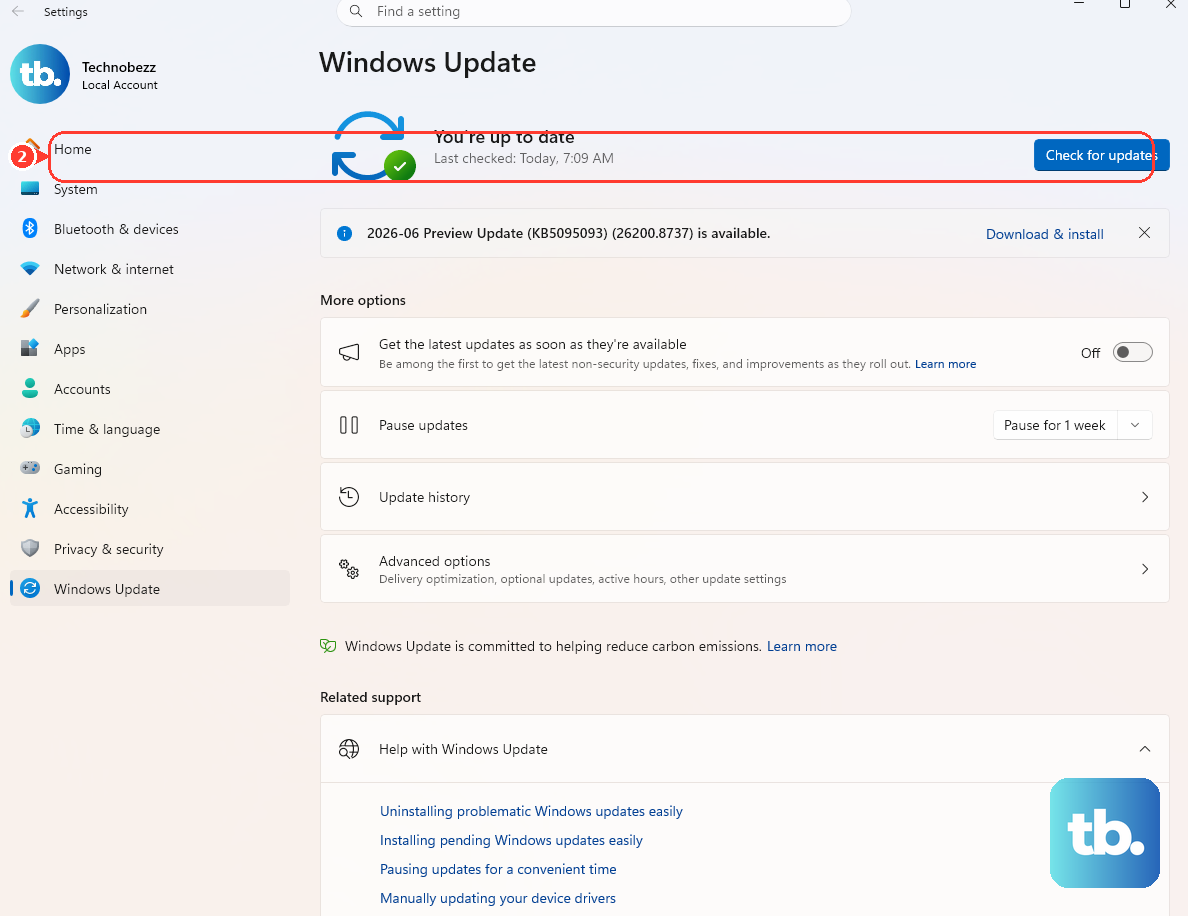
- 6.Open Start > Settings > Windows Update and select Check for updates.
For optional hardware drivers, open Start > Settings > Windows Update > Advanced options. Turn on Receive updates for other Microsoft products, select Optional updates, choose the listed driver updates, then select Download and install. Restart by right-clicking Start and selecting Shut down or sign out > Restart.
6. Repair the display driver after an update
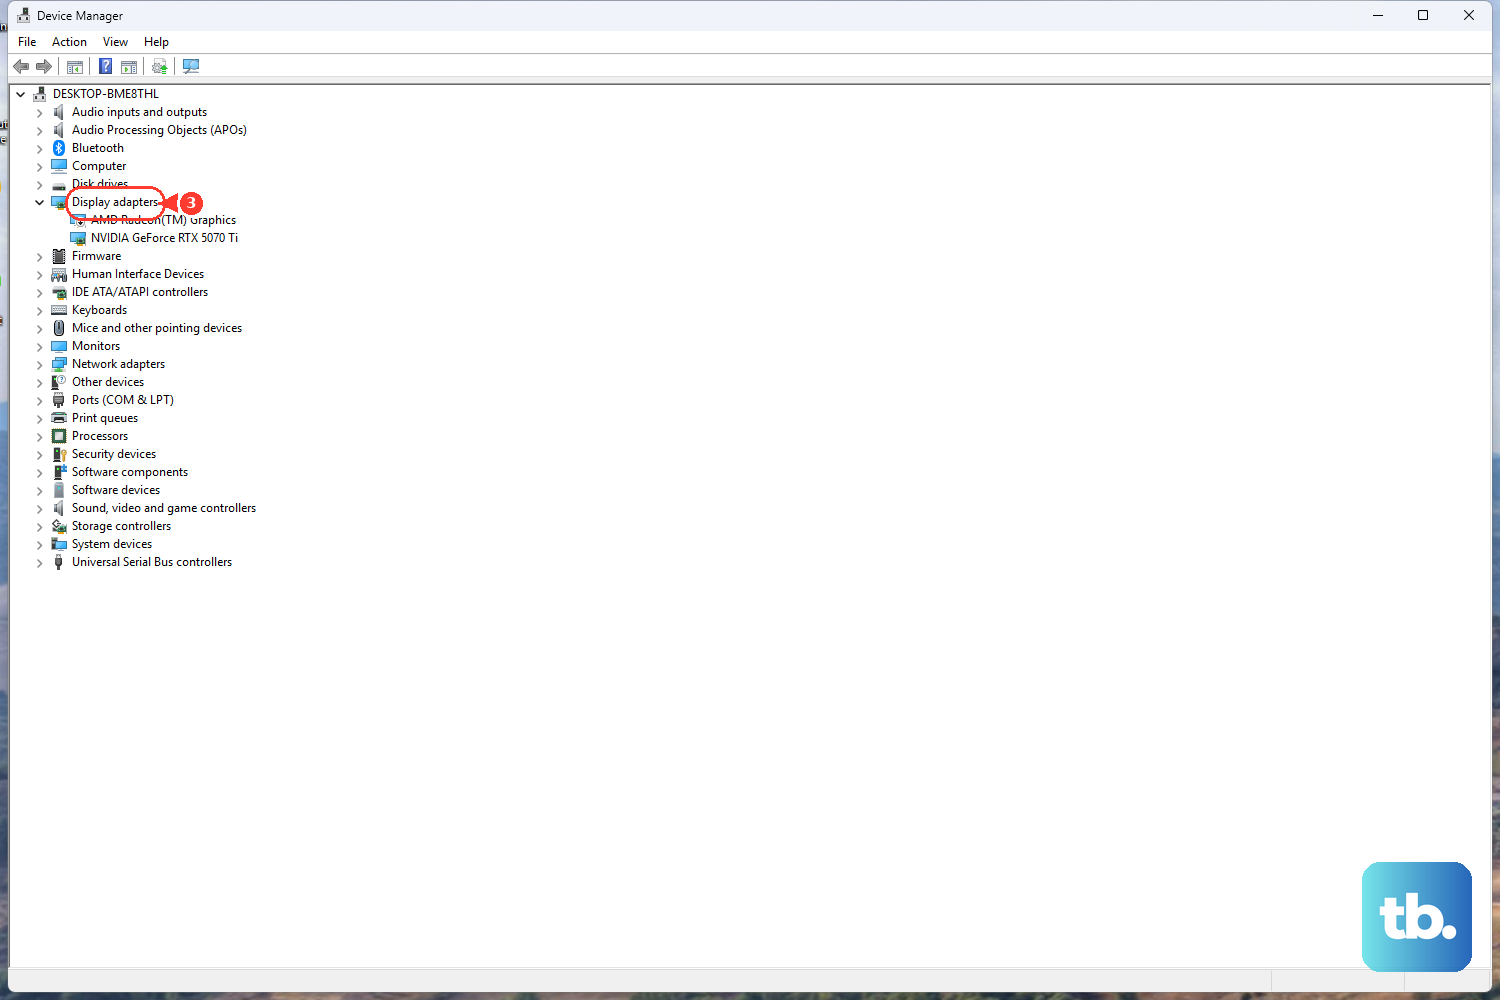
Right-click Start and select Device Manager.
Expand Display adapters.
Right-click the graphics adapter and select Update driver.
Select Search automatically for drivers and follow the prompts.
When the monitor stopped working after a Windows or driver update, use Device Manager first. If the issue started right after a driver change, roll it back: open Device Manager, expand Display adapters, right-click the adapter and select Properties, open the Driver tab, and select Roll Back Driver.
If Roll Back Driver is unavailable, reinstall the display driver. In Device Manager, right-click the adapter, select Uninstall device, choose Attempt to remove the driver for this device, then select Uninstall. Restart when prompted, reopen Device Manager, right-click the adapter, and select Update driver > Search automatically for updated driver software.
Dell PCs can use SupportAssist or Dell Drivers & Downloads. Intel, NVIDIA, and AMD also provide official driver pages or apps for supported graphics hardware.
7. Connect a wireless display the Windows 11 way
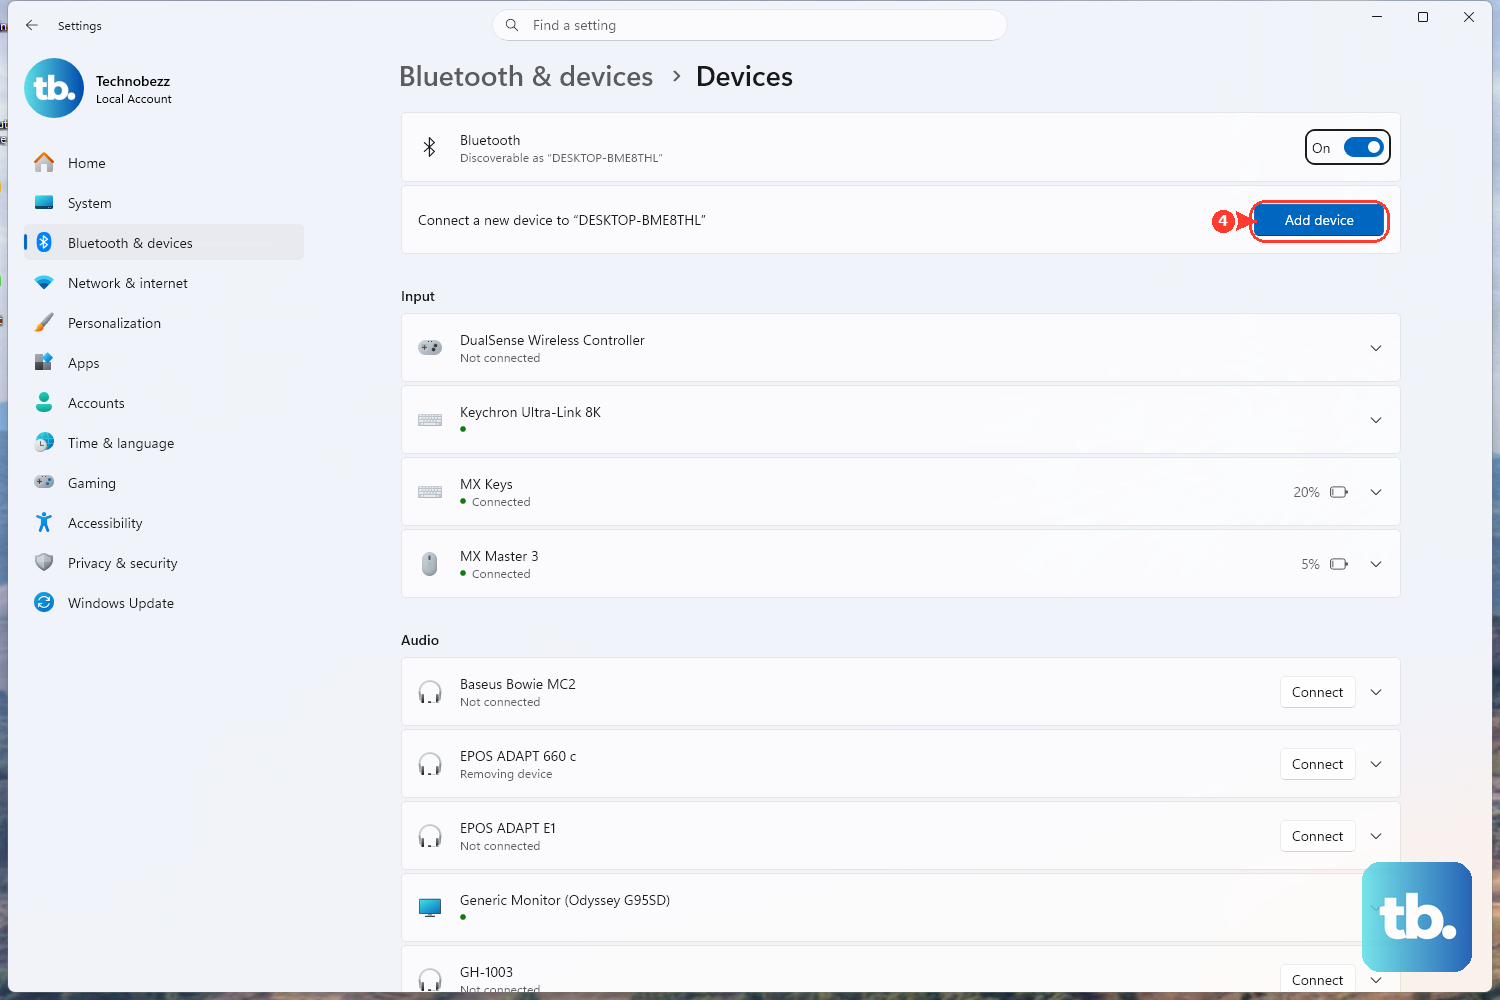
Use Cast for a wireless monitor, TV, projector, or Miracast adapter instead of older Windows 10 menus.
Turn on the TV, projector, display, or Miracast adapter.
Press Windows logo key + K.
Select the wireless display from the list.
Follow any on-screen instructions.
You can also open Start > Settings > System > Display > Multiple displays and select Connect. If Windows says the PC needs an external display with a cable, the PC does not support Miracast. Use the Network, Sound, or Battery icons on the right side of the taskbar to confirm Wi-Fi is turned on.
To refresh a broken wireless pairing, open Settings > Bluetooth & devices > Devices. Under Wireless displays & docks, select the wireless display or adapter, choose Remove device, then reconnect with Windows logo key + K.
8. Use adapter and GPU tools only when needed
Microsoft Wireless Display Adapter has its own setup flow: plug HDMI into the display, plug USB into a USB charging port on the display or a 5W USB Type-A charger, set the display to the correct HDMI input, then press Windows logo key + K and choose the adapter.
Install the Microsoft Wireless Display Adapter app from Microsoft Store to update firmware. In the app, select Update & security, then select Update when one is available. The same page includes Enter a PIN when connecting a new device.
DisplayPort daisy chaining needs DisplayPort 1.2 or higher with Multi-Stream Transport, then Windows arrangement in Settings > System > Display.
NVIDIA Control Panel manages displays connected to the NVIDIA-based graphics card.
AMD Eyefinity starts after Windows is already using extended mode.
Some multi-monitor layouts need vendor-specific support. Skip old instructions that point to Intel WiDi, Action Center > Connect, Control Panel > Display > Adjust resolution, or the old Intel Graphics Control Panel. Current Windows 11 setup uses Windows logo key + K for wireless displays, Windows logo key + P for projection modes, and Start > Settings > System > Display for monitor setup.
Frequently Asked Questions
Why does Windows show my monitor but the screen is black?
Use the monitor menu to select the correct Input or Source, reseat the cable, then press Windows logo key + P and choose Duplicate, Extend, or Second screen only.
What refresh rate should I use for an external monitor?
Open Start > Settings > System > Display > Advanced display, select the monitor, then choose a refresh rate. Windows only shows rates supported by the monitor, cable, adapter, GPU, and resolution.
Can I use another Windows 11 PC as a wireless display?
Yes. On the receiving PC, open Start > Settings > System > Projecting to this PC, add the Wireless Display optional feature, launch Wireless Display, then press Windows logo key + K on the sending PC and select the receiving PC.
How do I fix a Microsoft Wireless Display Adapter that will not connect?
Remove the adapter from the display, hold the reset button for 10 seconds until the LED blinks, reconnect it, wait for Ready to connect, then use Cast or Windows logo key + K.