You click Print, the document vanishes into nowhere, and you realize Windows just sent it to the wrong printer again. Maybe it landed on the office machine three floors down, or the old inkjet you stopped using months ago. The fix is to lock in the printer you actually want, and Windows 11 makes that straightforward once you turn off one setting that quietly overrides your choice.
This guide walks you through setting a default printer in Windows 11 (and Windows 10, where the path differs), then covers what to do when the printer you picked still refuses to cooperate. Every step here uses the built-in Settings app and the official Windows tools, so you will not need anything extra.
Open the Printers Screen in Settings
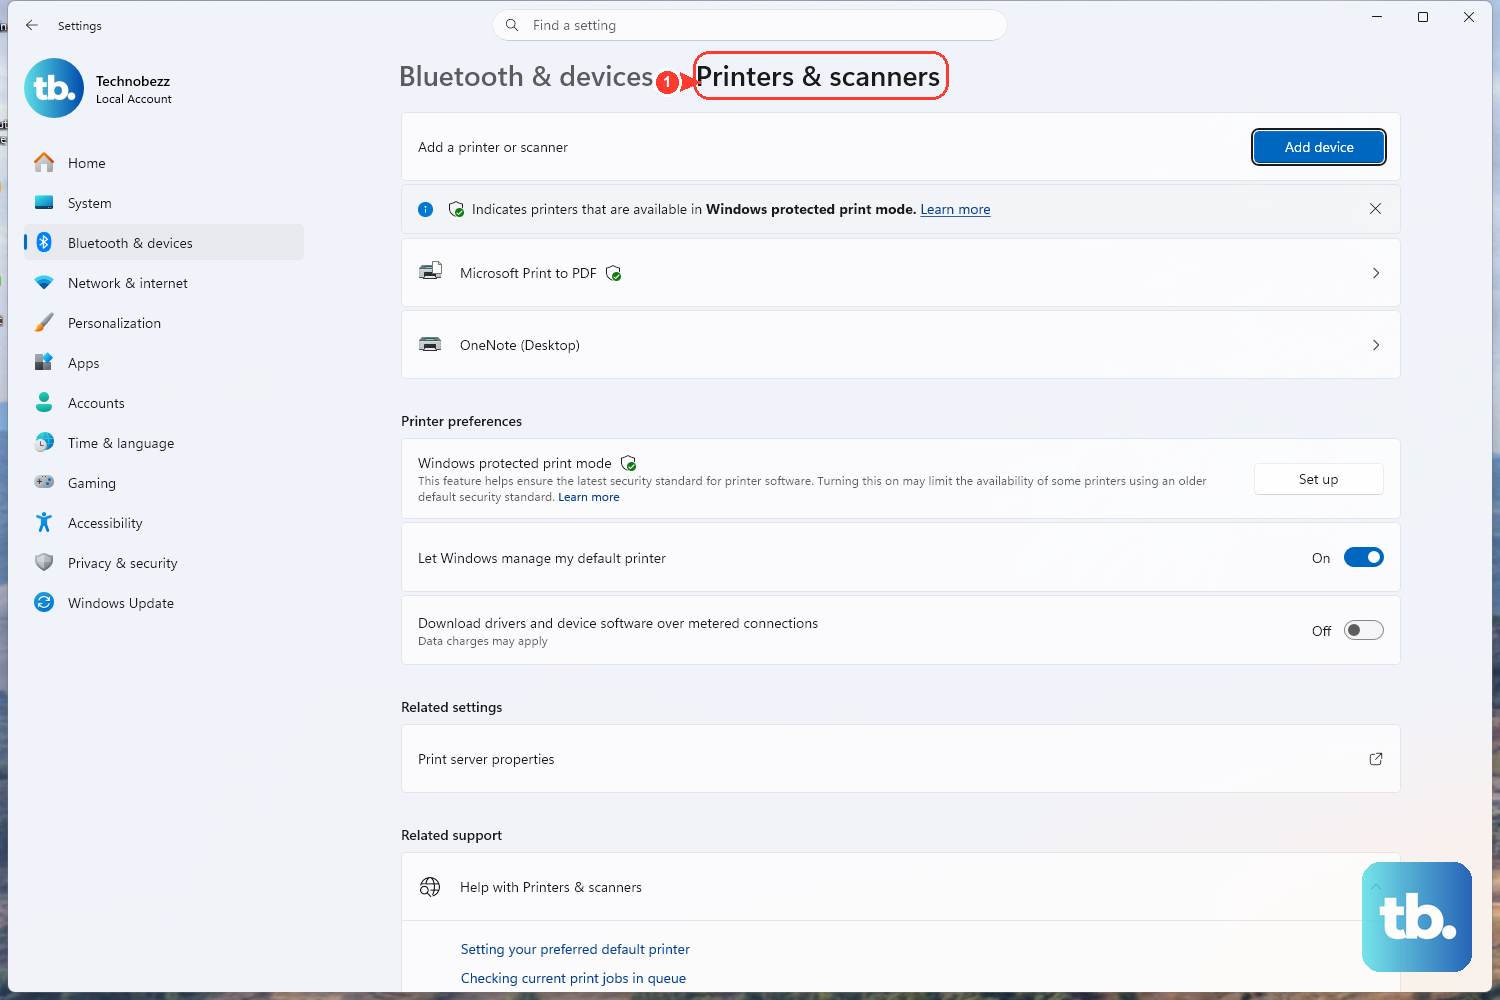
The default printer lives in the Settings app, on the screen that lists every printer installed on your PC. On Windows 11, select Start > Settings > Bluetooth & devices > Printers & scanners.
If you are still on Windows 10, the same screen sits in a slightly different place: Start > Settings > Devices > Printers & scanners. Either way, this is the one screen where you both choose a default and manage jobs, so it is worth getting comfortable with it.
Once it loads, you will see each installed printer listed by name. Keep this window open, because the next few steps all happen right here.
Stop Windows From Picking the Default for You
Here is the setting that trips up most people. Windows ships with an option called "Let Windows manage my default printer," and when it is turned on, Windows automatically makes the last printer you used the default. That is why your choice keeps changing on its own.
You need to turn this off before a manual default will stick. On the Printers & scanners screen in Windows 11, switch "Let Windows manage my default printer" to Off. On Windows 10, it shows up as a checkbox instead, and you clear it.
With Windows out of the way, you are now free to assign a permanent default that stays put until you change it yourself.
Set the Printer You Actually Want as Default
Now choose the machine you want every print job to use by default. On Windows 11, in the list of installed printers, select the printer you want, then choose Set as default. The status under the printer's name changes to Default, which confirms the change took effect.
On Windows 10 the flow has one extra step: select the printer, choose Manage, then in the device window select Set as default. After that, Windows will route your documents to this printer unless you deliberately pick another one at print time.
If you ever want to switch defaults later, you repeat this same step on whichever printer you prefer. Just remember that "Let Windows manage my default printer" needs to stay off, or your manual choice can get overwritten again.
When the Printer Shows Offline
Setting a printer as default does not help if its status reads Offline; jobs will sit there and never print. Start with the basics that Microsoft's offline troubleshooting guidance recommends: confirm the printer is powered on and properly connected to your PC or network.
If it still shows Offline, power-cycle the hardware. Turn the printer off, unplug it, wait a few seconds, plug it back in, and turn it on again. That short reset clears a surprising number of connection hiccups that leave a printer stranded in the Offline state.
On Windows 10 specifically, there is one more thing to check. Open the print queue, then from the Printer menu, clear Pause Printing and Use Printer Offline if either one is currently selected. With those cleared and the printer back online, your default should start accepting jobs again.
Clear Out Stuck Print Jobs
Sometimes the printer is fine but the queue is jammed with documents that will not move. To look inside the queue, head back to Printers & scanners (on Windows 11 that is Settings > Bluetooth & devices > Printers & scanners; on Windows 10 it is Settings > Devices > Printers & scanners) and select your printer.
Then select Open print queue, which is labeled Open queue on Windows 10. You will see a list of pending jobs in the order Windows is trying to send them.
Right-click each print job and select Cancel to remove it. Clearing every stuck item often gets the printer moving again, especially when one bad document at the front of the line was blocking everything behind it.
Restart the Print Spooler Service
If the queue refuses to clear no matter how many times you cancel jobs, the service that manages printing may need a restart. The Print Spooler service must be running for Windows to print, show printers, or install a printer, so this is a common and effective fix.
Press Windows key + R, type services.msc, and press Enter to open the Services console. In the Services list, locate Print Spooler, right-click it, and select Restart. If Restart is unavailable, select Start instead.
Restarting the spooler flushes its working state and frequently dislodges jobs that were otherwise frozen in place. Once it comes back up, try printing again before moving on to anything more involved.
Manually Empty the Spool Folder
When a single job simply will not delete, even after a spooler restart, you can clear the spool folder by hand. Treat this as a last resort: it removes all pending print jobs, so you will need to resend anything you still want printed.
First, open Services again: press Windows key + R, type services.msc, and press Enter. Right-click Print Spooler and select Stop. Stopping the service is required before you touch the folder, so Windows is not using the files while you delete them.
- 1.With the spooler stopped, open File Explorer and go to
C:\Windows\System32\spool\PRINTERS. - 2.Delete all files inside that folder; this removes every pending print job.
- 3.Return to Services, right-click Print Spooler, and select Start to turn printing back on.
After the spooler is running again, the stubborn job should be gone for good, and your default printer can accept fresh documents.
Let the Official Windows Troubleshooter Take Over
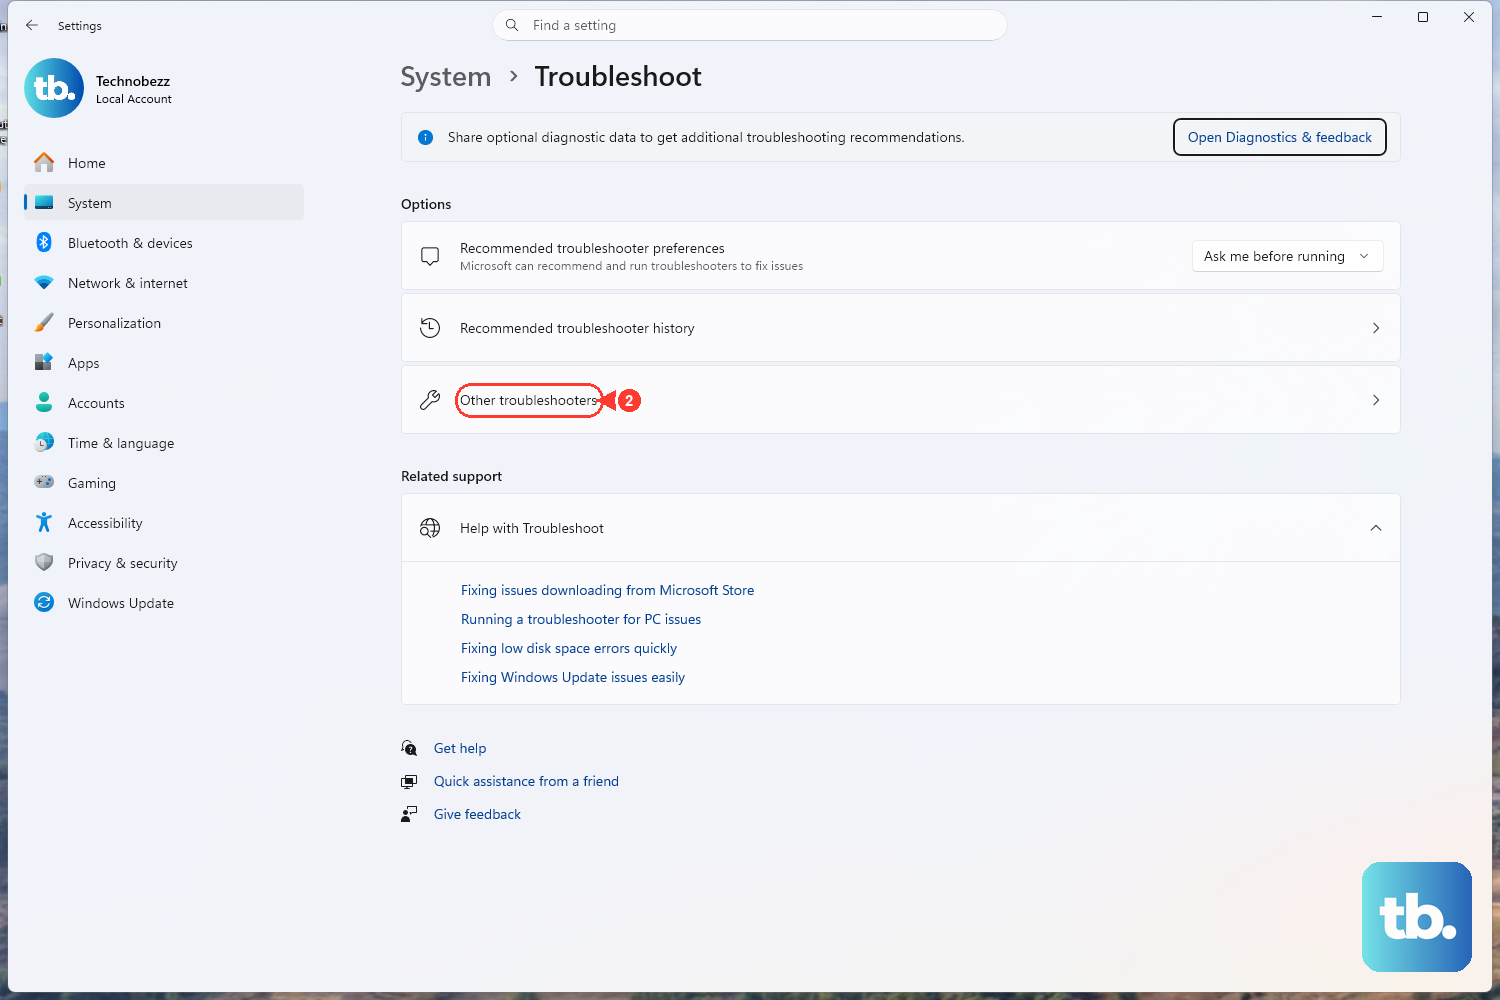
If problems persist after all of the above, hand things off to Microsoft's automated fixer. It works on both Windows 11 and Windows 10 and runs through a series of diagnostics on its own.
Open the "Fix printer connection and printing problems in Windows" support page and select Run the troubleshooter in Get Help (the link is aka.ms/PrinterConnection). The tool runs diagnostics and attempts to fix most printer problems automatically, so it is a good catch-all when you are not sure what is wrong.
Let it finish its checks, then try setting your default printer again from Settings > Bluetooth & devices > Printers & scanners if needed. Between a manually chosen default, a cleared queue, and the official troubleshooter, you should have your everyday printer locked in and printing reliably.
Frequently Asked Questions
Why does Windows 11 keep changing my default printer?
That happens because "Let Windows manage my default printer" is turned on, which automatically makes the last printer you used the default. Turn that setting off on the Printers & scanners screen in Settings > Bluetooth & devices > Printers & scanners, then set your default manually so it stays put.
Why won't my manual default printer stick?
A manually chosen default keeps getting overwritten while "Let Windows manage my default printer" is still on. Switch that setting off first, then select your printer and choose Set as default so the choice stays in place.
My printer is set as default but shows Offline. What now?
A default printer still won't print while its status is Offline. Confirm it is on and connected, then power-cycle it: turn the printer off, unplug it, wait a few seconds, plug it back in, and turn it on. On Windows 10, also open the print queue and clear Pause Printing and Use Printer Offline from the Printer menu if either is selected.
How do I clear a print job that won't delete?
Try restarting the Print Spooler first: press Windows key + R, type services.msc, press Enter, then right-click Print Spooler and select Restart. If the job still won't go, stop the spooler, delete all files in C:\Windows\System32\spool\PRINTERS, then start the spooler again. Note that this removes all pending print jobs.
Where is the official Windows printer troubleshooter?
Open the "Fix printer connection and printing problems in Windows" support page and select Run the troubleshooter in Get Help, available at aka.ms/PrinterConnection. It works on both Windows 11 and Windows 10 and attempts to fix most printer problems automatically.


