Your Windows microphone usually fails for one of four reasons: Windows is listening to the wrong device, the mic is muted, an app is blocked, or the browser or meeting app has its own microphone selected. Start with the Windows 11 input setting, then move through permissions, browser access, app settings, and drivers in that order. By the end, you will know exactly where the microphone is being blocked.
1. Choose the microphone Windows should use
Start here when Windows uses the laptop mic instead of your headset, webcam, or external microphone. This setting controls the default input device for Windows.
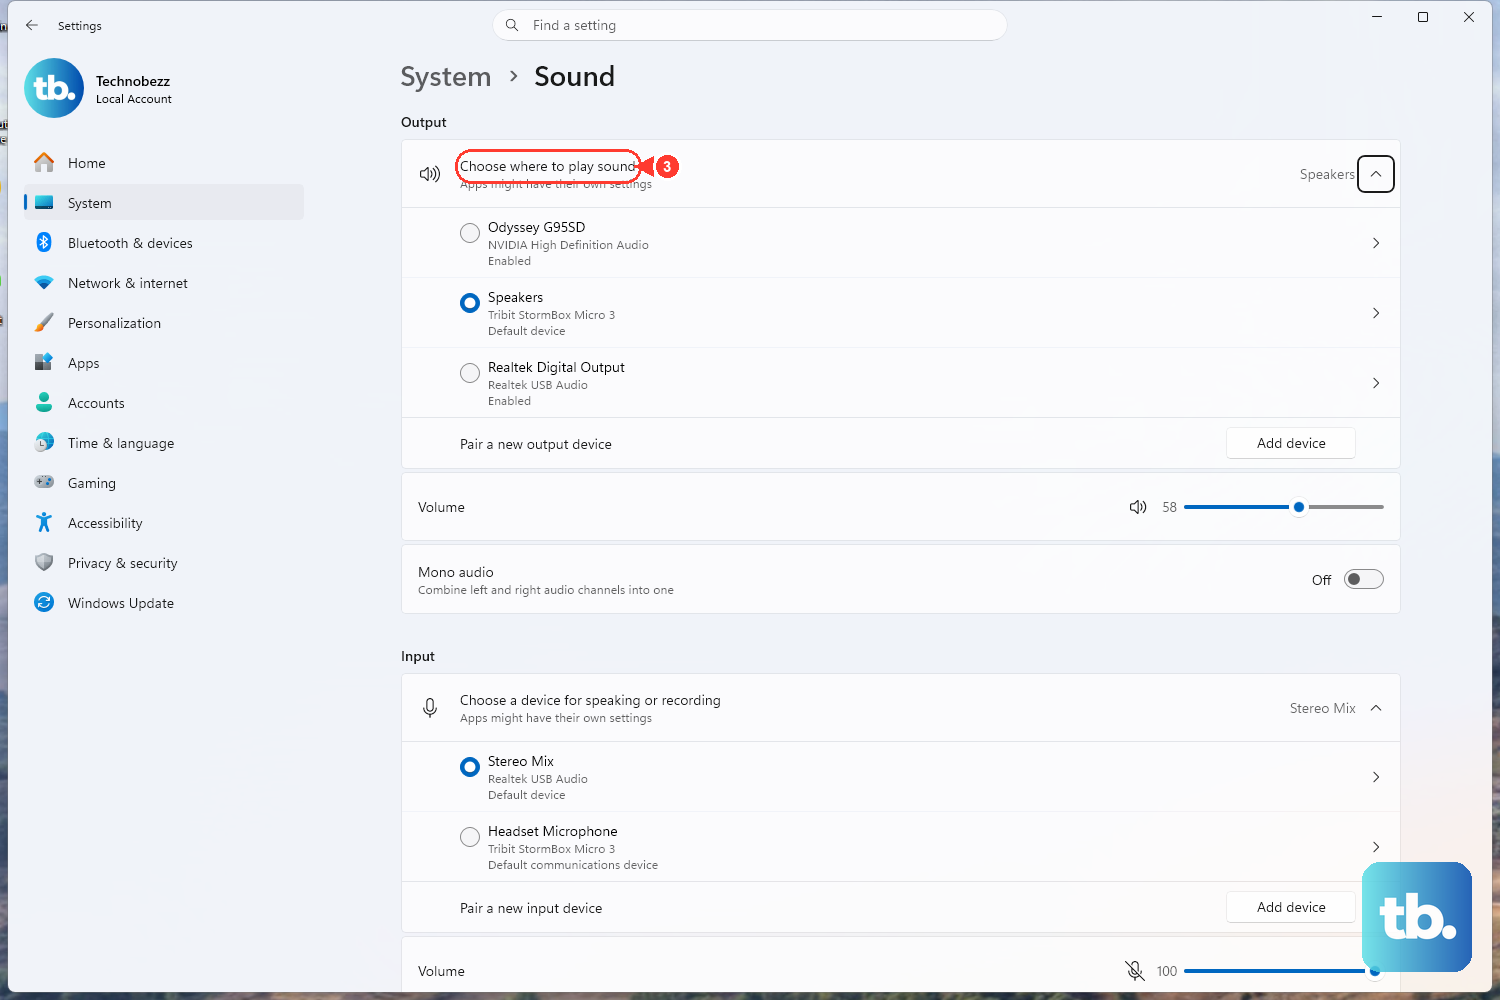
Select Start > Settings > System > Sound, then go to Input. Under Choose a device for speaking or recording, select the microphone or recording device you want Windows to use.
Windows 10 had an equivalent input picker, but standard Windows 10 support ended on October 14, 2025. For current consumer setup, use the Windows 11 path above.
2. Connect a new mic or pair a Bluetooth headset
Connect the microphone to your PC, then open Start > Settings > System > Sound. Check Input and confirm the connected microphone appears.
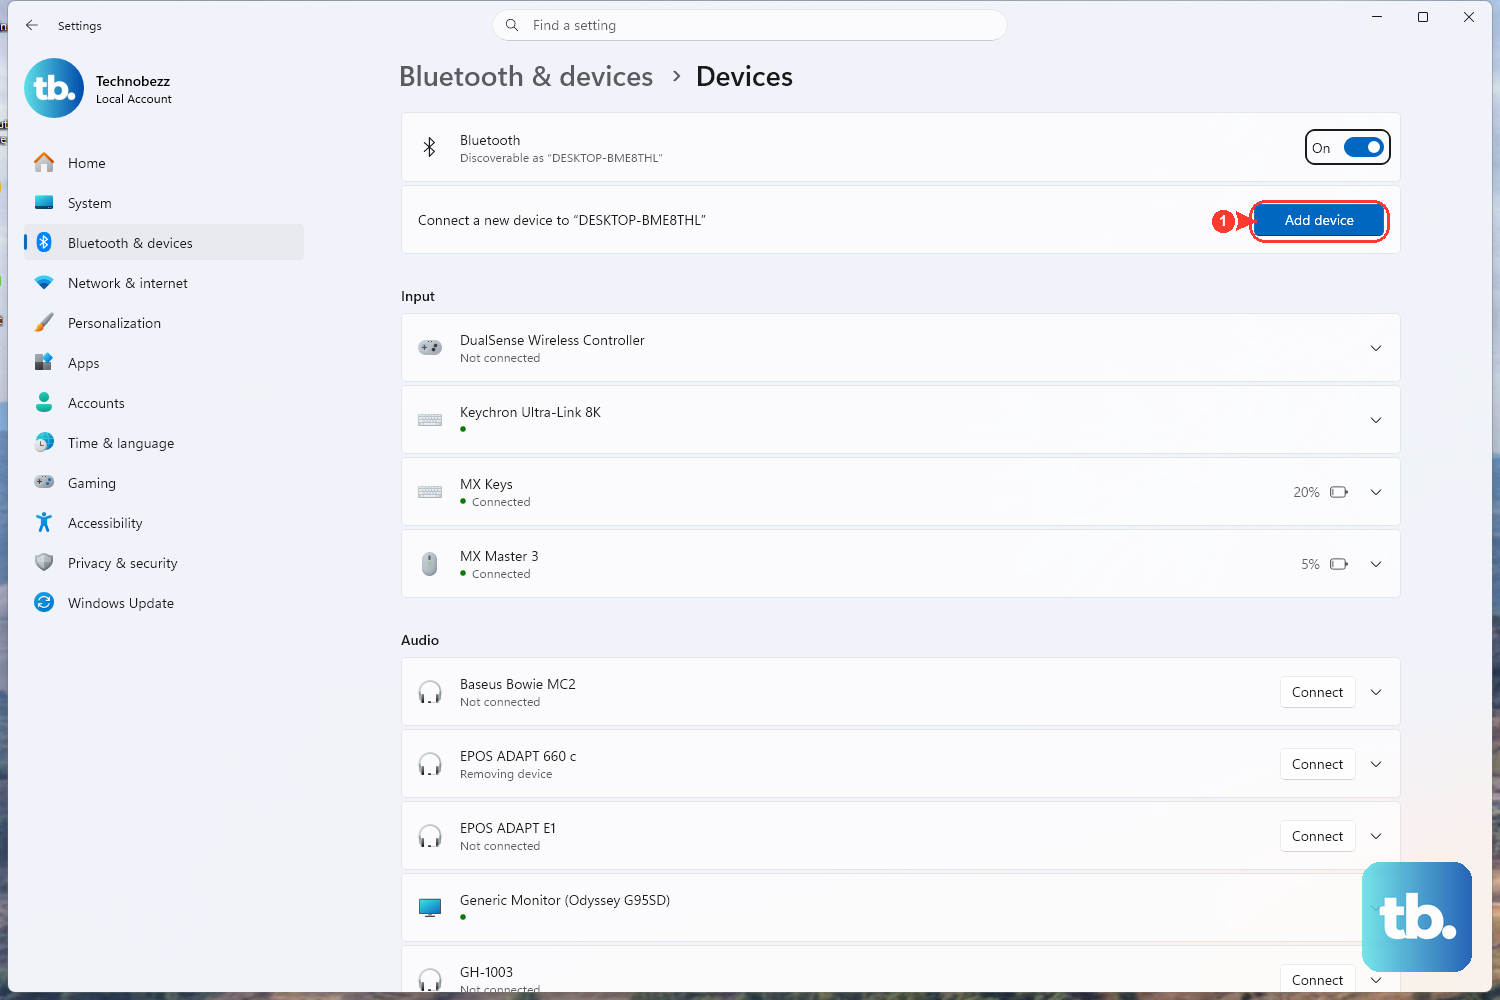
For Bluetooth, open Start > Settings > Bluetooth & devices > Devices > Add device. Choose Bluetooth, then follow the pairing prompts.
A USB or wired microphone should appear in Windows Sound settings after you connect it. A Bluetooth headset needs pairing before Windows can use it as an input device.
If a paired Bluetooth headset still refuses to behave, remove it and pair it again. Go to Start > Settings > Bluetooth & devices > Devices, select More options for the headset, choose Remove device, select Yes, then return to Add device.
3. Test the microphone and raise input volume
Run the Windows microphone test before troubleshooting Zoom, Teams, Chrome, or another app.
Open Start > Settings > System > Sound, then under Input, select your microphone. Open Properties.
Under Input settings, select Start test. Speak normally, then select Stop test. Select Play under Recorded sample, then move the Input volume slider until the recording is clear.
This test tells you whether the selected device is actually recording. Check the physical Mute button on the headset or microphone as well, because Windows can select the correct device while the hardware mute control blocks the audio.
4. Allow Windows and apps to use the microphone
- 1.Open Start > Settings > Privacy & security > Microphone.
- 2.Turn on Microphone access.
- 3.Turn on Let apps access your microphone.
- 4.Under Choose which apps can access your microphone, turn on the app that needs microphone access.
- 5.For desktop programs, turn on Let desktop apps access your microphone.
A correct default microphone still fails inside apps when Windows privacy access is off. The individual app switches apply to Microsoft Store apps. Desktop apps are handled by Let desktop apps access your microphone; Microsoft notes that desktop apps are not individually toggled on that page, and some desktop apps do not appear there depending on how they access the microphone.
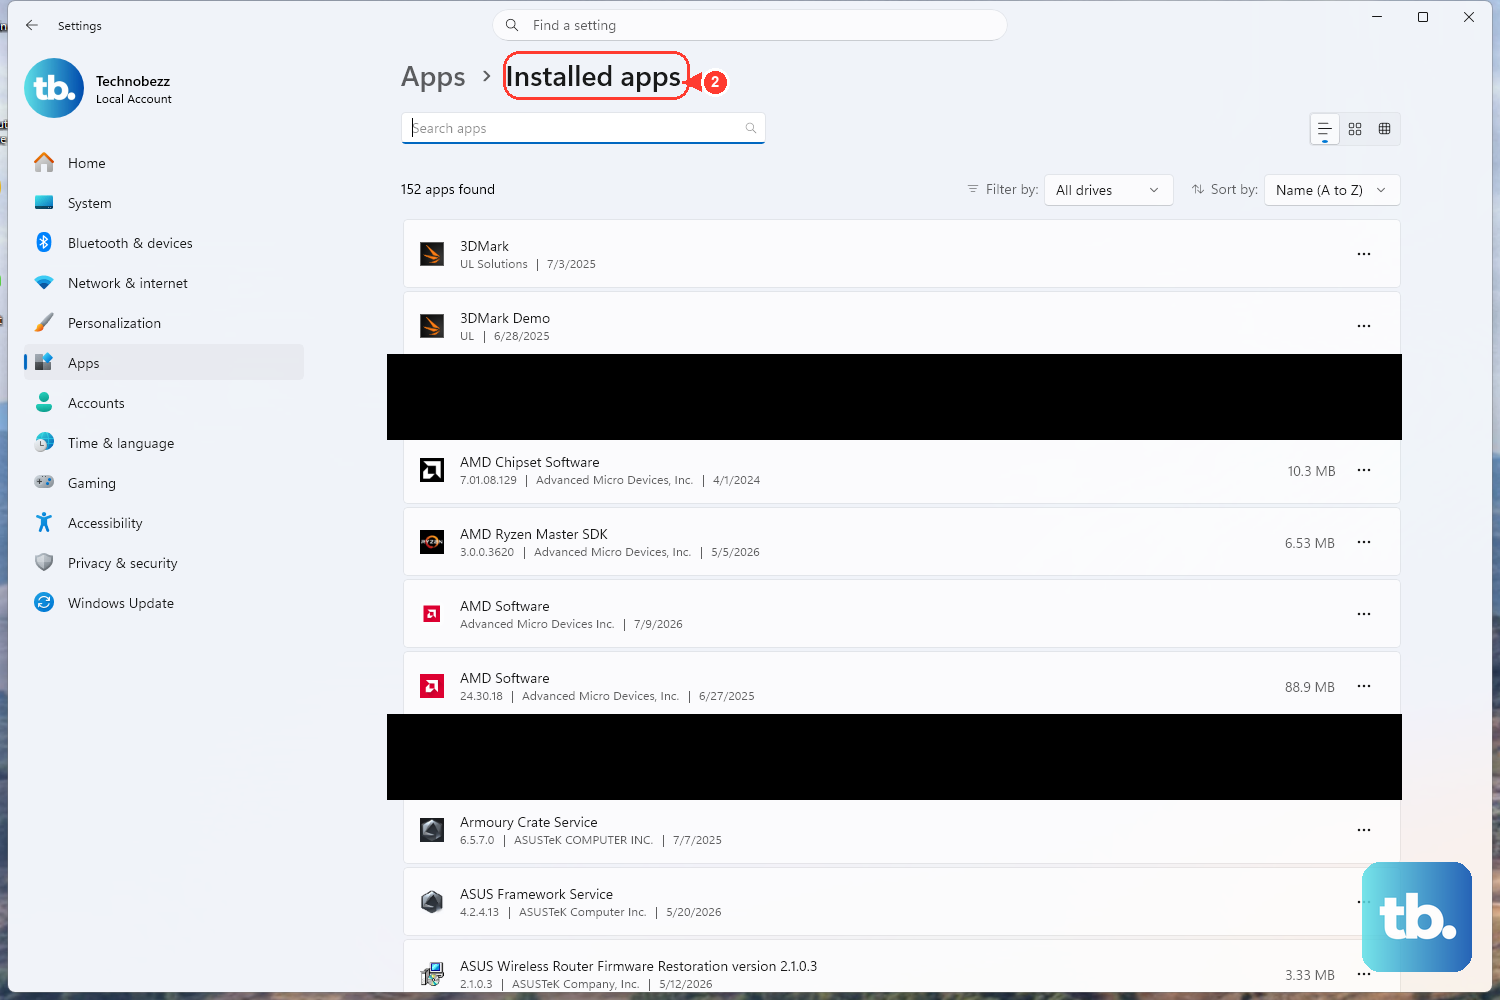
For packaged apps that expose permissions in Windows Settings, use the app page instead. Go to Start > Settings > Apps > Installed apps, find the app, select More options, open Advanced options, then turn on Microphone under App permissions.
5. Clear microphone blocks in the browser
Websites need browser permission even after Windows microphone access is enabled.
Microsoft Edge: open Settings and more > Settings > Privacy, search, and services > Site permissions > All permissions > Microphone, then turn on Ask before accessing. For one website, go to Settings and more > Settings > Privacy, search, and services > Site Permissions > All sites, choose the site, then set Microphone to Allow or Block.
Google Chrome: open More > Settings > Privacy and security > Site settings > Permissions > Microphone. Set the default behavior to Sites can ask to use your microphone so requests are not blocked outright, choose the default microphone from the down arrow, then review the sites listed as allowed or blocked.
Firefox: when a site asks for access, choose Allow or Block. Select Remember this decision to save the choice.
To edit saved choices later, open Settings > Privacy & Security > Permissions > Microphone > Settings, set the site to Allow or Block, then select Save Changes.
Fix the browser you use for calls, recordings, or voice tools. Firefox also lets you clear a saved site status from the permissions icon at the left of the address bar. Another route is Ctrl + I on the page, then Permissions, then clear Use Default for Use the microphone and choose Allow or Block.
6. Set the mic inside Teams or Zoom
Calling apps have their own device pickers. When a meeting uses the wrong microphone, change it inside the app instead of repeating the Windows default-device step.
In Microsoft Teams, open Settings and more > Settings > Devices > Manage devices. Under Audio > Audio settings, choose the connected mic from the Microphone menu, then select Make a test call.
During a supported Teams meeting on Windows 11, select the mic icon in the taskbar or press Windows + Alt + K to mute or unmute.
In the Zoom desktop app, sign in, select your profile picture, then open Settings > Audio. Under Microphone, choose the mic from the menu, use Test your microphone, and adjust Input Volume.
During a meeting, select the up arrow next to the Mute button, then pick your microphone directly from the list or open Audio settings. Zoom's Microphone modes are a separate optional advanced audio feature with account and app-version requirements.
7. Update the driver when the device stays broken
Use driver steps after the microphone is connected, selected, unmuted, tested, and allowed in privacy settings.
Open Start > Settings > Windows Update, then select Check for updates. Install available audio driver updates, then restart the PC.
For optional drivers, go to Start > Settings > Windows Update > Advanced options > Optional updates > Driver updates. Select the applicable driver, then choose Download & install.
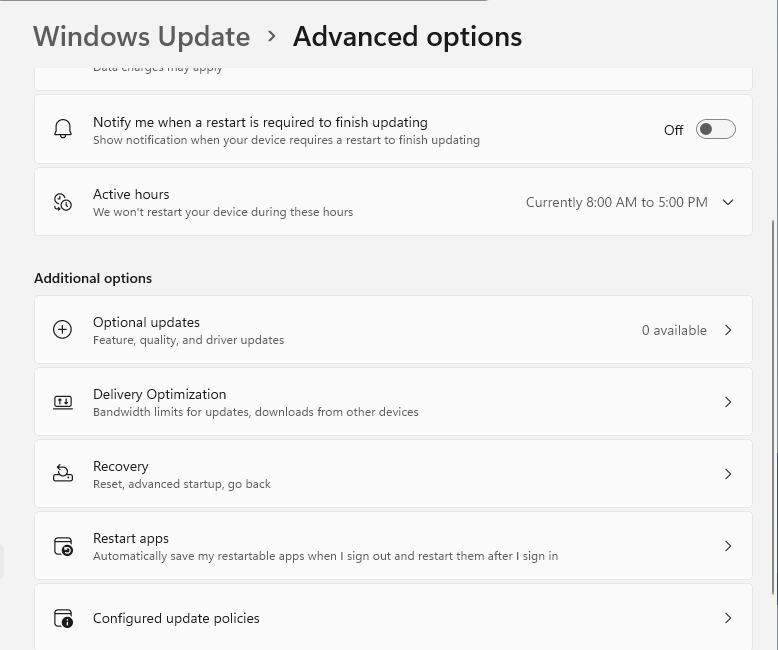
This is the right stage when the microphone is missing from Windows, stops working after changes, or fails across multiple apps. Device Manager gives you another current route.
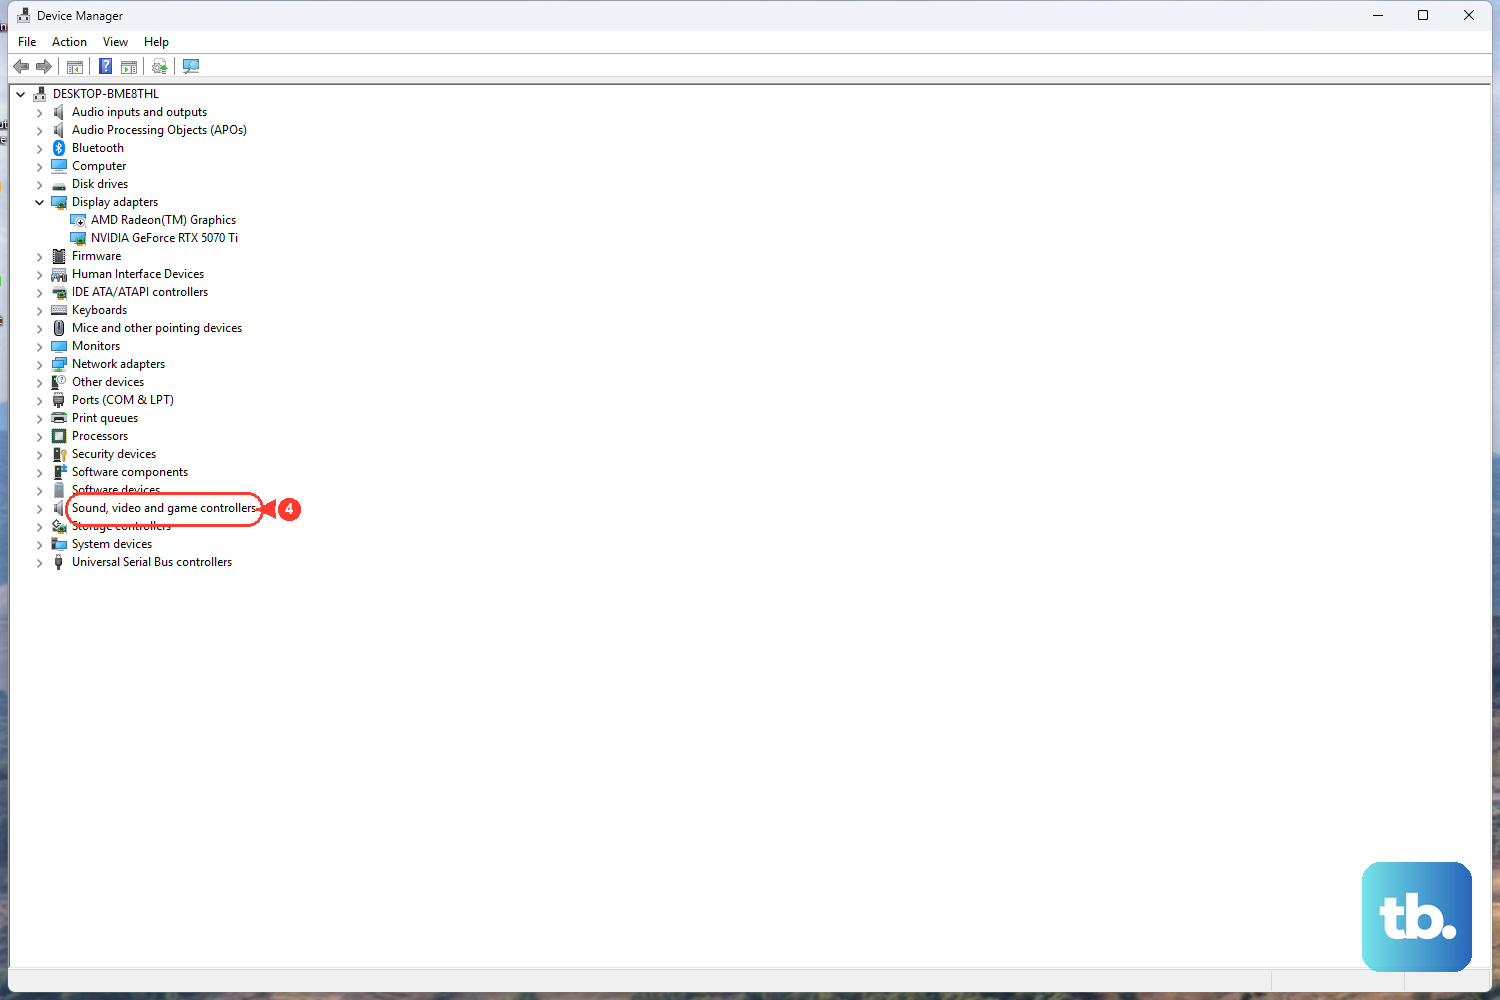
Select Start, type Device Manager, open Device Manager, expand Sound, video and game controllers, right-click the audio device, choose Update driver, then select Search automatically for drivers. For a driver downloaded from the device maker, choose Browse my computer for drivers and select the downloaded driver folder.
When updating does not fix it, reinstall the audio device from Device Manager. Expand Sound, video and game controllers, right-click the audio device, select Uninstall device, confirm the prompt, and restart.
Windows attempts to reinstall audio devices and drivers automatically after restart. On Surface PCs, use Windows Update first, then Microsoft's official Surface drivers and firmware download page for the matching Surface model.
8. Skip older microphone fixes that no longer fit
Older Windows tutorials often send people to classic Sound windows, Set Default Communication Device, Levels, Microphone Boost, or Windows 10's Privacy > Microphone page. Treat those as old routes, not the main fix for a current Windows 11 PC.
The classic Recording tab is the exception: Microsoft still documents it as a current fallback, so if a microphone is disabled, open Settings > System > Sound > Advanced > More sound settings, go to the Recording tab, right-click your mic, and select Enable.
Use Settings > System > Sound for device choice and testing, and Settings > Privacy & security > Microphone for access control.
Skip Cortana microphone settings too. Microsoft says Cortana voice assistance in Windows as a standalone app was retired in spring 2023, so Cortana-specific microphone advice does not belong in a Windows 11 microphone fix.
9. Ask IT when a work PC locks the setting
On a managed work or school PC, an administrator can control microphone access. That policy can block Windows apps from using the microphone, and Teams options can also be unavailable because of organizer or admin policies.
When Microphone access is locked, an app toggle is unavailable, or the meeting app refuses microphone access after the settings above are correct, contact your organization's IT support. Send the PC name, the microphone name, the blocked app, and the exact Windows setting or app menu that is locked.
Frequently Asked Questions
Why does my browser still ask for microphone permission after I enabled it in Windows?
Windows microphone access and browser site permission are separate. Enable the microphone in Windows Settings, then allow the specific website in Edge, Chrome, or Firefox.
Can I choose a different mic for Zoom or Teams than the Windows default?
Yes. Teams and Zoom both include their own microphone menus, so select the mic inside the app when a meeting uses the wrong device.
What should I check first when my headset microphone is silent?
Check the headset’s hardware mute control, select the headset under Windows Sound input, run the Windows microphone test, then confirm app permission.
Does voice typing have its own microphone picker in Windows 11?
Microsoft documents Windows key + H for voice dictation. The microphone device and permission are managed through Windows Sound and Microphone privacy settings.